Konica Minolta bizhub C35 User Manual
Printer/copier/scanner
Hide thumbs
Also See for bizhub C35:
- Reference manual (510 pages) ,
- User manual (394 pages) ,
- Service manual (330 pages)
Table of Contents
Advertisement
Advertisement
Table of Contents

Related Manuals for Konica Minolta bizhub C35


Summary of Contents for Konica Minolta bizhub C35
- Page 1 User’s Guide [Printer/Copier/Scanner]...
-
Page 2: Thank You
Thank You Thank you for purchasing a bizhub C35. You have made an excellent choice. Your bizhub C35 is specially designed for optimal performance in Windows, Macintosh and Linux environments. Trademarks KONICA MINOLTA and the KONICA MINOLTA logo are trademarks or registered trademarks of KONICA MINOLTA HOLDINGS, INC. -
Page 3: Software License Agreement
SOFTWARE LICENSE AGREEMENT This package contains the following materials provided by KONICA MINOLTA BUSINESS TECHNOLOGIES, INC. (KMBT): software included as part of the printing system (“Printing Software”), the digitally-encoded machine-readable outline data encoded in the special format and in the encrypted form (“Font Programs”), other software which runs on a computer system for use in conjunction with the Printing Software (“Host Software”), and related explanatory writ-... - Page 4 11. Notice to Government End Users: The Software is a “commercial item,” as that term is defined at 48 C.F.R.2.101, consisting of “commercial computer software” and “commercial computer software documentation,” as such terms are used in 48 C.F.R. 12.212. Consis- tent with 48 C.F.R.
-
Page 5: Legal Restrictions On Copying
Legal Restrictions on Copying Certain types of documents must never be copied with the purpose or intent to pass copies of such documents off as the originals. The following is not a complete list, but is meant to be used as a guide to responsible copying. -
Page 6: For Eu Member States Only
For EU member states only This symbol means: Do not dispose of this product together with your household waste! Please contact the Local Authority for appropriate dis- posal instructions. In the case of a new device being purchased, the used one can also be given to our dealer for appropriate disposal. -
Page 8: Table Of Contents
Contents 1 Introduction ....................1-1 Getting Acquainted with Your Machine ............1-2 Space Requirements................... 1-2 Part Names ....................1-4 Front View..................... 1-4 Rear View ..................... 1-6 Front View with Options ................ 1-6 Adjusting the angle of the control panel ............1-7 Drivers CD/DVD .................. - Page 9 2 Control panel and touch panel screens ............2-1 About the Control Panel ................2-2 Touch panel screens ..................2-5 Home screen....................2-5 Initial Copy mode screen................2-7 Initial Scan to Folder mode screen.............. 2-8 Initial Scan to E-mail mode screen.............. 2-9 Initial Fax mode screen ................
- Page 10 Enhanced security settings ..............3-74 Required settings ..................3-74 Changed settings ..................3-75 [Restore Defaults] ..................3-76 [HDD Format] .................... 3-76 [Paper Empty] ................... 3-77 4 Media Handling ....................4-1 Print Media ..................... 4-2 Specifications ....................4-2 Types ......................4-4 Plain Paper (Recycled Paper)...............
- Page 11 Placing a document on the original glass..........4-36 Loading a document into the ADF............. 4-37 5 Using the Printer Driver ................5-1 Selecting Driver Options/Defaults (for Windows) ....................5-2 Windows Vista/Server 2008/XP/Server 2003/2000 ......5-2 Uninstalling the Printer Driver (for Windows) ....................5-4 Windows Vista/Server 2008/XP/Server 2003/2000 ......
- Page 12 Basic copy operation ..................7-2 [Original Size] ....................7-4 Documents of mixed page sizes ..............7-4 [Paper] ......................7-5 [Zoom] ......................7-6 [Duplex/Combine] ..................7-7 [Density] ......................7-8 [Original Type] ....................7-9 [Color] ......................7-9 [Finishing] ....................7-10 [Proof Copy] ....................7-10 Proof Copy operation ................
- Page 13 Useful functions ................... 10-2 Performing Scan to E-mail mode operations ..........10-3 Basic Scan to E-mail operation ..............10-3 Specifying document settings ..............10-4 [Simplex/Duplex] ................. 10-4 [Original Size]..................10-5 [Original Mode]-[Separate Scan]............10-5 [Original Mode]- [Original Direction]............ 10-6 [Original Mode]- [Orig. Binding Position]..........10-6 [Color] ....................
- Page 14 Specifying the document name............... 10-25 Specifying communication settings ............10-26 [URL Notification] ................10-26 [URL Notification Address]..............10-26 Specifying destinations ................10-26 Selecting from registered destinations ............ 10-26 Selecting from the Favorites list............10-27 Selecting with an index search ............10-27 Selecting by searching for a destination type or name .....
- Page 15 Cleaning the Media Transfer Rollers for Tray 3/4 ....... 12-8 Cleaning the Media Feed Rollers for the ADF ........12-9 Cleaning the Laser Lens ................. 12-10 13 Troubleshooting ..................13-1 Introduction ....................13-2 Printing a configuration page ..............13-2 Unlocking the Scanner ................13-3 Preventing Media Misfeeds .................
-
Page 16: Introduction
1Introduction... -
Page 17: Getting Acquainted With Your Machine
Getting Acquainted with Your Machine Space Requirements To ensure easy operation, consumable replacement and maintenance, adhere to the recommended space requirements detailed below. 1068 mm (42.0") 150 mm 288 mm 100 mm (5.9") 530 mm (20.9") (11.3") (3.9") Front View 359 mm 508 mm (20.0") (14.1") - Page 18 359 mm (14.1") 508 mm (20.0") 70 mm 376 mm (14.8") (2.8") 954 mm (37.6") Side View with Options The option appears shaded in the above illustrations. Getting Acquainted with Your Machine...
-
Page 19: Part Names
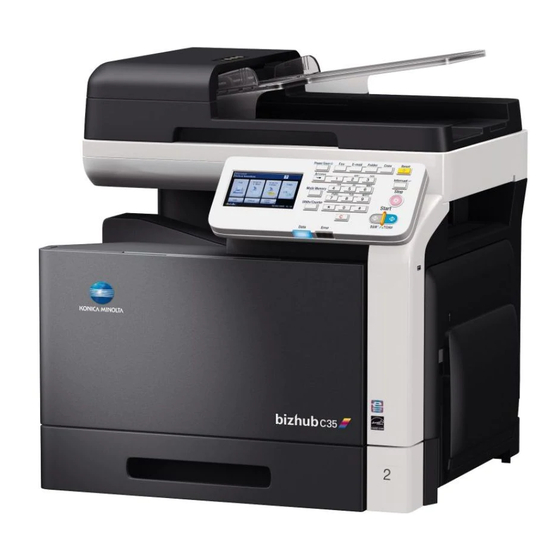
Part Names The following drawings illustrate the parts of your machine referred to throughout this guide, so please take some time to become familiar with them. Front View 1—Control panel 2—Automatic Document Feeder (ADF) 2-a: ADF feed cover 2-b: Document guide 2-c: Document feed tray 2-d: Document output tray 2-e: Document stopper... - Page 20 11—Fuser unit 12—Right door 13—Transfer roller 14—Transfer belt unit 15—Imaging unit(s) 16—Front cover 17—Waste toner bottle 18—Toner cartridge(s) Getting Acquainted with Your Machine...
-
Page 21: Rear View
Rear View 1—Power switch 2—Rear cover 3—Power connection 4—LINE (telephone line) jack 5—TEL (telephone) jack 6—10Base-T/100Base-TX/ 1000Base-T Ethernet Inter- face port 7—USB port Front View with Options 1—Lower feeder unit PF-P08 (Tray 3) 2—Lower feeder unit PF-P08 (Tray 4) Getting Acquainted with Your Machine... -
Page 22: Adjusting The Angle Of The Control Panel
Adjusting the angle of the control panel The control panel can be adjusted to any of three angles. Adjust the control panel to the angle that allows for easy operation. Grab the sides of the control panel, and then tilt it up. Before moving the control panel to a lower angle, tilt it up first, and then slowly tilt... -
Page 23: Drivers Cd/Dvd
Drivers CD/DVD Printer Drivers (PostScript Drivers) Operating System Use/Benefit Windows Vista/Server 2008/XP/ These drivers give you access to all of Server 2003/2000 the printer features, including finishing and advanced layout. For details, Windows Vista/Server 2008/XP/ refer to “Displaying Printer Driver Set- Server 2003 for 64bit tings (for Windows)”... -
Page 24: Printer Drivers (Ppd Files)
Printer Drivers (PPD Files) Operating System Use/Benefit Macintosh OS X (10.2.8/10.3.9/10.4/ These files are required in order to 10.5) use the printer driver for each operat- ing system. Macintosh OS X Server (10.2/10.3/ 10.4/10.5) For details of the Macintosh and Linux printer driver, refer to the [Ref- Red Hat Enterprise Linux 5 Desktop erence Guide] on the Documentation... -
Page 25: Applications Cd/Dvd
For details of the Macintosh and Linux drivers, refer to the Reference Guide on the Documentation CD/DVD. Windows TWAIN driver does not correspond to 64-bit applications though it corresponds to 32-bit applications on 64-bit OS. Applications CD/DVD Applications Applications Use/Benefit Download Manager This utility enables fonts and overlay data to be downloaded to the hard... - Page 26 PageScope Account Manager This utility is for centrally managing devices (such as multifunctional print- ers) on the network. With a Web browser, the usage and costs for each account or user of the network devices can be totaled and analyzed. For details, refer to the PageScope Account Manager User’s Guide on the Applications CD/DVD.
-
Page 27: Documentation Cd/Dvd
Documentation CD/DVD Documentation Documentation Use/Benefit Safety Information Guide Read this manual before plugging in the machine. This manual contains important information related to user safety and prevention of equipment problems. Installation Guide This manual provides installation details that must be performed in order to use this machine, such as setting up the machine and installing the drivers. -
Page 28: System Requirements
System Requirements Personal computer – Pentium 3: 400MHz or higher (Windows Vista: 1GHz or higher) – PowerPC G3 or later (G4 or later is recommended) – Macintosh equipped with an Intel processor Operating System – Microsoft Windows Server 2008 Standard/Enterprise, Windows Server 2008 Standard/Enterprise x64 Edition, Windows Vista Home Basic/ Home Premium/Ultimate/Business/Enterprise, Windows Vista Home Basic/Home Premium /Ultimate/Business /Enterprise x64 Edition,... - Page 29 1-14 Getting Acquainted with Your Machine...
-
Page 30: Control Panel And Touch Panel Screens
2Control panel and touch panel screens... -
Page 31: About The Control Panel
About the Control Panel No. Name Function Touch panel Displays various screens and messages. Specify the various settings by directly touching the panel. [Power Save] Press to enter Power Save mode. While the key/indicator machine is in Power Save mode, the indicator on the [Power Save] key lights up in green and the touch panel goes off. - Page 32 No. Name Function [Interrupt] key/ Press to enter Interrupt mode. While the machine is indicator in Interrupt mode, the indicator on the [Interrupt] key lights up in green. To cancel Interrupt mode, press the [Interrupt] key again. [Stop] key Pressing the [Stop] key while copying, scanning or printing temporarily stops the operation.
- Page 33 No. Name Function [Mode Memory] Press to store the desired settings for copy, fax or scan operations. In addition, stored settings can be recalled. [Access] key If user authentication or account track settings have been applied, press the [Access] key after entering the user name and password (for user authentica- tion) or the account name and password (for account track) in order to log on to this machine.
-
Page 34: Touch Panel Screens
Touch panel screens Home screen No. Indication Description Status Displays messages about the current operating sta- tus. [Fax] Press to enter Fax mode. For details, refer to the [Facsimile User’s Guide]. [Scan to E-mail] Press to enter Scan to E-mail mode. For details on the Scan to E-mail mode operations, refer to “Performing Scan to E-mail mode opera- tions”... - Page 35 No. Indication Description [USB/HDD] Press to print files on a USB memory device. Press to print a print job saved on hard disk. [Status] Press to view information on consumables and devices. [Job] Press to check a print, transmission, reception or stored data job.
-
Page 36: Initial Copy Mode Screen
Initial Copy mode screen No. Indication Description Number of cop- Indicates the specified number of copies. Copy mode Press to display the corresponding screen for speci- operations fying various settings. [Confirm] Press to check the currently specified copy settings. [Home] Press to return to the home screen. -
Page 37: Initial Scan To Folder Mode Screen
Initial Scan to Folder mode screen No. Indication Description [Favorites] Press to display frequently used destinations. [Direct Input] Press to directly enter an address of the selected destination type. [Log] Press to specify a destination from the log. [Confirm] Press to check the currently specified Scan to Folder mode settings. -
Page 38: Initial Scan To E-Mail Mode Screen
Initial Scan to E-mail mode screen No. Indication Description [Favorites] Press to display frequently used destinations. [Direct Input] Press to directly enter a destination address. [Log] Press to specify a destination from the log. [Confirm] Press to check the currently specified Scan to E-mail mode settings. -
Page 39: Job Screen
Job screen No. Indication Description [Print] Press to display a screen listing the print jobs. [Send] Press to display a screen listing the transmission jobs. [Receive] Press to display a screen listing the reception jobs. [Save] Press to display a screen listing the stored data jobs. [Active]/[Log] Press to display screens listing the jobs currently being performed or the job log. -
Page 40: Status Screen
Status screen No. Indication Description [Consumables] Press to display a screen showing the status of con- sumables. The percentages remaining for the consumables may be different from the actual amounts and should be used only as reference. [Device info.] Press to display a screen showing the information of devices. -
Page 41: Usb/Hdd Screen
USB/HDD screen No. Indication Description [Proof/Print] Press to print a print job saved on hard disk. [User Name] Select a user. [Memory Direct] Press to print files on a USB memory device. [File List] Select the file to be printed. In addition, print settings can be specified. -
Page 42: Keys And Icons That Appear In The Screens
Keys and icons that appear in the screens Icon Description If the screen has multiple pages, press [ ] or [ ] to select a dif- ferent page. If values appear between [ ] and [ ], the current page num- ber/total number of pages is indicated. - Page 43 Icon Description Appears when using a G3 fax connection. Appears when there are documents queued for a timer trans- mission. Appears when there are fax documents received with memory reception or PC faxing. Appears when data or documents are being sent from this unit. Appears when this unit is receiving data or documents.
-
Page 44: User Authentication And Account Track
User authentication and account track If user authentication or account track settings have been specified on the machine, the user name or account name and the password must be entered in the Login screen in order to log on. The following procedures describe how to log on when user authentication or account track settings have been specified. - Page 45 Press [Login]. If authentication was successful, the functions of this machine can be used. 2-16 User authentication and account track...
-
Page 46: Utility Settings
3Utility Settings... -
Page 47: [Accessibility]
[Accessibility] From the [Accessibility] screen, various settings can be specified for the dis- played screens and the operation of control panel keys. Accessibility Key Repeat/ Time to Start Interval Key Interval Sound Set- Set All Enable tings Volume Confirmation Input Confir- Enable Sound mation Sound... - Page 48 Completed Enable Preparation Volume Caution Low Caution Enable Sound Sound (Level 1) Volume Low Caution Enable Sound (Level 2) Volume Low Caution Enable Sound (Level 3) Volume High Enable Volume Panel Adjust Error Message Display Time Panel Adjust [Accessibility]...
- Page 49 Press the [Utility/Counter] key. Press [Accessibility]. All factory default values are shown in bold. Item Description [Key Repeat /Interval] The length of time until the value begins to change after a button is held down and the length of time for the value to change can be specified.
- Page 50 [Successful Complete Select if sounds are to be produced when an opera- Sound] tion or communication is completed successfully. [Completed Opera- Settings Enable : [Yes] / [No] tion Sound] Volume : [Low] / [Middle] / [High] Select whether sounds are produced when an opera- tion is completed successfully.
- Page 51 [Panel Adjust] If the touch panel buttons do not respond correctly, the position of buttons in the touch panel may not be correctly aligned with the position of the actual touch sensor and may need to be adjusted. Press the four check points ([+]) in the touch panel adjustment screen, making sure that a sound is produced with each, and then press the [Start] key.
-
Page 52: [Meter Count]
[Meter Count] From the [Meter Count] screen, the page count for each function and the total page count can be viewed. Meter Count Total Copy Print Scan Press the [Utility/Counter] key. Press [Meter Count]. Press [ ], [ ], [ ] or [ ] to display the desired information. Item Description [Total]... -
Page 53: [Address Registration]
[Address Registration] From the [Address Registration] screen, E-mail and fax destinations can be registered and viewed. Address E-mail Details Registration Details Press the [Utility/Counter] key. Press [Address Registration]. [Address Registration] does not appear if only account track settings have been specified and no user is logged on with an account. Item Description [E-mail]... -
Page 54: [User Settings]
[User Settings] From the [User Settings] screen, various settings are available to be changed by the user. User Settings Machine Language Settings Measurement Unit Setting Paper Tray Auto Tray Settings Switch Enable ATS/ Tray 1 Tray 2 Tray 3 Tray 4 ACS Level Copy Auto Zoom... - Page 55 Scan JPEG Settings Compression Level Black Compression Level Scan Initialize Setting Default Tray Print Paper Paper Tray Settings Settings Settings Tray 1 Paper Size Custom Size Paper Type Tray 2 Paper Size Custom Size Paper Type Simplex/ Tray 3 Paper Size Duplex Copies Paper Type...
- Page 56 Tray Mapping Tray Mapping Mode Logical Tray 0 Logical Tray 1 Logical Tray 2 Logical Tray 3 Logical Tray 4 Logical Tray 5 Logical Tray 6 Logical Tray 7 Logical Tray 8 Logical Tray 9 Report Print Config. Page Stats. Page Postscript Font List HDD Direct.
-
Page 57: [Machine Settings]
Fax Settings Remote RX Enabled Remote RX Fax Initialize Setting Press the [Utility/Counter] key. Press [User Settings]. [Machine Settings] All factory default values are shown in bold. Item Description [Language] Settings [English] / [FranCAis] / [Italiano] / [Deutsch] / [EspaNol] Specify the language for the screens that appear in the touch panel. - Page 58 [Paper Tray Settings] Specify paper tray settings. [Auto Tray Switch] Settings [ON] / [OFF] Select whether or not a paper tray loaded with paper of the same size is selected automati- cally when a paper tray that was selected man- ually becomes empty while printing copies.
-
Page 59: [Copy Settings]
[Copy Settings] All factory default values are shown in bold. Item Description [Auto Zoom for Combine] Settings [Yes] / [No] Select whether or not the zoom ratio is auto- matically adjusted when the [Auto] Paper set- ting and a Combine setting are selected. [Auto Sort/Group Selection] Settings [Yes] / [No] Select whether or not copies are automatically... -
Page 60: [Scan Settings]
[Scan Settings] All factory default values are shown in bold. Item Description [JPEG Compression Level] Settings [High Quality] / [Standard] / [High Compression] Select the compression method for saving an image in full color. [High Quality]: The data size will become large, but the image quality will be high. -
Page 61: [Print Settings]
[Print Settings] All factory default values are shown in bold. Item Description [Paper Settings] Specify settings for the paper and paper trays. [Paper Tray Settings] Specify settings for the paper trays. [Default Tray] Settings [Tray 1] / [Tray 2] / [Tray 3] / [Tray 4] Select the paper tray that is given priority. - Page 62 [Paper Size] Settings [Any] / [Letter] / [Legal] / [Execu- tive] / [A4] / [A5] / [A6] / [B5 (JIS)] / [B6] / [Govt Letter] / [Statement] / [Folio] / [SP Folio] / [UK Ouarto] / [Foolscap] / [Govt Legal] / [16K] / [Photo 4×6] / [Kai 16] / [Kai 32] / [Env C6] / [Env DL] / [Env Monarch] / [Env Chou#3] / [Env Chou#4] / [B5...
- Page 63 [Paper Type] Settings [Any] / [Plain Paper] / [Recycled] / [Thick 1] / [Thick 2] / [Label] / [Enve- lope] / [Postcard] / [Letterhead] / [Glossy 1] / [Glossy 2] / [1 Side Only] / [Special Paper] Select the type of paper loaded in the selected tray.
-
Page 64: [Fax Settings]
[Tray Mapping] Specify the Tray Mapping settings. [Tray Mapping Settings [ON] / [OFF] Mode] Select whether or not the Tray Mapping func- tion is used. [Logical Tray 0]- Settings [Physical Tray 1] / [Physical Tray [Logical Tray 9] 2] / [Physical Tray 3] Select the tray that is used for printing when a print job is received from another manufac- turer’s printer driver. -
Page 65: [Admin Settings]
[Admin Settings] From the Admin Settings screen, various settings are available to be changed by the machine administrator. In order to display the Admin Settings screen, the user must log on using the administrator password. Admin settings Machine Sleep Mode Settings Setting Sleep Time... - Page 66 Address Address Address Start Number Registration Book Book Number of Addresses List Output E-mail Start Number Number of Addresses List Output Start Number Number of Addresses List Output WebDAV Start Number Number of Addresses List Output Start Number Number of Addresses List Output [Admin Settings]...
- Page 67 Group Start Number Address Number of Addresses List Output Program Start Number Address Number of Addresses List Output Start Number E-mail Number of Addresses List Output Start Number Number of Addresses List Output 3-22 [Admin Settings]...
- Page 68 WebDAV Start Number Number of Addresses List Output Start Number Number of Addresses List Output Address Start Number Book Number of Addresses List Output Group Start Number Address Number of Addresses List Output Authentication Logout Confirmation Display [Admin Settings] 3-23...
- Page 69 Ethernet TCP/IP Enable IP Address Subnet Mask Gateway DHCP BOOTP ARP/Ping HTTP Telnet Bonjour Dynamic RAW Port Enable Bidirectional SMTP 3-24 [Admin Settings]...
- Page 70 SNMP WSD Print IPSec IP Address Access Filter Permission Access Rejection IPv6 Enable Auto Setting Link Local Global Address Gateway Address Netware AppleTalk Network Speed IEEE802. 1X Binary Division [Admin Settings] 3-25...
- Page 71 S/MIME S/MIME Settings Enabled Signature Encryption Auto. Obtain Certificates Print Digital Signature Memory Direct Print Job Timeout Copy Settings Select Tray when APS Paper Priority Print Settings Grayscale Page Startup Page Setting Auto Continue Paper Default Paper Size Paper Custom Size Width Length Paper Type...
- Page 72 Hold Job Timeout Quality Color Mode Settings Brightness Halftone Image Printing Text Printing Graphics Printing Edge Image Enhancement Printing Text Printing Graphics Printing Edge Strength Economy Print PCL Settings Contrast Image RGB Source Printing RGB Intent RGB Gray Text Printing RGB Source RGB Intent RGB Gray...
- Page 73 Graphics RGB Source Printing RGB Intent RGB Gray PS Settings RGB Source Image Printing RGB Intent RGB Gray Destination Profile Text Printing RGB Source RGB Intent RGB Gray Destination Profile Graphics RGB Source Printing RGB Intent RGB Gray Destination Profile Simulation Simulation Profile...
- Page 74 Gradation Tone Adjust Calibration AIDC Process CMYK Cyan Density Highlight Middle Shadow Magenta Highlight Middle Shadow Yellow Highlight Middle Shadow Black Highlight Middle Shadow [Admin Settings] 3-29...
- Page 75 Color Separation Emulation Default Emulation Postscript Wait Timeout Print PS Errors PS Protocol Auto Trapping Black Overprint CR/LF Mapping Lines Per Page Font Number Font Source Pitch Size Symbol Set Digital Signature XPS Error Page Fax Settings Sender Sender Settings Sender Fax 3-30 [Admin Settings]...
- Page 76 Header Header/ Position Footer Settings Fax TX Header Name Footer Position PB/DP Comm. Settings RX Mode Number of RX Call Rings Redial Redial Interval Line Monitor Line Monitor Volume Ring Pattern Manual RX V.34 OFF [Admin Settings] 3-31...
- Page 77 Inch Paper Function Priority Settings Paper Priority Print Paper Size Tray Selection for RX Print Min. Reduction for RX Print Print Separate Fax Pages Duplex Print Fax Function F-Code TX Settings Dest. Check Display Func. Confirm Addr (TX) Confirm Addr (Register) Restrict Fax Restrict Fax...
- Page 78 RX Password Fax RX PWD Enable Closed Net- work RX Password Forward TX Forward TX Settings Setting Forwarding Address Forward & Print Remote RX Remote RX Settings Enabled Remote RX PC-Fax RX PC-Fax RX Settings Setting PC-Fax RX Print Nighttime RX Night Fax RX Settings Print...
- Page 79 TX Reserve PC-Fax TX Error Report Broadcast Report Broadcast Result Report TX Result Report Screen List Print Fax Setup Pg Fax Target Fax Factory Default Fax File initializing Maintenance Print Menu Event Log Menu Halftone 64 Cyan 64 Magenta 64 Yellow 64 Black 64 Cyan 128...
- Page 80 Halftone 256 Cyan 256 Magenta 256 Yellow 256 Black 256 Gradation Activity Report Scan Send Report Print Scan Event Printer Plain Paper Leading Adjustment Edge Adjustment Thick 1 Thick 2 Envelope Side Edge Tray 1 Adjustment Tray 2 Tray 3 Tray 4 [Admin Settings] 3-35...
- Page 81 Left ADJ Tray 1 Duplex Tray 2 Tray 3 Tray 4 Simplex Pass Plain Paper 2nd Image Transfer Current Thick 1 Thick 2 Postcard Envelope Label Glossy 1 Glossy 2 Manual Plain Paper Duplex Thick 1 Thick 2 Postcard Envelope Label 3-36 [Admin Settings]...
- Page 82 Glossy 1 Glossy 2 Cyan Thick Paper Image Density Magenta Yellow Black Black Image Density Fine Line AIDC Mode Thick Mode Engine Engine DipSW DipSW 1 Engine DipSW 2 Engine DipSW 3 ~~~~~~~~~~~~~~~~~~~~~~ Engine DipSW 26 Engine DipSW 27 Engine DipSW 28 [Admin Settings] 3-37...
- Page 83 Main Scan Main Scan Adjust Page Scan Adjust Yellow Value Magenta Cyan Supplies Consumables Tranfer Belt Replace Unit Transfer Roller Unit Fusing Unit Scan Settings Auto Del Interval File Storage Document Hold Setting Security Administrator Settings Password Security Password Details Rules Manual Destination...
- Page 84 Enhanced Security Mode HDD Settings Check HDD Capacity Overwrite All Mode Data Execute Low-level Format Restore Restore Defaults NetWork Restore System Restore All HDD Format User Area Only User Area (Scan) Paper Empty Tray 1 Tray 2 Tray 3 Tray 4 Press the [Utility/Counter] key.
-
Page 85: [Machine Settings]
Type in the administrator password (default:12345678), and then press [OK]. If the administrator password (default:12345678) is incorrectly entered three times, machine operations are locked. If this occurs, turn the machine off, then on again. Press [OK]. [Machine Settings] All factory default values are shown in bold. Item Description [Sleep Mode Setting]... - Page 86 [Daylight Saving Time] Specify settings for daylight saving time. [Enable] Settings [Yes] / [No] Select whether or not the machine’s internal clock observes daylight saving time. If [Yes] is selected, the specified time offset from the current time appears. [Offset] Settings 1 to 150 (Default: 60) Specify the length of time applied for daylight...
-
Page 87: [Administrator Registration]
[Administrator Registration] Item Description [Administrator Registration] Specify administrator information. [Name] Specify the name of the administrator. [Ext Number] Specify the extension number for the adminis- trator. [Address] Specify the E-mail address for the administra- tor. This is the From address for E-mail messages sent from this machine and the address where machine status notifications will be sent. -
Page 88: [Authentication]
[Group Address] Specify settings for printing the list of group destinations. [Start Number]: Specify the starting group des- tination number. [Number of Addresses]: Specify the number of group destinations. [List Output]: Prints the list of group destina- tions. [Program Address] Specify settings for printing the list of program destinations. -
Page 89: [Ethernet]
[Ethernet] All factory default values are shown in bold. Item Description [TCP/IP] Specify network settings for the machine. [Enable] Settings [Yes] / [No] Select the setting for connecting to this machine through a network. If [No] is selected, the TCP/IP parameters do not appear. - Page 90 [Telnet] Settings [Enable] / [Disable] Select whether or not to enable Telnet trans- missions. [Bonjour] Settings [Enable] / [Disable] Select whether or not to enable Bonjour. [Dynamic DNS] Settings [Enable] / [Disable] Select whether or not to enable Dynamic DNS. [IPP] Settings [Enable] / [Disable]...
- Page 91 [IPv6] Specify IPv6 settings. [Enable] Settings [Yes] / [No] Select whether or not to enable IPv6. [Auto Setting] Settings [Enable] / [Disable] Select whether or not to enable the IPv6 auto setting. [Link Local] Displays the link-local address. [Global Address] Displays the global address.
-
Page 92: [Memory Direct Print]
[Auto. Obtain Certifi- Settings [Yes] / [No] cates] Select whether or not to automatically obtain certificates. [Print Digital Signature] Settings [Yes] / [No] Select whether or not to print S/MIME informa- tion. [Memory Direct Print] Description Settings [Enable] / [Disable] Select whether or not to enable the Memory Direct function. -
Page 93: [Print Settings]
[Print Settings] All factory default values are shown in bold. Item Description [Grayscale Page] Settings [Auto] / [Grayscale Print] / [Color Print] Specify the operation to be performed for black-and-white pages in a job specified for color printing. [Auto]: Printing is automatically performed according to the first page of the job. - Page 94 [Paper] Specify settings for the paper used for printing. [Default Paper] Specify settings for the paper that is normally used. [Paper Size] Settings [Letter] / [Legal] / [Executive] / [A4] / [A5] / [A6] / [B5 (JIS)] / [B6] / [Govt Letter] / [Statement] / [Folio] / [SP Folio] / [UK Quarto] / [Foolscap] / [Govt Legal] / [16K] / [Photo 4×6] /...
- Page 95 [Hold Job Timeout] Settings [Disable] / [1 Hour] / [4 Hours] / [1 Day] / [1 Week] Specify the length of time until print jobs saved on the hard disk are deleted. If [Disable] is selected, print jobs are not deleted at a specific time.
- Page 96 [Graphics Printing] Settings [Line Art] / [Detail] / [Smooth] Select how halftones in graphics are repro- duced. [Line Art]: Halftones are reproduced with high precision. [Detail]: Halftones are reproduced with detail. [Smooth]: Halftones are reproduced with smoothness. [Edge Enhancement] Select how edges in images, text and graphics are emphasized.
- Page 97 [Economy Print] Settings [ON] / [OFF] Select whether to print graphics with a reduced density by reducing the amount of toner that is used. [ON]: The amount of toner used is reduced when printing. [OFF]: The amount of toner used is not reduced when printing.
- Page 98 [Text Printing] Specify settings for RGB text data. [RGB Source] Settings [Device Color] / [sRGB] Select the color space for RGB text data. If [Device Color] is selected, no color space is specified. RGB source profiles downloaded with Down- load Manager or PageScope Web Connection are available as RGB Source.
- Page 99 [RGB Gray] Settings [Bk=CMYK Gray=CMYK] / [Bk=K Gray=K] / [Bk=K Gray=CMYK] Select how black and grays are reproduced in RGB graphics data. [Bk=CMYK Gray=CMYK]: Black is reproduced using the CMYK colors. [Bk=K Gray=K]: Black and gray are reproduced using black only. [Bk=K Gray=CMYK]: Black is reproduced using only black.
- Page 100 [RGB Gray] Settings [Bk=CMYK Gray=CMYK] / [Bk=K Gray=K] / [Bk=K Gray=CMYK] Select how black and grays are reproduced in RGB image data. [Bk=CMYK Gray=CMYK]: Black is reproduced using the CMYK colors. [Bk=K Gray=K]: Black and gray are reproduced using black only. [Bk=K Gray=CMYK]: Black is reproduced using only black.
- Page 101 [RGB Intent] Settings [Vivid] / [Photographic] / [Relative Color] / [Absolute Color] Select the characteristic applied when convert- ing RGB text data to CMYK data. [Vivid]: A vivid output is produced. [Photographic]: A brighter output is produced. [Relative Color]: Relative color is applied to the RGB source profile.
- Page 102 [Graphics Printing] Specify settings for RGB graphics data. [RGB Source] Settings [Device Color] / [sRGB] / [AppleRGB] / [AdobeRGB1998] / [ColorMatchRGB] / [BlueAdjus- tRGB] Select the color space for RGB graphics data. If [Device Color] is selected, no color space is specified.
- Page 103 [Destination Pro- Settings [Auto] file] Select the destination profile. [Auto]: A destination profile that the machine automatically adapts is selected based on a combination of the specified color matching, halftones and other profiles. Destination profiles downloaded with Down- load Manager or PageScope Web Connection are available as Destination Profile.
- Page 104 [Gradation Adjust] Specify settings for gradation level adjust- ments. [Tone Calibration] Settings [ON] / [OFF] [ON]: Image adjustments are applied. [OFF]: Image adjustments are not applied. [AIDC Process] Settings [Execute] / [Cancel] [Execute]: Image adjustments are performed immediately. [Cancel]: Image adjustments are not per- formed.
- Page 105 [Postscript] Specify settings for PostScript errors and data transmissions. [Wait Timeout] Settings 0 to 300 (Default: 0) Specify the time until an error is determined to be a PostScript error. If [0] is selected, no timeout is performed. [Print PS Errors] Settings [ON] / [OFF] Select whether or not an error page is printed...
- Page 106 [Font Source] Specify font settings for the PCL language. [Font Number] Settings 0 to 102 (Default: 000) Specify the default font in the PCL language. The font numbers that appear correspond to the PCL font list. For details on printing the font list, refer to “[Print Settings]”...
-
Page 107: [Fax Settings]
[XPS] Specify XPS settings. [Digital Signature] Settings [Enable] / [Disable] Select whether or not to enable XPS digital sig- natures. [Enable]: XPS digital signatures are enabled. [Disable]: XPS digital signatures are disabled. [XPS Error Page] Settings [ON] / [OFF] Select whether or not an error report is printed after an XPS error has occurred. - Page 108 [Halftone 256] Settings [Print] / [Cancel] Prints the halftone pattern using a 100% den- sity for each CMYK color. [Cyan 256]/ [Magenta 256]/ [Yellow 256]/ [Black 256] [Gradation] Settings [Print] / [Cancel] Prints the gradation pattern. [Activity Report] Settings [Print] / [Cancel] Prints the communications activity report.
- Page 109 [Tray2] Settings -15 to 15 Adjust the left margin of media fed from Tray 2 for simplex (single-sided) printing. [Tray3] Settings -15 to 15 Adjust the left margin of media fed from Tray 3 for simplex (single-sided) printing. [Tray4] Settings -15 to 15 Adjust the left margin of media fed from Tray 4 for simplex (single-sided) printing.
- Page 110 [Thick 2] Settings -8 to 7 Adjust the 2nd image transfer output (ATVC) for simplex (single-sided) printing of Thick 2 paper. [Postcard] Settings -8 to 7 Adjust the 2nd image transfer output (ATVC) for simplex (single-sided) printing of postcards. [Envelope] Settings -8 to 7 Adjust the 2nd image transfer output (ATVC)
- Page 111 [Envelope] Settings -8 to 7 Adjust the 2nd image transfer output (ATVC) for duplex (double-sided) printing of envelopes. [Label] Settings -8 to 7 Adjust the 2nd image transfer output (ATVC) for duplex (double-sided) printing of labels. [Glossy 1] Settings -8 to 7 Adjust the 2nd image transfer output (ATVC) for duplex (double-sided) printing of Glossy 1 media.
- Page 112 [AIDC Mode] Settings [Mode 1] / [Mode 2] Select the AIDC operation mode. [Mode 1]: Standard mode [Mode 2]: Low mode [Thick Mode] Settings [Quality Mode] / [Speed Mode] In order to prevent toner from clogging within the developer unit as a result of it being driven at half-speed, select the timing for driving the developer unit at full speed for a fixed length of time when thick paper is being fed.
-
Page 113: [Scan Settings]
[Scan Adjust Value] Specify color adjustments for yellow, magenta and cyan. [Yellow] Settings -42 to 42 (Default: 0) Finely adjust the ratio of yellow in the main scanning direction. [Magenta] Settings -42 to 42 (Default: 0) Finely adjust the ratio of magenta in the main scanning direction. -
Page 114: [Security Settings]
[Security Settings] All factory default values are shown in bold. Item Description [Administrator Password] Settings [12345678] Change the administrator password. Specify the administrator password as a 0 to 8 digit number. If password rules have been applied, an 8-digit password must be specified. If the administrator password is incorrectly entered three times, machine operations are locked. - Page 115 [Disable Job History Settings [ON] / [OFF] Display] Select whether or not to display the communi- cation log. If [ON] is selected, the communica- tion log is not displayed. [Restrict Scan to USB] Settings [Allow] / [Restrict] Select whether or not to prohibit the Scan to USB function.
- Page 116 [Mode] Settings [Mode 1] / [Mode 2] / [Mode 3] / [Mode 4] / [Mode 5] / [Mode 6] / [Mode 7] / [Mode 8] Select the method for overwriting the data on the hard disk. [Mode 1]: Overwritten with 0x00 [Mode 2]: Overwritten with 1-byte random num- bers Overwritten with 1-byte random num-...
- Page 117 [Execute] Press to delete all data on the hard disk by overwriting it, and then press [OK]. Perform this operation when disposing of this machine. While the data is being deleted by being overwritten, do not use the power switch to turn the machine off and on.
-
Page 118: Changing The Administrator Password
Changing the administrator password The following procedure describes how to change the administrator pass- word. Press [Administrator Password]. Press [Password] (top). Type in the current administrator password, and then press [OK]. Press [Password] (bottom). Type in the new administrator password, and then press [OK]. Press [OK]. -
Page 119: Conditions Of The Password Rules
Conditions of the password rules – Specify a password of 8 or more digits. – Uppercase and lowercase letters are differentiated. – Half-width symbols are used. The use of symbols such as the quota- tion mark ("), plus sign (+) and spaces are limited with some settings. –... -
Page 120: Changed Settings
Changed settings For increased security, the following settings are set when enhanced security settings are applied. A changed setting cannot be changed when [Enhanced Security Mode] is set to [OFF]. If password rules have been applied, a password that does not meet the conditions of the password rules is considered a failed attempt during authentication. -
Page 121: [Restore Defaults]
[Restore Defaults] Item Description [Restore Network] Resets the network settings to their defaults. After this is pressed, the printer is automatically restarted. [Restore System] Resets the system settings to their defaults. After this is pressed, the printer is automatically restarted. [Restore All] Resets all settings to their defaults. -
Page 122: [Paper Empty]
[Paper Empty] All factory default values are shown in bold. Item Description [Tray 1] Settings [ON] / [OFF] Select whether or not a message appears when Tray 1 has run out of paper. [Tray 2] Settings [ON] / [OFF] Select whether or not a message appears when Tray 2 has run out of paper. - Page 123 3-78 [Admin Settings]...
-
Page 124: Media Handling
4Media Handling... -
Page 125: Print Media
Print Media Specifications Media Media Size Tray* Duplex Copy Scan Inch Millimeter Letter 8.5 × 11.0 215.9 × 279.4 1/2/3/4 Yes Letter Plus 8.5 × 215.9 × 322.3 1/2 12.69 Government 8.0 × 10.5 203.2 × 266.7 1/2 letter Legal 8.5 ×... - Page 126 Media Media Size Tray* Duplex Copy Scan Inch Millimeter Envelope You #6 7.5 × 190.5 × 98.4 3.875 Envelope DL 8.7 × 4.3 220.0 × 110.0 1 Envelope C6 6.4 × 4.5 162.0 × 114.0 1 Envelope You #2 6.4 × 4.5 162.0 ×...
-
Page 127: Types
Types Keep media on a flat, level surface in its original wrapper until it is time to load it. For a list of approved media, refer to http://printer.konicaminolta.com. Before printing a large number of copies on special paper (other than plain paper), perform a trial print to check the quality of the print result. -
Page 128: Thick Stock
Keep media between 15% and 85% relative humidity. Toner does not adhere well to moist or wet media. Layered Adhesive Folded, creased, curled, embossed, warped, or wrinkled Perforated, three-hole punched, or torn Too slick, too coarse, or too textured Different in texture (roughness) on the front and back Too thin or too thick Stuck together with static electricity Composed of foil or gilt;... -
Page 129: Envelope
Envelope Print on the front (address) side only. Some parts of the envelope consist of three layers of paper—the front, back, and flap. Anything printed in these lay- ered regions may be lost or faded. You can print continuously with envelope. However, this could affect the media feed, depending on the media quality and printing environment. -
Page 130: Label
Label A sheet of labels consists of a face sheet (the printing surface), adhesive, and a carrier sheet: The face sheet must follow the plain paper specification. The face sheet surface must cover the entire carrier sheet, and no adhe- sive should come through on the surface. -
Page 131: Letterhead
Are precut or perforated OK to use Do not use Shiny backed paper Full-page labels (uncut) Letterhead You can print continuously with letterhead. However, this could affect the media feed, depending on the media quality and printing environment. If problems occur, stop the continuous printing and print one sheet at a time. Check your application documentation for more information on printing letterhead. -
Page 132: Glossy Media
Orientation Tray 1 Face down Tray 2 Face up Driver Postcard Media Type Duplexing Not supported Use postcards that are Approved for laser printing DO NOT use postcards that are Coated Designed for inkjet printers Precut or perforated Preprinted or multicolored If the postcard is warped, press on the warped area before putting it in the tray 1/2. -
Page 133: Single Side Only
Orientation Tray 1 Face down Tray 2 Face up Driver Glossy 1 (100–128 g/m Media Type Glossy 2 (129–158 g/m Weight 100 to 158 g/m Duplexing Not supported Single Side Only Print on the single side only. You can print continuously with single side only paper. However, this could affect the media feed, depending on the media quality and printing environ- ment. -
Page 134: Special Paper
Special Paper You can print continuously with special paper. However, this could affect the media feed, depending on the media quality and printing environment. If problems occur, stop the continuous printing and print one sheet at a time. Select this setting when special paper, for example, high-quality paper, is loaded as plain paper with a weight of 60–90 g/m². -
Page 135: Printable Area
Printable Area The printable area on all media sizes is up to 4.2 mm (0.165") from the edges of the media. Each media size has a specific image- Printable able area, the maximum area on which Area the printer can print clearly and without distortion. -
Page 136: Envelopes
Envelopes Envelopes can only be printed on their front sides (side where the recipient’s address is written). In addition, printing on the front side in the area overlap- ping the back flap cannot be guaranteed. The location of this area differs depending on the envelope type. -
Page 137: Loading Media
Loading Media How do I load media? Note Do not mix media of different types and sizes, as this will cause media misfeeds or machine trouble. Note Paper edges are sharp and may cause injuries. When refilling media, first remove any media remaining in the tray. Stack it with the new media, even the edges, then reload it. - Page 138 Slide the media guides to pro- vide more space between them. Press down on the center of the paper-lifting plate until the left and right locking tabs (white) lock into place. Load the paper face down in the tray. Loading Media 4-15...
-
Page 139: Other Media
Do not load so much paper that the top of the stack is higher than the maximum limit guide. Up to 100 sheets (80 g/m ) of plain paper can be loaded into the tray at one time. Slide the media guides against the edges of the paper. -
Page 140: Loading Envelopes
Loading Envelopes Open Tray 1. Slide the media guides to pro- vide more space between them. Press down on the center of the paper-lifting plate until the left and right locking tabs (white) lock into place. Loading Media 4-17... - Page 141 Load the envelopes flap side up in the tray. Before loading enve- lopes, press them down to make sure that all air is removed, and make sure that the folds of the flaps are firmly pressed; other- wise the envelopes may become wrinkled or a media misfeed may occur.
-
Page 142: Loading Label Sheets/Letterhead/Postcards/Thick Stock And Glossy Media
Select [Copy]/[Paper]/[Tray 1]/[Change Tray Set]/[Paper Size] and [Paper Type] in the configuration menu, and then select the setting for the size and type of paper that are loaded. See also. Loading Label Sheets/Letterhead/Postcards/Thick Stock and Glossy Media Open Tray 1. Slide the media guides to pro- vide more space between them. - Page 143 Press down on the center of the paper-lifting plate until the left and right locking tabs (white) lock into place. Load the media face down in the tray. Up to 20 sheets can be loaded into the tray at one time. Slide the media guides against the edges of the media.
-
Page 144: Tray 2
Tray 2 Loading Plain Paper, Single Side Only and Special Paper Pull out Tray 2. Press down the media pressure plate to lock it into place. Slide the media guides to pro- vide more space between them. Loading Media 4-21... - Page 145 Turn the paper selection dial to select the size of paper to be loaded. Load the paper face up in the tray. Do not load above the mark. Up to 250 sheets (80 g/m ) of plain paper can be loaded into the tray at one time.
- Page 146 Slide the media guides against the edges of the paper. Close Tray 2. Select [Copy]/[Paper]/[Tray 2]/[Change Tray Set]/[Paper Size] and [Paper Type] in the configuration menu, and then select the setting for the size and type of paper that are loaded. See also “[Paper]” on page 7-5. Loading Media 4-23...
-
Page 147: Loading Label Sheets/Letterhead/Postcards/Thick Stock And Glossy Media
Loading Label Sheets/Letterhead/Postcards/Thick Stock and Glossy Media Pull out Tray 2. Press down the media pressure plate to lock it into place. Slide the media guides to pro- vide more space between them. 4-24 Loading Media... - Page 148 Turn the paper selection dial to select the size of paper to be loaded. Load the paper face up in the tray. Up to 20 sheets can be loaded into the tray at one time. Loading Media 4-25...
- Page 149 Slide the media guides against the edges of the paper. Close Tray 2. Select [Copy]/[Paper]/[Tray 2]/[Change Tray Set]/[Paper Size] and [Paper Type] in the configuration menu, and then select the setting for the size and type of paper that are loaded. See also “[Paper]” on page 7-5. 4-26 Loading Media...
-
Page 150: Tray 3/4 (Optional Lower Feeder Unit)
Tray 3/4 (Optional Lower Feeder Unit) Loading Plain Paper, Single Side Only and Special Paper Pull out Tray 3 or Tray 4. Press down the media pressure plate to lock it into place. Slide the media guides to pro- vide more space between them. Loading Media 4-27... - Page 151 Load the paper face up in the tray. Do not load above the mark. Up to 500 sheets (80 g/m ) of plain paper can be loaded into the tray at one time. Slide the media guides against the edges of the paper. 4-28 Loading Media...
- Page 152 Close Tray 3 or Tray 4. Select [Copy]/[Paper]/[Tray 3]/[Change Tray Set]/[Paper Size] and [Paper Type] in the configuration menu, and then select the setting for the size and type of paper that are loaded. See also “[Paper]” on page 7-5. Loading Media 4-29...
-
Page 153: About Duplex Printing
About Duplex Printing Duplex (double-sided) printing can be done with this printer, which has the duplex unit built in as a standard. If the paper has low opacity (high translu- cency), then the printed data from one side of the page will show through to the other side. - Page 154 If [Long Edge (Bottom)] is selected, the pages will be laid out to flip at the bottom. In addition, if [Booklet] is selected, autoduplex printing is performed. The following Order settings are available when [Booklet] is selected. If [Left Binding] is selected, the pages can be folded as a left-bound booklet.
-
Page 155: Output Tray
Output Tray All media is fed out facing down into the output tray of the machine. This tray has a capacity of approximately 250 sheets (A4/Letter) of 80 g/m paper. If the media is stacked too high in the output tray, your machine may experience media misfeeds, excessive media curl, or static buildup. -
Page 156: Media Storage
Media Storage Keep media on a flat, level surface in its original wrapper until it is time to load it. Media that has been stored for a long time out of its packaging may dry up too much and cause misfeeding. If media has been removed from its wrapper, place it in its original pack- aging and store in a cool, dark place on a level surface. -
Page 157: Original Media
Original Media Specifications Documents that can be placed on the original glass The following types of documents can be placed on the original glass. Document type Sheets, books, three-dimensional object Document size Maximum size : Legal Copy and Scan : 30–216 30–356 mm ×... - Page 158 Do not load the following types of documents into the ADF. Documents containing pages of different sizes Wrinkled, folded, curled, or torn documents Highly translucent or transparent documents, such as overhead transpar- encies or diazo photosensitive paper Coated documents such as carbon-backed paper Documents printed on paper thicker than 128 g/m²...
-
Page 159: Loading A Document
Loading a Document Placing a document on the original glass Lift to open the ADF cover. Position the document on the original glass. Document Align the document with the arrow on the left side toward the rear of the machine. 4-36 Loading a Document... -
Page 160: Loading A Document Into The Adf
Gently close the ADF cover. Loading a document into the ADF Put the document into the ADF Document document feed tray face up. Before loading a docu- ment into the ADF, check that no document pages remain on the original glass. - Page 161 4-38 Loading a Document...
-
Page 162: Using The Printer Driver
5Using the Printer Driver... -
Page 163: Selecting Driver Options/Defaults (For Windows)
– (Windows XP/Server 2003) From the [Start] menu, choose [Printers and Faxes] to display the [Printers and Faxes] directory. Right-click the KONICA MINOLTA bizhub C35 PCL6 or KONICA MINOLTA bizhub C35 PS printer icon and choose [Properties]. – (Windows 2000) From the [Start] menu, choose [Settings] and then [Printers] to display the [Printers] directory. - Page 164 From the [Device Options] list, select an option, one at a time, and then select [Installed] or [None] from the [Setting] menu. Click [Apply]. Depending on the version of the operating system, [Apply] may not appear. If this is the case, continue with the next step. Select the [General] tab.
-
Page 165: Uninstalling The Printer Driver (For Windows)
Close all applications. Choose the Uninstall Program as follows: – (Windows Vista/Server 2008/XP/Server 2003) From the [Start] menu, choose [All programs], [KONICA MINOLTA], [bizhub C35], and then [Uninstall Printer Driver]. – (Windows 2000) From the [Start] menu, choose [Programs], [KONICA MINOLTA], [bizhub C35], and then [Uninstall Printer Driver]. -
Page 166: Displaying Printer Driver Settings (For Windows)
From the [Start] menu, click [Control Panel], then [Hardware and Sound], and then click [Printers] to open the Printers directory. Right-click the KONICA MINOLTA bizhub C35 PCL6, KONICA MINOLTA bizhub C35 PS or KONICA MINOLTA bizhub C35 XPS printer icon, and then click [Printing Preferences]. Windows XP/Server 2003 From the [Start] menu, choose [Printers and Faxes] to display the [Print- ers and Faxes] directory. -
Page 167: Using The Postscript, Pcl And Xps Printer Driver
Using the Postscript, PCL and XPS Printer Driver Common Buttons The buttons described below appear on each tab. [OK] Click to exit the Properties dialog box, saving any changes made. [Cancel] Click to exit the Properties dialog box without saving any changes made. [Apply] Click to save all changes without exiting the Properties dialog box. -
Page 168: [Printer View]
[Printer View] Click the button to display an image of the printer in the figure area. When this button is clicked, it changes to the [Paper View] button (when a tab other than the [Quality] tab is selected) or the [Quality View] button (when the [Quality] tab is selected). -
Page 169: [My Tab]
Specify the PostScript output method Specify whether or not the error messages of a print job are printed Print a mirror image Specify whether or not the application can directly output PostScript data [My Tab] [My Tab] allows you to Display the most frequently used functions (from each tab) whose settings are often changed Add or remove displayed functions by clicking [Edit My Tab]. -
Page 170: [Layout] Tab
To display a list of jobs saved with a [Job Retention] setting, press [USB/HDD] in the home screen, and then press [Proof/Print]. Print the document by selecting the job in the list. The password must be entered if one has been specified for the job. [Layout] Tab The [Layout] Tab allows you to Print several pages of a document on the same page (N in 1 printing) -
Page 171: [Quality] Tab
Print a frame around watermarks Print transparent (shaded) watermarks Print the watermark on only the first page Print the watermark repeatedly throughout the all pages The [Copy Protect] function prevents unauthorized copying. The document is printed with the specified text or pattern in the back- ground. -
Page 172: [Other] Tab
Print using the printer’s fonts (PCL and Postscript printer driver only) Control the tones of an image (Contrast) (PCL printer driver only) Specify the image compression method (PCL printer driver only) Select whether or not Auto Trapping function is used (Postscript printer driver only) Specify the Black Over Print function (Postscript printer driver only) [Other] Tab... - Page 173 5-12 Using the Postscript, PCL and XPS Printer Driver...
-
Page 174: Proof/Print And Memory Direct Functions
6Proof/Print and Memory Direct functions... -
Page 175: Proof/Print
Proof/Print Print jobs saved on hard disk can be printed or deleted. If [Store Job], [Print and Hold], [Secured Job] or [Proof then Print] was selected for [Job Retention] in the printer driver, the job file is saved on the hard disk. Printing a job saved on the hard disk In the home screen, press [USB/HDD]. -
Page 176: Memory Direct
Memory Direct PDF, XPS, JPEG and TIFF files saved on USB memory devices can be printed by plugging the USB memory device into the machine. Printing from a connected USB memory device Plug the USB memory device into the USB HOST port. appears at the bottom of the screen. -
Page 177: Selecting The Type Of Files To Be Displayed
Selecting the type of files to be displayed In the home screen, press [USB/HDD]. Press [Memory Direct]. Press [File Type]. Select the type of files to be displayed. Press [OK]. Memory Direct... -
Page 178: Performing Copy Mode Operations
7Performing Copy mode operations... -
Page 179: Basic Copy Operation
Basic copy operation The general procedure for making copies is described below. In the home screen, press [Copy]. Place the document on the origi- nal glass or load it into the ADF. For details on positioning the document, refer to “Placing a document on the original glass”... - Page 180 For details on specifying Finishing settings, refer to “[Finishing]” on page 7-10. For details on performing the Proof Copy operation, refer to “[Proof Copy]” on page 7-10. For details on performing the Separate Scan operation, refer to “[Sep- arate Scan]” on page 7-11. For details on performing the ID Copy operation, refer to “[ID Copy]”...
-
Page 181: [Original Size]
A document containing pages of different sizes can be loaded into the ADF. For details on copying documents with pages of different sizes, refer to “[Original Size]” on page 7-4. [Original Size] The document size can be specified. Item Description [Standard Size] Select the size of the document. -
Page 182: [Paper]
[Paper] The size and type of the paper to be printed on can be selected, and the size and type settings for the paper loaded into each paper tray can be changed. The paper size can be selected automatically according to the document size or it can be specified manually. -
Page 183: [Zoom]
[Zoom] The image size for the document can be enlarged or reduced. Item Description [+]/[-] Specify the zoom ratio of the copy (25.0% to 400.0%). With documents loaded into the ADF, the zoom ratio can be set between 25% and 200%. [Set Zoom] The various preset zoom ratios and the zoom ratio for the [Minimal] setting can be changed. -
Page 184: [Duplex/Combine]
[Duplex/Combine] Whether the scanned document and the printed copy are printed on just one side or both sides can be specified. In addition, document images of multiple pages (2 or 4 pages) can be combined and printed on a single page. Item Description [Duplex]... -
Page 185: [Density]
Item Description [Binding Position] Specify the binding positions for the document and the copies. [Orig. Binding Posi- Select [Left Bind], [Right Bind], [Top Bind] or tion] [Auto] as the binding position for the document. If the binding position for the document is set to [Auto], the binding position is set at the left or at the top. -
Page 186: [Original Type]
[Original Type] Select the document quality (text or image documents). Item Description [Text] Select this setting when copying documents con- taining only text. [Text/Photo] Select this setting when copying documents con- taining both text and photos. Black text, color text and shading are automatically recognized, and the most appropriate image pro- cessing is performed. -
Page 187: [Finishing]
[Finishing] Specify any settings for finishing outputted copies. Item Description [Sort] Select this setting when making multiple copies of documents containing multiple pages so that they will be automatically separated into sets of the full document. [Group] Select this setting when making multiple copies of documents containing multiple pages so that they will be automatically separated into sets of each page. -
Page 188: [Separate Scan]
Using the keypad, the number of copies can be changed. To print another proof copy, press [Proof Copy]. To change the settings, press [Cancel], and then perform steps 2 through 8. Press [Print]. The remaining number of copies is printed. [Separate Scan] The scan operation can be divided into several sessions, for example, when all pages of a document cannot be loaded into the ADF, and then the scanned... -
Page 189: [Id Copy]
In the home screen, press [Copy]. Place the document on the original glass or load it into the ADF. For details on positioning the document, refer to “Placing a document on the original glass” on page 4-36 and “Loading a document into the ADF”... -
Page 190: [Paper Margin]
The card can only be placed on the original glass. Position the card to be scanned aligned at the upper-left corner of the original glass. Since the image is printed 4 mm from the top and left side, reposition the card as necessary In the home screen, press [Copy]. -
Page 191: [Scan Quality]
[Scan Quality] The quality can be adjusted for the document to be scanned. Item Description [Background removal] Adjust the background density when copying docu- ments with a colored background (such as newspa- pers or recycled paper) or thin documents where the back side is visible from the front side. -
Page 192: Additional Copy Operations
8Additional copy operations... -
Page 193: Interrupting A Copy Job
Interrupting a copy job The current jobs can be temporarily interrupted so a document can be copied with different copy settings. This is convenient for quickly making a copy. The [Interrupt] key cannot be pressed while a document is being scanned. -
Page 194: Copy Programs
Copy programs Frequently used copy settings can be stored together as a program to easily be recalled later. Storing a copy program A maximum of 15 copy programs can be stored. In the home screen, press [Copy]. Specify the copy settings. Press the [Mode Memory] key. -
Page 195: Copying Using Stored Settings (Copy Programs)
Copying using stored settings (copy programs) In the home screen, press [Copy]. Place the document on the original glass or load it into the ADF. For details on positioning the document, refer to “Placing a document on the original glass” on page 4-36 and “Loading a document into the ADF”... -
Page 196: Scanning From A Computer Application
9Scanning From a Computer Application... -
Page 197: Basic Scanning Operation
Basic Scanning Operation Documents can be scanned from a computer connected to this machine via a network. Scanning settings can be specified and the scanning operation can be performed from TWAIN- or WIA-compatible applications. From the scan- ner driver, a preview can be displayed and various adjustments, such as the size of the scan area, can be specified. -
Page 198: Windows Twain Driver Settings
Windows TWAIN Driver Settings Mode settings [Mode Settings] Select [Basic Mode] for specifying basic settings, or select [Advanced Mode] for specifying detailed settings. The settings that can be specified differ for each mode. When [Basic Mode] is selected The following parameters can be set when [Basic Mode] is selected. [Help] icon Click to display Help information. -
Page 199: When [Advanced Mode] Is Selected
If the [Rotate back side] check box is selected, the back side of the image is rotated 180° and scanned. (Applies only if [ADF (2-sided)] is selected.) [Image size] Shows the data size of the scan image. [Close] Click to close the TWAIN driver window. [Prescan] Click to begin scanning a preview image. - Page 200 [Resolution] Specify the resolution. [Scale] Specify the enlargement or reduction ratio for the selected area. If the resolution is set at 1200 × 1200dpi or higher, a setting larger than 100% cannot be specified. Scanning Mode Select [Auto] or [Manual]. When [Manual] is selected, a tab appears so that detailed settings can be specified, for example, for [Brightness/Contrast], [Fil- ter], [Curves], [Levels], [Color Balance], and [Hue/Saturation].
- Page 201 [Zoom Prescan] icon Click to rescan the area selected in the preview window and enlarge it to fit the window. [Mirror] icon Click to display a mirror image of the preview image. [Tone Reversal] icon Click to reverse the colors of the preview image. [Clear] icon Click to erase the preview image.
-
Page 202: Windows Wia Driver Settings
Windows WIA Driver Settings [Paper source] Select the paper source. [Color picture] Select this setting when scanning in color. [Grayscale picture] Select this setting when scanning in grayscale. [Black and white picture or text] Select this setting when scanning in black and white. [Custom Settings] Select this setting when scanning with [Adjust the quality of the scanned pic- ture] settings applied. -
Page 203: Macintosh Twain Driver Settings
Macintosh TWAIN Driver Settings Mode settings [Mode Settings] Select [Basic Mode] for specifying basic settings, or select [Advanced Mode] for specifying detailed settings. The settings that can be specified differ for each mode. When [Basic Mode] is selected The following parameters can be set when [Basic Mode] is selected. [Help] icon Click to display Help information. -
Page 204: When [Advanced Mode] Is Selected
If the [Rotate back side] check box is selected, the back side of the image is rotated 180° and scanned. (Applies only if [ADF (2-sided)] is selected.) [Image size] Shows the data size of the scan image. [Close] Click to close the TWAIN driver window. [Prescan] Click to begin scanning a preview image. - Page 205 [Resolution] Specify the resolution. [Scale] Specify the enlargement or reduction ratio for the selected area. If the resolution is set at 1200 × 1200dpi or higher, a setting larger than 100% cannot be specified. [Scanning Mode] Select [Auto] or [Manual]. When [Manual] is selected, a tab appears so that detailed settings can be specified, for example, for [Brightness/Contrast], [Fil- ter], [Curves], [Levels], [Color Balance], and [Hue/Saturation].
- Page 206 [Zoom Prescan] icon Click to rescan the area selected in the preview window and enlarge it to fit the window. [Mirror] icon Click to display a mirror image of the preview image. [Tone Reversal] icon Click to reverse the colors of the preview image. [Clear] icon Click to erase the preview image.
-
Page 207: Using A Web Service
Using a Web Service The scan command can be sent from a computer (Windows Vista) on the net- work or this machine can scan using a specified operation, and the scan data can be sent to a computer. The settings that must be specified in advance on the computer are described below. -
Page 208: Specifying The Scan Command From A Computer (Web Service)
Specifying the scan command from a computer (Web Service) A computer can send the scan command to this machine, then receive the scan data. As an example, the procedure for scanning from the Windows Photo Gallery is described below. The scan command can also be sent from this machine, where the data will be saved. - Page 209 9-14 Using a Web Service...
-
Page 210: Scanning With The Machine
1Scanning with the machine... -
Page 211: Initial Settings
Initial settings This machine is equipped with scanning functions for saving data on this machine’s hard disk or on a USB memory device, and with network scanning functions for sending scanned image data through the network with E-mail transmissions, FTP transmissions, SMB transmissions, WebDAV transmis- sions and Web Service transmissions. -
Page 212: Performing Scan To E-Mail Mode Operations
Performing Scan to E-mail mode operations Basic Scan to E-mail operation The basic procedure for the Scan to E-mail operation, which sends scan data with an E-mail transmission, is described below. Press [Scan to E-mail] to display the initial Scan to E-mail mode screen. Place the document in the ADF or on the original glass. -
Page 213: Specifying Document Settings
This machine cannot automatically detect the size of an original docu- ment that will be scanned. Before scanning the document, specify its size. If the size of the original document is not correctly specified, some parts of the image may be lost. For details on specifying the size of an original document, refer to “[Original Size]”... -
Page 214: [Original Size]
[Original Size] Specify the size of the document that is to be sent. Item Description [Standard Size] Select the size of the document. Select [Letter/Legal] to scan a document con- taining different page sizes. [Custom Size] Specify the size of the document if it is a non-standard size. -
Page 215: [Original Mode]- [Original Direction]
[Original Mode]- [Original Direction] Specify the orientation of the document. Item Description [Top] Select this setting when the document is loaded with its top edge at the top. [Bottom] Select this setting when the document is loaded with its top edge at the bottom. [Left] Select this setting when the document is loaded with its top edge at the left (at the right when... -
Page 216: [Color]
[Color] Select whether the document will be scanned in color or black and white. Item Description [ON] Select this setting to automatically detect [Auto Color] the color of the document and scan it with the corresponding setting. [OFF] Select this setting to scan in full color. [Gray Scale] Select this setting for documents with [Monotone]... -
Page 217: Specifying Scan Settings
Specifying scan settings The [Background/Density], [Resolution] and [File Settings] parameters avail- able from the [Settings] screen can be used to specify scan settings. [Background/Density] Specify the appropriate image quality settings for the document. Item Description [Background Removal] Select the density of the background color at which documents with a background color are to be scanned. -
Page 218: [File Settings]-[File Type]
[File Settings]-[File Type] Select the file format for the scan data to be saved. Item Description [PDF] Select this setting to save the data in the PDF format. [Compact PDF] Select this setting to save the data compressed more than with the PDF format. [TIFF] Select this setting to save data in the TIFF for- mat. -
Page 219: [File Settings]-[Pdf Encrypt]
[File Settings]-[PDF Encrypt] Specify the encryption settings when [PDF] or [Compact PDF] is selected. Item Description [Encryption [Yes] Select this setting to enable encryption. Level] After selecting this setting, set the encryp- tion level to [Low], [Middle] or [High]. [No] Select this setting to disable encryption. - Page 220 Item Description [Details] If encryption has been enabled, detailed permission settings can be specified. This appears only if [Encryption Level] is set to [Yes] and a password has been specified for [Document Permissions]. [Printing Select whether to allow the data to be Allowed] printed ([Allow]), to prohibit printing ([Restrict]), or to allow printing only at a...
-
Page 221: Specifying Communication Settings
Specifying communication settings The [Communication] parameters available from the [Settings] screen can be used to specify settings for E-mail transmissions. [Binary Div] Select whether or not transmission data is divided. Item Description [ON] Select this setting to divide transmission data. [OFF] Select this setting to not divide transmission data. - Page 222 Item Description [From] Specify the sender’s address. Select [Administrator E-mail Addr.] or [User Address], or type it in directly. [Body] Type in the body text for the E-mail message. Performing Scan to E-mail mode operations 10-13...
-
Page 223: Specifying Destinations
Specifying destinations Use any of the following methods to specify destinations. “Selecting from registered destinations” on page 10-26 “Directly typing in the address” on page 10-28 “Selecting from the log” on page 10-31 Selecting from registered destinations An address book destination or group destination can be selected from those previously registered on the machine. -
Page 224: Selecting By Searching For A Destination Type Or Name
Selecting by searching for a destination type or name Destinations can be selected by searching for their type or name. In the initial Scan to E-mail mode screen, press Press [Search]. Select the method to search for destinations. – [Type]: Select the destination type (“Fax”, “E-mail”, etc.). –... -
Page 225: Selecting A Program Destination
The only destinations that appear in the log are those specified after pressing [Direct Input]. In addition, destinations specified with broadcast transmissions do not appear in the log. Selecting a program destination Data can be sent with a program destination previously registered on the machine. - Page 226 Place the document in the ADF or on the original glass. – For details on loading the original document, refer to “Loading a Docu- ment” on page 4-36. If the document contains more pages than can be loaded into the ADF, set [Settings] - [Original Mode] - [Separate Scan] to [ON] so that the document can be divided and scanned separately.
- Page 227 If the memory becomes full while the document is being scanned, scanning cannot continue. To send the document pages that have already been scanned, press the [Start] key. To stop the transmission, press the [Stop] key. To check a scan job, press [Job], and then press [Save] in the [Log] screen.
-
Page 228: Specifying Document Settings
Specifying document settings The [Simplex/Duplex], [Original Size], [Original Mode], [Color] and [Original Type] parameters available from the [Settings] screen can be used to specify document settings. [Simplex/Duplex] Select whether double-sided documents are to be scanned when the ADF is used. Item Description [1-sided]... -
Page 229: [Original Mode]-[Separate Scan]
[Original Mode]-[Separate Scan] A document can be divided and scanned separately. The scan operation can be divided into several sessions, for example, when the document contains more pages than can be loaded into the ADF or when the original glass is being used to scan a document containing multiple pages, and then all scanned pages can be sent as a single document. -
Page 230: [Original Mode]- [Orig. Binding Position]
[Original Mode]- [Orig. Binding Position] Specify the binding position when scanning a double-sided document using the ADF. The orientation of the back sides of the pages differs depending on whether the double-sided document will be bound at the top or at the left. Item Description [Left Bind]... -
Page 231: [Original Type]
[Original Type] Select the appropriate image quality setting according to the content of the document. Item Description [Text] Select this setting when scanning documents containing only text. [Text/Photo] Select this setting when scanning documents containing a combination of text and photos. [Photo] Select this setting when scanning documents containing only photos. -
Page 232: [Resolution]
[Resolution] Select the resolution at which the document is to be scanned. Item Description [150×150dpi] Select this setting to scan the document at 150 × 150 dpi. [200×200dpi] Select this setting to scan the document at 200 × 200 dpi. [300×300dpi] Select this setting to scan the document at 300 ×... -
Page 233: [File Settings]-[Scan Setting]
[File Settings]-[Scan Setting] Select whether the data is divided into individual pages or multi-page data is created when multiple pages are scanned. Item Description [Single Page] Select this setting to save the data divided into individual pages. [Multi Page] Select this setting to save the scan as multi-page data. -
Page 234: Specifying The Document Name
[Details] If encryption has been enabled, detailed permis- sion settings can be specified. This appears only if [Encryption Level] is set to [Yes] and a password has been specified for [Document Permissions]. [Printing Select whether to allow the data to be printed Allowed] ([Allow]), to prohibit printing ([Restrict]), or to allow printing only at a low resolution ([Low Resolution]). -
Page 235: Specifying Communication Settings
Specifying communication settings The [Communication] parameters available from the [Settings] screen can be used to specify settings for sending job completion notifications by E-mail. [URL Notification] Description Settings [ON] / [OFF] Specify whether or not notifications of completion of a job are to be sent by E-mail. -
Page 236: Selecting From The Favorites List
Selecting from the Favorites list When destinations are registered, they can be specified as [Favorites]. As a default, the [Favorites] destination list appears when the initial Scan to Folder mode screen is displayed. Select a destination from the list. To specify multiple destinations for a broad- cast transmission, specify all destinations where the data is to be sent. -
Page 237: Directly Typing In The Address
Directly typing in the address To specify a destination that is not registered with the machine, directly type in the address. With [FTP] In the initial Scan to Folder mode screen, press [Direct Input]. Press [FTP]. Specify settings for [Host Name], [File Path], [User Name] and [Password] for the destination computer. -
Page 238: With [Webdav]
If [Admin Settings] - [Security Settings] - [Security Details] - [Manual Destination Input] is set to [Restrict], an address cannot be directly typed in. For details on [Manual Destination Input], refer to “[Security Settings]” on page 3-69. With [WebDAV] In the initial Scan to Folder mode screen, press [Direct Input]. Press [WebDAV]. -
Page 239: With [Hdd]
If [Admin Settings] - [Security Settings] - [Security Details] - [Restrict Scan to USB] is set to [Restrict], [USB Memory] is not available. For details on [Restrict Scan to USB], refer to “[Security Settings]” on page 3-69. With a USB Memory transmission, only one destination can be speci- fied. -
Page 240: Selecting From The Log
If [Admin Settings] - [Security Settings] - [Security Details] - [Manual Destination Input] is set to [Restrict], an address cannot be directly typed in. For details on [Manual Destination Input], refer to “[Security Settings]” on page 3-69. With a Web Service transmission, only one destination can be speci- fied. - Page 241 Press the [Start] key. – Press the [Start (Color)] key to scan in color, or press the [Start (B&W)] key to scan in black and white. 10-32 Specifying destinations...
-
Page 242: Registering Destinations
Registering destinations Destination registration By registering destinations where scan data is frequently sent, recipients can be recalled allowing a data to easily be sent. With this machine, address book destinations, group destinations and program destinations can be registered. Address Book The information for destinations (E-mail addresses and computer folders, etc.) where data is frequently sent can be registered. -
Page 243: Registering An Address Book Destination
Registering an address book destination The procedure for registering an address book destination for scan data is described below. E-mail address book destinations can be registered from the control panel of this machine or from PageScope Web Connection. The following procedure describes how to register from the control panel of this machine. -
Page 244: Registering A Program Destination
[Favorites] For frequently used destinations, set to [ON]. This displays the destination in the [Favorites] list, allowing it to be found more easily. [Index] Select the index characters that will be used to search for the destination. Press [OK]. Registering a program destination The procedure for registering a program destination for scan transmissions is described below. - Page 245 10-36 Registering destinations...
- Page 246 Replacing Consumables...
-
Page 247: Replacing Consumables
Replacing Consumables Note Failure to follow instructions as outlined in this manual could result in voiding your warranty. Note If the toner has run out or the time to replace the transfer belt unit has been reached, an error message appears. Refer to “Error messages” on page 13-39. - Page 248 Refer to the following URL for recycling information. US: printer.konicaminolta.net/products/recycle/index.asp Europe: www.konicaminolta.eu/printing-solutions/more-information/ clean-planet.html Other regions: printer.konicaminolta.com Note The use of non-genuine toner cartridges may result in unstable performance. In addition, any damage caused by the use of non-genuine toner cartridges is not covered by the warranty, even if it occurs during the warranty period.
- Page 249 When replacing a toner cartridge, refer to the following table. For optimum print quality and performance, use only approved KONICA MINOLTA toner cartridges for your specific machine type, as listed in the table below. You can find your machine type and the toner cartridge part numbers on the consum- ables reorder label inside the front cover your machine.
- Page 250 Level during handling and storage. Do not turn cartridges upside down; the toner inside the cartridges may become caked or unequally distributed. Away from salty air and corrosive gases such as aerosols. Replacing Consumables 11-5...
-
Page 251: Replacing A Toner Cartridge
Replacing a Toner Cartridge Note Be careful not to spill toner while replacing a toner cartridge. If toner spills, immediately wipe it off with a soft, dry cloth. When the toner is empty, the message [Replace Toner (x)] appears in the touch panel. - Page 252 Pull the front lever of the color toner cartridge indicated to the Y M C K left. The replacement procedure for the toner cartridge is the same for all colors (yellow: Y, magenta: M, cyan: C, and black: K). The following instructions show the procedure to replace the toner cartridge (Y).
- Page 253 Remove the toner cartridge from the bag. Shake the cartridge to distribute the toner. 3 × Peel off the protective film from the right side of the toner car- tridge. 11-8 Replacing Consumables...
- Page 254 Make sure that the toner car- tridge is the same color as the machine compartment, and then insert the toner cartridge into the machine. Fully insert the toner car- tridge. Pull the lever to the right to lock it in place. The front lever should be securely returned to its original position;...
- Page 255 Close the front cover. When closing the front cover, press the area of the cover with small pro- jections. 11-10 Replacing Consumables...
-
Page 256: Replacing A Imaging Unit
Replacing a Imaging Unit When replacing a imaging unit, refer to the following table. For optimum print quality and performance, use only approved KONICA MINOLTA imaging units for your specific machine type, as listed in the table below. You can find your machine type and the imaging unit part numbers on the consumables reorder label inside the front cover your machine. - Page 257 If the messages [Replace Imaging Unit] appear, replace the specified imaging unit. As an example, the procedure for replacing the black imaging unit is described below. Check the message window to see which color imaging unit needs replac- ing. Open the machine’s front cover. Pull the front lever of the color Y M C K toner cartridge indicated to the...
- Page 258 Grab the handle of the toner car- tridge to be removed, and then pull out the cartridge. Do not tilt removed toner car- tridge, otherwise toner may spill. Pull up the waste toner bottle to unlock it. Grab the left and right handles of the waste toner bottle, and then slowly pull out the bottle.
- Page 259 While pressing down the area marked “Push” on the imaging unit to be replaced, slide the unit completely out of the machine. The following instructions show the procedure to replace the imaging unit (K). Note Dispose of the used imaging unit according to your local regulations. Do not burn the imaging unit.
- Page 260 Hold the imaging unit with both hands, and then shake it twice as shown in the illustration. Do not grab the bottom of the bag; otherwise, the imaging unit may be damaged, resulting in decreased print quality. Remove the protective cover from the imaging unit.
- Page 261 Remove the paper from the imaging unit. Remove the protective cover from the imaging unit. Make sure that the new imaging unit to be installed is the same color as the machine compart- ment, and then install the imag- ing unit in the machine. Press in on the waste toner bot- tle until it locks into place.
- Page 262 Make sure that the toner car- tridge is the same color as the machine compartment, and then insert the toner cartridge into the machine. Fully insert the toner car- tridge. Pull the lever to the right to lock it in place. The front lever should be securely returned to its original position;...
- Page 263 Close the front cover. When closing the front cover, press the area of the cover with small pro- jections. 11-18 Replacing Consumables...
-
Page 264: Replacing The Waste Toner Bottle
Replacing the Waste Toner Bottle When the waste toner bottle becomes full, the message [Waste Toner Box Full] appears in the message window. The machine stops and will not start again until the waste toner bottle is replaced. Open the machine’s front cover. Pull up the waste toner bottle to unlock it. - Page 265 Grab the left and right handles of the waste toner bottle, and then slowly pull out the bottle. Do not tilt removed waste toner box, otherwise waste toner may spill. Remove the new waste toner bottle from its packaging. Insert the used waste toner bottle into the plastic bag included in the box, and then box it Note Dispose of the used waste toner bottle according to your local...
- Page 266 Close the front cover. When closing the front cover, press the area of the cover with small pro- jections. If the waste toner bottle is not fully inserted, the front cover cannot be closed. Replacing Consumables 11-21...
-
Page 267: Replacing The Transfer Roller
Replacing the Transfer Roller When the time to replace the transfer roller is reached, the message [Replace transfer roller unit.] appears. Printing can continue even after this message appears; however, since the print quality is reduced, the transfer roller should be replaced immediately. - Page 268 While continuing to press the levers, remove the transfer roller. Prepare a new transfer roller. While pressing the levers, insert the shaft of the transfer roller into the bearings. Move the levers away from you until it snaps into place. Replacing Consumables 11-23...
-
Page 269: Replacing The Transfer Belt Unit
Close the right door. Reset the counter in the [Admin Settings]/[Maintenance Menu]/[Supplies]/ [Consumables Replace]/[Transfer Roller Unit] menu. Replacing the Transfer Belt Unit When the time to replace the transfer belt unit is reached, the message [Replace image transfer belt.] appears. Printing can continue even after this message appears;... - Page 270 Open the machine’s front cover. Remove the all toner cartridges, all imaging units and waste toner bottle. For details on removing the toner cartridges, imaging units or waste toner bottle, refer to “Replacing a Toner Car- tridge” on page 11-6 or “Replacing a Imaging Unit”...
- Page 271 Pull the lever, and then open the right door. Before opening the right door, fold up Tray 1. Remove the top part of the right door. Push down the guides. 11-26 Replacing Consumables...
- Page 272 Hold the handles, and then care- fully pull out the transfer belt unit. Be sure to keep the transfer belt level; other- wise, the transfer belt may be scratched. Prepare a new transfer belt unit. Be careful not to touch the surface of the belt.
- Page 273 Insert the new transfer belt unit along the rails. Fully insert it until it locks into place. Be sure to keep the transfer belt level; other- wise, the transfer belt may be scratched. Push up the guides. Install the top part of the right door.
- Page 274 Close the right door. Install the all toner cartridges, all imaging units and waste toner bottle. For details on installing the toner cartridges, imaging units or waste toner bottle, refer to “Replacing a Toner Car- tridge” on page 11-6 or “Replacing a Imaging Unit”...
- Page 275 When closing the front cover, press the area of the cover with small pro- jections. Reconnect the power cord, and turn on the machine. Reset the counter in the [Admin Settings]/[Maintenance Menu]/[Supplies]/ [Consumables Replace]/[Transfer Belt Unit] menu. 11-30 Replacing Consumables...
-
Page 276: Replacing The Backup Battery
Replacing the Backup Battery When the backup battery is at its end of life, the machine’s date and time can- not be retained. Follow the procedure described below to replace the backup battery. Note Only use the coin-shaped 3V lithium battery CR2032. It’s very important to protect the machine controller board and any associated circuit boards from electrostatic damage. - Page 277 Using a coin, remove a screw. Open the cover. Remove the hook, and then remove the backup battery. 11-32 Replacing Consumables...
- Page 278 Remove the hook, and then insert a new backup battery. When inserting the new backup battery, be sure that the + side faces tow- erd the left. Risk of explosion if bat- tery is replaced by an incorrect type. Dispose of used batteries according to your local regulations.
-
Page 279: Replacing The Fuser Unit
Replacing the Fuser Unit When the time to replace the fuser unit is reached, the message [Replace fusing unit.] appears. Printing can continue even after this message appears; however, since the print quality is reduced, the fuser unit should be replaced immediately Turn off the machine. - Page 280 Pull down the 2 levers. Remove the fuser unit. Prepare a new fuser unit. Be careful not to touch the surface of the fuser roller. Replacing Consumables 11-35...
- Page 281 Lift up the 2 levers. Remove the packing material. Push down the 2 levers. 11-36 Replacing Consumables...
- Page 282 Pull down the 2 levers of a new fuser unit. Insert the fuser unit until it locks into place. Lift up the 2 levers. Replacing Consumables 11-37...
- Page 283 Close the fuser unit cover. Close the right door. Reset the counter in the [Admin Settings]/[Maintenance Menu]/[Supplies]/ [Consumables Replace]/[Fusing Unit] menu. 11-38 Replacing Consumables...
-
Page 284: Antistatic Protection
Antistatic Protection Note It’s very important to protect the printer controller board from electrostatic damage while performing any task involving the controller board. Turn off all power switches first. If an antistatic wrist strap is provided in your printer option kit, attach one end of it to your wrist and the other end to the bare metal chassis on the back of your printer. - Page 285 11-40 Antistatic Protection...
-
Page 286: Maintenance
Maintenance... -
Page 287: Maintaining The Machine
Maintaining the machine CAUTION Read all caution and warning labels carefully, making sure to follow any instructions contained in them. These labels are located on the inside of the machine’s covers and the interior of the machine body. Handle the machine with care to preserve its life. Abuse handling may cause damage and void your warranty. - Page 288 Do not cover the machine immediately after using it. Turn it off and wait until it cools down. Do not leave the machine’s covers open for any length of time, especially in well-lit places; light may damage the imaging units. Do not open the machine during printing.
-
Page 289: Cleaning The Machine
Cleaning the machine CAUTION Be sure to turn off the machine and unplug the power cord before cleaning. Exterior Control Panel Ventilation Grill Machine Exterior Original Cover Pad Original Glass 12-4 Cleaning the machine... -
Page 290: Media Rollers
Media Rollers The accumulation of paper dust and other debris on the media rollers can cause media-feeding problems. Cleaning the Media Feed Rollers (Manual Feed Tray) Open Tray 1. Press down on the center of the paper-lifting plate until the left and right locking tabs (white) lock into place. - Page 291 Clean the media feed rollers by wiping them with a soft, dry cloth. Close the tray. 12-6 Cleaning the machine...
-
Page 292: Cleaning The Media Feed Rollers For Tray 2/3/4
Cleaning the Media Feed Rollers for Tray 2/3/4 Pull out the tray. Clean the media feed rollers by wiping them with a soft, dry cloth. Close the tray. Cleaning the machine 12-7... -
Page 293: Cleaning The Media Transfer Rollers For Tray 3/4
Cleaning the Media Transfer Rollers for Tray 3/4 Open the right side cover of Tray 3 or Tray 4. Before opening the right side cover of Tray 3 or Tray 4, fold up Tray 1. Clean the media transfer rollers by wiping them with a soft, dry cloth. -
Page 294: Cleaning The Media Feed Rollers For The Adf
Cleaning the Media Feed Rollers for the ADF Open the ADF feed cover. Clean the media feed rollers by wiping them with a soft, dry cloth. Close the ADF feed cover. Cleaning the machine 12-9... -
Page 295: Cleaning The Laser Lens
Cleaning the Laser Lens This machine is constructed with four laser lenses. Clean all lenses as described below. The laser lens cleaning tool should be attached to the inside of the tray 2. Pull out the tray 2. Remove the cover. Since the cover will be used later, do not return it to its original position. - Page 296 Close the tray 2. Open the machine’s front cover. Remove the waste toner bottle and the toner cartridge and imaging unit for the color of laser lens to be cleaned. For details on removing the toner cartridge, imaging unit or waste toner bottle, refer to “Replacing a Toner Car- tridge”...
- Page 297 Insert the laser lens cleaning tool into the imaging unit open- ing, pull it out, and then repeat this back and forth movement 2 or 3 times. Install the removed toner car- tridge, imaging unit and waste toner bottle. For details on installing the toner cartridge, imaging unit or waste toner bottle, refer to “Replacing a Toner Car-...
- Page 298 Return the laser lens cleaning tool to its holder on the inside of the tray 2. Close the cover. Close the tray 2. Clean between each of the laser lenses in the same way. The laser lens cleaning tool is included with the machine. Safely store the laser lens cleaning tool so that it will not be lost.
- Page 299 12-14 Cleaning the machine...
-
Page 300: Troubleshooting
Troubleshooting... -
Page 301: Introduction
Introduction This chapter provides information to aid you in resolving machine problems you may encounter, or at least guide you to the proper sources for help. Printing the configuration page page 13-2 Unlocking the Scanner page 13-3 Preventing media misfeeds page 13-4 Understanding the media path page 13-5... -
Page 302: Unlocking The Scanner
Unlocking the Scanner Lift open the ADF cover. Move the scanner lock lever to Close the ADF cover. Turn off the machine, and then turn it on again. Unlocking the Scanner 13-3... -
Page 303: Preventing Media Misfeeds
Preventing Media Misfeeds Make sure that... Media matches the machine specifications. Media is flat, especially on the leading edge. The machine is on a hard, flat, level surface. You store media in a dry location away from moisture and humidity. You always adjust the media guides in the tray after inserting the media (a guide that is not properly adjusted can cause poor print quality, media mis- feeds, and machine damage). -
Page 304: Understanding The Media Path
Understanding the Media Path Understanding media path will help you locate media misfeeds 1 ADF media feed rollers 2 Document feed tray 3 Document output tray 4 Fuser unit 10 Print head unit 5 Duplex 11 Imaging unit 6 Tray 1 (Manual feed tray) 12 Transfer belt unit 7 Tray 4 (optional lower feeder unit) 13 Toner cartridge 8 Tray 3 (optional lower feeder unit) 14 Output tray... -
Page 305: Clearing Media Misfeeds
Clearing Media Misfeeds To avoid damage, always remove misfed media gently, without tearing it. Any piece of media left in the machine, whether large or small, can obstruct the media path and cause further misfeeds. Do not reload media that has misfed. Note The image is not fixed on the media before the fusing process. -
Page 306: Clearing A Media Misfeed In Tray 2
Clearing a Media Misfeed in Tray 2 Pull the lever, and then open the right door. Before opening the right door, fold up Tray 1. Carefully pull out the misfed media. Clearing Media Misfeeds 13-7... - Page 307 CAUTION The area around the fuser unit is extremely hot. Touching anything other than the indicated levers may result in burns. If you get burned, immediately cool the skin under cold water, and then seek professional medical attention. Note Decreased print quality may result if the surface of the image transfer belt or the transfer roller is touched.
- Page 308 Close the right side door. Pull out Tray 2, and then remove all media from the tray. Fan the media you removed and then align it well. Clearing Media Misfeeds 13-9...
- Page 309 Load the media face up in Tray 2. Make sure that the media is flat. Do not load paper above the mark. Slide the media guides against the edges of the paper. Close Tray 2. 13-10 Clearing Media Misfeeds...
-
Page 310: Clearing A Media Misfeed In Tray 3/4
Clearing a Media Misfeed in Tray 3/4 Open the right side cover of Tray 3 or Tray 4. Before opening the right side cover of Tray 3 or Tray 4, fold up Tray 1. Carefully pull out the misfed media. Close the right side cover of Tray 3 or Tray 4. - Page 311 Pull out Tray 3 or Tray 4, and then remove all paper from the tray. Fan the paper you removed and then align it well. Load the paper face up in Tray 3 or Tray 4. Make sure that the paper is flat. Do not load paper above the mark.
-
Page 312: Clearing A Media Misfeed From The Adf
Clearing a Media Misfeed from the ADF Open the ADF feed cover. Remove the document from the ADF document feed tray. Lift to open the ADF cover. Clearing Media Misfeeds 13-13... - Page 313 Remove any misfed media. Close the ADF cover. Close the ADF feed cover. 13-14 Clearing Media Misfeeds...
-
Page 314: Clearing A Media Misfeed From The Duplex
Clearing a Media Misfeed from the Duplex Pull the lever, and then open the right door. Before opening the right door, fold up Tray 1. Carefully pull out the misfed media. Close the right door. Clearing Media Misfeeds 13-15... -
Page 315: Clearing A Media Misfeed From The Fuser Unit
Clearing a Media Misfeed from the Fuser Unit Pull the lever, and then open the right door. Before opening the right door, fold up Tray 1. Lift up the 2 levers. Open the fuser unit cover. 13-16 Clearing Media Misfeeds... - Page 316 Carefully pull out the misfed media. If the misfed media cannot be removed by pulling it down, pull it from the top of the fuser unit. Clearing Media Misfeeds 13-17...
- Page 317 CAUTION The area around the fuser unit is extremely hot. Touching anything other than the indicated levers may result in burns. If you get burned, immediately cool the skin under cold water, and then seek professional medical attention. Note Decreased print quality may result if the surface of the image transfer belt or the transfer roller is touched.
- Page 318 Close the fuser unit cover. Push down the 2 levers. Close the right door. Clearing Media Misfeeds 13-19...
-
Page 319: Clearing A Media Misfeed From Tray 1 (Manual Feed Tray) And Transfer Roller
Clearing a Media Misfeed from Tray 1 (Manual Feed Tray) and Transfer Roller Pull the lever, and then open the right door. Before opening the right door, fold up Tray 1. Carefully pull out the misfed media. 13-20 Clearing Media Misfeeds... - Page 320 CAUTION The area around the fuser unit is extremely hot. Touching anything other than the indicated levers may result in burns. If you get burned, immediately cool the skin under cold water, and then seek professional medical attention. Note Decreased print quality may result if the surface of the image transfer belt or the transfer roller is touched.
- Page 321 Close the right door. 13-22 Clearing Media Misfeeds...
-
Page 322: Solving Problems With Media Misfeeds
Check the media path again to make misfed in the sure that you have removed all of the machine. misfed media. Duplex mis- Unsupported media Use KONICA MINOLTA-approved feeds. (wrong size, thick- media. See “Special Paper” on ness, type, etc.) is page 4-11. being used. - Page 323 Symptom Cause Solution Media is mis- The loaded document Load the correct document. For details fed in the does not meet the on the documents that can be loaded, ADF. specifications. refer to “Documents that can be loaded into the ADF” on page 4-34. The loaded document Load the document so that it does not exceeds the maxi-...
- Page 324 If the flaps are on the long edge, load the envelopes with the flap edge toward the machine and the flap side facing up. Unsupported media Use KONICA MINOLTA-approved (wrong size, thick- media. ness, type, etc.) is See “Specifications” on page 4-2.
-
Page 325: Solving Other Problems
Solving Other Problems Symptom Cause Solution Machine The power cord is not Turn off the machine, confirm that the power is not correctly plugged into power cord is correctly plugged into the outlet. the outlet, and then turn on the machine. - Page 326 The job is very com- Wait. No action needed. plex. A toner cartridge for a Install a correct KONICA MINOLTA different region or an toner cartridge approved for your spe- unapproved toner cific machine. cartridge is installed...
- Page 327 Symptom Cause Solution Not all pages A different user acci- Try printing the remaining pages. print. dentally canceled the job. The tray is empty. Check that the tray is loaded with media, in place, and secure. A document is printed Print the overlay file using a suitable with an overlay file printer driver.
- Page 328 Symptom Cause Solution With N-up on Both the printer driver For N-up on multiple copies, choose multiple cop- and the application Collate only in the printer driver’s Basic ies, the out- have been set for col- Tab. Do not set collation in the applica- put is lation.
- Page 329 Check them for damage. If necessary, or fuser unit is defec- contact Technical Support with the tive. error information. Unsupported media Use KONICA MINOLTA-approved (wrong size, thick- media. See “Specifications” on ness, type, etc.) is page 4-2. being used. Also, refer to http://printer.konicaminolta.com...
-
Page 330: Solving Problems With Printing Quality
Solving Problems with Printing Quality Symptom Cause Solution Nothing is One or more of the Remove the toner cartridges and printed, or toner cartridges may check if any is damaged. there are be defective. blank spots One or more of the Remove the imaging units and check on the imaging units may be... - Page 331 Symptom Cause Solution Image is too Laser lens is dirty. Clean the laser lens. light; there is The copy density is Select a darker copy density. low image set too light. density. The media is moist Remove the moist media and replace from humidity.
- Page 332 Symptom Cause Solution Image is One or more of the Remove the toner cartridges and blurred; toner cartridges may check for damage. If it is damaged, background be defective. replace it. is lightly One or more of the Remove the imaging units and check stained;...
- Page 333 Remove the moist media and replace it appears. with new, dry media. Unsupported media Use KONICA MINOLTA-approved (wrong size, thick- media. See “Specifications” on ness, type, etc.) is page 4-2. being used. Also, refer to http://printer.konicaminolta.com...
- Page 334 Symptom Cause Solution There are One or more of the Remove the toner cartridges and toner toner cartridges are check for damage. If it is damaged, smudges or defective or installed replace it. residual incorrectly. images. There are The media transfer Clean the media transfer roller.
- Page 335 Symptom Cause Solution Image The laser lens is dirty. Clean the laser lens. defects. A toner cartridge may Remove the toner cartridges and be leaking. check for damage. If it is damaged, replace it. A toner cartridge may Remove the toner cartridge with the be defective.
- Page 336 Symptom Cause Solution Colors are Gradations are not Set [Print Settings]/[Quality Settings]/ not register- adjusted correctly. [Gradation Adjust]/[Tone Calibration] in ing properly; the [Admin Settings] menu to [ON], The front cover is colors are and then perform the AIDC color cali- opened during the mixed or bration.
-
Page 337: Status, Error And Service Messages
Status, error and service messages Various status, error and service messages appear in the touch panel of the control panel. They provide information about the machine and help you locate problems that may have occurred. Check the message that appears, and then perform the necessary steps. -
Page 338: Error Messages
Error messages Warning messages Message Cause Solution [Unable to collate.] There is not enough After one copy is space available on the printed, the error is can- [Prints one set only.] hard disk for collated celed. printing. [HDD is low on disk There is too little Delete downloaded space.]... - Page 339 Message Cause Solution [Toner is low.] The time to replace Prepare the new toner the toner cartridge is cartridge. [Prepare new toner near. cartridge.] [Replace imaging unit The time to replace Prepare the new imag- soon.] the imaging unit is ing unit.
-
Page 340: Operator Messages
Message Cause Solution [The USB device is An incompatible USB Disconnect the USB invalid.] device is connected to device from the USB the USB HOST port. HOST port. [Disconnect USB device.] [IEEE802.1x Auth. failed] IEEE 802.1X port Turn the machine off, authentication timed then on again. - Page 341 Message Cause Solution [Toner Cartridge Missing] No toner cartridge is Install the correct toner installed. Otherwise, a cartridge. [install toner cartridge and toner cartridge close all doors.] incompatible with the machine has been installed. [Waste Toner Box Full] The waste toner bottle Replace the waste is full.
- Page 342 Message Cause Solution [Replenish paper] There is no paper in Load paper into the the paper tray specified paper tray. [Replenish paper in Tray x selected for printing. or select other paper tray.] (when [Auto Tray Switching] is set to [OFF]) [Paper Size/Type The type and size of...
- Page 343 Message Cause Solution [Check Scanner Lock The scanner is locked. Cancel the job. Lever] Unlock the scanner. [Unlock the scanner lock For details, refer to lever.] “Unlocking the Scan- ner” on page 13-3. [Place Original on Glass] The selected Place the document on document size cannot the original glass if it [Unable to scan from ADF...
- Page 344 Message Cause Solution [Memory Full (Scan)] The memory capacity Cancel the job. is insufficient. [Insufficient memory.] Otherwise, the SSD [The job is cancelled.] storage area is insufficient. [HDD Capacity Over] There is not enough Delete any unneces- space available on the sary files.
-
Page 345: Service Messages
Service messages These messages indicate a more serious problem that can only be corrected by a service representative. If one of these messages appears, turn the machine off, then on again. If the problem persists, contact your local vendor or authorized service provider. Message Cause Solution... -
Page 346: Installing Accessories
Installing Accessories... -
Page 347: Introduction
Introduction Note Use of accessories not manufactured or supported by KONICA MINOLTA will void your warranty. For details of accessories, visit our web site (http://printer.konicam- inolta.com) Lower Feeder Unit 500-sheet tray included (Tray 3/Tray 4) 14-2 Introduction... -
Page 348: Lower Feeder Unit Pf-P08
Lower Feeder Unit PF-P08 You can install up to one optional lower feeder unit PF-P08 (Tray 3/4). The lower feeder unit PF-P08 increases your machine’s media feed capacity by 500 sheets. Kit Contents Lower feeder unit with a tray (500-sheet capacity) Lower Feeder Unit PF-P08 14-3... -
Page 349: Installing A Lower Feeder Unit Pf-P08
Installing a Lower Feeder Unit PF-P08 Note Since consumables are installed in the machine, be sure to keep the printer level when moving it in order to prevent accidental spills. Turn off the machine and discon- nect the power cord and inter- face cables. - Page 350 With another person’s help, place the machine on top of the lower feeder unit, making sure that the positioning pins on the lower feeder unit correctly fit into the holes on the bottom of the machine. 41 kg 90 lbs WARNING! This machine weighs approximately 41 kg (90 lbs) when it is fully loaded with consumables.
- Page 351 Reconnect the power cord, and turn on the machine. Declare Paper Source Unit 3/4 in the Windows printer driver [Properties]/ [Configure] tab. 14-6 Lower Feeder Unit PF-P08...
- Page 352 Appendix...
-
Page 353: Technical Specifications
Technical specifications Type Desktop integrated flatbed ADF printer Document holder Stationary (unit scanning) Photoconductor Luminous source CCFL Dual Printing system Semiconductor laser beam scanning + dry-type electrophotographic method Developing system Dry mono-component SMT developing system Fusing system Lower free belt fusing system Resolution Scanning 600 dpi ×... - Page 354 Warm-up Time Time until the machine is ready to begin printing after being turned on (at room temperature (23°C)) 120 V: Avg. 45 seconds 220 V: Avg. 45 seconds 240 V: Avg. 45 seconds Paper sizes Tray 1 Paper width : 92 to 216 mm (manual Paper length: 148 to 356 mm...
- Page 355 Paper capacity Tray 1 Plain/Recycled/Single side only/Spe- (manual cial paper: feed tray) 100 sheets Envelope: 10 envelopes Label/Postcard/Thick 1/Thick 2/Glossy 1/Glossy 2/Letterhead: 20 sheets Tray 2 Plain/Recycled/Single side only/Spe- cial paper: 250 sheets Label/Postcard/Thick 1/Thick 2/Glossy 1/Glossy 2/Letterhead: 20 sheets Tray 3/ Plain/Recycled/Single side only/Spe- Tray 4...
- Page 356 External dimensions Height: 550 mm (21.7") Width: 530 mm (20.9") Depth: 508 mm (20") Excluding some protruding parts and the manual feed tray. Weight Approximately 35.8 kg (78.9 lb) (without consum- ables) Approximately 40.5 kg (89.3 lb) (with consumables) Interface USB 2.0 (High Speed) compliant, 10Base-T/ 100Base-TX/1000Base-T Ethernet, Host USB (USB device printing)
-
Page 357: Consumable Life Expectancy Chart
Consumable Life Expectancy Chart User-Replaceable Item Average Life Expectancy Toner cartridge Standard in-box Cartridge: 6,000 pages or more (continuous) Replacement Cartridge (High-Capacity): 6,000 pages or more (continuous) Declared yield value in accordance with ISO/ IEC 19798. The toner cartridge life will be shorter when using intermittent printing. -
Page 358: Text Input
Text input The procedure for using the keyboard screen is described below. Entering text In the keyboard screen, press the character that you want to enter. To enter uppercase letters, press [ To enter symbols, press [ To enter special characters, such as accented characters, press [ To delete the character to the right of the cursor, press [Delete]. -
Page 359: Our Concern For Environmental Protection
Our Concern for Environmental Protection ® As an ENERGY STAR Partner, we have determined that this machine meets the ENERGY STAR Guidelines for energy efficiency. What is an ENERGY STAR product? An ENERGY STAR product has a special feature that allows it to automati- cally switch to a “low-power mode”... - Page 360 Index Numerics Job Timeout ......3-47 Machine Settings ...... 3-40 10Base-T/100Base-TX/1000Base-T Maintenance Menu ....3-62 Ethernet Interface port ..1-4 Memory Direct Print ....3-47 Paper Empty ......3-77 Print Settings ......3-48 Restore Defaults ...... 3-76 Accessibility .........3-2 Scan Settings ......3-68 Account track ......2-15 Security Settings ......
- Page 361 Copy mode ........7-2 Path .......... 13-5 Color ...........7-9 Preventing misfeeds ....13-4 Density ........7-8 Media Misfeed Duplex/Combine ......7-7 ADF ........13-13 Finishing ........7-10 Duplex ........13-15 ID Copy ........7-12 Fuser Unit ....... 13-16 Original Size .......7-4 Transfer Roller ....... 13-20 Original Type ......7-9 Tray 1 ........
- Page 362 Special Paper ......4-11 Color ........10-21 Thick Stock .........4-5 File Setting ....10-23, 10-24 Print quality .......13-31 FTP ........10-28 Print Setting HDD ........10-30 Copy Settings ......3-14 Original Mode ....10-20, 10-21 Fax Settings ......3-19 Original Size ......10-19 Machine Settings ......3-12 Original Type ......
- Page 363 Utility Setting ........3-1 Waste toner bottle ......1-4 WIA Driver ........9-7 A-12 Index...
- Page 364 http://konicaminolta.com Copyright A121-9561-00A 2009.10 2009...