Table of Contents
Advertisement
Advertisement
Table of Contents

Related Manuals for DeLonghi MAGNIFICA


Summary of Contents for DeLonghi MAGNIFICA
- Page 1 Magnifica Coffee Maker Please retain instructions for future reference...
- Page 2 • TELEFONISCHE KLANTENDIENST • ä ä é é ç ç í í Ä Ä ä ä í í ç ç Ä Ä ü ü ë ë Ö Ö ê ê Ç Ç à à ë ë ç ç Ä Ä ü ü ë ë ã ã ì ì Ü Ü Å Å Ä Ä •...
- Page 3 Electrical requirements Green and Yellow to Earth Before using this appliance ensure that the voltage indicated on the prod- uct corresponds with the main voltage in your home, if you are in any 13 amp doubt about your supply contact your local electricity company. Fuse The flexible mains lead is supplied connected to a B.S.
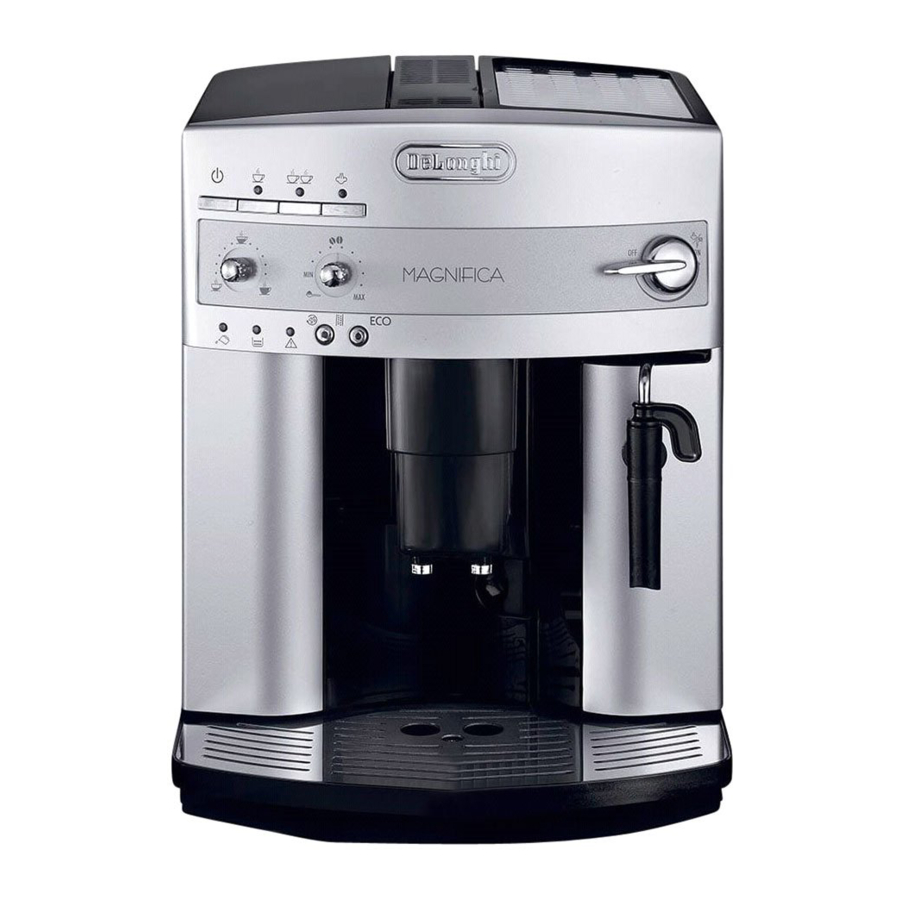
- Page 4 Bean container lid Centre lid for the ground coffee Container for the coffee beans Compartment for the measure (for pre-ground coffee) Grinding coarseness adjustment knob Cup warmer tray Container for pre-ground coffee Control panel Steam knob Steam spout Infuser Milk frother (removable) Mobile drawer Milk frother nozzle...
-
Page 5: Table Of Contents
Description of the control panel … … … … … … … … … … … … … … … … …5 Safety warning … … … … … … … … … … … … … … … … … … … … … … …6 Installation …... -
Page 6: Description Of The Control Panel
1. DESCRIPTION OF THE CONTROL PANEL 1) On/off button 11)Ground coffee button (disables the coffee grin- der) 2) 1 cup and coffee temperature OK light 12)Ground coffee light (coffee grinder disabled) 3) One cup button 13)Scale alarm light 4) 2 cup and coffee temperature OK light 14)Generic alarm indicator light 5) Two cup button 15)Grounds container full or absent indicator light... -
Page 7: Safety Warning
2 SAFETY WARNINGS 3 INSTALLATION CAREFULLY READ AND KEEP THESE INSTRUC- • After unpacking, make sure the appliance is TIONS! complete and undamaged. If in doubt, do not use it. Contact professionally qualified person- • This machine is designed to “make espresso cof- nel. -
Page 8: Preparing The Coffee Maker
To correctly learn how to use the machine, when starting it for the first time, carefully follow the step-by-step instructions described in the following paragraphs. 4 PREPARING THE COFFEE MAKER 4.1 FILLING THE WATER TANK • Remove the water tank (Fig.1), rinse it and fill it with fresh water, without exceeding the MAX line. -
Page 9: Preparing The Coffee (Using Coffee Beans)
5 PREPARING THE COFFEE (USING COFFEE BEANS) 1) Before delivering the coffee, always make sure that the green lights are on steady, that the water tank and the coffee bean con- tainer are full. 2) Adjust the right-hand knob (Fig. 7) to set the desired taste of the coffee. Turning the knob clockwise increases the quantity of coffee beans that the machine will grind, and thus makes the taste of the coffee stronger. - Page 10 Then let the water flow out into the drip tray underneath, or alternatively use this water to fill (and then empty) the cup to be used for the coffee, so as to pre-heat it. 2) Unless preheated, do not use cups that are too thick, as they will absorb too much heat. 3) Use cups that have been previously heated by rinsing them with hot water or alternatively by leaving them for at least 20 minutes on the cup warmer tray on top of the machine with the appliance on.
-
Page 11: Adjusting The Coffee Grinder
When using the machine for the first time, 4-5 cups of coffee need to be made before the machine starts to give satisfying results. When an alarm light comes on to signal an anomaly, do not contact the service centre straight away.The problems can almost always be resolved by following the instructions indicated in paragraphs 12 and 13. -
Page 12: Preparing Espresso Coffee With Ground Coffee (Instead Of Beans)
7 PREPARING ESPRESSO COFFEE WITH GROUND COFFEE (INSTEAD OF BEANS) 1. Press the button to select the ground coffee function (Fig. 18). The light inside the button switches on to indicate that the function has been selected and the coffee grinder has been disabled. 2. -
Page 13: Preparing Cappuccinos (Using Steam)
9 PREPARING CAPPUCCINOS (USING STEAM) • Fill a container with around 100 grams of milk for each cappuccino being prepared. When choosing the size of the container, remember that the volume will increase by 2 or 3 times. It is recommended to use semi skimmed milk at fridge temperature in a small metal jug. -
Page 14: Cleaning And Maintenance
• Carefully wash the milk frother and the steam nozzle in warm water. • Check that the two holes indicated by the arrows in Fig. 27 are not clogged. If necessary, clean them using a needle or pin. • Replace the steam nozzle by inserting it and vigorously turning it upwards into the steam spout. -
Page 15: Cleaning The Infuser
10.2 CLEANING THE INFUSER The infuser must be cleaned regularly to prevent it from filling with coffee deposits (that may lead to malfunctions).To clean it, proceed as follows: • turn the machine off by pressing the button (Fig. 4) (do not unplug it) and wait for all the indicator lights to go off;... -
Page 16: Descaling
Check that the two red buttons have opened back out, otherwise the door cannot close. The two red but- The two red but- tons have opened tons have not out CORREC- opened out CORRECT INCORRECT NOTE 1: infuser is not inserted correctly until hearing the click and the two red buttons have not opened out properly, the service door will not close and the machine will not operate (when switching on the machine the... -
Page 17: Setting The Water Hardness
• after around 30 minutes, when the light comes on (chap. 12 - point 1), turn the steam knob half a turn clockwise (Fig.6) until it stops. The machine must be rinsed so as to eliminate the residues of descaling solution from inside the machine. -
Page 18: Meaning Of The Normal Operation Indicator Lights
11 MEANING OF THE NORMAL OPERATION INDICATOR LIGHTS LIGHT DESCRIPTION MEANING The machine is not ready to make coffee (the ideal indicator water temperature has not yet been reached).Wait lights flash for the indicator lights to come on steady before making the coffee. -
Page 19: Alarm Indicator Lights
12 MEANING OF THE ALARM INDICATOR LIGHTS AND WHAT TO DO WHEN THEY ARE MEANING ACTION LIGHTS DESCRIPTION Fill the water tank as described in par. The water tank is empty or is 5,note 6 and insert it fully. light is on positioned incorrectly. - Page 20 MEANING DESCRIPTION ACTION LIGHTS After cleaning, the infuser has pro- Insert the infuser,see par.10.2 bably been left out of the coffee light is on maker steady and the green lights are flashing. Thoroughly clean the inside of The inside of the machine is very the machine, as described in par.
- Page 21 PROBLEM CAUSE SOLUTION Scrape the remains of dry coffee • The coffee does not • The outlet is blocked accumulated with a needle (Fig. 28). come out of one of the spouts. • The holes in the spouts are clog- Clean the holes in the milk frother and the •...
- Page 22 5732135000/ 01.05...