JVC KD-AVX1 Instructions Manual
Dvd/cd receiver
Hide thumbs
Also See for KD-AVX1:
- Instructions manual (201 pages) ,
- Service manual (85 pages) ,
- Installation & connection manual (6 pages)
Table of Contents
Advertisement
Available languages
Available languages
DVD/CD RECEIVER
ПРИЕМНИК ДЛЯ ВОСПРОИЗВЕДЕНИЯ ДИСКОВ DVD И КОМПАКТ-ДИСКОВ
KD-AVX1
For installation and
connections, refer to
the separate manual.
Указания по
установке и
выполнению
соединений
приводятся
в отдельной
инструкции.
В соответствии с Законом Российской Федерации "О защите прав потре-
бителей" срок службы (годности) данного товара "по истечении которого
он может представлять опасность для жизни, здоровья потребителя,
причинять вред его имуществу или окружающей среде" составляет семь
(7) лет со дня производства. Этот срок является временем, в течение
которого потребитель данного товара может безопасно им пользоваться при
условии соблюдения ин струк ции по эксплуатации данного товара, проводя
необходимое обслуживание, включающее замену расходных материалов и/или
соответствующее ремонтное обеспечение в специализированном сервисном
центре.
Дополнительные косметические материалы к данному товару, поставляе-
мые вместе с ним, могут храниться в течение двух (2) лет со дня его
производства.
Срок службы (годности), кроме срока хранения дополнительных космети-
ческих материалов, упомянутых в предыдущих двух пунктах, не затрагивает
никаких других прав потребителя, в частности, гарантийного свидетельства
JVC, которое он может получить в соответствии с законом о правах
потребителя или других законов, связанных с ним.
INSTRUCTIONS
ИНСТРУКЦИИ ПО ЭКСПЛУАТАЦИИ
KD-AVX1
OK
SOURCE
MENU
T/P
BACK BAND
DISP
D
LVT1323-009B
[EE]
Advertisement
Table of Contents

Related Manuals for JVC KD-AVX1


Summary of Contents for JVC KD-AVX1
- Page 1 ческих материалов, упомянутых в предыдущих двух пунктах, не затрагивает приводятся никаких других прав потребителя, в частности, гарантийного свидетельства в отдельной JVC, которое он может получить в соответствии с законом о правах инструкции. потребителя или других законов, связанных с ним. INSTRUCTIONS ИНСТРУКЦИИ...
-
Page 2: How To Reset Your Unit
Thank you for purchasing a JVC product. Please read all instructions carefully before operation, to ensure your complete understanding and to obtain the best possible performance from the unit. IMPORTANT FOR LASER PRODUCTS 1. CLASS 1 LASER PRODUCT 2. CAUTION: Do not open the top cover. There are no user serviceable parts inside the unit; leave all servicing to qualified service personnel. - Page 3 WARNINGS: This product incorporates copyright protection technology that is protected • DO NOT install any receiver in by U.S. patents and other intellectual locations where; property rights. Use of this copyright – it may obstruct the steering wheel and protection technology must be authorized gearshift lever operations, as this may by Macrovision, and is intended for home result in a traffic accident.
-
Page 4: How To Read This Manual
How to read this manual Characters shown on the monitor The following methods are used to make the In addition to the Roman alphabets (A – Z, a explanations simple and easy-to-understand: –z), the following characters will be used to •... -
Page 5: Table Of Contents
Contents Monitor adjustments ...... 34 How to reset your unit ......How to forcibly eject a disc ....Other disc operations ..... 35 How to read this manual ......Characters shown on the monitor ..Basic operations ........35 Selecting the playback modes ....37 Introduction —... -
Page 6: Introduction - Playable Discs
Introduction — Playable discs Discs you can play Caution for DualDisc playback You can play back the following discs (12 cm • The Non-DVD side of a “DualDisc” does and 8 cm) on this receiver: not comply with the “Compact Disc Digital •... -
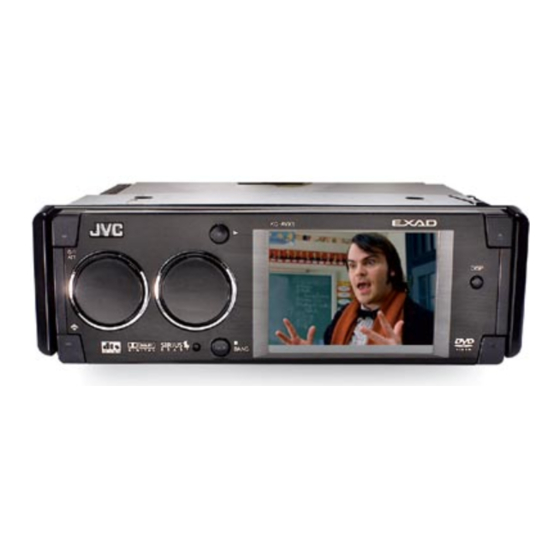
Page 7: Control Panel
Control panel Parts identification Monitor indications Ex.: Source screen on JPEG playback KD-AVX1 DISP SOURCE MENU BACK BAND Monitor indications (standby/on attenuator) button 2 • +/– (volume +/–) button w Source indicator • SOURCE button e Main display • MENU button r Clock display 3 •... -
Page 8: Remote Controller
Remote controller — RM-RK230 Installing the lithium coin battery Main elements and features (CR2025) MONITOR CONTROL MODE ASPECT MENU DVD / RECEIVER CONTROL ZOOM SOURCE –100 +100 PRESET / TITLE BAND –10 / TITLE DUAL Before using the remote controller: DISC + TOP M MENU... - Page 9 8 SETUP button (for DVD/VCD)* 9 SHIFT button Controllable only if your monitor is one of p Basic disc operation buttons* the JVC monitors — KV-MR9010 or 7 (stop), 3 (play), 8 (pause) KV-MH6510. • 3 (play) also function as ZOOM button These buttons function as the number when pressed with SHIFT button.
-
Page 10: Getting Started
Getting started Basic operations SOURCE MENU BACK BAND ⁄ Turn on the power. Adjust the volume. Ÿ SOURCE MENU SOURCE MENU Volume level indicator You cannot select some sources if they are not ready. Adjust the sound as you want. (See pages 41 –... -
Page 11: Setting The Clock
Finish the procedure. Setting the clock SOURCE MENU Select “PSM” menu. How to go back to the previous menu In the menu operations, you can go back to the previous screens by pressing BACK repeatedly. Ex.: Set the hour and minute. 1 Select “Clock Hr”... -
Page 12: Radio Operations
Radio operations Listening to the radio SOURCE MENU BACK BAND To tune in to a station manually SOURCE MENU In step ! on the left column... TUNER (FM1/2/3,AM) Ÿ BACK BAND Lights up when receiving an FM stereo broadcast with sufficient signal strength. 2 Select the desired station frequencies. - Page 13 When an FM stereo broadcast is hard to To tune in strong-signal FM station only receive In step 2 on the left column..1 Select “Lo/DX”, then set it to “Local”. SOURCE MENU 2 Select “MODE” menu. 3 Select “MONO”, then set it to “On”. 2 Finish the procedure.
-
Page 14: Storing Stations In Memory
Storing stations in memory You can preset six stations for each band. FM station automatic presetting — SSM (Strong-station Sequential “-SSM-” is shown until automatic presetting Memory) is over. Local FM stations with the strongest signals are SOURCE MENU searched and stored automatically in the FM band. -
Page 15: Listening To A Preset Station
Listening to a preset station While selecting TUNER as the source..The preset list appears. Select the preset station (1 – 6) you want. PRESET LIST appears. • You can also move to the preset list by selecting “List” on the “MODE” menu. See “When an FM stereo broadcast is hard to receive”... -
Page 16: Fm Rds Operations
FM RDS operations Searching for your favorite FM RDS programme BACK BAND You can tune in to a station broadcasting your Select one of the twenty-nine PTY favorite programme by searching for a PTY code. codes. • To store your favorite programme, see page If there is a station broadcasting a programme of the same PTY code as you have selected, that station is tuned... -
Page 17: Storing Your Favorite Programmes
Select a preset number (Preset1–6) What you can do with RDS you want to store the programme RDS (Radio Data System) allows FM into. stations to send an additional signal along with their regular programme signals. By receiving the RDS data, this receiver can do the following: •... -
Page 18: Tracking The Same Programme-Network-Tracking Reception
• If lights up, TA Standby Reception is To deactivate the PTY Standby Reception, activated. select “OFF” on “PTY” in the “MODE” menu. • If flashes, TA Standby Reception is not goes off. yet activated. (This occurs when you are •... -
Page 19: Disc Operations
Disc operations Playing a disc in the receiver The disc type is automatically detected, and Before performing any operations, make playback starts automatically (for DVD: sure the following..automatic start depends on its internal program). • For DVD playback, you can change the Setup Menu setting to your preference. - Page 20 • When inserting a DVD disc: • When inserting a VCD: DVD playback starts automatically on the VCD playback starts automatically on the monitor when the parking brake is applied. monitor when the parking brake is applied. The screen such as below appears when The screen such as below appears when pressing D DISP.
-
Page 21: Basic Operations
Basic operations Operations Monitor indication and/or next operation Playback is paused. To stop play temporarily A still picture appears. A Frame by frame playback B Slow motion playback • No sound comes out during Slow Motion Playback. • When playing a VCD, Reverse Slow Motion Playback is prohibited. - Page 22 To go to the next or previous To locate a particular title/chapter/ chapters/tracks track directly • For DVD: During play or pause—select a chapter. • For DVD: During play or pause During stop—select a title. • For MP3/WMA/JPEG: Select a track within the same folder.
-
Page 23: Dvd/Vcd Special Functions
DVD/VCD special functions Selecting audio languages Selecting subtitles For DVD: You can select the language of the subtitle You can select the language to listen to if to be shown on the monitor. the disc has multiple audio languages. • You can set the initial subtitle language using the setup menu (see page 30). -
Page 24: Disc Menu Operations
Canceling the PBC playback Disc menu operations Menu-driven playback is possible while playing back a DVD with menu-driven features or a VCD with the PBC (PlayBack Control). 2 Select a track to start normal playback using the number buttons (see page 9). While playing a DVD To resume the PBC function A title list or disc menu will appear on the... -
Page 25: On-Screen Disc Operations
On-Screen disc operations 1 Disc type About the On-Screen Bar 2 • Audio signal format type (for DVD and You can check the disc information and use DTS CD) some functions through the on-screen bar. • PBC (only for VCD) •... -
Page 26: Basic On-Screen Bar Operations
To erase the on-screen bar Basic on-screen bar operations Display the on-screen bar. • The on-screen bar for a CD or MP3/WMA/ JPEG disc automatically disappears in a few seconds after the last operation. (twice) (DVD, VCD) (CD Text/audio CD, MP3/WMA, JPEG) •... - Page 27 To search for a particular point by playing , INTRO Intro play (See page 38.) INTRO time VCD (while PBC is not in use): 1 Select (Canceled) INTRO 2 Enter the elapsed playing time of the current title/track of the disc. MP3/WMA: INTRO TRACK INTRO FOLDER...
-
Page 28: Basic Control Screen Operations
To select a folder or track Basic control screen operations While Dual Zone (see page 40) is on..You can search for and play the desired items 1 Select “Folder” column or “Track” column through the control screen when using the on the control screen. -
Page 29: List Screen Operations
For MP3/WMA/JPEG: List screen operations While Dual Zone is on and the disc play stops..You can display the folder list/track list before Display the folder list. starting play when using the external monitor Each time you press the button, and Dual Zone function (see page 40). -
Page 30: Av Setup Menu
AV setup menu You can store the initial disc playback status. Select an item you want to set up. • While playing, no change can be made on the setup menu. Basic setting procedure While stop..SOURCE MENU Select “MODE” menu. Ex.: When selecting “DOWN MIX”... -
Page 31: Setup Menu
You can also set up from the remote controller when a DVD or a VCD is inserted. • While playing, no change can be made on the setup menu. AUDIO • When shipped from the factory, the on-screen DIGITAL AUDIO OUTPUT STREAM/PCM languge is set to Russian. - Page 32 Item Contents MENU LANGUAGE Select the initial disc menu language. AUDIO LANGUAGE Select the initial audio language. SUBTITLE Select the initial subtitle language or erase the subtitle (OFF). ON SCREEN LANGUAGE Select the language for the Setup menu called up from the remote (OSD LANGUAGE) controller (see page 31) and some indications shown on the monitor.
- Page 33 Item Contents DIGITAL AUDIO OUTPUT Select the signal format to be emitted through the DIGITAL OUT (D. AUDIO OUTPUT) (Optical) terminal on the rear. For details, see page 65. • PCM ONLY (PCM) : Select this when connecting an amplifier or a decoder incompatible with Dolby Digital, DTS or MPEG Audio, or connecting to a recording device.
-
Page 34: Monitor Adjustments
Monitor adjustments You can adjust color and brightness of the Adjust the item. monitor on the unit. While selecting disc (DVD, VCD, or JPEG disc only) as the source..SOURCE MENU Ex.: When adjusting “BRIGHT” Select “MODE” menu. 4/¢ • Each time you press the menu screen disappears for a few seconds and you can see the result of the adjustment. -
Page 35: Other Disc Operations
Other disc operations In this section, you can learn how to use the To fast-forward or buttons on the control panel in order to operate reverse the chapter/track the DVD/CD player. Basic operations Fast-forwards. To stop a disc Reverses. • The search speed changes to x2 ] x10 for all BACK BAND discs (DVD, VCD, CD), but the information shown on the monitor is only for DVD/VCD. - Page 36 To go to the next or previous Prohibiting disc ejection JPEG folders You can lock a disc in the loading slot. To next folders. To previous folders. • To select a particular track in a folder (for MP3/WMA disc) after selecting a folder: Select “NO EJECT?”.
-
Page 37: Selecting The Playback Modes
Selecting the playback modes You can use only one of the following playback modes at a time. Playback mode indicator appears. SOURCE MENU Select “MODE” menu. Select your desired playback mode. Mode Plays repeatedly Repeat Chapter* The current chapter. • lights up. -
Page 38: Random Mode
Mode Plays at random Random Folder All tracks of the current folder, then tracks of the next folder and • For VCD: While PBC (see page 24) is so on. not in use. • lights up. Disc: All tracks of the disc. •... -
Page 39: List Screen Operations
Select the list you want to use. List screen operations You can display the folder list/file list and select a folder/file directly while playing back. When “File” is selected, the file list of the Folder/file list screens current folder appears. JPEG Folder list Select the folder/file you want. -
Page 40: Dual Zone Operations
Dual Zone operations On the control panel: Playing back two sources You can also activate and deactivate Dual Zone. at a time SOURCE MENU You can connect external audio equipment to the 2nd AUDIO OUT plug on the rear, and play back a disc separately from the source selected on the unit. -
Page 41: Sound Adjustments
Sound adjustments Selecting preset sound modes You can select a preset sound mode suitable to Select one of the preset sound modes. the music genre. Available sound modes: Hard Rock/R&B/Pop/Jazz/Dance/Country/ Reggae/Classic User1/User2/User3 Flat (To cancel the sound mode) Finish the procedure. SOURCE MENU DISP... -
Page 42: Adjusting The Sound
Adjusting the sound You can adjust the sound characteristics to your preference. SOURCE MENU Select “SEL” menu. Select your desired adjustment item. Fad/Bal (Fader/Balance) Adjust fader—speaker output balance between the front and rear speakers. • Upmost—front only • Downmost—rear only When using a two-speaker system, set the fader center. - Page 43 Vol Adjust (volume adjust) Adjust and store the volume level of each source except FM. Once you have made an adjustment, it is memorized, and the volume level will automatically increase or decrease by adjusted level when you change the source. Adjust to match the input level to the FM sound level.
-
Page 44: General Settings - Psm
General settings — PSM Select a PSM item. Basic procedure You can change PSM (Preferred Setting Mode) items listed in the table that follows. SOURCE MENU Ex.: When you select “Dimmer” Adjust the PSM item selected. Select “PSM” menu. Repeat steps to adjust the other PSM items if necessary. - Page 45 Indications Selectable settings, [reference page] Dimmer Auto: [Initial]; Dims the monitor when you turn on the headlights. Off: Cancels. Activates dimmer. Time Set: Sets the Dimmer On/Off time. Bright You can adjust the brightness to make the monitor clear and legible. Brightness –15 (darkest) to +15 (brightest) [Initial];...
- Page 46 Travel [Initial] O Warning O News O Weather O Event O Standby Reception Special O Rad Inf (Radio Information) O Sports O Finance O (back to the beginning) EXT INPUT* CHANGER: [Initial]; To use a JVC CD changer, [50]. External input EXT IN: To use any external component, [53]. Beep You can deactivate the key-touch tone if you do not want it to beep each time you press a button.
- Page 47 Indications Selectable settings, [reference page] Amp Gain You can change the maximum volume level of this receiver. Amplifier gain control High Power: [Initial]; VOL 00 – VOL 50 Low Power: VOL 00 – VOL 30 (Select this if the maximum power of the speaker is less than 50 W to prevent them from damaging the speaker.) Off:...
-
Page 48: Other Main Functions
Other main functions Assign a title. Assigning titles to the sources 1 Select a character set. DISP You can assign titles to CDs (both in this receiver and in the CD changer), and change the source names of AV-INPUT and EXT-INPUT. 2 Select a character. -
Page 49: Detaching The Control Panel
Attaching the control panel Detaching the control panel When detaching or attaching the control panel, be careful not to damage the connectors on the back of the control panel and on the panel holder. Detaching the control panel Before detaching the control panel, be sure to turn off the power. -
Page 50: Cd Changer Operations
CD changer operations Playing discs in the CD changer SOURCE MENU About the CD changer It is recommended to use the JVC MP3- SOURCE MENU compatible CD changer with your receiver. • You can also connect other CH-X series CD changers (except CH-X99 and CH-X100). - Page 51 To fast-forward or reverse the track Ÿ Select a disc. Fast-forwards. Reverses. To go to the next or previous tracks DISC LIST appears. To the following tracks. To the beginning of the current track, then the previous tracks. To go to the next or previous folders (only for MP3 discs) To next folders.
-
Page 52: Selecting The Playback Modes
Selectable modes Selecting the playback modes Repeat You can use only one of the following playback Mode Plays repeatedly modes at a time. Track: The current track. • lights up. Folder*: All tracks of the current folder. SOURCE MENU • lights up. -
Page 53: External Component Operations
External component operations Playing an external component SOURCE MENU Ÿ You can connect an external component to Turn on the connected component LINE IN plug and VIDEO IN plug on the rear, and start playing the source. or to the CD changer jack on the rear using the KS-U57 Line Input Adapter (not supplied) or Adjust the volume. -
Page 54: Dab Tuner Operations
DAB tuner operations Listening to the DAB tuner SOURCE MENU BACK BAND Start searching for an ensemble. SOURCE MENU Ÿ When an ensemble is received, BACK BAND searching stops. To stop searching, press the same button again. ⁄ Current band Select a service (either primary or secondary) to listen to. - Page 55 “DAB AF” on page 46). It is recommended to use DAB (Digital Audio Broadcasting) tuner KT-DB1000 with your receiver. If you have another DAB tuner, consult your JVC IN-CAR DRC indicator ENTERTAINMENT dealer. appears. • Refer also to the Instructions supplied for your DAB tuner.
-
Page 56: Storing Dab Services In Memory
Storing DAB services in memory Tuning in to a preset DAB service You can preset six DAB services (primary) for When the source is DAB..each band. BACK BAND Ex.: Storing an ensemble (primary service) into the preset number 4 of the DAB1 band. When the source is DAB.. -
Page 57: Using The Standby Receptions
Select “MODE” menu. Using the standby receptions TA (Road Traffic News) Standby Reception • Operations are exactly the same as explained on page 18 for FM RDS stations. Select “Announce”. • You cannot activate TA Standby Reception separately for the DAB tuner and for FM tuner. -
Page 58: Tracing The Same Programme-Alternative Frequency Reception
To show the Dynamic Label Segment (DLS) Tracing the same programme— information Alternative Frequency Reception DISP You can keep listening to the same programme by activating the Alternative Frequency Reception. • While receiving a DAB service: When driving in an area where a DAB service cannot be received, this receiver automatically tunes in to another ensemble or FM RDS station, broadcasting the same programme. -
Page 59: Maintenance
Maintenance How to clean the connectors To keep discs clean Frequent detachment will deteriorate the A dirty disc may not play correctly. connectors. If a disc does become dirty, wipe To minimize this possibility, periodically wipe it with a soft cloth in a straight line the connectors with a cotton swab or cloth from center to edge. -
Page 60: Language Codes
Language codes Code Language Code Language Code Language Afar Inupiak Kirundi Abkhazian Indonesian Rumanian Afrikaans Icelandic Kinyarwanda Ameharic Hebrew Sanskrit Sindhi Arabic Yiddish Assamese Javanese Sangho Aymara Georgian Serbo-Croatian Azerbaijani Kazakh Singhalese Bashkir Greenlandic Slovak Byelorussian Cambodian Slovenian Bulgarian Kannada Samoan Bihari Korean (KOR) -
Page 61: More About This Receiver
More about this receiver Basic operations • If a DAB tuner is connected and Alternative Frequency Reception for DAB services (DAB Turning on the power AF) is activated, Network-Tracking Reception • By pressing SOURCE on the receiver, you (AF-Regn’l) is also activated automatically. can also turn on the power. - Page 62 • Some DVD-R/DVD-RW or CD-R/CD-RW • This receiver can play back MP3/WMA files may not play back on this receiver because meeting the conditions below: of their disc characteristics, and for the – Bit rate: MP3: 32 kbps — 320 kbps following causes: WMA: 32 kbps —...
- Page 63 Playing a JPEG disc • While playing (or pausing), you cannot change these languages. • It is recommended that you record a file After you change any of these language at 640 x 480 resolution. (If a file has been settings, eject the disc and insert it (or another recorded at a resolution of more than 640 x disc) again so that your setting takes effect.
- Page 64 About sounds reproduced through the rear terminals • Through the analog terminals (Speaker out/LINE OUT/2nd AUDIO OUT): 2-channel signal is emitted. When playing a multi-channel encoded disc, multi-channel signals are downmixed. (DOWN MIX: see page 33.) • Through DIGITAL OUT (optical): Digital signals (Linear PCM, Dolby Digital, DTS, MPEG Audio) are emitted through this terminal.
- Page 65 Output signals through the DIGITAL OUT terminal Output signals are different depending on the “DIGITAL AUDIO OUTPUT” setting on the setup menu (see page 33). DIGITAL AUDIO OUTPUT Output Signals Playback Disc STREAM/PCM DOLBY DIGITAL/PCM PCM ONLY DVD 48 kHz, 16/20/24 bits Linear PCM 48 kHz, 16 bits stereo Linear PCM 96 kHz, Linear PCM with DTS...
-
Page 66: Troubleshooting
Troubleshooting What appears to be trouble is not always serious. Check the following points before calling a service center. Symptoms Causes Remedies • Sound cannot be heard The volume level is set to Adjust it to the optimum from the speakers. the minimum level. - Page 67 Symptoms Causes Remedies • Disc cannot be played Disc is inserted upside Insert the disc correctly. back. down. • CD-R/CD-RW or DVD-R/ CD-R/CD-RW or DVD-R/ • Insert a finalized CD-R/ DVD-RW cannot be played DVD-RW is not finalized. CD-RW or DVD-R/ back.
- Page 68 Symptoms Causes Remedies • Disc cannot be played No MP3/WMA tracks are Change the disc. back. recorded on the disc. MP3/WMA tracks do not Add the extension code have the extension code <.mp3> or <.wma> to their <.mp3> or <.wma> in their file names.
- Page 69 Symptoms Causes Remedies • Disc cannot be played No JPEG files are recorded Change the disc. back. on the disc. JPEG files do not have the Add the extension code extension code <.jpg> or in <.jpg> to their file names. their file names.
- Page 70 Symptoms Causes Remedies • “No DAB Signal” appears Signal is too weak. Search for another ensemble. on the monitor. • “Reset08” appears on the This receiver is not Connect this receiver and monitor. connected to the DAB tuner the DAB tuner correctly and correctly.
-
Page 71: Specifications
Specifications [MW Tuner] AUDIO AMPLIFIER SECTION Sensitivity: 20 µV Maximum Power Output: Selectivity: 35 dB Front: 50 W per channel [LW Tuner] Rear: 50 W per channel Sensitivity: 50 µV Continuous Power Output (RMS): Front: 20 W per channel into 4 Ω, 40 Hz DVD/CD PLAYER SECTION to 20 000 Hz at no more than 0.8% total harmonic distortion. - Page 72 5 ∞...
- Page 77 ∞ 4 ¢...
- Page 79 % fi @ # % fi 5 ∞ 4 ¢ 1 ¡ 5 ∞ 4 ¢ 5 ∞ 4 ¢...
- Page 80 ⁄ Ÿ...
- Page 82 Ÿ...
- Page 86 Ÿ...
- Page 91 BACK BAND...
- Page 96 (DVD, VCD) (MP3/WMA/JPEG/CD-текст/ звуковой компакт-диск)
- Page 97 % fi @ #...
- Page 98 ‰ ¡ ‰...
- Page 101 С пульта дистанционного управления: АУДИО ЦИФPOBOЙ АУДИО BЫXOД STREAM/PCM CMEШEHИE СТЕРЕО CЖATИE ДИH. ДИAПAЗOHA BКЛЮЧЕНО АУДИО ЦИФPOBOЙ АУДИО BЫXOД STREAM/PCM CMEШEHИE СТЕРЕО CЖATИE ДИH. ДИAПAЗOHA BКЛЮЧЕНО...
- Page 104 4 ¢...
- Page 105 BACK BAND...
- Page 107 Выбор режимов воспроизведения В одно и то же время возможна работа только в одном из следующих режимов воспроизведения. Появляется индикатор режима воспроизведения. Выберите меню “MODE”. Выберите необходимый режим воспроизведения. Режим “Repeat” Режим Повторное воспроизведение • Для DVD-диска: Chapter* Текущий раздел. во...
- Page 109 5 ∞...
- Page 116 Announce O Warning O News O Weather O Travel Event O Special O Rad Inf O Sports O Finance O...
- Page 121 Ÿ 4 ¢ DISC + DISC –...
- Page 123 Ÿ ⁄...
- Page 124 Ÿ ⁄...
- Page 126 4 ¢...
- Page 132 ®...
- Page 141 Технические характеристики БЛОК УСИЛИТЕЛЕЙ ЗВУКА [Радиоприемник в диапазоне CB] [Радиоприемник в диапазоне ДB] БЛОК ПРОИГРЫВАТЕЛЯ DVD/КОМПАКТ-ДИСКОВ Ω Ω Ω ® БЛОК МОНИТОРА ОБЩИЕ ТРЕБОВАНИЯ БЛОК РАДИОПРИЕМНИКА [Радиоприемник в диапазоне FM] Ω Ω Конструкция и технические требования могут быть изменены без уведомления.
- Page 142 Having TROUBLE with operation? Please reset your unit Refer to page of How to reset your unit Затруднения при эксплуатации? Пожалуйста, перезагрузите Ваше устройство Для получения информации о перезагрузке Вашего устройства обратитесь на соответствующую страницу EN, RU © 2005 Victor Company of Japan, Limited 0405MNMMDWJEIN...