Cisco Nexus 3000 Series Installation Manual
Hide thumbs
Also See for Nexus 3000 Series:
- Command reference manual (356 pages) ,
- Configuration manual (338 pages) ,
- Hardware installation manual (90 pages)
Table of Contents
Advertisement
Quick Links
S e n d d o c u m e n t c o m m e n t s t o n e x u s 3 k - d o c f e e d b a c k @ c i s c o . c o m
Cisco Nexus 3000 Series Hardware
Installation Guide
December, 2013
Americas Headquarters
Cisco Systems, Inc.
170 West Tasman Drive
San Jose, CA 95134-1706
USA
http://www.cisco.com
Tel: 408 526-4000
800 553-NETS (6387)
Fax: 408 527-0883
Text Part Number: OL-25338-04
Advertisement
Table of Contents

Related Manuals for Cisco Nexus 3000 Series


Summary of Contents for Cisco Nexus 3000 Series
- Page 1 S e n d d o c u m e n t c o m m e n t s t o n e x u s 3 k - d o c f e e d b a c k @ c i s c o . c o m Cisco Nexus 3000 Series Hardware...
- Page 2 OR ITS SUPPLIERS HAVE BEEN ADVISED OF THE POSSIBILITY OF SUCH DAMAGES. Cisco and the Cisco logo are trademarks or registered trademarks of Cisco and/or its affiliates in the U.S. and other countries. To view a list of Cisco trademarks, go to this URL: www.cisco.com/go/trademarks.
-
Page 3: Table Of Contents
Command References Technical References Error and System Messages Obtaining Documentation and Submitting a Service Request Overview of the Cisco Nexus 3000 Series Switches C H A P T E R Cisco Nexus 3016 Switch Chassis for the Cisco Nexus 3016 Switch... - Page 4 Power Supply for the Cisco Nexus 3132Q Switch 1-18 Fan Tray for the Cisco Nexus 3132Q Switch 1-19 Transceiver and Cabling Options for the Cisco Nexus 3132Q Switch 1-20 Cisco Nexus 3172PQ Switch 1-21 Chassis for the Cisco Nexus 3172PQ Switch...
- Page 5 A P P E N D I X Switch Specifications Environmental Specifications Power Specifications Cable and Connector Specifications A P P E N D I X Console Cable Console Port Supported Power Cords and Plugs Jumper Power Cord Cisco Nexus 3000 Series Hardware Installation Guide OL-25338-04...
- Page 6 S e n d d o c u m e n t c o m m e n t s t o n e x u s 3 k - d o c f e e d b a c k @ c i s c o . c o m LED Descriptions A P P E N D I X Chassis and Module LEDs for the Cisco Nexus 3000 Series Switches Chassis and Module LED Descriptions Power Supply Status...
-
Page 7: Preface
S e n d d o c u m e n t c o m m e n t s t o n e x u s 3 k - d o c f e e d b a c k @ c i s c o . c o m Preface This preface describes the audience, organization, and conventions of the Cisco Nexus 3000 Series Hardware Installation Guide. It also provides information on how to obtain related documentation. -
Page 8: Conventions
Tämä varoitusmerkki merkitsee vaaraa. Tilanne voi aiheuttaa ruumiillisia vammoja. Ennen kuin käsittelet laitteistoa, huomioi sähköpiirien käsittelemiseen liittyvät riskit ja tutustu onnettomuuksien yleisiin ehkäisytapoihin. Turvallisuusvaroitusten käännökset löytyvät laitteen mukana toimitettujen käännettyjen turvallisuusvaroitusten joukosta varoitusten lopussa näkyvien lausuntonumeroiden avulla. SÄILYTÄ NÄMÄ OHJEET Cisco Nexus 3000 Series Hardware Installation Guide viii OL-25338-04... - Page 9 Utilize o número da instrução fornecido ao final de cada aviso para localizar sua tradução nos avisos de segurança traduzidos que acompanham este dispositivo. GUARDE ESTAS INSTRUÇÕES Cisco Nexus 3000 Series Hardware Installation Guide OL-25338-04...
- Page 10 Använd det nummer som finns i slutet av varje varning för att hitta dess översättning i de översatta säkerhetsvarningar som medföljer denna anordning. SPARA DESSA ANVISNINGAR Cisco Nexus 3000 Series Hardware Installation Guide OL-25338-04...
- Page 11 Brug erklæringsnummeret efter hver advarsel for at finde oversættelsen i de oversatte advarsler, der fulgte med denne enhed. GEM DISSE ANVISNINGER Cisco Nexus 3000 Series Hardware Installation Guide OL-25338-04...
- Page 12 S e n d d o c u m e n t c o m m e n t s t o n e x u s 3 k - d o c f e e d b a c k @ c i s c o . c o m Cisco Nexus 3000 Series Hardware Installation Guide...
-
Page 13: Related Documentation
S e n d d o c u m e n t c o m m e n t s t o n e x u s 3 k - d o c f e e d b a c k @ c i s c o . c o m Related Documentation Documentation for the Cisco Nexus 3000 Series Switch is available at the following URL: http://www.cisco.com/en/US/products/ps11541/tsd_products_support_series_home.html... -
Page 14: Release Notes
Cisco Nexus 3000 Series Verified Scalability Guide for Cisco NX-OS Release 5.0(3)U2(2) Installation and Upgrade Guides Cisco Nexus 3000 Series Hardware Installation Guide Regulatory Compliance and Safety Information for the Cisco Nexus 5000 Series, Cisco Nexus 3000 Series, and Cisco Nexus 2000 Series Licensing Guide... -
Page 15: Obtaining Documentation And Submitting A Service Request
Obtaining Documentation and Submitting a Service Request For information on obtaining documentation, submitting a service request, and gathering additional information, see the monthly What’s New in Cisco Product Documentation, which also lists all new and revised Cisco technical documentation, at: http://www.cisco.com/en/US/docs/general/whatsnew/whatsnew.html... - Page 16 S e n d d o c u m e n t c o m m e n t s t o n e x u s 3 k - d o c f e e d b a c k @ c i s c o . c o m Cisco Nexus 3000 Series Hardware Installation Guide...
-
Page 17: Cisco Nexus 3016 Switch
Cisco Nexus 3548 and Cisco Nexus 3524 Switches, page 1-26 Cisco Nexus 3016 Switch The Cisco Nexus 3016 switch is a 1 rack unit (RU) switch that supports 16 fixed 40-Gigabit Ethernet downlink (host-facing) and uplink (network-facing) ports, two fixed 100/1000 management ports, one RS-232 console port, and one USB port. -
Page 18: Chassis For The Cisco Nexus 3016 Switch
Fully populated with two power supplies and a fan tray, the switch weighs 20.5 pounds (9.3 kg) and can be easily installed by one or two people. Figure 1-1 shows the front of the Cisco Nexus 3016 chassis and identifies the components that you use to install and connect the chassis. Figure 1-2 shows the rear of the chassis and identifies the components that you use to install and connect the chassis. -
Page 19: C H A P T E R 1 Overview Of The Cisco Nexus 3000 Series Switches
40-Gigabit uplink or downlink ports (16) Status LED Grounding pad Ports for the Cisco Nexus 3016 Switch The Cisco Nexus 3016 switch chassis includes the following ports: 40-Gigabit Ethernet uplink or downlink ports (16 ports) • 100/1000 Ethernet management ports (2 ports) •... -
Page 20: Power Supply For The Cisco Nexus 3016 Switch
Power Supply for the Cisco Nexus 3016 Switch The Cisco Nexus 3000 Series switch has two slots for power supplies that are initially installed with one or two AC or DC power supplies that have forward or reverse airflow for their cooling. The switch requires only one power supply for its operations, but you can include a second one for redundancy. -
Page 21: Fan Tray For The Cisco Nexus 3016 Switch
Fan Tray for the Cisco Nexus 3016 Switch The Cisco Nexus 3016 switch ships with one fan tray, which is the same fan tray used by the Cisco Nexus 3064 switch (part number N3K-C3064-FAN for forward airflow or N3K-C3064-FAN-B for reverse airflow). -
Page 22: Cisco Nexus 3048 Switch
S e n d d o c u m e n t c o m m e n t s t o n e x u s 3 k - d o c f e e d b a c k @ c i s c o . c o m Cisco Nexus 3048 Switch The Cisco Nexus 3048 switch is a 1 rack unit (RU) switch that supports 48 fixed 10/100/1000 Ethernet downlink (server-facing) ports, four fixed 10-Gigabit Ethernet uplink (network-facing) ports, two fixed 100/1000 management ports, and one console port. - Page 23 Chapter 1 Overview of the Cisco Nexus 3000 Series Switches Cisco Nexus 3048 Switch S e n d d o c u m e n t c o m m e n t s t o n e x u s 3 k - d o c f e e d b a c k @ c i s c o . c o m...
-
Page 24: Ports For The Cisco Nexus 3048 Switch
1- and 10-Gigabit Ethernet uplink ports (4) 10/100/1000 Ethernet downlink ports (48) Grounding pad Ports for the Cisco Nexus 3048 Switch The Cisco Nexus 3048 switch chassis includes the following ports: 10/100/1000 Ethernet downlink ports (48 ports) • 1- and 10-Gigabit Ethernet uplink ports •... -
Page 25: Power Supply For The Cisco Nexus 3048 Switch
Power Supply for the Cisco Nexus 3048 Switch The Cisco Nexus 3000 Series switch has two slots for power supplies that are initially installed with one or two AC or DC power supplies that have forward or reverse airflow for their cooling. The switch requires only one power supply for its operations, but you can include a second one for redundancy. -
Page 26: Fan Tray For The Cisco Nexus 3048 Switch
Fan Tray for the Cisco Nexus 3048 Switch The Cisco Nexus 3048 switch ships with one fan tray, which provides forward airflow from the fan tray to the port connector end exhaust (spares part number N3K-C3048-FAN=) or reverse airflow from the port connectors end of the chassis to the fan tray for exhaust (spares part number N3K-C3048-FAN-B). -
Page 27: Cisco Nexus 3064 Switch
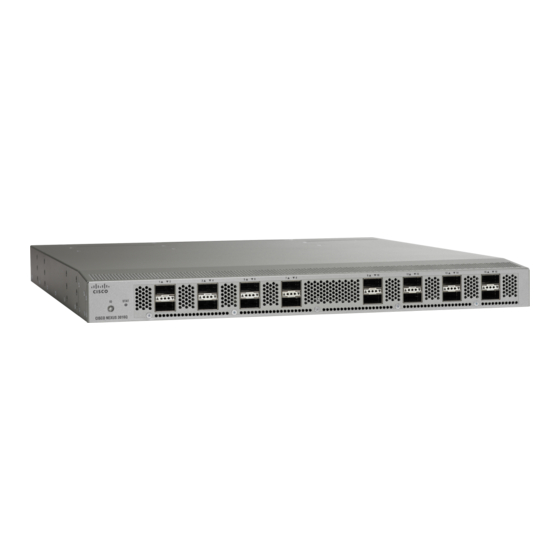
SFP-H10GB-ACU10M 10-Gigabit Ethernet transceiver connected to an active 10-meter copper cable Cisco Nexus 3064 Switch The Cisco Nexus 3064 is a 1 rack unit (RU) switch that supports 48 fixed 1- and 10-Gigabit Ethernet host ports, four fixed 40-Gigabit Ethernet network ports, two fixed 100/1000 management ports, and one console port. -
Page 28: Chassis For The Cisco Nexus 3064 Switch
S e n d d o c u m e n t c o m m e n t s t o n e x u s 3 k - d o c f e e d b a c k @ c i s c o . c o m Chassis for the Cisco Nexus 3064 Switch The 1-RU Cisco Nexus 3064 chassis (part number N3K-C3064PQ-10GE or N3K-C3064PQ-10GX) is 1.72 inches (4.37 cm) high, 17.3 inches (43.9 cm) wide, and 19.7 inches (45.0 cm) deep. This switch is designed for 19-inch (48.3 cm) racks. -
Page 29: Ports For The Cisco Nexus 3064 Switch
Chapter 1 Overview of the Cisco Nexus 3000 Series Switches Cisco Nexus 3064 Switch S e n d d o c u m e n t c o m m e n t s t o n e x u s 3 k - d o c f e e d b a c k @ c i s c o . c o m... -
Page 30: Power Supply For The Cisco Nexus 3064 Switch
Power Supply for the Cisco Nexus 3064 Switch The Cisco Nexus 3000 Series switch has two slots for power supplies that are initially installed with one or two AC or DC power supplies that have forward or reverse airflow for their cooling. The switch requires only one power supply for its operations, but you can include a second one for redundancy. -
Page 31: Port Connections For The Cisco Nexus 3064 Switch
40-Gigabit copper cable, or four 10-Gigabit copper cables with SFP+ transceivers. Table 1-10 describes the QSFP+ transceivers and cable connections that you can use. Table 1-10 QSFP+ Transceivers and Cables Used with the Cisco Nexus 3064 Switch Part Number Transceivers and Cables QSFP-40G-SR4 40-Gigabit SR4 QSFP transceiver on both ends of an optical cable. -
Page 32: Cisco Nexus 3132Q Switch
LX/LH Cisco Nexus 3132Q Switch The Cisco Nexus 3132Q Switch is a high-performance switch that is a member of the Cisco Nexus 3100 switches. The Nexus 3100 switches are second-generation Cisco Nexus 3000 series switches and offer improved port density, scalability, and features compared to the first-generation switches. -
Page 33: Chassis For The Cisco Nexus 3132Q Switch
Chassis for the Cisco Nexus 3132Q Switch The 1-RU Cisco Nexus C3132Q chassis (part number N3K-C3132Q-40GE) is 1.72 inches (4.4 cm) high, 17.3 inches (43.9 cm) wide, and 19.7 inches (50.5 cm) deep. This switch is designed for 19-inch (48.3 cm) racks. -
Page 34: Ports For The Cisco Nexus 3132Q Switch
Power Supply for the Cisco Nexus 3132Q Switch The Cisco Nexus 3000 Series switch has two slots for power supplies that are initially installed with one or two AC or DC power supplies that have forward or reverse airflow for their cooling. The switch requires only one power supply for its operations, but you can include a second one for redundancy. -
Page 35: Fan Tray For The Cisco Nexus 3132Q Switch
Fan Tray for the Cisco Nexus 3132Q Switch The Cisco Nexus C3132Q switch supports four (3+1) redundant fans, which provide either forward or reverse airflow for cooling. You can hot swap the fan tray during operations but must replace it within one minute. -
Page 36: Transceiver And Cabling Options For The Cisco Nexus 3132Q Switch
Transceiver and Cabling Options for the Cisco Nexus 3132Q Switch The Cisco Nexus 3132Q has 32 QSFP+ ports. QSFP+ technology allows a smooth transition from 10 to 40 Gigabit Ethernet infrastructures in data centers. Each of the Cisco Nexus 3132Q switch’s QSFP+ ports can operate in either native 40 Gigabit Ethernet mode or 4 x 10 Gigabit Ethernet mode. -
Page 37: Cisco Nexus 3172Pq Switch
Cisco QSA Module Cisco Nexus 3172PQ Switch The Cisco Nexus 3172PQ Switch is a high-performance switch that is a member of the Cisco Nexus 3100 switches. The Nexus 3100 switches are second-generation Cisco Nexus 3000 series switches and offer improved port density, scalability, and features compared to the first-generation switches. - Page 38 Chapter 1 Overview of the Cisco Nexus 3000 Series Switches Cisco Nexus 3172PQ Switch S e n d d o c u m e n t c o m m e n t s t o n e x u s 3 k - d o c f e e d b a c k @ c i s c o . c o m...
-
Page 39: Ports For The Cisco Nexus 3172Pq Switch
Power Supply for the Cisco Nexus 3172PQ Switch The Cisco Nexus 3000 Series switch has two slots for power supplies that are initially installed with one or two AC or DC power supplies that have forward or reverse airflow for their cooling. The switch requires only one power supply for its operations, but you can include a second one for redundancy. -
Page 40: Fan Tray For The Cisco Nexus 3172Pq Switch
Transceiver and Cabling Options for the Cisco Nexus 3172PQ Switch The Cisco Nexus 3172PQ supports a wide variety of 1, 10, and 40 Gigabit Ethernet connectivity options. 1 and 10 Gigabit Ethernet connectivity is achieved in the first 48 ports, and 40 Gigabit Ethernet connectivity is achieved using QSFP+ transceivers in the last 6 ports. -
Page 41: Part Number
CVR-QSFP-SFP10G Cisco QSA Module For in-rack or adjacent-rack cabling, the Cisco Nexus 3172PQ supports SFP+ direct-attach 10 Gigabit Ethernet copper, an innovative solution that integrates transceivers with Twinax cables into an energy-efficient and low-cost solution. For longer cable runs, multimode and single-mode optical SFP+ transceivers are supported. -
Page 42: Cisco Nexus 3548 And Cisco Nexus 3524 Switches
GE SFP, LC connector LX/LH transceiver (SMF) Cisco Nexus 3548 and Cisco Nexus 3524 Switches The Cisco Nexus 3548 is a 1 rack unit (RU) switch that supports 48 fixed 1- and 10-Gigabit Ethernet Small Form-Factor Pluggable (SFP+) ports, dual redundant, hot-swappable power supplies, four individual, redundant, hot-swappable fans, one 1-PPS timing port, two 10/100/1000 management ports, one console port, and one USB port. -
Page 43: Chassis For The Cisco Nexus 3548 Switch
Chassis for the Cisco Nexus 3548 Switch The 1-RU Cisco Nexus 3548 chassis (part number N3K-C3548P-10G) is 1.72 inches (4.37 cm) high, 17.3 inches (43.9 cm) wide, and 18.38 inches (46.7 cm) deep. This switch is designed for 19-inch (48.3 cm) racks. -
Page 44: Ports For The Cisco Nexus 3548 Switch
Chapter 1 Overview of the Cisco Nexus 3000 Series Switches Cisco Nexus 3548 and Cisco Nexus 3524 Switches S e n d d o c u m e n t c o m m e n t s t o n e x u s 3 k - d o c f e e d b a c k @ c i s c o . c o m... -
Page 45: Power Supply For The Cisco Nexus 3548 Switch
Power Supply for the Cisco Nexus 3548 Switch The Cisco Nexus 3000 Series switch has two slots for power supplies that are initially installed with one or two AC or DC power supplies that have forward or reverse airflow for their cooling. The switch requires only one power supply for its operations, but you can include a second one for redundancy. -
Page 46: Port Connections For The Cisco Nexus 3548 Switch
Port Connections for the Cisco Nexus 3548 Switch The Cisco Nexus 3548 supports a wide variety of 1 and 10 Gigabit Ethernet connectivity options. For in-rack or adjacent-rack cabling, the Cisco Nexus 3548 supports SFP+ direct-attach 10 Gigabit Ethernet copper, an innovative solution that integrates transceivers with Twinax cables into an energy-efficient and low-cost solution. - Page 47 10-Gigabit Ethernet transceiver connected to an active 7-meter copper cable SFP-H10GB-ACU10M 10-Gigabit Ethernet transceiver connected to an active 10-meter copper cable The Cisco Nexus 3548 is compatible with existing Gigabit Ethernet infrastructures. Both the uplink and downlink 10 Gigabit Ethernet interfaces can also operate in Gigabit Ethernet mode.
- Page 48 Chapter 1 Overview of the Cisco Nexus 3000 Series Switches Cisco Nexus 3548 and Cisco Nexus 3524 Switches S e n d d o c u m e n t c o m m e n t s t o n e x u s 3 k - d o c f e e d b a c k @ c i s c o . c o m...
-
Page 49: Chapter 2 Installing The Cisco Nexus 3000 Series Switches
Starting the Switch, page 2-17 Before you install, operate, or service the system, see the Regulatory Compliance and Safety Information Note for the Cisco Nexus 5000 Series, Cisco Nexus 3000 Series, and Cisco Nexus 2000 Series for important safety information. Warning IMPORTANT SAFETY INSTRUCTIONS This warning symbol means danger. -
Page 50: Installation Options With Racks And Cabinets
Unpacking and Inspecting the Switch, page 2-5 • Installation Options with Racks and Cabinets The Cisco Nexus 3000 Series switches can be installed in the following types of racks using a rack-mount kit shipped with the switch: Open EIA rack •... -
Page 51: Chassis Weight
Lift the switch slowly, keeping your back straight. Lift with your legs, not with your back. Bend at • the knees, not at the waist. Installation Guidelines When installing the Cisco Nexus 3000 Series switch, follow these guidelines: • Record the information listed in Appendix E, “Site Planning and Maintenance Records”... -
Page 52: Required Equipment
Avoid UPS types that use ferroresonant technology. These UPS types can become unstable Caution with systems such as the Cisco Nexus 3000 Series switches, which can have substantial current draw fluctuations because of fluctuating data traffic patterns. Ensure that circuits are sized according to local and national codes. For North America, the power •... -
Page 53: Unpacking And Inspecting The Switch
The airflow direction must be the same for all modules. Installing the Switch This section describes how to use the rack-mount kit to install the Cisco Nexus 3000 Series switch into a cabinet or rack that meets the requirements described in Appendix A, “Cabinet and Rack... - Page 54 (3 inches [7.6 cm] minimum) and module handles (1 inch [2.5 cm] minimum). Figure 2-2 Two Ways to Attach Rack-Mount Brackets and Guides on the Cisco Nexus 3000 Series Chassis Cisco Nexus 3000 Series Hardware Installation Guide...
- Page 55 Chapter 2 Installing the Cisco Nexus 3000 Series Switches Installing the Switch S e n d d o c u m e n t c o m m e n t s t o n e x u s 3 k - d o c f e e d b a c k @ c i s c o . c o m...
- Page 56 Chapter 2 Installing the Cisco Nexus 3000 Series Switches Installing the Switch S e n d d o c u m e n t c o m m e n t s t o n e x u s 3 k - d o c f e e d b a c k @ c i s c o . c o m...
- Page 57 Chapter 2 Installing the Cisco Nexus 3000 Series Switches Installing the Switch S e n d d o c u m e n t c o m m e n t s t o n e x u s 3 k - d o c f e e d b a c k @ c i s c o . c o m...
-
Page 58: Grounding The Switch
12-24 screws to 30 in-lb (3.39 · Grounding the Switch This section describes the need for system grounding for all of the Cisco Nexus 3000 Series switches and explains how to prevent damage from electrostatic discharge. This section includes the following topics: Proper Grounding Practices, page 2-11 •... -
Page 59: Proper Grounding Practices
Chapter 2 Installing the Cisco Nexus 3000 Series Switches Grounding the Switch S e n d d o c u m e n t c o m m e n t s t o n e x u s 3 k - d o c f e e d b a c k @ c i s c o . c o m Proper Grounding Practices Grounding is one of the most important parts of equipment installation. -
Page 60: Establishing The System Ground
The system ground connection is required if this equipment is installed in a U.S. or European Central Office. • You do not need to power down the chassis because the Cisco Nexus 3000 Series switches are equipped with AC-input power supplies. Cisco Nexus 3000 Series Hardware Installation Guide... -
Page 61: Required Tools And Equipment
Grounding the Cisco Nexus 3000 Series Chassis The chassis has a grounding pad with two threaded M4 holes for attaching a grounding lug. The system ground is located on the left side of the chassis (left of the front) on the Cisco Nexus 3000 Series switches. -
Page 62: Preventing Electrostatic Discharge Damage
Chapter 2 Installing the Cisco Nexus 3000 Series Switches Grounding the Switch S e n d d o c u m e n t c o m m e n t s t o n e x u s 3 k - d o c f e e d b a c k @ c i s c o . c o m... - Page 63 ESD grounding straps are available with banana plugs, metal spring clips, or alligator clips. All • chassis from the Cisco Nexus 3000 Series switches are equipped with a banana plug connector (identified by the ground symbol next to the connector) somewhere on the front panel. We recommend that you use a personal ESD grounding strap equipped with a banana plug.
- Page 64 S e n d d o c u m e n t c o m m e n t s t o n e x u s 3 k - d o c f e e d b a c k @ c i s c o . c o m To attach the ESD wrist strap to the system ground lug screw for any of the Cisco Nexus 3000 Series...
-
Page 65: Starting The Switch
Caution between 1 and 10 megohm (Mohm). Starting the Switch This section provides instructions for powering up the Cisco Nexus 3000 Series switch and verifying the component installation. Note Do not connect the Ethernet port to the LAN until the initial switch configuration has been performed. - Page 66 Chapter 2 Installing the Cisco Nexus 3000 Series Switches Starting the Switch S e n d d o c u m e n t c o m m e n t s t o n e x u s 3 k - d o c f e e d b a c k @ c i s c o . c o m...
- Page 67 Components”). If it still does not operate correctly, contact your customer service representative for a replacement. If you purchased this product through a Cisco reseller, contact the reseller directly for technical Note support. If you purchased this product directly from Cisco, contact Cisco Technical Support at this URL: http://www.cisco.com/en/US/support/tsd_cisco_worldwide_contacts.html.
- Page 68 Chapter 2 Installing the Cisco Nexus 3000 Series Switches Starting the Switch S e n d d o c u m e n t c o m m e n t s t o n e x u s 3 k - d o c f e e d b a c k @ c i s c o . c o m...
-
Page 69: Chapter 3 Connecting To The Network
C H A P T E R Connecting to the Network This chapter describes how to connect the following ports on a Cisco Nexus 3000 Series switch: Console port —A direct local management connection used to initially configure the switch •... -
Page 70: Preparing For Network Connections
S e n d d o c u m e n t c o m m e n t s t o n e x u s 3 k - d o c f e e d b a c k @ c i s c o . c o m Preparing for Network Connections When preparing your site for network connections to the Cisco Nexus 3000 Series switch, consider the following for each type of interface, and gather all the required equipment before connecting the ports: Cabling required for each interface type •... -
Page 71: Connecting To The Management Port
Note emulation. The terminal emulation software (such as HyperTerminal or Procomm Plus) makes communication between the Cisco Nexus 3000 Series switch and a computer possible during setup and configuration. To connect the console port to a computer terminal, follow these steps:... -
Page 72: Installing And Replacing Sfp Or Sfp+ Transceivers
SFP+ transceivers on optical cables to make the 1- or 10-Gigabit Ethernet uplink connections. For the Cisco Nexus 3064 switch, you must use RJ-45 connectors on copper cables to make the downlink connections and SFP transceivers on copper or optical cables or SFP+ transceivers on optical cables to make the 1- or 10-Gigabit Ethernet uplink connections. -
Page 73: Installing Optical Cables Into Sfp Or Sfp+ Transceivers
This section includes the following topics: Installing an Optical Cable into an SFP or SFP+ Transceiver, page 3-6 • Replacing an Optical Cable for an SFP or SFP+ Transceiver, page 3-6 • Cisco Nexus 3000 Series Hardware Installation Guide OL-25338-04... -
Page 74: Installing An Optical Cable Into An Sfp Or Sfp+ Transceiver
Caution If the cable does not install easily, ensure that it is correctly positioned before continuing. For instructions on verifying connectivity, see the appropriate Cisco Nexus 3000 Series CLI configuration guide. Replacing an Optical Cable for an SFP or SFP+ Transceiver When pulling an optical cable from a transceiver, grip the body of the connector. -
Page 75: Maintaining Sfp And Sfp+ Transceivers And Fiber-Optic Cables
Inspect routinely for dust and damage. If damage is suspected, clean and then inspect fiber ends • under a microscope to determine if damage has occurred. Cisco Nexus 3000 Series Hardware Installation Guide OL-25338-04... - Page 76 S e n d d o c u m e n t c o m m e n t s t o n e x u s 3 k - d o c f e e d b a c k @ c i s c o . c o m Cisco Nexus 3000 Series Hardware Installation Guide...
-
Page 77: Replacing Components
Removing an AC Power Supply Caution If you are using the Cisco Nexus 3000 Series switch with one power supply, removing the power supply causes the switch to shut down. If the power supply is functioning, you can install a new power supply in the second power supply slot (see the “Installing an AC Power Supply”... -
Page 78: Installing An Ac Power Supply
Step 4 N2200-P-BLNK). Figure 4-1 Removing the Power Supply from the Cisco Nexus 3000 Series Switch Push thumb latch to the left and slide out to remove. 2 Slide in until the latch clicks to install. Installing an AC Power Supply To install a power supply, follow these steps: Ensure that the system (earth) ground connection has been made for the chassis. -
Page 79: Removing A Dc Power Supply
S e n d d o c u m e n t c o m m e n t s t o n e x u s 3 k - d o c f e e d b a c k @ c i s c o . c o m Depending on the outlet receptacle on your power distribution unit, you may need the optional Note jumper power cord to connect the Cisco Nexus 3000 Series switch to your outlet receptacle. See “Jumper Power Cord” section on page C-8. -
Page 80: Installing A Dc Power Supply
The fan tray is designed to be removed and replaced while the system is operating without causing an electrical hazard or damage to the system if the replacement is performed within 1 minute. Cisco Nexus 3000 Series Hardware Installation Guide OL-25338-04... -
Page 81: Installing A Fan Tray
Installing a Fan Tray, page 4-6 • Figure 4-2 shows how to remove and install a fan tray for the Cisco Nexus 3000 Series switch. Figure 4-2 Fan Tray for the Cisco Nexus 3000 Series Switch Loosen captive screws and slide out to remove. 2 Slide in and tighten captive screws to install. -
Page 82: Installing A Fan Tray
Verify that the LED is green. If the LED is not green, one or more fans are faulty. If this problem occurs, contact your customer service representative for a replacement part. If you purchased this product through a Cisco reseller, contact the reseller directly for technical support. Note If you purchased this product directly from Cisco, contact Cisco Technical Support at this URL: http://www.cisco.com/en/US/support/tsd_cisco_worldwide_contacts.html. -
Page 83: Appendix
Standard 19-inch (48.3 cm) (four-post EIA cabinet or rack, with mounting rails that conform to • English universal hole spacing per section 1 of ANSI/EIA-310-D-1992). See the “Requirements Specific to Perforated Cabinets” section on page A-2. Cisco Nexus 3000 Series Hardware Installation Guide OL-25338-04... -
Page 84: A Cabinet And Rack Specifications
S e n d d o c u m e n t c o m m e n t s t o n e x u s 3 k - d o c f e e d b a c k @ c i s c o . c o m The cabinet or rack must also meet the following requirements: The minimum vertical rack space per Cisco Nexus 3000 Series switch chassis must be one RU (rack •... -
Page 85: Cable Management Guidelines
To help with cable management, you might want to allow additional space in the rack above and below the chassis to make it easier to route all of the fiber optic or copper cables through the rack. Cisco Nexus 3000 Series Hardware Installation Guide OL-25338-04... - Page 86 S e n d d o c u m e n t c o m m e n t s t o n e x u s 3 k - d o c f e e d b a c k @ c i s c o . c o m Cisco Nexus 3000 Series Hardware Installation Guide...
-
Page 87: Appendix
Cisco Nexus 3548 1.72 in. (4.36 cm) 17.3 in. (43.9 cm) 18.38 in (46.7 cm) 17.4 lb (7.9 kg) 1. Fully configured weight—For the Cisco Nexus 3064, that includes two power supplies and one fan try. Environmental Specifications Table B-2 lists the environmental specifications for the Cisco Nexus 3000 Series switches. -
Page 88: Power Specifications
0 to 10,000 feet (0 to 3050 m) Nonoperating (storage) –1000 to 30,000 feet (–304 to 15,150 m) Power Specifications This section describes the AC power specifications for the Cisco Nexus 3000 Series switches. Table B-3 lists the specifications for the AC power supply. Table B-3... - Page 89 S e n d d o c u m e n t c o m m e n t s t o n e x u s 3 k - d o c f e e d b a c k @ c i s c o . c o m Table B-3 Specifications for the Cisco Nexus 3000 Series AC Power Supplies (continued) Property...
- Page 90 S e n d d o c u m e n t c o m m e n t s t o n e x u s 3 k - d o c f e e d b a c k @ c i s c o . c o m Cisco Nexus 3000 Series Hardware Installation Guide...
-
Page 91: Cable And Connector Specifications
S e n d d o c u m e n t c o m m e n t s t o n e x u s 3 k - d o c f e e d b a c k @ c i s c o . c o m A P P E N D I X Cable and Connector Specifications This appendix provides cable and port specifications for all of the Cisco Nexus 3000 Series switches. This appendix includes the following sections: Console Port, page C-2 •... - Page 92 Note Only the regular power cords or jumper power cords provided with the switch are supported. Table C-1 lists the power cords for the Cisco Nexus 3000 Series switches and provides their lengths in feet and meters. Table C-1 Power Cords for the Cisco Nexus 3000 Series Switches...
- Page 93 S e n d d o c u m e n t c o m m e n t s t o n e x u s 3 k - d o c f e e d b a c k @ c i s c o . c o m Table C-1 Power Cords for the Cisco Nexus 3000 Series Switches (continued) Length...
- Page 94 Cordset rating 10A, 250V Plug: (2500 mm) EL 218 (CCEE GB2009) Connector: EL 701 (IEC60320/C13) Figure C-5 CAB-9K10A-EU Cordset rating: 10A/16 A, 250 V Length: 8 ft 2 in. (2.5 m) Plug: M2511 Connector: VSCC15 Cisco Nexus 3000 Series Hardware Installation Guide OL-25338-04...
- Page 95 Connector: EL 701B Plug: (IEC60320/C13) EL 212 (SI-32) Figure C-8 CAB-9K10A-IT Cordset rating: 10 A, 250 V Length: 8 ft 2 in. (2.5 m) Plug: Connector I/3G C15M (CEI 23-16) (EN60320/C15 ) Cisco Nexus 3000 Series Hardware Installation Guide OL-25338-04...
- Page 96 Length: 2500mm Connector: EL 701C Plug: EL 210 (EN 60320/C15) (BS 1363A) 13 AMP fuse Figure C-11 CAB-AC-250V/13A Cordset rating 13A, 250V (6.6 feet) (79±2m) Connector: Plug: EL 701 EL312MoldedTwistlock (IEC60320/C13) (NEMA L6-20) Cisco Nexus 3000 Series Hardware Installation Guide OL-25338-04...
- Page 97 Plug: NEMA 6-15P Connector: IEC60320/C13 Figure C-13 CAB-9K12A-NA Cordset rating 13A, 125V (8.2 feet) (2.5m) Connector: Plug: NEMA 5-15P IEC60320/C15 Figure C-14 CAB-C13-CBN Cordset rating 10A, 250V (686mm) Connector: Plug: HS10S SS10A Cisco Nexus 3000 Series Hardware Installation Guide OL-25338-04...
- Page 98 Jumper Power Cord Figure C-16 shows the plug connector on the optional jumper power cord for the Cisco Nexus 3000 Series switches. This cable plugs into the power supply and the receptacle of a power distribution unit for a cabinet. This cable comes in 6- and 9-foot (2- and 3-meter) lengths.
-
Page 99: Led Descriptions
S e n d d o c u m e n t c o m m e n t s t o n e x u s 3 k - d o c f e e d b a c k @ c i s c o . c o m A P P E N D I X LED Descriptions This appendix describes the conditions indicated by the chassis and module LEDs on the Cisco Nexus 3000 Series switches. This appendix includes the following sections: Chassis and Module LEDs for the Cisco Nexus 3000 Series Switches, page D-1 •... -
Page 100: Chassis And Module Led Descriptions
LED Descriptions Chassis and Module LEDs for the Cisco Nexus 3000 Series Switches S e n d d o c u m e n t c o m m e n t s t o n e x u s 3 k - d o c f e e d b a c k @ c i s c o . c o m... -
Page 101: Power Supply Status
“Power Supply Status” section on page D-3. Power Supply Status This section describes the power supply LED indicators for the Cisco Nexus 3000 Series switches. Table D-2 describes the status indicated by the two LEDs on each power supply. Table D-2... - Page 102 Blinking green Activity The Cisco Nexus 3548 switch uses the activity LED to indicate both status and activity. The LED is Off, Note if there is no cable attached or if the connection is off. The LED has a slow blink rate, if there is a link, but no activity.
-
Page 103: Site Planning And Maintenance Records
S e n d d o c u m e n t c o m m e n t s t o n e x u s 3 k - d o c f e e d b a c k @ c i s c o . c o m A P P E N D I X Site Planning and Maintenance Records This appendix provides log sheets that you can use to record information when installing a Cisco Nexus 3000 Series switch. This appendix includes the following sections: Site Preparation Checklist, page E-1 •... - Page 104 Distance limitations for signaling • Site wiring • levels • 1. Verify that the power supply installed in the chassis has a dedicated AC source circuit. 2. UPS = uninterruptible power supply. Cisco Nexus 3000 Series Hardware Installation Guide OL-25338-04...
-
Page 105: Contact And Site Information
E-2) to record contact and site information. Table E-2 Contact and Site Information Contact person Contact phone Contact e-mail Building/site name Data center location Floor location Address (line 1) Address (line 2) City State Zip code Country Cisco Nexus 3000 Series Hardware Installation Guide OL-25338-04... -
Page 106: Chassis And Module Information
E-3) to record information about the chassis and modules. Contract Number_______________________________________________ Chassis Serial Number___________________________________________ Product Number________________________________________________ Table E-3 Network-Related Information Switch IP address Switch IP netmask Hostname Domain name IP broadcast address Gateway/router address DNS address Modem telephone number Cisco Nexus 3000 Series Hardware Installation Guide OL-25338-04... - Page 107 Cisco Nexus 3016 rack Cisco Nexus 3048 installation visual identification mounting kit grounding 2-13 Cisco Nexus 3000 Series Hardware Installation Guide IN-1 OL-25338-04...
- Page 108 1-13, 1-18, 1-23, 1-28 power supply locations uplink 1-13, 1-18, 1-23, 1-28 rack 1-13, 1-18, 1-23, 1-28 installation positioning 1-12, 1-17, 1-21, 1-27 mounting kit power supply locations 1-12 requirements rack Cisco Nexus 3000 Series Hardware Installation Guide IN-2 OL-25338-04...
-
Page 109: Led Descriptions D
Cisco Nexus 3016 Cisco Nexus 3048 Cisco Nexus 3064 grounding 1-13 attaching the ESD wrist strap (procedure) 2-15 best practices 2-11 chassis 2-13 establishing 2-12 Cisco Nexus 3000 Series Hardware Installation Guide IN-3 OL-25338-04... - Page 110 (table) power supplies airflow direction connecting to AC power source 2-17 management ports connecting to DC power source 2-18 connecting LED descriptions D-2, D-3 locations locations Cisco Nexus 3016 Cisco Nexus 3000 Series Hardware Installation Guide IN-4 OL-25338-04...
- Page 111 1-12, 1-13, 1-17, 1-18, 1-22, 1-27, 1-28 chassis switch installation Cisco Nexus 3016 equipment required Cisco Nexus 3048 guidelines fan tray screw torques power supply system 2-12 reverse airflow, set up temperature specifications Cisco Nexus 3000 Series Hardware Installation Guide IN-5 OL-25338-04...
- Page 112 Cisco Nexus 3016 Cisco Nexus 3048 Cisco Nexus 3064 1-13, 1-18, 1-23, 1-28 USB ports Cisco Nexus 3016 Cisco Nexus 3048 Cisco Nexus 3064 1-13, 1-18, 1-23, 1-28 weights Cisco Nexus 3000 Series Hardware Installation Guide IN-6 OL-25338-04...