Table of Contents
Advertisement
Quick Links
C1™
User Guide
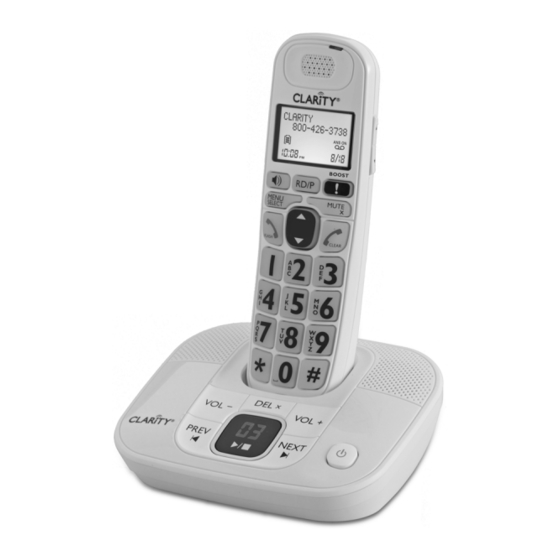
Clarity® DECT6.0 Amplified
Big Button Cordless Phone with
Digital Answering Machine
Clarity, a Division of Plantronics, Inc.
4289 Bonny Oaks Drive,
Chattanooga,TN 37406
Tel: 800-426-3738 Fax: 800-325-8871
E-mail: claritycs@plantronics.com
Website: www.clarityproducts.com
©2011 Clarity, a Division of Plantronics, Inc.All rights reserved.
Clarity, C1, C1HS are trademarks or registered trademarks of
Plantronics, Inc.
Rev.A (05-11)
Printed in China
Advertisement
Table of Contents

Related Manuals for Clarity C1


Summary of Contents for Clarity C1
-
Page 1: Digital Answering Machine
Clarity, a Division of Plantronics, Inc. 4289 Bonny Oaks Drive, Chattanooga,TN 37406 Tel: 800-426-3738 Fax: 800-325-8871 E-mail: claritycs@plantronics.com Website: www.clarityproducts.com ©2011 Clarity, a Division of Plantronics, Inc.All rights reserved. Clarity, C1, C1HS are trademarks or registered trademarks of Plantronics, Inc. Rev.A (05-11) Printed in China... -
Page 2: Table Of Contents
TABLE OF CONTENTS Important Safety Instructions............4 INSTALLATION Installing your phone - Base.............8 Installing batteries - Handset............9 OVERVIEW Handset Overview................10 Base Overview ................14 Handsest Screen Symbols..............17 Handset Menu Structure..............18 Handset Text Entry Table..............19 AUDIO SETTINGS Audio Tone Settings.................20 Audio Boost..................20 Audio Volume Settings..............21 Mute....................21 USING YOUR PHONE Making a Call..................23... - Page 3 TABLE OF CONTENTS TABLE OF CONTENTS DIRECTORY BASE SETTINGS Add a New Directory Entry............28 Change the dial mode..............39 View a Directory Entry..............28 Set the Home Area Code..............39 Search a Directory Entry by Name..........29 REGISTER/DEREGISTER HANDSETS Edit a Directory Entry..............29 Register a Handset................40 Delete a Directory Entry...............30 Deregister All Handsets..............41 SPEED DIAL NUMBERS...
-
Page 4: Important Safety Instructions
If you are not sure of the voltage in your home, consult 21. Discontinue use of product and contact Clarity if the product overheats, has your dealer or local power company. - Page 5 NOTE: PLEASE RETAIN A COPY OF PROOF OF PURCHASE FOR YOUR levels. RECORDS. 25. If you experience a skin irritation after using this product, discontinue use and contact Clarity. Location BATTERY SAFETY INSTRUCTIONS For maximum coverage and reduce the interference, here are some guidelines you should consider when you place the base unit: Dispose of used batteries according to the instructions.
-
Page 6: Installing Your Phone - Base
INSTALLING YOUR PHONE INSTALLING/CHARGING BATTERIES Connecting the base station 1) Slide out the battery compartment cover. 1) Plug the power supply & line cord into the base station. 2) Place the two batteries as indicated. Follow the polarity. 2) Plug the other end of power supply & line cord into the wall 3) Slide the battery compartment cover back. -
Page 7: Handset Overview
• In idle mode, press repeatedly to view the last numbers dialed • While entering numbers, press and hold to insert a dialing pause 2. BOOST During a call, press to enhance the clarity and loudness of your caller’s voice. 3. MUTE / X (REMOVE) •... - Page 8 HANDSET OVERVIEW HANDSET OVERVIEW 6. VOLUME DOWN / CALL LOG / SCROLL DOWN 11. SPEAKER (on/off) • In menu mode: Press to scroll down the menu items. • In idle / pre-dial mode: Press to make a call with the •...
-
Page 9: Base Overview
BASE OVERVIEW BASE OVERVIEW 1. DEL (DELETE) • Press once to delete the message during playback. • While in standby, press twice to delete all old messages. • Note: New voice messages will not be deleted. 2. VOL + (VOLUME UP) Increase speaker volume during message playback. -
Page 10: Base Overview
BASE OVERVIEW HANDSET SCREEN ICONS The screen display gives you information on the current status of the Message window displays telephone. See the table below for other message window displays. There are no messages in the answering system. After a power failure, the number in the message window flashes to indicate the date and time need to be (flashing) set. -
Page 11: Handset Menu Structure
HANDSET MENU STRUCTURE HANDSET - TEXT ENTRY TABLE The following table shows you where each letter and punctuation character can be found. This will be helpful when storing a name in the directory. Flashes when low battery power level is detected, needs charging. -
Page 12: Audio Tone Settings
Audio Boost setting (1-6) are independent. PROCEED WITH CARE. Use the audio boost feature to enhance the clarity and loudness of your Mute caller’s voice on the handset earpiece . Use the mute function to turn off the microphone while on a call. You can hear To turn on this feature: the caller, but the caller does not hear you. -
Page 13: Using Your Phone
USING YOUR PHONE USING YOUR PHONE Press <TALK ON / FLASH> or <SPEAKER> to dial out to the Make a Call selected entry. 1. Pre-dialing 6. Call from the Redial List Enter the phone number first, then press <TALK ON/FLASH> or In idle mode, press <RD/P>... -
Page 14: Chain Dialing
USING YOUR PHONE USING YOUR PHONE Chain dialing Redial list This feature allows you to initiate a dialing sequence from numbers stored in You can redial up to 20 of the last numbers called. If you have stored a name the directory, call log or redial list while you are on a call. -
Page 15: Find The Handset
USING YOUR PHONE USING YOUR PHONE Transfer an External Call from Handset to Handset Find the Handset During an external call: You can use the handset locator feature to find misplaced handsets. 1. Press <MENU/SELECT>, then <UP/DOWN> to select Intercom. 2. -
Page 16: Add A New Directory Entry
DIRECTORY DIRECTORY Your phone can store up to 100 directory entries with names and numbers. Search a Directory Entry by Name Each directory entry can have a maximum of 30 digits for the phone number 1. In idle mode, press <UP> to show the first entry in the directory. and 15 characters for the name. -
Page 17: Delete A Directory Entry
DIRECTORY SPEED DIAL NUMBERS This telephone has 10 speed dial locations where you can assign telephone Press <MENU/SELECT>, then use the keypad to edit the number if numbers from the directory you wish to dial numbers by pressing and holding necessary. -
Page 18: Delete A Speed Dial Number
SPEED DIAL NUMBERS CALLER ID DISPLAY CALLER ID DISPLAY (NETWORK DEPENDENT) Note: If the speed dial location you selected is empty, the screen shows the speed dial list instead. This product supports caller ID services offered by most telephone service Delete the Speed Dial Number providers. -
Page 19: View The Call Log Entries
CALLER ID DISPLAY CALLER ID DISPLAY Reasons for missing caller ID information For example, if a caller number is displayed as 123-456-7890, the various • formats will be: • 456-7890 Screen Reason • 1-456-7890 message • 123-456-7890 Private name The caller prefers not to show the name •... -
Page 20: Handset Settings
HANDSET SETTINGS HANDSET SETTINGS Your phone comes with a selection of settings that you can change to 4. Press <MENU/SELECT> to turn the voicemail indication off. A personalize your phone the way you like it to work. confirmation tone sounds. -OR- Press <TALK OFF/CLEAR>... -
Page 21: Set The Ringer Tone
HANDSET SETTINGS BASE SETTINGS Set the Ringer Tone Change the Dial Mode The default dialing mode is suitable for your country and network operator. It 1. Press <MENU/ SELECT>, then <UP/DOWN> to select Ringers. is unlikely that you should need to change this setting unless advised to do so. 2. -
Page 22: Register/Deregister Handsets
REGISTER/DEREGISTER HANDSETS REGISTER/DEREGISTER HANDSETS If the registration is not successful, the handset screen shows Registration Your telephone can support up to five cordless handsets - C1HS™. The failed. Please start again from step 1 above. handset needs to register with the telephone base before use. You must Note: You cannot register a handset if any other system handset is in use. -
Page 23: Answering System
Press <TONE> to change the quality of the audio of the handset to • best suit your hearing. If using the handset earpiece, press <BOOST> to enhance the clarity • and loudness of message playback. Press again to stop this feature. -
Page 24: Play The Current Announcement
ANSWERING SYSTEM ANSWERING SYSTEM The announcement is the greeting callers hear when calls are answered by the Note: If your announcement is deleted, calls are answered with the default answering system. announcement, “Hello. Please leave a message after the tone.” The telephone has a default announcement, “Hello. -
Page 25: Call Screening Setup
ANSWERING SYSTEM SETTINGS ANSWERING SYSTEM SETTINGS Call Screening Setup Message Alert Tone You can choose whether incoming messages are played through the speaker When the message alert tone is set to On and there is at least one new on the telephone base while they are being recorded. message, the telephone base beeps every 10 seconds –... -
Page 26: Remote Access Code
ANSWERING SYSTEM SETTINGS ANSWERING SYSTEM SETTINGS Remote Access Code Press to listen to all messages. If there are new messages, To access your answering system remotely from any touch-tone telephone, Play all messages the system plays back only the new messages (oldest first). you need to enter a two-digit number (00-99). -
Page 27: Troubleshooting
ANSWERING SYSTEM TROUBLESHOOTING Note: If you have difficulty with your telephone, please try the suggestions below. If you do not enter a valid remote access code, the system answers the • call automatically. My telephone doesn’t work at all If the date and time are not set when a message is recorded, the system Make sure the power cord is securely plugged in. - Page 28 TROUBLESHOOTING TROUBLESHOOTING I cannot dial out "Out of range or no pwr at base" appears on my cordless First try all the suggestions in the item I cannot get a dial tone. handset • Make sure you have a dial tone before dialing. The cordless handset may Ensure that the telephone base is powered up.
- Page 29 TROUBLESHOOTING TROUBLESHOOTING My cordless handset does not ring when I receive a call My caller ID isn’t working Make sure that the ringer is not turned off. Caller ID is a subscription service. You must subscribe to this service • •...
-
Page 30: Technical Information
Thank you... TECHNICAL INFORMATION Amplified dB Level: 40dB ..for purchasing this Clarity amplified telephone. We hope you will Dimensions enjoy using your new system. • Handset Size: 7” x2 1/4” x 1 1/2” (H x W x D) • Base Size: 2 1/4” x 5 3/4” x 4 1/2” (H x W x D)