Table of Contents
Advertisement
Available languages
Available languages
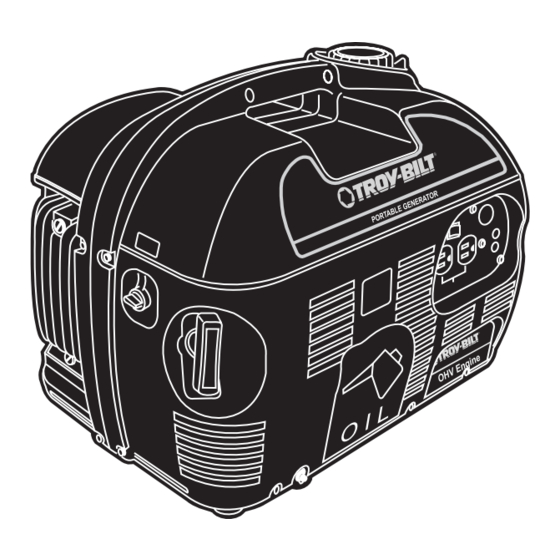
Owner's Manual / Manual del Propietario
Portable Generator / Generador Portátil
Model / Modelo 01923
IMPORTANT: READ SAFETY RULES AND INSTRUCTIONS CAREFULLY
IMPORTANTE: LEYO LA SEGURIDAD LAS ORDENES Y LAS INSTRUCCIONES DETENIDAMENTE
Questions? Preguntas?
Helpline - 1-888-611-6708 M-F 8-5 CT
Troy-Bilt® is a registered trademark of MTD and is used under license to Briggs & Stratton Power Products.
Troy-Bilt® es una marca registrada registrada de MTD y se usa abajo licencia a Briggs & Stratton Power Products.
BRIGGS & STRATTON POWER PRODUCTS GROUP, LLC
JEFFERSON, WISCONSIN, U.S.A.
Printed in USA
Manual No. 192411GS Revision 1 (02/05/2003)
Advertisement
Chapters
Table of Contents

Related Manuals for Troy-Bilt 1923


Summary of Contents for Troy-Bilt 1923
- Page 1 Troy-Bilt® is a registered trademark of MTD and is used under license to Briggs & Stratton Power Products. Troy-Bilt® es una marca registrada registrada de MTD y se usa abajo licencia a Briggs & Stratton Power Products. BRIGGS & STRATTON POWER PRODUCTS GROUP, LLC JEFFERSON, WISCONSIN, U.S.A.
-
Page 2: Table Of Contents
Section Safety Rules TABLE OF CONTENTS SAFETY RULES Safety Rules........2-4 This is the safety alert symbol. -
Page 3: Safety Rules
Section 1: Safety Rules DANGER WARNING Running generator gives off carbon monoxide, Fuel and its vapors are extremely flammable and an odorless, colorless, poison gas. explosive. Breathing carbon monoxide will cause nausea, Fire or explosion can cause severe burns or fainting or death. - Page 4 Section 1: Safety Rules CAUTION WARNING Exceeding generators wattage/amperage capacity can damage generator and/or electrical devices connected Unintentional sparking can result in fire or to it. electric shock. • See “Don’t Overload Generator” on page 10. • Start generator and let engine stabilize before connecting WHEN ADJUSTING OR MAKING REPAIRS TO YOUR electrical loads.
-
Page 5: Know Your Generator
Features and Controls Section KNOW YOUR GENERATOR Read this owner’s manual and safety rules before operating your generator. Compare the illustrations with your generator to familiarize yourself with the locations of various controls and adjustments. Save this manual for future reference. Spark Plug (inside Fuel Tank cover) -
Page 6: Assembly
Assembly Section ASSEMBLY • If the oil level is not at the point of overflowing from the oil filler neck, slowly fill engine with recommended oil. • Reinstall oil filler cap and tighten securely. Carton Contents • Replace the oil fill cover. Check all contents. -
Page 7: Operation
Operation Section GROUNDING THE • Be sure the spark plug wire is attached to the spark plug. • Turn the fuel valve to the “Open” position (fully GENERATOR clockwise) (Figure 4). Figure 4 — Fuel Valve in Open Position The National Electrical Code requires that the frame and external electrically conductive parts of this generator be properly connected to an approved earth ground. -
Page 8: Oil Alert System
Section 4: Operation NOTE: If engine starts after 3 pulls, but fails to run for Oil Alert System more than 10 seconds, check for proper oil level in The Oil Alert System is designed to prevent engine damage crankcase. This unit is equipped with a Oil Alert System caused by an insufficient amount of oil in the crankcase. -
Page 9: Extension Cords
Section 4: Operation CAUTION! Although each receptacle is rated Figure 7 — Battery Connections for 120 Volts at 15 Amps (1,440 watts or 1.44 kW), the generator is rated for a total of 1,000 watts. To 12 Volt DC Panel Powering loads that exceed the wattage capacity of Receptacle the generator can damage it or cause serious... -
Page 10: Power Management
Section 4: Operation DON'T OVERLOAD Plug in and turn on the next load. Again, permit the generator to stabilize. GENERATOR Repeat steps 4 and 5 for each additional load. NEVER add more loads than the generator capacity. Take special care to consider surge loads in generator capacity, Capacity as described above. -
Page 11: Maintenance
Maintenance Section PRODUCT Some adjustments will need to be made periodically to properly maintain your generator. SPECIFICATIONS All adjustments in this section should be made at least once each season. Follow the requirements in the “Maintenance Schedule” chart shown below in Figure 11. Generator Specifications NOTE: Once a year you should clean or replace the spark Rated Surge Watts . -
Page 12: To Clean The Generator
Section 5: Maintenance To Clean the Generator • Remove oil drain plug, sealing washer, and oil filler cap. Drain oil completely into a suitable container. • Use a damp cloth to wipe exterior surfaces clean. • Install oil drain plug and sealing washer. Tighten securely. •... - Page 13 Section 5 & 6: Maintenance & Storage To clean or replace air filter element: • Install the clean screen in the reverse order of removal. NOTE: If you use your generator on any forest-covered, • Loosen the air cleaner cover screws, remove the air brush-covered or grass-covered unimproved land, it must cleaner cover, and remove the element (see item have a spark arrester installed.
-
Page 14: Storage
Section Storage WARNING! Contact with a hot engine or Figure 15 – Drain Fuel From Carburetor exhaust system can cause serious burns or fires. Let the engine cool before transporting or storing the Carburetor Fuel generator. Drain Screw Take care to not drop or strike the generator when transporting. -
Page 15: Troubleshooting
Troubleshooting Section TROUBLESHOOTING Problem Cause Correction One of the circuit breakers is open. Reset circuit breaker. No AC or DC output Fault in generator. Contact Authorized service facility. Poor connection or defective cord set. Check and repair. is available but Connected device is bad. -
Page 16: Wiring Diagram
Wiring Diagram Section WIRING DIAGRAM... -
Page 17: Exploded Views And Parts Lists
Exploded Views and Parts Lists Section EXPLODED VIEW AND PARTS LIST – MAIN UNIT Item Part # Qty Description Item Part # Qty Description ENG, MITSUB, 2.4HP 16 187392GS SCREW 187378GS ROTOR 17 187383GS BASE, GEN 187411GS 18 187390GS BOLT, FLNG 187379GS STATOR 19 187385GS... - Page 18 Section 9: Exploded Views and Parts Lists EXPLODED VIEW AND PARTS LIST – MAIN UNIT Item Part # Qty Description Item Part # Qty Description 187436GS CAP, FUEL 25 187371AGS 1 BOTTLE, OIL 187439GS PACKING, TANK 26 192413GS DECAL, LWR PANEL 187438GS FLTR, FUEL 27 187773GS...
- Page 19 Section 9: Exploded Views and Parts Lists EXPLODED VIEW AND PARTS LIST – ENGINE Cylinder Block, Cylinder Head Item Part # Qty Description 187380GS BLOCK, CYL 187386GS ASSY, GOV, GEAR 187387GS SLIDER, GOV 187391GS SHFT, GOV 187393GS PLUG, DRAIN 187394GS SEAL, OIL 187395GS BRG, BALL...
- Page 20 Section 9: Exploded Views and Parts Lists EXPLODED VIEW AND PARTS LIST – ENGINE Crankcase Cover, Crankshaft/Camshaft Item Part # Qty Description 187394GS SEAL, OIL 187473GS CVR, CRANKCASE 187474GS DIPSTICK, OIL 187475GS O-RING, DIPSTICK 187477GS BRG, PTO 187478GS BOLT, CRANKCASE CVR 187428GS PIN, DWL 187479GS...
- Page 21 Section 9: Exploded Views and Parts Lists EXPLODED VIEW AND PARTS LIST – ENGINE Piston/Rod, Magneto/Flywheel, Air Cleaner Item Part # Qty Description 187526GS ROD, CNNCTNG, STD 187527GS ROD, CNNCTNG, US.25 187528GS ROD, CNNCTNG, US.50 187529GS BOLT, CNNCTNG ROD 187530GS ASSY, PSTN, STD 187531GS ASSY, PSTN, OS.25...
- Page 22 Section 9: Exploded Views and Parts Lists EXPLODED VIEW AND PARTS LIST – ENGINE Carburetor, Control/Linkages Item Part # Qty Description 187469GS CARB, COMPLETE 187471GS JET, MAIN 187476GS SHFT, THROTTL 187480GS VLV, NEEDLE 187482GS CLIP, CARB 187483GS PIN, CARB 187485GS VLV, THRTTL 187491GS HHCS, CARB...
- Page 23 Section 9: Exploded Views and Parts Lists EXPLODED VIEW AND PARTS LIST – ENGINE Fan Cover, Recoil Starter, Oil Sensor Item Part # Qty Description 187521GS CVR, FAN 187522GS CVR, FAN 187523GS CVR, FAN 187524GS BOLT, FAN CVR Item Part # Qty Description 187557GS ASSY, RECOIL, STRTR...
- Page 24 Section 9: Exploded Views and Parts Lists EXPLODED VIEW AND PARTS LIST – ENGINE Lead Wires, Muffler, Gasket Set Item Part # Qty Description 187571GS WIRE, LEAD 187572GS PLUG, SPARK 187573GS CAP, PLUG 187574GS TIEWRAP, LEAD WIRE 187575GS WIRE, LEAD Item Part # Qty Description 187449GS...
-
Page 25: Warranty
EMISSION CONTROL SYSTEM WARRANTY Briggs & Stratton Power Products (BSPP), the California Air Resources Board (CARB) and the United States Environmental Protection Agency (U.S.EPA) Emission Control System Warranty Statement (Owner's Defect Warranty Rights and Obligations) EMISSION CONTROL WARRANTY COVERAGE IS Cold start enrichment system APPLICABLE TO CERTIFIED ENGINES PURCHASED IN Carburetor and internal parts... - Page 26 Sección Reglas de Seguridad TABLA DE CONTENIDOS INSTRUCCIONES DE SEGURIDAD Reglas De Seguridad ......26-28 Éste es el símbolo de alerta de seguridad.
- Page 27 Sección 1: Instrucciones de Seguridad PELIGRO ADVERTENCIA Al generador funcionar, se produce monóxido de La gasolina y sus vapores son extremadamente carbono, un gas inodoro y venenoso. inflamables y explosivos. El respirar el monóxido de carbono, producirá El fuego o una explosión pueden causar quemaduras náusea, desmayo o la muerte.
- Page 28 Sección 1: Instrucciones de Seguridad PRECAUCIÓN ADVERTENCIA El sobrepasar la capacidad del amperaje y vataje del generador, puede dañar al generador y los aparatos Chispear involuntario puede tener como resultado el eléctricos conectados al mismo. fuego o el golpe eléctrico. •...
-
Page 29: Conozca Su Generador
Sección Características y Controles CONOZCA SU GENERADOR Lea este manual del propietario y las reglas de seguridad antes de operar su generador. Compare las ilustraciones con su generador para familiarizarse con la ubicación de los diferentes controles y ajustes. Conserve este manual para referencias futuras. - Page 30 Sección Montaje MONTAJE • Si el nivel de aceite no se encuentra en el punto de desbordamiento del cuello del rellenador de aceite, llene lentamente el motor con el aceite recomendado. Contenido del Empaque • Reinstale la tapa del rellenador de aceite y sujételo de forma Si cualquiera de las partes no están presente o se encuentran segura.
-
Page 31: Para Arrancar El Motor
Sección Operación CONEXION A TIERRA DEL • Gire la válvula de combustible a la posición “Open” (“ABIERTO”) (completamente en la dirección de las manecillas GENERADOR del reloj) (Figura 19). El Código Eléctrico Nacional exige que el bastidor y las partes Figura 19 —... -
Page 32: Detener El Motor
Sección 4: Operación ¡PRECAUCIÓN! ¡ADVERTENCIA! ¡Peligro al respirar! NUNCA haga NO permita que se fume, llamas funcionar el motor en áreas con ventilación deficiente. El abiertas, chispas o cualquier otra fuente de calor alrededor escape contiene monóxido de carbono, un gas inodoro y de la batería. - Page 33 Sección 4: Operación • Arranque el motor. Deje que el motor funcione mientras la Clavija Accesoria de 12 Voltios DC, batería se recarga. 8.3 Amperios • Cuando la batería haya cargado, apague el motor (vea “Parado Este receptáculo le permite recargar una batería de 12 Voltios del Motor”...
- Page 34 Sección 4: Operación NO SOBRECARGUE GENERADOR Conecte y encienda la próxima carga. De nuevo, permita que el generador se estabilice. Capacidad Repita los pasos 4 y 5 para cada carga adicional que usted tenga. Usted debe asegurarse que su generador puede proveer el suficiente vataje calificado (cuando esté...
-
Page 35: Mantenimiento
Sección Mantenimiento ESPECIFICACIONES DEL Será necesario realizar algunos ajustes de manera periódica para mantener de forma apropiada a su generador. PRODUCTO Todos los ajustes en esta sección deberán hacerse por lo menos una vez cada temporada. Cumpla con los requisitos en el cuadro Especificaciones del Generador “Programa de Mantenimiento”... -
Page 36: Para Limpiar El Generador
Sección 5: Mantenimiento Para Limpiar el Generador • Instale la clavija de drenaje y la arandela. Apriete con fuerza. • Rellene con el aceite recomendado y verifique su nivel. • Utilice una franela húmeda para limpiar las superficies externas. Consulte la página 30 para conocer cuáles son las •... - Page 37 Sección 5 & 6: Mantenimiento & Almacenamiento Para limpiar o reemplazar el elemento del filtro de aire: NOTA: Si usa su generador en un terreno boscoso, cubierto por maleza o por césped, debe tener un amortiguador de chispas • Afloje los tornillos de la cubierta del filtro de aire, remueva la instalado.
-
Page 38: Almacenamiento
Sección Almacenamiento ¡PRECAUCIÓN! El contacto con el motor o el Figura 30 – Drene El Combustible De Carburador sistema de escape cuando están calientes, puede causar Tornillo del quemaduras graves o incendios. Permita que el motor se Desaguadero del enfríe antes de transportar o almacenar el generador. Combustible del Tenga cuidado de no dejar caer ni golpear el generador Carburador... -
Page 39: Notas
Notas NOTAS... - Page 40 Notas NOTAS...
-
Page 41: Diagnosticos De Averías
Sección Diagnosticos de Averías DIAGNÓSTICO Y REPARACIÓN DE AVERÍAS Solución Problema Causa Uno de los cotacircuitos está abierto. Reajuste el cortacircuito. Falla en el generador. Póngase en contacto con el servicio El motor está funcionando técnico autorizado. pero no existe salida de AC Mala conexión o juego de cordones Revise y repare. -
Page 42: Garantia Del Sistema De Control De Emisiones
GARANTIA DEL SISTEMA DE CONTROL DE EMISIONES Briggs & Stratton Power Products (BSPP), California Air Resources Board (Consejo de Recursos sobre el Aire de California, CARB, por sus siglas en inglés) y United States Environmental Protection Agency (Agencia de Protección Ambiental de EE.UU. -
Page 43: Garantia
GARANTÍA LIMITADA "Troy-Bilt® es una marca registrada de MTD bajo licencia de Briggs & Stratton Power Products. Briggs & Stratton Power Products reparará o sustituirá sin cargo alguno cualquier componente del equipo** que presente defectos de materiales y/o mano de obra. Los gastos de transporte de las piezas enviadas para reparar o sustituir conforme a los términos de esta garantía correrán a cargo del... - Page 44 LIMITED WARRANTY “Troy-Bilt® is a registered trademark of MTD and is used under license to Briggs & Stratton Power Products. Briggs & Stratton Power Products will repair or replace, free of charge, any part, or parts of the equipment** that are defective in material or workmanship or both.