JVC TH-A25 Instructions Manual
Dvd digital cinema system
Hide thumbs
Also See for TH-A25:
- Instructions manual (144 pages) ,
- Service manual (72 pages) ,
- Service manual (26 pages)

Related Manuals for JVC TH-A25


Summary of Contents for JVC TH-A25
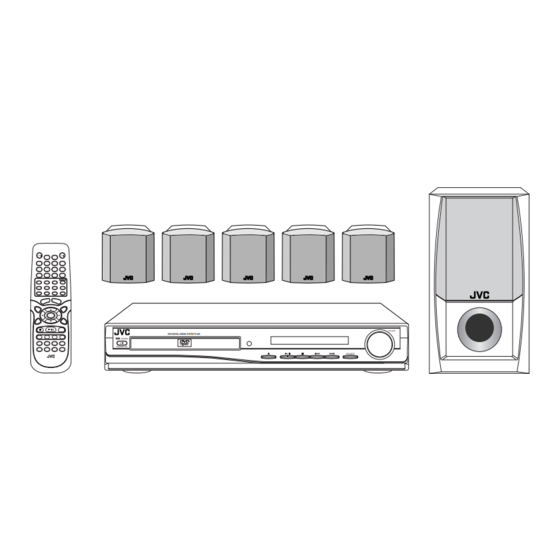
- Page 1 DVD DIGITAL CINEMA SYSTEM TH-A25 Consists of XV-THA25 and SP-THA25 SOUND VOLUME DVD DIGITAL CINEMA SYSTEM TH-A25 STANDBY STANDBY/ON SOURCE INSTRUCTIONS LVT1111-003C...
- Page 2 Warnings, Cautions and Others IMPORTANT for the U.K. DO NOT cut off the mains plug from this equipment. If the plug fitted is not suitable for the power points in your home or the cable is too short to reach a power point, then obtain an appropriate safety approved extension lead or consult your dealer.
- Page 3 IMPORTANT FOR LASER PRODUCTS REPRODUCTION OF LABELS 1 CLASSIFICATION LABEL, PLACED ON EXTERIOR SURFACE CLASS 1 LASER PRODUCT KLASSE 1 LASER PRODUKT LUOKAN 1 LASER LAITE KLASS 1 LASER APPARAT PRODUCTO LASER CLASE 1 2 WARNING LABEL, PLACED INSIDE THE UNIT 1.
- Page 4 SAFETY INSTRUCTIONS “SOME DOS AND DON’TS ON THE SAFE USE OF EQUIPMENT” This equipment has been designed and manufactured to meet international safety standards but, like any electrical equipment, care must be taken if you are to obtain the best results and safety is to be assured. Do read the operating instructions before you attempt to use the equipment.
-
Page 5: Table Of Contents
Table of Contents Parts Identification ........2 Moving to a Particular Portion Directly ........25 Center Unit ................. 2 Searching for a Particular Point ..........25 Repeating Playback ..............26 Remote Control ................3 7 Repeat Play ................26 Getting Started ........... 4 7 A–B Repeat ................ -
Page 6: Parts Identification
Parts Identification Center Unit Front Panel VOLUME DVD DIGITAL CINEMA SYSTEM TH-A25 STANDBY STANDBY/ON SOURCE See pages in the parentheses for details. Front Panel 7 3/8 (play/pause) button (11, 12, 29) 1 STANDBY/ON button and STANDBY lamp (10–13) 2 Disc tray (10) •... -
Page 7: Remote Control
Remote Control See pages in the parentheses for details. Remote Control 1 AUDIO button (10, 12, 13) 2 TV button (10, 42) 3 DIMMER button (14) 4 • Number buttons • MEMORY button (33) • CANCEL button 5 Source selecting buttons •... -
Page 8: Getting Started
Getting Started Before Installation Putting Batteries in the Remote Control General Precautions Before using the remote control, put two supplied batteries first. • When using the remote control, aim the remote control directly at • DO NOT insert any metal object into the center unit. the remote sensor on the center unit. -
Page 9: Connecting The Fm And Am Antennas
Connecting the FM and AM Antennas If AM reception is poor, connect single vinyl-covered wire (not supplied). AM Loop antenna (supplied) If FM reception is poor, connect outdoor FM antenna (not supplied). Snap the tabs on the loop into FM antenna (supplied) the slots of the base to assemble the AM Loop antenna. -
Page 10: Speaker Layout Diagram
Getting Started Speaker Layout Diagram Center unit VOLUME VOLUME DVD DIGITAL CINEMA SYSTEM TH-A25 DVD DIGITAL CINEMA SYSTEM TH-A25 Subwoofer STANDBY STANDBY STANDBY/ON STANDBY/ON SOURCE SOURCE (WOOFER) Right front position Left front position Center position Left rear Right rear position... -
Page 11: Connecting The Speakers
When setting the speakers Connecting the Speakers To obtain the best possible sound from this system, you need to place all the speakers except the subwoofer at the same distance Connect the satellite speakers and subwoofer to the terminals on the from the listening position with each front faced toward the listener. -
Page 12: Connecting Audio/Video Component
Getting Started Connecting Audio/Video Component Turn the power off to all components before connections. TV connection The SCART cable is not supplied with this system. Use the cable supplied with the other component or purchase one at an electric appliance store. Video cord (supplied) SCART cable (not supplied) You can connect TV with either the composite video cord (... - Page 13 Audio component connection Illustrations of the input/output terminals below are typical Connect other components to the center unit with the audio examples. cord. When you connect other components, refer also to their Use the cord supplied with the other component or purchase manuals since the terminal name actually printed on the rear one at an electric appliance store.
-
Page 14: Basic Disc Operations
(See the manual supplied with your TV.) remote control. • When you use a JVC’s TV, you can turn on your TV by pressing If operations using the center unit are different from those on the remote control, and select the video input by using the remote control, they are then explained. -
Page 15: Start Playback
Start Playback To turn off the sounds temporarily From the remote control ONLY: Press 3/8. MUTING Press MUTING. The disc tray closes. “LOADING” appears on the display for a while. To restore the sound, press MUTING again. • You can also start playback by closing the disc tray •... -
Page 16: Moving To Another Chapter/Track/File
Basic Disc Operations • This system can memorize the end point even when you press 7 once when playing back a DVD (“PRESS PLAY TO CONTINUE” appears on the TV screen). When you start playback again by pressing 3/8, playback begins from where it has been AUDIO AUDIO DIMMER... -
Page 17: Basic Tuner Operations
Basic Tuner Operations On the front panel: Press SOURCE repeatedly until the desired band (FM SOURCE or AM) appears on the display. AUDIO The last received station of the selected band is tuned into. AUDIO DIMMER SLEEP • Each time you press the button, the source changes as follows: DVD/CD DIGITAL IN MEMORY... -
Page 18: Other Basic Operations
Other Basic Operations Start playback on the external component. • For in-depth information about the external component, see the manual supplied with it. AUDIO DIMMER SLEEP DIMMER SLEEP Notes: • When “DIGITAL IN” is selected as the source and the Dolby Digital or DTS multi-channel signal is detected, Multichannel Surround is activated automatically. -
Page 19: Creating Realistic Sound Fields
Creating Realistic Sound Fields I To adjust speaker output level You can adjust the output level of the center speaker, rear speakers, and subwoofer listening to the test tone. AUDIO DIMMER SLEEP Press 3/2 while the test tone comes out of the L-F.BLANCE-R CENTER speaker you want to adjust. -
Page 20: Basic Sound Adjustment Procedure
Creating Realistic Sound Fields I Basic sound adjustment procedure • You can also adjust the sound setting referring to the display on the center unit. Refer to the display indication when you Ex. : To adjust the front speaker balance want to adjust the sound using sources other than discs. -
Page 21: Surround Mode Introduction
I Dolby Pro Logic II modes Surround Mode Introduction Dolby Pro Logic II You can use the following surround to reproduce a realistic sound Dolby Pro Logic II is the multichannel playback format to decode field. any 2 channel (stereo) sources—either digital or analog—into 5.1 •... -
Page 22: Activating The Surround Mode
Creating Realistic Sound Fields Activating the Surround Mode You can enjoy Digital Multichannel Surround (Dolby Digital and AUDIO DTS Digital Surround) and Dolby Pro Logic II. DIMMER SLEEP To activate Digital Multichannel Surround When you start playback a Dolby Digital or DTS multi channel disc, the system detects it and activate Multichannel Surround MEMORY CANCEL... -
Page 23: Disc Introduction-Dvd/Vcd/Svcd/Cd
Disc Introduction—DVD/VCD/SVCD/CD This system has been designed to play back the following discs: DVD, If “ ” appears on the TV screen when pressing a button, the DVD-R, DVD-RW, Video CD (VCD), Super Video CD (SVCD), Audio disc cannot accept an operation you have tried to do, or CD (CD), CD-R, and CD-RW. -
Page 24: Disc Playback
Disc Playback Using the On-Screen Bar You can only use the remote control for the operations in this “Disc Playback” section. You can check the following information on a disc while the disc is loaded, and you can use some functions through the on-screen bar. 7 Showing the On-Screen Bar From the remote control ONLY: AUDIO... -
Page 25: Basic Operation Through The On-Screen Bar
7 Basic operation through the On-Screen Bar Contents of the on-screen bar See the corresponding pages for details of each function. • : Disc Type icon DVD SVCD VCD Ex.: To select “ TITL (Repeat Title)” for the repeat mode •... -
Page 26: Selecting The Audio Languages
Disc Playback EN 1/3 DE 02/17 AUDIO DIMMER SLEEP EN 1/3 FR 2/3 ES 3/3 MEMORY CANCEL Ex.: When the DVD has 3 audio languages— SOUND FM/AM English (EN), French (FR), and Spanish (ES). CONTROL TEST TONE TV CH Press ENTER. ENTER TV VOL TV/VIDEO MUTING... -
Page 27: Selecting The Playback Channel
Selecting the Playback Channel Checking the Remaining Time When you play back a karaoke VCD/SVCD or CD, you can select While playing back a disc, you can check the remaining time to be the left channel or right channel to listen to. played back. -
Page 28: Disc Menu-Driven Playback
Disc Playback For VCD/SVCD Some VCDs and SVCDs have menus for interactive operations or a contents search function. The Play Back Control function (PBC) AUDIO DIMMER SLEEP allows you to operate the VCD/SVCD using such menus. When you start playing a VCD/SVCD with PBC function, a menu will automatically appear on the TV screen. -
Page 29: Moving To A Particular Portion Directly
Moving to a Particular Portion Notes: • You can also select a desired title, chapter or track by using 5/∞ in Directly step 3 . • You can move to another track directly by simply pressing the You can move to another title, chapter, track, or particular portion in corresponding number buttons, then ENTER while playing back a CD/ VCD/SVCD (you can skip steps 1 and 2 ). -
Page 30: Repeating Playback
Disc Playback For VCD/SVCD/CD REPEAT:TRACK REPEAT:DISC AUDIO DIMMER SLEEP (REPT TRACK)* (REPT DISC)* REPEAT:OFF (REPEAT OFF)* * appearing on the display MEMORY CANCEL SOUND REPEAT:TRACK: Current track will be repeated. FM/AM REPEAT:DISC: All the disc will be repeated. CONTROL TEST TONE TV CH REPEAT:OFF: Repeat play is canceled. -
Page 31: Special Picture Playback
7 Slow Motion Playback To cancel A–B Repeat Press 5/∞ to select “ OFF” in step 3 , then press ENTER. You can enjoy slow motion playback while playing a DVD, VCD, or SVCD. “REPEAT A-B” disappears from the display and “REPEAT:OFF” From the remote control ONLY: appears on the TV screen. -
Page 32: Mp3/Jpeg Introduction
MP3/JPEG Introduction What is JPEG? This system is incorporated with an MP3 decoder and JPEG decoder. You can play back MP3 tracks (files) and JPEG files A still-picture data compression system proposed by the Joint recorded on CD-Rs and CD-RWs. Photographic Expert Group, which features small decrease in image •... -
Page 33: Mp3/Jpeg Playback
MP3/JPEG Playback To stop playback for a moment MENU MENU Press 3/8. NEWS/INFO The picture stays on the TV screen when you play back ENTER a JPEG file. ENTER TIME ON SCREEN To resume play, press 3/8 again or ENTER. PTY SEARCH CHOICE/TIME ON SCREEN... -
Page 34: Operations Using The On-Screen Display
MP3/JPEG Playback The on-screen display AUDIO DIMMER SLEEP 0001/0003 0:00:28 Number buttons ALPHA BETA ANT01 GAMMA BULL02 DELTA COOT03 MEMORY CANCEL DOG04 ELEPHANT05 SOUND FM/AM FOX06 TV CH CONTROL TEST TONE TV VOL TV/VIDEO MUTING 1 : Folder column AUDIO VOL •... -
Page 35: Selecting A Particular File/Folder Directly
Selecting a Particular File/Folder Directly Browsing Pictures in the Current Folder You can move to a particular file/folder in the current folder directly. You can browse pictures in the current folder in smaller size. From the remote control ONLY: JPEG file ONLY: Press the number buttons to select a file/folder Press MENU. -
Page 36: Tuner Operations
Tuner Operations Tuning in Stations AUDIO From the remote control: DIMMER SLEEP FM/AM Press FM/AM repeatedly to select the band. The last received station of the selected band is tuned MEMORY MEMORY CANCEL • Each time you press the button, the band alternates between FM/AM SOUND FM/AM... -
Page 37: Using Preset Tuning
To tune in a preset station Using Preset Tuning From the remote control: Once a station is assigned to a channel number, the station can be Press FM/AM repeatedly to select the FM/AM quickly tuned. You can preset up to 30 FM and 15 AM stations. band. -
Page 38: Using The Rds (Radio Data System) To Receive Fm Stations
Tuner Operations What information can RDS signals provide? You can see the following RDS signals the station sends on the display. AUDIO DIMMER SLEEP PS NAME (Program Service): While searching, “PS NAME” appears, then the station names will be displayed. “NO PS” appears if no signal is sent. RT (Radio Text): MEMORY CANCEL... -
Page 39: Searching For A Program By Pty Codes
Press PTY 9 or ( PTY to select the desired Searching for a Program by PTY Codes program. Each time you press the button, the display changes to show the One of the advantages of the RDS service is that you can locate a following. -
Page 40: Description Of The Pty Codes
Tuner Operations I Description of the PTY codes: NEWS: News. WEATHER: Weather reports and forecasts. AFFAIRS: Topical program expanding or enlarging upon the FINANCE: Stock Market reports, commerce, trading etc. news—debate, or analysis. CHILDREN: Programs targeted at a young audience. INFO: Programs the purpose of which is to impart advice in SOCIAL A:... -
Page 41: Setting Up The Dvd Preferences
Setting Up the DVD Preferences Setting the System Preferences You can only use the remote control for the setup menu You can set the system preferences to match it to your usage and operations. operating circumstances. On the general setting menu, you can set the following: AUDIO DIMMER SLEEP... -
Page 42: The Basic Procedure To Set Up The System Preferences
Setting Up the DVD Preferences Press 5/∞ to select (highlight) the menu item you want to adjust. ENTER Select “TV DISPLAY” here. The sub menu for “TV DISPLAY” appears on the right AUDIO DIMMER SLEEP column. Number - - GENERAL PAGE -- buttons TV DISPLAY WIDE... -
Page 43: Setting The Preferences
I The basic procedure to set up preferences Setting the Preferences Ex.: To select the desired language as the initial language for “AUDIO.” You can select your favorite language to listen to or read on the TV screen. You can also restrict playback of DVDs containing violent Press CHOICE. -
Page 44: To Set The Parental (Rating) Level
Setting Up the DVD Preferences I To change the password Repeat steps 1 to 5 of “The basic procedure to set up preferences” to select “CHANGE” then AUDIO DIMMER SLEEP press ENTER. The “PASSWORD CHANGE PAGE” appears. Number buttons PASSWORD CHANGE PAGE OLD PASSWORD: MEMORY CANCEL... -
Page 45: To Release The Parental Lock Temporarily
7 To release the parental lock temporarily When you set a strict parental level, some discs may not be played back at all. If you try to play back such a disc, you need to input the password to release parental lock temporarily (“INPUT PASSWD:” appears on the TV.) You cannot play the disc before you enter the correct password. -
Page 46: Operating Tv
Operating TV You can use the remote control to operate not only this unit but also JVC’s TV. • Refer also to the manuals supplied for the other products. • To operate the other products, aim the remote control directly at the remote sensor on the target product. -
Page 47: Maintenance
Maintenance To get the best performance of the unit, keep your discs and mechanism clean. General Notes Cleaning the unit In general, you will have the best performance by keeping your • Stains on the unit discs, and the mechanism clean. Should be wiped off with a soft cloth. -
Page 48: Troubleshooting
Troubleshooting Use this chart to help you solve daily operational problems. If there is any problem you cannot solve, contact your JVC service center. PROBLEM POSSIBLE CAUSE SOLUTION Power does not come on. The power cord is not plugged in. -
Page 49: Specifications
Specifications Center unit (XV-THA25) Subwoofer (SP-WA25) Amplifier section Speaker: 15 cm Bass-reflex, Magnetically Shielded Front/Center/Rear: 30 W per channel, min. RMS at 6 Ω as 1 kHz, Power Handling Capacity: 55 W with no more than 10% total harmonic distortion 3 Ω... - Page 50 MEMO...
- Page 51 VICTOR COMPANY OF JAPAN, LIMITED 0803TMMMDWSAM...