Table of Contents
Advertisement
MO1104-EA
•
The measurement functions built into this watch are not intended for taking
measurements that require professional or industrial precision. Values
produced by this watch should be considered as reasonable representations
only.
•
The Moon phase indicator that appears on the display of this watch is not
intended for navigation purposes. Always use proper instruments and
resources to obtain data for navigation purposes.
•
When engaging in mountain climbing or other activities in which losing your
way can create a dangerous or life-threatening situation, always use a second
compass to confirm direction readings.
•
Note that CASIO COMPUTER CO., LTD. assumes no responsibility for any
damage or loss suffered by you or any third party arising through the use of
this product or its malfunction.
E-2
Things to check before using the watch
1. Check the battery power level.
Is "H" or "M" displayed for the battery power indicator
(page E-14)?
Does any one of the following conditions exist?
•
Battery power indicator shows "L" and "LOW" is
displayed in the upper right corner of the screen.
•
"CHG" is displayed in the upper right corner of the screen.
•
The face is blank.
Power is low. Charge the watch by placing it in a
location where it is exposed to light. For details,
see "Charging the Watch" (page E-12).
E-4
Contents
E-3
About This Manual
E-4
Things to check before using the watch
E-12 Charging the Watch
E-19
To recover from the sleep state
E-20
To turn Power Saving on and off
E-21 Mode Reference Guide
E-25 Timekeeping
E-26 Configuring Home City Settings
E-26
To configure Home City settings
E-28
To change the Daylight Saving Time (summer time) setting
E-6
E-57 Thermometer
E-57
To enter and exit the Digital Compass/Thermometer Mode
E-59
To calibrate the temperature sensor
E-61 Specifying Temperature Unit
E-61
To specify temperature unit
E-63 Temperature Reading Precautions
E-64 Using the Moon Data
E-64
To enter the Moon Data Mode
E-67
To reverse the displayed Moon phase
E-71 Checking the Current Time in a Different Time Zone
E-71
To enter the World Time Mode
E-72
To view the time in another time zone
E-72
To specify standard time or daylight saving time (DST) for a city
E-8
Operation Guide 3261 3281
Warning !
NO
The watch is charged
sufficiently.
For details about
charging, see
"Charging the Watch"
(page E-12).
YES
Go to step 2.
Congratulations upon your selection of this CASIO watch.
About This Manual
•
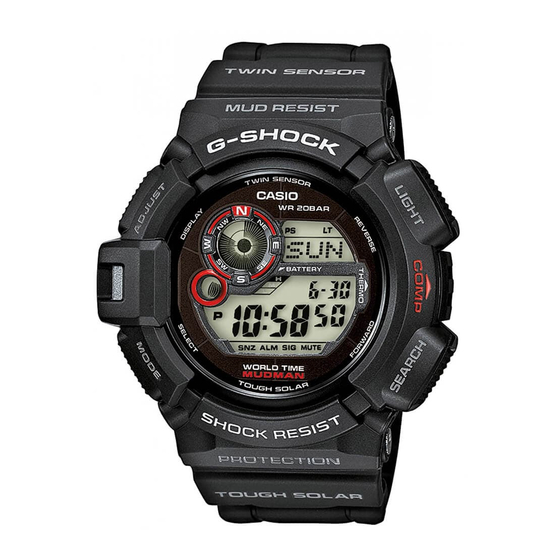
Depending on the model of your watch, display text appears either as dark figures
on a light background (Module 3261), or light figures on a dark background
(Module 3281). All of the illustrations in this manual show Module 3261.
•
Button operations are indicated using the letters shown in the illustration.
•
Note that the product illustrations in this manual are intended for reference only,
and so the actual product may appear somewhat different than depicted by an
illustration.
2. Check the Home City and the daylight saving time (DST) setting.
Use the procedure under "To configure Home City settings" (page E-26) to configure
your Home City and daylight saving time settings.
Important!
World Time Mode data depend on correct Home City, time, and date settings in the
Battery power
Timekeeping Mode. Make sure you configure these settings correctly.
indicator
YES
3. Set the current time.
•
To set the time manually
See "Configuring Current Time and Date Settings" (page E-29).
The watch is now ready for use.
NEXT
E-29 Configuring Current Time and Date Settings
E-29
E-33 Digital Compass
E-34
E-40
E-42
E-43
E-46
E-48
E-50
E-52
E-74 Using the Stopwatch
E-74
E-74
E-75
E-75
E-77 Using the Countdown Timer
E-77
E-78
E-79
E-79
Module 3261
Module 3281
To change the current time and date settings
To take a digital compass reading
To perform magnetic declination correction
To perform bidirectional calibration
To perform northerly calibration
To store a direction angle reading in Bearing Memory
To set a map and find your current location
To find the bearing to an objective
To determine the direction angle to an objective on a map and head in
that direction
To enter the Stopwatch Mode
To perform an elapsed time operation
To pause at a split time
To measure two finishes
To enter the Countdown Timer Mode
To specify the countdown start time
To perform a countdown timer operation
To stop the alarm
ENGLISH
E-1
E-3
E-5
E-7
E-9
Advertisement
Table of Contents

Related Manuals for Casio 3261


Summary of Contents for Casio 3261
- Page 1 Depending on the model of your watch, display text appears either as dark figures measurements that require professional or industrial precision. Values on a light background (Module 3261), or light figures on a dark background produced by this watch should be considered as reasonable representations (Module 3281).
-
Page 2: Charging The Watch
Operation Guide 3261 3281 E-80 Using the Alarm E-94 Troubleshooting E-80 To enter the Alarm Mode E-99 Specifications E-81 To set an alarm time E-82 To test the alarm E-82 To turn an alarm and the Hourly Time Signal on and off... -
Page 3: Mode Reference Guide
Operation Guide 3261 3281 To turn Power Saving on and off Mode Reference Guide 1. In the Timekeeping Mode, hold down until SET Power saving Power saving starts to flash and the city name starts to scroll on the Your watch has 7 “modes”. The mode you should select depends on what you want to do. -
Page 4: Digital Compass
Operation Guide 3261 3281 3. Press to move the flashing in the sequence shown below to select the other Screen To do this: Do this: settings. Toggle between 12-hour (12H) and 24-hour Press (24H) timekeeping. 12/24-Hour City Name Seconds Hour... - Page 5 Operation Guide 3261 3281 To perform magnetic declination correction • The illustration, for example, shows the value you should input and the direction 1. In the Digital Compass/Thermometer Mode, hold down setting you should select when the map shows a magnetic declination of 1°...
- Page 6 Operation Guide 3261 3281 To find the bearing to an objective 5. Still holding the map in front of you, turn your body until north as indicated by the 1. Set the map so its northerly indication is aligned with watch and the northerly direction on the map are aligned.
-
Page 7: Specifying Temperature Unit
Operation Guide 3261 3281 Specifying Temperature Unit 4. Use (+) and (–) to change the displayed calibration by 0.1°C (0.2°F) steps. • To return the currently flashing value to its initial factory default setting, press at the same time. OFF will appear in place of the flashing Use the procedure below to specify the temperature unit to be used in the Digital temperature value for about one second, followed by the initial default value. -
Page 8: Checking The Current Time In A Different Time Zone
Operation Guide 3261 3281 Checking the Current Time in a Different Time Zone Moon phase (part you can see) (part you cannot see) You can use the World Time Mode to view the current time in one of 31 time zones (48... -
Page 9: Using The Alarm
Operation Guide 3261 3281 Using the Alarm • When you enter the Alarm Mode, the screen you were viewing when you last exited the mode appears first. You can set four one-time alarms and one snooze alarm. Current time Current time... -
Page 10: Button Operation Tone
• If ERR keeps appearing, contact your original dealer or nearest authorized CASIO measurement on a train, boat, etc. Move away from large metal objects and try distributor to have the watch checked. -
Page 11: City Code Table
Operation Guide 3261 3281 Bearing Sensor Precision: Countdown Timer: Direction: Within ±10° Measuring unit: 1 second Values are guaranteed for a temperature range of –10°C to 40°C (14°F to Countdown start time setting range: 1 minute to 24 hours (1-hour increments and 104°F).