Casio LK-120 User Manual
Hide thumbs
Also See for LK-120:
- User manual (37 pages) ,
- Service manual & parts manual (34 pages) ,
- User manual (36 pages)

Related Manuals for Casio LK-120


Summary of Contents for Casio LK-120
- Page 1 USER’S GUIDE GUÍA DEL USUARIO Please keep all information for future reference. Guarde toda información para tener como referencia futura. LK120ES1A...
- Page 2 • Do not short-circuit the battery terminals. • The product is not intended for children under 3 years. • Use only CASIO AD-E95100L adaptor. • The AC adaptor is not a toy. • Be sure to disconnect the AC adaptor before cleaning the product.
-
Page 3: Safety Precautions
Safety Precautions Before using the instrument, be sure to Symbol Examples carefully read through the instructions This triangle symbol ( ) means contained in this manual. that the user should be careful. (The example at left indicates electrical shock caution.) Symbols Various symbols are used in this user’s guide This circle with a line through it... - Page 4 AC adaptor. Water creates outlet. the risk of fire and electric shock. 3. Contact your original retailer or an authorized CASIO Service Batteries Provider. Misuse of batteries can cause them to leak, resulting in damage to...
- Page 5 3. Contact your original retailer or Location an authorized CASIO Service Avoid locating the product on an Provider. unstable stand, on an uneven surface, or any other unstable Disassembly and Modification location.
- Page 6 Cleaning CAUTION Before cleaning the product, always unplug the AC adaptor from the AC Adaptor wall outlet first. Leaving the AC Misuse of the AC adaptor creates adaptor plugged in creates the risk the risk of fire and electric shock. of damage to the AC adaptor, fire, Always make sure you observe and electric shock.
- Page 7 Display Screen Heavy Objects • Never push on the display Never place heavy object on top of screen’s LCD panel or subject it the product. to strong impact. Doing so can Doing so can make the product top cause the LCD panel’s glass to heavy, causing the product to tip crack, creating the risk of personal over or the object to fall from it,...
-
Page 8: Main Features
Main Features On-screen fingering and timing indicators • Easy-to-understand on-screen indicators help to simplify keyboard play, even for novices. 100 amazingly realistic tones Enhanced auto-accompaniment function for greater versatility • 50 built in auto-accompaniment patterns. 100 Built-in Song Bank tunes •... -
Page 9: Table Of Contents
Contents Safety Precautions ....E-1 3-Step Lesson System ..E-20 Using 3-Step Lesson System ....E-20 Main Features ......E-6 Voice Fingering Guide ......E-22 Timing Indicator ........E-22 General Guide ......E-8 Step 1: Master the timing ......E-23 Attachment of Score Stand ......E-9 Step 2: Master the melody ....... -
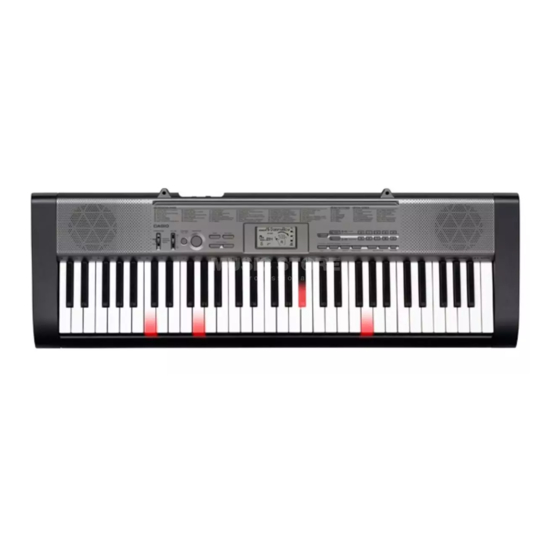
Page 10: General Guide
General Guide... -
Page 11: Attachment Of Score Stand
1 POWER/MODE selector E RHYTHM button 2 VOLUME slider F TONE button 3 SYNCHRO/FILL-IN button G SONG BANK button 4 START/STOP button H Number buttons 5 DEMO button 3-STEP LESSON 6 KEY LIGHT button I STEP 1 button 7 TEMPO/VALUE buttons J STEP 2 button 8 Speakers K STEP 3 button... -
Page 12: Quick Reference
Quick Reference This section provides a quick overview of keyboard operation using steps one and two of the 3-step lesson feature. See page E-20 for detailed explanations of these steps. Set the POWER/MODE selector to NORMAL. Play the melody part on the keyboard. <If you pressed the STEP 1 button in ...>... -
Page 13: Power Supply
Power Supply Prepare a household power outlet or batteries. Using Batteries You can use six AA-size batteries for power. IMPORTANT! • Use alkaline or zinc-carbon batteries. Never use oxyride or • Be sure to comply with the “Safety Precautions” provided any other nickel based batteries. -
Page 14: Auto Power Off
Auto Power Off The Digital Keyboard will turn off automatically to preserve power if you do not perform any operation for about six minutes. To disable Auto Power Off Hold down the TONE button while turning on the keyboard to disable Auto Power Off. NOTE •... -
Page 15: Connections
• You can get information about accessories that are sold separately for this product from the CASIO catalog [Rear Panel] available from your retailer, and from the CASIO website at the following URL. PHONES/OUTPUT jack Audio connection http://world.casio.com/... -
Page 16: Basic Operations
Basic Operations POWER/MODE DEMO TONE Number buttons VOLUME TEMPO/VALUE RHYTHM START/STOP SYNCHRO/FILL-IN SONG BANK This part of the manual provides you with the basic NOTE information you need to use your keyboard. • Always enter two digits for the tone number. If you enter only one digit, the display will automatically return to the previous tone number setting after a few seconds. -
Page 17: Other Useful Functions
BASS DRUM RIDE BELL Other Useful Functions SIDE STICK TAMBOURINE To change the key of the keyboard ACOUSTIC SNARE SPLASH CYMBAL HAND CLAP COWBELL The transpose feature of this keyboard lets you raise or lower its key in semitone increments. This means you can easily ELECTRIC SNARE CRASH CYMBAL 2 match to suit someone’s voice, and you can eliminate sharps... -
Page 18: Playing The Demo Tunes
NOTE NOTE • If you leave the transpose screen on the display for about five • If you leave the tuning screen on the display for about five seconds without doing anything, the screen is automatically seconds without doing anything, the screen is automatically cleared. -
Page 19: Playing Rhythms
FINGERED lets you play chords as you normally do, rhythm number for the rhythm you want to use. while CASIO CHORD makes it possible to play fully formed Example: To select “37 SAMBA”, input 3 and then 7. chords with one finger. -
Page 20: Using The Casio Chord System
Continue pressing different keys on the Using the CASIO CHORD system accompaniment keyboard to play your chord The CASIO CHORD system lets you easily play the four main progression. types of chords. Play of chords is simplified as shown in the chart below. -
Page 21: Improvising With The Preset Patterns
You can start the rhythm and accompaniment pattern at the same time, with your play of the accompaniment keyboard. To do this, follow the steps below. Accompaniment Set the POWER/MODE selector to the CASIO keyboard CHORD or FINGERED position. • See the “Fingered Chord Charts” on page A-3 for information on the fingerings of chords for all roots. -
Page 22: 3-Step Lesson System
3-Step Lesson System KEY LIGHT TONE SPEAK SONG BANK ONE KEY PLAY STEP 1 PART SELECT START/STOP STEP 2 STEP 3 NOTE Using 3-Step Lesson System • You may not be able to see the keyboard keys light under direct Even individuals who cannot play the keyboard at all can sunlight or in other brightly lit areas. - Page 23 To stop Song Bank tune play, press the START/ Crossed Finger Indications STOP button again. The display also shows when you have to cross fingers to play notes, and in which direction your fingers should cross. To exit the Song Bank Mode, press the SONG Example: Display for playing the notes below with the right BANK button again.
-
Page 24: Voice Fingering Guide
Key Lighting System Operation and Display Voice Fingering Guide Contents During 3-step Lesson Play Voice fingering guide uses a simulated human voice to call out fingering numbers during Step 1 and Step 2 one-hand Whenever you select an Auto Accompaniment tune (00 to part practice. -
Page 25: Step 1: Master The Timing
Turning Off Key Lighting Step 1: Master the timing Press the KEY LIGHT button. Press the STEP 1 button. • The KEY LIGHT indicator disappears when the key • When you do, the STEP 1 indicator appears. light system is turned off. •... -
Page 26: Step 2: Master The Melody
Step 2: Master the melody Step 3: Play at normal speed Press the STEP 2 button. Press the STEP 3 button. • When you do, the STEP 2 indicator appears. • When you do, the STEP 3 indicator appears. • After a count sounds, the keyboard stands by and •... -
Page 27: To Practice The Left Hand Part
To practice the left hand part Once you master right hand part play, you can use the two- hand tunes (numbers 84 through 99) to practice left hand part. Press the SONG BANK button until the SONG BANK indicator appears. •... -
Page 28: Technical Reference
Page E-13 the keyboard. the PHONES/OUTPUT jack. 4. The POWER/MODE selector is 4. Normal play is not possible on Page E-17 in the CASIO CHORD or the accompaniment keyboard FINGERED position. while the POWER/MODE selector is set to CASIO CHORD FINGERED. - Page 29 Symptom Cause Action See Page • Cannot change TRANSPOSE/ • Keyboard is in the Song Bank • Press the SONG BANK button Page E-20 TUNE settings. Mode. to return to the normal mode. • Demo tune play is in progress. •...
-
Page 30: Specifications
Auto-accompaniment Rhythm patterns: 50 presets Tempo: Adjustable, (216 steps, = 40 to 255), initial value; 120 Chords: Two systems; CASIO CHORD, FINGERED Other: Fill-in pattern, Synchro start Song Bank tunes: 100 tunes Musical Information Function: Tone, Auto Accompaniment, Song Bank numbers and names; tempo, 3 step... -
Page 31: Operating Precautions
Any reproduction of the contents of this manual, either in part or its entirety, is prohibited. Except for your own, personal use, any other use of the contents of this manual without the consent of CASIO is prohibited under copyright laws. - Page 32 • No ponga en cortocircuito los terminales de pila. • El producto no es para ser usado por niños menores de 3 años. • Utilice solamente el adaptador de CA CASIO AD-E95100L. • El adaptador de CA no es un juguete.
- Page 33 Precauciones de seguridad Antes de usar el instrumento, asegúrese de Ejemplos de símbolos leer cuidadosamente las instrucciones Este símbolo triangular ( ) significa contenidas en este manual. que el usuario debe tener cuidado. (El ejemplo de la izquierda indica precaución de descargas eléctricas.) Símbolos Este círculo con una línea En esta guía del usuario y sobre el producto...
- Page 34 CASIO autorizado. No toque el adaptador de CA ADVERTENCIA mientras sus manos están mojadas. Haciéndolo crea el riesgo de Humo, olores anormales, sobrecalentamientos descargas eléctricas.
- Page 35 Deje toda inspección interna, ajuste y reparación que sea realizado por su vendedor original o un proveedor de servicio CASIO autorizado. Caída e impactos El uso continuado de este producto después de que ha sido dañado al...
- Page 36 Limpieza PRECAUCIÓN Antes de limpiar el producto, primero siempre desenchufe el Adaptador de CA adaptador de CA desde el El uso inadecuado del adaptador tomacorriente. Dejando de CA crea el riesgo de incendios adaptador de CA enchufado crea el y descargas eléctricas. Asegúrese riesgo de daños al adaptador de CA, siempre observar...
- Page 37 Display • En caso de que sienta cualquiera • No aplique presión sobre el panel de los síntomas similares a LCD del display ni lo exponga a aquéllos descritos anteriormente fuertes impactos. Haciéndolo cuando se utiliza este producto, ocasiona que el vidrio del panel pare de usarlo de inmediato y LCD se raje, creando el peligro comuníquese con su médico.
- Page 38 Características principales Indicadores de sincronización y digitación sobre la pantalla • Los indicadores sobre la pantalla fácil de comprender lo asisten a simplificar la ejecución del teclado, aun a los novicios. 100 sonidos reales asombrosos Función de acompañamiento automático mejorado para una mayor versatilidad •...
- Page 39 Contenido Precauciones de Sistema de lección de seguridad ....... S-1 3 pasos ......... S-20 Usando el sistema de lección de Características principales ..S-6 3 pasos ............S-20 Guía de digitación por voz .......S-22 Guía general......S-8 Indicador de sincronización ..... S-22 Paso 1: Aprendiendo la sincronización ...
-
Page 40: Guía General
Guía general... -
Page 41: Fijación De Soporte De Partitura Musical
1 Selector de alimentación/modo (POWER/MODE) E Botón de ritmos (RHYTHM) 2 Deslizador de volumen (VOLUME) F Botón de tono (TONE) 3 Botón de sincronización/relleno G Botón del banco de canciones (SONG BANK) (SYNCHRO/FILL-IN) H Botones numéricos 4 Botón de inicio/parada (START/STOP) LECCION EN 3 PASOS (3-STEP LESSON) 5 Botón de demostración (DEMO) I Botón Paso 1 (STEP 1) -
Page 42: Referencia Rápida
Referencia rápida Esta sección proporciona un bosquejo rápido de la operación del teclado, usando los pasos uno y dos de la función de lección de 3 pasos. Para las explicaciones detalladas de estos pasos, vea la página S-21. Ejecute la parte de melodía sobre el teclado. Ajuste el selector POWER/MODE a NORMAL. -
Page 43: Fuente De Alimentación
Fuente de alimentación Funciona con una toma de corriente o con pilas. Uso de las pilas Puede utilizar seis pilas de tamaño AA. ¡IMPORTANTE! • Escoja pilas alcalinas o de zinc-carbón. • Asegúrese de observar las “Precauciones de seguridad” No utilice pilas Oxyride ni otras pilas a base de níquel. incluidas en este manual. -
Page 44: Desactivación Automática
Información importante acerca de las pilas Desactivación automática Lo siguiente muestra la duración de pila aproximada. El teclado digital se apagará automáticamente para ahorrar Pilas alcalinas .......... 4 horas energía tras un período de inactividad de aproximadamente Pilas de zinc carbón ....... 1 hora seis minutos. -
Page 45: Conexiones
• Solicite el catálogo de CASIO a su vendedor, para encontrar información acerca de los accesorios vendidos por separado [Panel trasero] para este producto, o visite el sitio web de CASIO en la siguiente URL. Toma PHONES/OUTPUT Conexión de audio http://world.casio.com/... -
Page 46: Operaciones Básicas
Operaciones básicas Botones numéricos POWER/MODE DEMO TONE Number buttons VOLUME TEMPO/VALUE RHYTHM START/STOP SYNCHRO/FILL-IN SONG BANK Esta parte del manual le proporciona la información básica NOTA que necesita para usar el teclado. • Ingrese siempre dos dígitos para el número de sonido. Si ingresa solamente un dígito, la presentación retorna automáticamente al ajuste de sonido previo luego de unos Activación y desactivación de la... -
Page 47: Otras Funciones Prácticas
BASS DRUM RIDE BELL Otras funciones prácticas SIDE STICK TAMBOURINE Para cambiar la clave del teclado ACOUSTIC SNARE SPLASH CYMBAL HAND CLAP COWBELL La función de transposición de este teclado le permite elevar o descender la clave en incrementos de semitonos. Esto ELECTRIC SNARE CRASH CYMBAL 2 significa que puede adaptarse fácilmente a la voz de... -
Page 48: Reproduciendo Las Melodías De Demostración
NOTA NOTA • Si deja la pantalla de transposición sobre la presentación • Si deja la pantalla de afinación sobre la presentación durante durante unos cinco segundos sin realizar ninguna operación, cinco segundos sin realizar ninguna operación, la pantalla se la pantalla se borra automáticamente. -
Page 49: Ejecutando Los Ritmos
RHYTHM para CASIO CHORD o FINGERED con el selector POWER/MODE. retornar al número de sonido ajustado previamente. El panel sobre las teclas del teclado de acompañamiento está... - Page 50 Presione de una a cuatro teclas en el teclado de Usando el sistema CASIO CHORD acompañamiento, y el acompañamiento El sistema de acordes CASIO CHORD le permite ejecutar correspondiente comienza a ejecutarse fácilmente los cuatro tipos de acordes. La ejecución de los acordes está...
-
Page 51: Improvisando Con Los Patrones De Ritmos Programados
Para hacer esto, siga los pasos siguientes. todas las notas fundamentales. Ajuste el selector POWER/MODE a la posición Para ejecutar un acompañamiento CASIO CHORD o FINGERED. automático FINGERED Seleccione un ritmo automático. Utilice el selector POWER/MODE para Presione el botón SYNCHRO/FILL-IN. -
Page 52: Sistema De Lección De 3 Pasos
Sistema de lección de 3 pasos KEY LIGHT TONE SPEAK SONG BANK ONE KEY PLAY STEP 1 PART SELECT START/STOP STEP 2 STEP 3 NOTA Usando el sistema de lección de 3 pasos • La luz de las teclas del teclado pueden no verse bajo la luz Aun las personas que no sepan tocar el teclado pueden seguir directa del sol o en otras áreas iluminadas brillantes. - Page 53 Presione el botón START/STOP para iniciar la Indicaciones de dedos cruzados ejecución de la melodía seleccionada. La presentación también muestra cuando tiene que cruzar • La melodía que selecciona se ejecuta repetidamente, los dedos para ejecutar las notas, y en qué dirección sus dedos con las teclas del teclado iluminándose para indicar deben cruzarse.
-
Page 54: Guía De Digitación Por Voz
Operación del sistema de iluminación de Guía de digitación por voz tecla y contenidos del display durante la La guía de digitación por voz utliza una voz humana simulada para llamar los números de la digitación, durante una práctica ejecución de lección de 3 pasos de parte de una mano de los pasos 1 y 2. -
Page 55: Paso 1: Aprendiendo La Sincronización
Desactivando la iluminación de tecla Paso 1: Aprendiendo la sincronización Presione el botón KEY LIGHT. Presione el botón STEP 1. • El indicador KEY LIGHT desaparece cuando el sistema • Cuando lo hace, aparece el indicador STEP 1. de iluminación de tecla se encuentra desactivado. •... -
Page 56: Paso 2: Aprendiendo La Melodía
Paso 2: Aprendiendo la melodía Paso 3: Ejecución a la velocidad normal Presione el botón STEP 2. Presione el botón STEP 3. • Cuando lo hace, aparece el indicador STEP 2. • Cuando lo hace, aparece el indicador STEP 3. •... -
Page 57: Para Practicar La Parte De La Mano Izquierda
Para practicar la parte de la mano izquierda Una vez que aprende la ejecución de la parte de la mano derecha, puede usar las melodías de ejecución con las dos manos (números 84 al 99) para practicar la parte de la mano izquierda. -
Page 58: Referencia Técnica
PHONES/ OUTPUT. 4. El selector POWER/MODE se 4. La ejecución normal no es Página S-17 encuentra en la posición CASIO posible sobre el teclado de CHORD o FINGERED. acompañamiento mientras el selector POWER/MODE se ajusta a CASIO CHORD o FINGERED. - Page 59 Problema Causas posibles Acción Vea la página • No se pueden cambiar los • El teclado se encuentra en el • Presione el botón SONG BANK Página S-20 ajustes de TRANSPOSE/TUNE. modo de banco de canciones. para retornar al modo normal. •...
-
Page 60: Especificaciones
Acompañamiento automático Patrones de ritmo: 50 preajustes Tempo: Ajustable, (216 pasos, = 40 a 255), Valor inicial; 120 Acordes: 2 sistemas; CASIO CHORD, FINGERED Otros: Patrón de redoble, Inicio sincrónico Melodías del banco de canciones: 100 melodías Función de información musical: Sonido, acompañamiento automático, números y nombres del banco de canciones,... -
Page 61: Precauciones Operacionales
Se prohíbe la reproducción, total o parcial, del contenido de este manual. De acuerdo con las leyes de derechos de autor, se prohíbe cualquier uso del contenido de este manual, excepto para su uso personal, sin la previa autorización de CASIO. -
Page 63: Apéndice
Appendix/Apéndice Tone List Lista de sonidos PIANO BRASS/REED/PIPE LAYER PIANO 1 TRUMPET STR PIANO PIANO 2 TUBA STR E.PIANO HONKY-TONK BRASS ENS CHOIR E.P STUDIO PIANO FR.HORN 1 CHOIR ORGAN ELEC PIANO 1 FR.HORN 2 STR GUITAR ELEC PIANO 2 BRASS 1 STR HARP ELEC PIANO 3... -
Page 64: Lista De Ritmos
Rhythm List Lista de ritmos POPS I DANCE/FUNK TECHNO CLUB POP FUNKY POP TRANCE SOUL BALLAD DISCO FUNK POP BALLAD LITE POP POPS II EUROPEAN 16 BEAT FUNK POLKA MARCH 8 BEAT POP POP ROCK WALTZ DANCE POP SLOW WALTZ TANGO POP FUSION FOLKIE POP... -
Page 65: Cuadros De Acordes Digitados
Fingered Chord Charts Cuadros de acordes digitados This table shows the left-hand fingerings (including inverted forms) for a number of often-used chords. : Left hand finger Esta tabla muestra las digitaciones (incluyendo las formas invertidas) para varios de numbers los acordes más a menudo usados. : Números de los dedos de la mano izquierda... - Page 66 Cannot be specified in FINGERED setting because of accompaniment keyboard limitations, but augmented and diminished (seventh) chords made up of the same component notes (with different base note) can be used instead. Chords with same component notes as B aug ... D aug, F aug Chords with same component notes as B aug ....
-
Page 67: Lista De Canciones
Song List / Lista de canciones SONG BANK / BANCO DE CANCIONES 00 JUPITER FROM “THE PLANETS” 50 TURKEY IN THE STRAW 01 DECK THE HALL 51 MY OLD KENTUCKY HOME 02 WE WISH YOU A MERRY CHRISTMAS 52 HOME ON THE RANGE 03 JINGLE BELLS 53 ALOHA OE 04 SILENT NIGHT... - Page 68 This recycle mark indicates that the packaging conforms to the environmental protection legislation in Germany. Esta marca de reciclaje indica que el empaquetado conforma a la legislación de protección ambiental en Alemania. CASIO COMPUTER CO.,LTD. 6-2, Hon-machi 1-chome MA1004-A Printed in China Shibuya-ku, Tokyo 151-8543, Japan...