Table of Contents
Advertisement
Available languages
Available languages
Safe Operation Practices • Set-Up • Operation • Maintenance • Service • Troubleshooting • Warranty
O
'
M
peratOr
s
anual
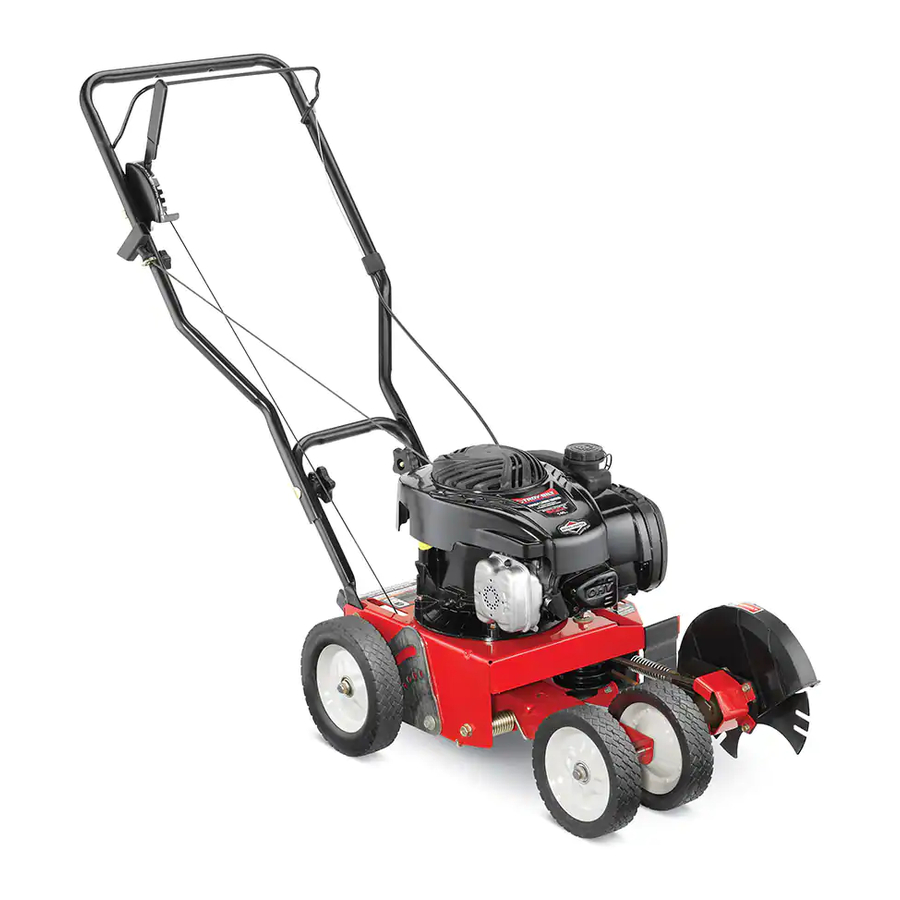
Lawn Edger — Model 554
WARNING
READ AND FOLLOW ALL SAFETY RULES AND INSTRUCTIONS IN THIS MANUAL
BEFORE ATTEMPTING TO OPERATE THIS MACHINE.
FAILURE TO COMPLY WITH THESE INSTRUCTIONS MAY RESULT IN PERSONAL INJURY.
TROY-BILT LLC, P.O. BOX 361131 CLEVELAND, OHIO 44136-0019
Printed In USA
Form No. 769-08749A
(January 3, 2013)
Advertisement
Chapters
Table of Contents

Related Manuals for Troy-Bilt TB554


Summary of Contents for Troy-Bilt TB554
- Page 1 READ AND FOLLOW ALL SAFETY RULES AND INSTRUCTIONS IN THIS MANUAL BEFORE ATTEMPTING TO OPERATE THIS MACHINE. FAILURE TO COMPLY WITH THESE INSTRUCTIONS MAY RESULT IN PERSONAL INJURY. TROY-BILT LLC, P.O. BOX 361131 CLEVELAND, OHIO 44136-0019 Printed In USA Form No. 769-08749A...
-
Page 2: Table Of Contents
Visit us on the web at www.troybilt.com See How-to Maintenance and Parts Installation Videos at www.troybilt.com/tutorials ◊ Call a Customer Support Representative at (800) 828-5500 or (330) 558-7220 ◊ Write to Troy-Bilt LLC • P.O. Box 361131 • Cleveland, OH • 44136-0019... -
Page 3: Safe Operation Practices
Important Safe Operation Practices WARNING! This symbol points out important safety instructions which, if not followed, could endanger the personal safety and/or property of yourself and others. Read and follow all instructions in this manual before attempting to operate this machine. Failure to comply with these instructions may result in personal injury. - Page 4 Never fill containers inside a vehicle or on a truck Muffler and engine become hot and can cause a burn. or trailer bed with a plastic liner. Always place Do not touch. containers on the ground away from your vehicle Never operate this machine without good visibility or before filling.
-
Page 5: Maintenance And Storage
Keep children away from hot or running engines. They can According to the Consumer Products Safety Commission suffer burns from a hot muffler. (CPSC) and the U.S. Environmental Protection Agency (EPA), this product has an Average Useful Life of seven (7) years, Never allow children under 14 years of age to operate this or 70 hours of operation. -
Page 6: Safety Symbols
Safety Symbols This page depicts and describes safety symbols that may appear on this product. Read, understand, and follow all instructions on the machine before attempting to assemble and operate. Symbol Description READ THE OPERATOR’S MANUAL(S) Read, understand, and follow all instructions in the manual(s) before attempting to assemble and operate WARNING—... -
Page 7: Assembly & Set-Up
Assembly & Set-Up Contents of Carton • One Edger • One Edger Operator’s Manual • One Bottle Engine Oil • One Engine Operator’s Manual • One Trenching Blade Kit† • One Wing Knob and Rope Guide † If Equipped Control Cable Z-Fitting NOTE: This machine is shipped WITHOUT GASOLINE or OIL. - Page 8 Securing Control Cable Stand behind the edger and hold the blade control against the upper handle. WARNING: The cable must be routed properly to Gently pull the starter rope out of the engine. avoid contact with all sharp edges and hot surfaces. Such contacts damage the cable and render the controls inoperative.
-
Page 9: Features & Controls
Controls and Features Blade Control Blade Depth Control Lever Primer Recoil Starter Bevel Adjustment Lever Curb Height Adjustment Lever Blade Control WARNING! Be familiar with all the controls and their proper operation. Know how to stop the Located on the upper handle, the blade control must be machine and disengage it quickly. -
Page 10: Operation
Operation Starting the Engine To start the edger’s engine, proceed as follows: Move the blade depth control lever back to the START position in the adjacent (top) notch. Push the primer three times. See Figure 5-1. Do not prime to restart a warm engine. NOTE: If you push the primer too many times, excessive fuel will flood the carburetor and the engine will be difficult to start. - Page 11 Edging Along a Curb Trenching (If equipped) The right, rear wheel of the edger can be lowered into one of five You can utilize the edger’s optional trenching feature in order positions to ease the task of edging along a curb. To adjust the to create a wider cutting path for such things as laying wire for height of curb wheel, proceed as follows: landscape lighting.
-
Page 12: Maintenance & Adjustment
Maintenance & Adjustments Maintenance Lubrication Wheels WARNING! Disconnect the spark plug wire and ground against the engine before performing any Lubricate the wheels and bearings at least once a season with a adjustment, repairs or maintenance. light oil. Also if the wheels are removed for any reason, lubricate the surface of the axle bolt and the inner surface of the wheel Engine with light oil. -
Page 13: Service
Service Belt Replacement Drive Belt Flange NOTE: To aid in reassembly, note the orientation of the drive belt Luck Nut on the two idler pulleys and the engine flywheel pulley prior to performing the following steps. Refer to Figure 7-1. The edger drive belt is subject to wear and should be replaced if any signs of cracking, shredding or rotting are present. - Page 14 Off-Season Storage Observe the following when preparing the edger for long-term storage: Clean and lubricate the edger thoroughly as instructed on the previous page. Refer to the Engine Operator’s Manual packed separately with the edger for engine manufacturers’s storage instructions. Coat the edger blade with chassis grease to prevent rusting and corrosion.
-
Page 15: Troubleshooting
Troubleshooting Problem Cause Remedy Engine fails to start 1. Dirty air cleaner. 1. Refer to the Engine Operator’s Manual 2. Engine needs to be primed. 2. Push primer bulb two or three times. 3. Fuel tank empty. 3. Fill tank with clean, fresh gasoline. 4. -
Page 16: Parts List
Handle, Frame & Wheel Assembly †Trencher Kit †If Equipped... - Page 17 Handle, Frame & Wheel Assembly Ref. Part No. Description Ref. Part No. Description 687-02022 Curb Height Adjustment Lever 736-04019 Flat Washer, .531 x 1.25 x .181 687-02585 Curb Height Adjuster Plate 936-0232 Wave Washer .531 x .781 x .013 687-02126 Blade Plate Assembly 736-0234 Flat Washer, .385 x 1.5 x .075...
- Page 18 MANUFACTURER’S LIMITED WARRANTY FOR The limited warranty set forth below is given by Troy-Bilt LLC with Routine maintenance items such as lubricants, filters, blade respect to new merchandise purchased and used in the United States sharpening, tune-ups, brake adjustments, clutch adjustments,...
- Page 19 LEA Y SIGA TODAS LAS INSTRUCCIONES DE ESTE MANUAL ANTES DE PONER EN FUNCIONAMIENTO ESTA MÁQUINA. SI NO RESPETA ESTAS INSTRUCCIONES PUEDE PROVOCAR LESIONES PERSONALES. TROY-BILT LLC, P.O. BOX 361131 CLEVELAND, OHIO 44136-0019 Impreso en Estados Unidos de América Formulario No. 769-08749A...
- Page 20 Ver Vídeos demostrativos de instalación de mantenimiento y piezas en www.troybilt.com/Tutorials ◊ Llame a un representante de Asistencia al Cliente al (800) 828-5500 ó (330) 558-7220 ◊ Escríbanos a Troy-Bilt LLC • P.O. Box 361131 • Cleveland, OH • 44136-0019...
-
Page 21: Importante Medidas Importantes De Seguridad
Medidas importantes de seguridad ¡ADVERTENCIA! La presencia de este símbolo indica que se trata de instrucciones importantes de seguridad que se deben respetar para evitar poner en peligro su seguridad personal y/o material y la de otras personas. Lea y siga todas las instrucciones de este manual antes de poner en funcionamiento esta máquina. - Page 22 Nunca llene los recipientes en el interior de El silenciador y el motor se calientan y pueden causar un vehículo o camión o caja de remolque con quemaduras. No los toque. recubrimiento plástico. Coloque siempre los Nunca opere esta máquina sin buena visibilidad o recipientes en el piso y lejos del vehículo antes de iluminación.
- Page 23 Mantenga a los niños alejados de los motores en marcha No cambie la configuración del regulador del motor o calientes. Pueden sufrir quemaduras con un silenciador ni acelere demasiado el mismo. El regulador del motor caliente. controla la velocidad máxima segura de funcionamiento del motor.
-
Page 24: Ensamblado Y Configuración
Montaje y Configuración Contents of Carton • Un Edger • Un Manual de Operario de Edger • Un 18 oz. Petróleo de Motor • Un Manual de Operario de Motor • Un kit de Blade Zanjas† • Una guía de la cuerda y perilla de aletas † De ser equipado Accesorio “Z” de Cable de Control NOTA: Esta unidad se entrega SIN GASOLINA ni ACEITE. Después de armar la unidad, realice la carga de gasolina del motor según Desenrolle el cable del motor por debajo de la manija inferior. las instrucciones del manual del motor que se entrega con la unidad. Para facilitar el acoplamiento del accesorio “Z”, quite temporariamente el lado izquierdo del control de la NOTA: Las referencias al lado derecho o izquierdo de la cuchilla como se muestra en Figura 3-2. bordeadora se observan desde la posición del operador. Montaje Control de la Cuchilla Barra Retire y deseche cualquier cartón de empaque que pudiere Manija superior... - Page 25 Presione el perno que está dentro del accesorio de presión Jale suavemente de la cuerda de arranque fuera del motor. dentro del orificio que se encuentra del lado izquierdo de la manija superior, según se muestra en Figura 3-3. ¡ADVERTENCIA! La cuchilla de la bordeadora ROTARÁ...
-
Page 26: Controles Y Características
Controles y Características Control de cuchilla Palanca de control de la cuchilla Cebador Arrancador de retroceso Palanca de ajuste del biselado Palanca de ajuste de altura del bordillo Control de las cuchillas ¡ADVERTENCIA! Familiarícese con todos los controles y con el uso adecuado de los mismos. El control de la cuchilla, ubicado en la barra de control superior, Sepa cómo detener la máquina y desactivar los se debe presionar contra la barra superior para poder operar la... -
Page 27: Funcionamiento
Funcionamiento Encendido del motor Para encender el motor de la bordeadora, proceda de la siguiente forma: Mueva la palanca de control de profundidad de la cuchilla para atrás a la posición INICIO de la muesca adyacente (superior). Empuje el cebador tres veces. Vea la Figure 5-1. No cebe el motor caliente para reiniciarlo luego de una detención breve. - Page 28 Recorte a lo largo de un bordillo La rueda posterior derecha de la bordeadora se puede bajar a una de cinco posiciones para facilitar la tarea de recorte a lo largo de un bordillo. Para ajustar la altura de la rueda del bordillo, haga lo siguiente: Baje la rueda posterior derecha moviendo la palanca de ajuste de la altura del bordillo ligeramente a la izquierda.
-
Page 29: Mantenimiento Y Ajustes
Mantenimiento y Ajustes Mantenimiento Lubricación ¡ADVERTENCIA! Desconecte el cable de la bujía Ruedas de encendido y haga masa contra el motor antes de Lubrique las ruedas y cojinetes por lo menos una vez por realizar cualquier ajuste, reparación o temporada con un aceite liviano. Además, si se quitan las ruedas mantenimiento. -
Page 30: Servicio
Servicio Reemplazo de correa Tuerca de Correa de transmisión seguridad de la brida NOTA: Para ayudar a armar nuevamente, observe la orientación de la correa de transmisión sobre las dos poleas locas y la polea volante del motor antes de realizar los siguientes pasos. Vea la Figura 7-1. -
Page 31: Solución De Problemas
Solución de Problemas Problem Cause Remedy El motor no arranca 1. El filtro de aire está sucio 1. Consulte el manual del motor enviado junto con su unidad. 2. El motor debe ser cebado 2. Empuje el bulbo del cebador dos o tres veces. - Page 32 Las disposiciones de esta garantía cubren el recurso de reparación para cuchillas, dientes, bolsas para pasto, ruedas, ruedas para la única y exclusiva que surge de la venta. Troy-Bilt no se hará plataforma de la podadora tractor, asientos, zapatas antideslizantes, responsable de ninguna pérdida o daño incidental o resultante,...