
Related Manuals for Pioneer DEH-1900R


Summary of Contents for Pioneer DEH-1900R
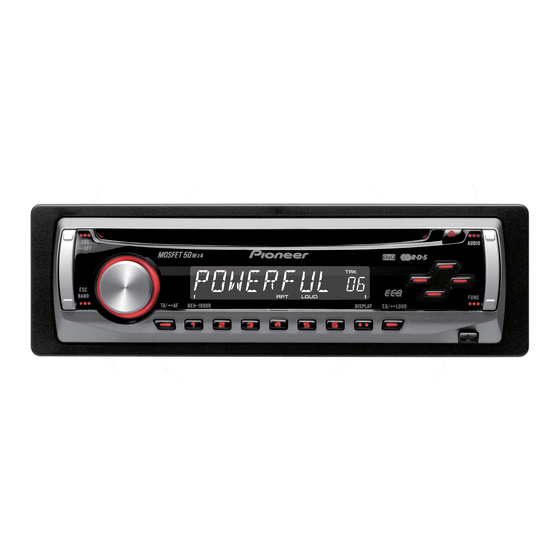
- Page 1 Operation Manual Mode d’emploi CD RDS Receiver Récepteur RDS avec lecteur de CD DEH-1920R DEH-1900R...
-
Page 2: Table Of Contents
Contents Thank you for buying this Pioneer product. Please read through these operating instructions so you will know how to operate your model properly. After you have finished reading the instructions, keep this man- ual in a safe place for future reference. -
Page 3: Before You Start
Refer all ser- vicing to qualified personnel. ! The Pioneer CarStereo-Pass is for use only in Germany. ! Keep this manual handy as a reference for op- If you want to dispose this product, do not mix erating procedures and precautions. -
Page 4: Removing The Front Panel
Section Before You Start Removing the front panel Press DETACH to release the front panel. Grab the front panel and remove. Put the front panel into provided pro- tective case for safe keeping. Attaching the front panel Slide the front panel to the left until it clicks. -
Page 5: Operating This Unit
Section Operating this unit 3 3 3 4 4 4 8 8 8 7 7 7 8 DETACH button What’s What Press to remove the front panel from the Head unit head unit. 1 SOURCE button 9 EQ button This unit is turned on by selecting a source. Press to select various equalizer curves. -
Page 6: Lcd Display
Section Operating this unit 8 Stereo (5) indicator LCD display Shows when the selected frequency is being broadcast in stereo. 9 LOC indicator Shows when local seek tuning is on. Basic Operations Turning the unit on and 1 Main display section selecting a source Shows the various information such as You can select a source you want to listen to. -
Page 7: Storing And Recalling Broadcast Frequencies
Section Operating this unit Press BAND to select a band. The LOCAL 4 setting allows reception of only Press BAND until the desired band (F1, F2 for the strongest stations, while lower settings let FM or MW/LW) is displayed. you receive progressively weaker stations. To perform manual tuning, briefly press Storing the strongest broadcast c or d. -
Page 8: Receiving Pty Alarm Broadcasts
Section Operating this unit Receiving PTY alarm broadcasts Using Auto PI Seek for preset stations When preset stations cannot be recalled, as When the emergency PTY code broadcasts, when travelling long distances, the unit can the unit receives it automatically (ALARM ap- be set to perform PI Seek during preset recall. -
Page 9: Pty List
Section Operating this unit Press TA to turn traffic announcement NAT MUS National music OLDIES Oldies, golden oldies standby on. FOLK MUS Folk music # To turn traffic announcements standby off, L.CLASS Light classical music press TA again. CLASSIC Classical music EDUCATE Educational programs Use VOLUME to adjust the TA volume... -
Page 10: Playing Tracks In Random Order
Section Operating this unit Press c or d to select the repeat range. Audio Adjustments DSC – Repeat all tracks Using balance adjustment TRK – Repeat just the current track # If you perform track search or fast forward/re- Fader/balance setting creates an ideal listen- verse, repeat play is automatically cancelled. -
Page 11: Adjusting Loudness
Section Operating this unit Press a or b to adjust the level. Other Functions +6 to –6 is displayed as the level is increased Adjusting initial settings or decreased. # To return to the normal display, press BAND. Using the initial settings, you can customize various system settings to achieve optimal per- formance from this unit. -
Page 12: Saving The Battery Consumption
! When a call is made or received using a cellular telephone connected to this unit. ! When the voice guidance is output from a Pioneer navigation unit connected to this unit. The sound is turned off, MUTE is displayed and no audio adjustments, except volume con- trol, are possible. -
Page 13: Additional Information
Display indication is improper. leads are connected. Error messages Handling guideline of discs When you contact your dealer or your nearest and player Pioneer Service Center, be sure to record the error message. ! Use only discs featuring following logo. Message Cause Action... -
Page 14: Dual Discs
Appendix Additional Information ! Condensation may temporarily impair the player’s performance. Leave it to adjust to the warmer temperature for about one hour. Also, wipe any dump discs with a soft cloth. ! Playback of discs may not be possible be- cause of disc characteristics, disc format, recorded application, playback environ- ment, storage conditions and so on. -
Page 15: Specifications
Appendix Additional Information Specifications FM tuner Frequency range ...... 87.5 MHz to 108.0 MHz General Usable sensitivity ..... 8 dBf (0.7 µV/75 W, mono, Power source ......14.4 V DC (10.8 V to 15.1 V S/N: 30 dB) allowable) Signal-to-noise ratio ....75 dB (IEC-A network) Grounding system .... - Page 16 Contenido Gracias por haber comprado este producto Pioneer. Lea con detenimiento estas instrucciones sobre el funcionamiento del aparato, para que pueda darle el mejor uso posible. Una vez que las haya leído, conserve este manual en un lugar seguro para consultarlo en el futuro.
-
Page 17: Antes De Comenzar
Solicite a personal calificado que realice el gente, existe un sistema de recogida distinto servicio técnico. para los productos electrónicos que requieren ! El CarStereo-Pass Pioneer es para usarse sólo un procedimiento adecuado de tratamiento, en Alemania. recuperación y reciclado. -
Page 18: Protección Del Producto Contra Robo
Sección Antes de comenzar Protección del producto contra robo Se puede extraer la carátula como medida antirrobo. Importante ! Proceda con cuidado al retirar o colocar la ca- rátula. ! Evite someter la carátula a impactos excesi- vos. ! Mantenga la carátula fuera del alcance de la luz solar directa y no la exponga a altas tem- peraturas. -
Page 19: Utilización De Esta Unidad
Sección Utilización de esta unidad 3 3 3 4 4 4 8 8 8 7 7 7 8 Botón DETACH Qué es cada cosa Presione este botón para extraer la carátula Unidad principal de la unidad principal. 1 Botón SOURCE 9 Botón EQ Esta unidad se enciende al seleccionar una Presione este botón para seleccionar las di-... -
Page 20: Display Lcd
Sección Utilización de esta unidad 6 Indicador RPT Display LCD Aparece cuando la repetición de reproduc- ción está activada. 7 Indicador LOUD Aparece en el display cuando se activa la sonoridad. 8 Indicador de estéreo (5) Aparece cuando la frecuencia seleccionada se está... -
Page 21: Apagado De La Unidad
Sección Utilización de esta unidad # En la memoria se pueden almacenar hasta 12 Apagado de la unidad emisoras FM, 6 para cada una de las dos bandas % Mantenga presionado SOURCE hasta FM, y 6 emisoras MW/LW. que se apague la unidad. # Presione a o b para recuperar las frecuen- cias de las emisoras de radio. -
Page 22: Rds
Sección Utilización de esta unidad Presione a para activar la función BSM. Selección de frecuencias Las seis frecuencias de las emisoras más fuer- alternativas tes se almacenarán en orden según la intensi- Si el sintonizador no puede obtener una dad de las señales. buena recepción, la unidad busca automática- # Para cancelar el proceso de almacenamiento, mente otra emisora de la misma red. -
Page 23: Recepción De Anuncios De Tráfico
Sección Utilización de esta unidad Uso de la búsqueda PI automática ra TP de otra red realzada (una emisora que brinda información que remite a emisoras TP). para emisoras presintonizadas Cuando no se pueden recuperar las emisoras Sintonice una emisora TP o la emisora presintonizadas, como por ejemplo, al realizar TP de otra red realzada. -
Page 24: Lista Pty
Sección Utilización de esta unidad # Asegúrese de que el lado de la etiqueta Lista PTY del disco esté hacia arriba. Específico Tipo de programa # Después de colocar un CD, presione SOURCE NEWS Noticias para seleccionar el reproductor de CD incorpora- AFFAIRS Temas de actualidad INFO... -
Page 25: Exploración De Las Pistas De Un Cd
Sección Utilización de esta unidad Presione a o b para activar o desacti- Ajustes de audio var la reproducción aleatoria. Uso del ajuste del balance Cuando la repetición aleatoria está activada, en el display aparece RDM. El ajuste de fader/balance crea un entorno de # Para volver a la visualización normal, presione audio ideal en todos los asientos ocupados. -
Page 26: Ajuste De La Sonoridad
Sección Utilización de esta unidad Ajuste de graves/medios/agudos Presione AUDIO para seleccionar SLA. Se puede ajustar el nivel de graves/medios/ Presione a o b para ajustar el volumen agudos. de la fuente. Se visualiza SLA +4 a SLA –4 mientras se au- Presione AUDIO para seleccionar BASS/ menta o disminuye el volumen de la fuente. -
Page 27: Ajuste Del Paso De Sintonía De Fm
Presione c para seleccionar 50 (50 kHz). Pre- ! Cuando funciona el sistema de orientación sione d para seleccionar 100 (100 kHz). por voz de la unidad de navegación Pioneer conectada a esta unidad. El sonido se desactiva, se visualiza MUTE y no Cambio de la búsqueda PI... -
Page 28: Información Adicional
Mensajes de error Pautas para el manejo de Cuando contacte con su concesionario o con discos y del reproductor el servicio técnico Pioneer más cercano, ase- gúrese de anotar el mensaje de error. ! Use sólo discos que tengan el siguiente logo. -
Page 29: Discos Dobles
Apéndice Información adicional ! Evite dejar discos en ambientes excesiva- mendamos que no utilice un disco doble mente calientes o expuestos a la luz solar en esta unidad. ! Consulte la información del fabricante del directa. ! No fije etiquetas, no escriba ni aplique sus- disco para obtener más información sobre tancias químicas en la superficie de los los discos dobles. -
Page 30: Especificaciones
Apéndice Información adicional Especificaciones Características de la frecuencia ............. 5 Hz a 20 000 Hz (±1 dB) Generales Relación de señal a ruido ..94 dB (1 kHz) (red IEC-A) Gama dinámica ......92 dB (1 kHz) Fuente de alimentación ..14,4 V CC (10,8 a 15,1 V per- Número de canales .... - Page 31 Inhalt Vielen Dank, dass Sie sich für dieses Pioneer-Produkt entschieden haben. Lesen Sie sich diese Bedienungsanleitung bitte aufmerksam durch, um sich mit der richtigen Bedienungsweise für Ihr Modell vertraut zu machen. Anschließend sollten Sie die Bedienungsanleitung an einem sicheren Ort griffbereit aufbewahren.
-
Page 32: Bevor Sie Beginnen
Stationsspeicher gelöscht und muss stem)-Funktion ist nur in Gebieten mit UKW- neu programmiert werden. Sendern verfügbar, die RDS-Signale ausstrah- ! Sollte dieses Produkt nicht ordnungsgemäß len. funktionieren, dann wenden Sie sich bitte an Ihren Händler oder an eine Pioneer-Kunden- dienststelle in Ihrer Nähe. -
Page 33: Unsere Website
Sie es erneut. Die Frontplatte könnte durch bereitstellen können. übermäßige Kraftanwendung beschädigt ! Auf unserer Website finden Sie die jeweils werden. neuesten Informationen der Pioneer Corporation. Diebstahlschutz Zum Schutz vor Diebstahl kann die Frontplatte vom Hauptgerät abgenommen werden. Wichtig ! Beim Abnehmen bzw. -
Page 34: Bedienung Des Geräts
Abschnitt Bedienung des Geräts 3 3 3 4 4 4 8 8 8 7 7 7 8 Taste DETACH Die einzelnen Teile Zum Entfernen der Frontplatte vom Haupt- Hauptgerät gerät. 1 Taste SOURCE 9 Taste EQ Dieses Gerät wird durch die Wahl einer Pro- Zu Wahl verschiedener Entzerrungskurven. -
Page 35: Lcd-Display
Abschnitt Bedienung des Geräts 6 RPT-Anzeige LCD-Display Erscheint, wenn die Wiederholwiedergabe eingeschaltet ist. 7 LOUD-Anzeige Erscheint im Display, wenn Loudness einge- schaltet ist. 8 Stereo-Anzeige (5) Erscheint, wenn der empfangene Sender ein Stereo-Programm ausstrahlt. 1 Hauptanzeigebereich 9 LOC-Anzeige Zeigt verschiedene Informationen an, u. a. Erscheint, wenn die Lokal-Suchlaufabstim- Wellenbereich, Wiedergabezeit und andere mung eingeschaltet ist. -
Page 36: Regeln Der Lautstärke
Abschnitt Bedienung des Geräts Regeln der Lautstärke Speichern und Abrufen von Senderfrequenzen % Mit VOLUME wird die Lautstärke einge- stellt. % Zum Speichern einer abgestimmten Frequenz drücken Sie eine der Stationsta- sten 1 bis 6 und halten diese gedrückt, bis Ausschalten des Geräts die Stationsnummer nicht mehr blinkt. -
Page 37: Speichern Der Stationen Mit Den Stärksten Sendesignalen
Abschnitt Bedienung des Geräts Speichern der Stationen mit Empfang von PTY-Alarm- den stärksten Sendesignalen Sendungen Mit BSM (Best-Sender-Memory) lassen sich Bei Ausstrahlung des PTY-Notrufcodes wird die sechs stärksten Sender automatisch den dieser vom Gerät automatisch empfangen (im Stationstasten 1 bis 6 zuordnen, speichern Display wird ALARM angezeigt). -
Page 38: Empfang Von Verkehrsdurchsagen
Abschnitt Bedienung des Geräts Gebrauch des PI-Suchlaufs Empfang von Verkehrsdurchsagen Wenn der Tuner keinen geeigneten Sender fin- Mit TA (Verkehrsdurchsagebereitschaft) wer- det oder der Empfang schwach wird, sucht den automatisch Verkehrsmeldungen empfan- das Gerät automatisch nach einer anderen gen, ungeachtet der gerade gehörten Station mit derselben Programmierung. -
Page 39: Pty-Liste
Abschnitt Bedienung des Geräts ! Bei der Suchlaufabstimmung oder bei BSM # Achten Sie darauf, dass die beschriftete werden ausschließlich TP-Stationen und ver- Seite der Disc nach oben zeigt. # Wenn bereits eine CD eingeführt wurde, drük- knüpfte Verkehrsfunk-Programmketten abge- stimmt, wenn TA eingeschaltet ist. -
Page 40: Abspielen Von Titeln In Zufälliger Reihenfolge
Abschnitt Bedienung des Geräts Abspielen von Titeln in Drücken Sie a oder b, um die Pause ein- oder auszuschalten. zufälliger Reihenfolge # Zum Zurückschalten zur normalen Anzeige Die Titel einer CD können in einer zufallsbe- drücken Sie BAND. stimmten Reihenfolge abgespielt werden. Drücken Sie FUNCTION, um RDM zu Audio-Einstellungen wählen. -
Page 41: Einstellen Von Entzerrungskurven
Abschnitt Bedienung des Geräts Einstellen von Entzerrungskurven stärkeänderungen beim Umschalten von Programmquellen zu vermeiden. Sie können die Einstellungen für die derzeit ! Die Einstellungen beruhen auf der UKW- gewählte Equalizer-Kurve wunschgemäß än- Tuner-Lautstärke, die unverändert bleibt. dern. Individuell angepasste Equalizer-Kurven ! Die MW/LW-Tuner-Lautstärke kann mit SLA werden unter CUSTOM gespeichert. -
Page 42: Einstellen Des Ukw-Kanalrasters
! Wenn von einem an dieses Gerät ange- Umschalten des Auto-PI-Suchlaufs schlossenen Pioneer-Navigationsgerät die Sprachführung ausgegeben wird. Das System kann automatisch nach einer an- Der Ton wird abgeschaltet, im Display er- deren Station mit derselben Programmierung scheint MUTE und sämtliche Audio-Einstel-... -
Page 43: Zusätzliche Informationen
Die Display-Anzeige funktioniert nicht ordnungsgemäß. Fehlermeldungen Richtlinien für die Vor der Kontaktaufnahme mit Ihrem Händler Handhabung von Discs und oder der nächstgelegenen Pioneer-Kunden- Player dienststelle sollten Sie sich die angezeigte Fehlermeldung notieren. ! Verwenden Sie ausschließlich Discs, die das nachstehende Logo aufweisen. -
Page 44: Dual-Discs
Anhang Zusätzliche Informationen ! Berühren Sie unter keinen Umständen die ! Da die CD-Seite von Dual-Discs physika- Disc-Oberfläche mit den aufgezeichneten lisch nicht mit dem allgemeinen CD-Stand- Daten. ard kompatibel ist, ist eine Wiedergabe der ! Bewahren Sie die Discs bei Nichtgebrauch CD-Seite mit diesem Gerät ggf. -
Page 45: Technische Daten
Anhang Zusätzliche Informationen Technische Daten UKW-Tuner Frequenzbereich ...... 87,5 MHz bis 108,0 MHz Allgemein Nutzempfindlichkeit ....8 dBf (0,7 µV/75 W, Mono, Si- Stromversorgung ..... 14,4 V Gleichspannung (To- gnal-Rauschabstand: 30 leranz 10,8 V bis 15,1 V) Erdungssystem ......Negativ Signal-Rauschabstand .. - Page 46 Table des matières Nous vous remercions d’avoir acheté cet appareil Pioneer. Afin d’utiliser votre appareil correctement, veuillez lire ce mode d’emploi entière- ment. Après avoir lu ce mode d’emploi, conservez-le dans en endroit sûr pour pouvoir vous y référer ultérieurement.
-
Page 47: Avant De Commencer
Dans les pays qui ne sont pas mentionnés ci-des- ! En cas d’anomalie, consultez le distributeur sus, veuillez contacter les autorités locales pour ou le centre d’entretien agréé par Pioneer le savoir comment vous pouvez vous débarrasser de plus proche. -
Page 48: Détacher La Face Avant
Section Avant de commencer Important ! Lorsque vous enlevez ou remontez la face avant, manipulez-la doucement. ! Évitez de heurter la face avant. ! Conservez la face avant à l’abri des tempéra- tures élevées et de la lumière directe du soleil. Détacher la face avant Appuyez sur DETACH pour libérer la face avant. -
Page 49: Utilisation De L'appareil
Section Utilisation de l’appareil 3 3 3 4 4 4 8 8 8 7 7 7 7 Touche FUNCTION Description de l’appareil Appuyez sur cette touche pour rappeler le Appareil central menu des fonctions quand vous utilisez une source. 1 Touche SOURCE Cet appareil est mis en service en sélection- 8 Touche DETACH nant une source. -
Page 50: Ecran Lcd
Section Utilisation de l’appareil 5 Indicateur TA Ecran LCD Il s’éclaire lorsque la fonction TA (attente d’un bulletin d’informations routières) est en service. 6 Indicateur RPT Il indique quand la répétition de lecture est en service. 7 Indicateur LOUD Il apparaît sur l’afficheur quand la correc- tion physiologique est en service. -
Page 51: Réglage Du Volume
Section Utilisation de l’appareil Réglage du volume Mise en mémoire et rappel des fréquences de stations % Utilisez VOLUME pour régler le niveau sonore. % Lorsque se présente une fréquence que vous désirez mettre en mémoire, mainte- nez la pression sur une des touches de pré- Mise hors tension de l’appareil sélection 1 à... -
Page 52: Mise En Mémoire Des Fréquences Des Émetteurs Les Plus Puissants
Section Utilisation de l’appareil Mise en mémoire des fréquences La liste des types d’émission (code d’identifi- cation du type de programme) est donnée à la des émetteurs les plus puissants page 54. La fonction BSM (Mémoire des meilleures sta- # Les informations PTY et la fréquence s’affi- tions) vous permet d’utiliser les touches de chent pendant huit secondes. -
Page 53: Réception Des Bulletins D'informations Routières
Section Utilisation de l’appareil ! Au cours d’une recherche AF (recherche Remarques d’une autre fréquence possible), les sons peu- ! La programmation régionale et les réseaux ré- vent être interrompus par ceux d’une autre gionaux dépendent de chaque pays (ils peu- émission. -
Page 54: Liste Des Codes Pty
Section Utilisation de l’appareil Appuyez sur TA pendant la réception DRAMA Pièces de théâtre et séries radiophoni- ques d’un bulletin d’informations routières pour CULTURE Émissions culturelles couvrant tous abandonner cette réception. les aspects nationaux ou régionaux La source d’origine est rétablie mais le synto- SCIENCE Nature, science et technologie niseur demeure en attente d’un bulletin d’in-... -
Page 55: Répétition De La Lecture
Section Utilisation de l’appareil Répétition de la lecture Quand vous trouvez la plage désirée appuyez sur b pour arrêter la lecture du La répétition de la lecture vous permet d’écou- contenu du disque. ter à nouveau la même plage musicale. # Si les conditions de lecture se sont à... -
Page 56: Utilisation De L'égaliseur
Section Utilisation de l’appareil Utilisation de l’égaliseur Appuyez sur AUDIO pour choisir LOUD. Six réglages d’égaliseur préenregistrés, tels Appuyez sur a ou b pour mettre la cor- que DYNAMIC, VOCAL, NATURAL, CUSTOM, rection physiologique en service ou hors FLAT et POWERFUL sont disponibles et peu- service. -
Page 57: Autres Fonctions
Section Utilisation de l’appareil Autres fonctions Appuyez sur c ou d pour choisir l’incré- ment d’accord FM. Ajustement des réglages initiaux Appuyez sur c pour choisir 50 (50 kHz). Ap- puyez sur d pour choisir 100 (100 kHz). À partir des réglages initiaux, vous pouvez per- sonnaliser divers réglages du système pour obtenir un fonctionnement optimal de cet ap- Mise en service ou hors service... -
Page 58: Silencieux
à cet ap- pareil. ! Quand le guidage vocal est émis par un équipement de navigation Pioneer connecté à cet appareil. Le son est coupé, MUTE est affiché et aucun réglage audio n’est possible sauf le contrôle du volume. -
Page 59: Informations Complémentaires
Messages d’erreur Conseils sur la manipulation Quand vous contactez votre distributeur ou le des disques et du lecteur Service d’entretien agréé par Pioneer le plus proche, n’oubliez pas de noter le message ! Utilisez seulement des disques affichant le d’erreur. -
Page 60: Disques Duaux
Annexe Informations complémentaires ! Évitez de laisser les disques dans des envi- ment pour CD et ne sera pas éjecté. Pour ronnements trop chauds, en particulier éviter cela, nous vous recommandons de sous la lumière directe du soleil. vous abstenir d’utiliser des Disques Duaux ! Ne posez aucune étiquette à... -
Page 61: Caractéristiques Techniques
Annexe Informations complémentaires Caractéristiques techniques Rapport signal/bruit ....94 dB (1 kHz) (Réseau IEC-A) Généralités Dynamique ......... 92 dB (1 kHz) Nombre de canaux ....2 (stéréo) Alimentation ......14,4 V DC (10,8 V à 15,1 V acceptable) Syntoniseur FM Mise à... - Page 62 Sommario Grazie per aver acquistato questo prodotto Pioneer. Leggere attentamente queste istruzioni operative, in modo da imparare come azio- nare correttamente il modello. Dopo aver terminato la lettura delle istruzioni, conser- vare questo manuale in un luogo sicuro, per consultazione futura.
-
Page 63: Prima Di Iniziare
Rivolgersi a personale qualificato per qualsia- si intervento di servizio. Se si vuole eliminare questo prodotto, non get- ! Il CarStereo-Pass Pioneer può essere usato tarlo insieme ai rifiuti domestici. Esiste un si- solo in Germania. stema di raccolta differenziata in conformità... -
Page 64: Rimozione Del Frontalino
Sezione Prima di iniziare Importante ! Rimuovere o montare il frontalino delicata- mente. ! Evitare di sottoporre il frontalino a urti eccessi- ! Mantenere il frontalino lontano dalla luce so- lare diretta e dalle alte temperature. Rimozione del frontalino Premere DETACH per sganciare il fron- talino. -
Page 65: Funzionamento Dell'unità
Sezione Funzionamento dell’unità 3 3 3 4 4 4 8 8 8 7 7 7 7 Tasto FUNCTION Nomenclatura Premere questo tasto per richiamare il Unità principale menu delle funzioni quando si controlla una sorgente. 1 Tasto SOURCE Questa unità viene accesa selezionando 8 Tasto DETACH una sorgente. -
Page 66: Display Lcd
Sezione Funzionamento dell’unità 5 Indicatore TA Display LCD Mostra se è attivata la funzione TA (standby per i notiziari sul traffico). 6 Indicatore RPT Indica l’attivazione della riproduzione ripetu- 7 Indicatore LOUD Viene visualizzato sul display quando è atti- vata la funzione di sonorità. 1 Sezione del display principale 8 Indicatore stereo (5) Mostra le diverse informazioni come la... -
Page 67: Regolazione Del Volume
Sezione Funzionamento dell’unità Regolazione del volume Memorizzazione e richiamo delle frequenze di trasmissione % Usare VOLUME per regolare il livello so- noro. % Quando viene individuata una frequen- za che si desidera memorizzare, premere uno dei tasti di preselezione sintonia da 1 a Spegnimento dell’unità... -
Page 68: Memorizzazione Delle Frequenze Di Trasmissione Più Forti
Sezione Funzionamento dell’unità Memorizzazione delle frequenze Nome di servizio del programma—Informazio- ni PTY—Frequenza di trasmissione più forti Le informazioni PTY (codice ID del tipo di pro- La funzione BSM (memorizzazione delle sta- gramma) sono elencate a pagina 70. zioni migliori) consente di memorizzare auto- # Le informazioni PTY e la frequenza vengono vi- maticamente le sei frequenze di trasmissione sualizzate sul display per otto secondi. -
Page 69: Ricezione Dei Notiziari Sul Traffico
Sezione Funzionamento dell’unità ! Durante una ricerca di frequenza AF, l’audio ! Il numero della preselezione può scomparire può essere temporaneamente interrotto da un dal display se il sintonizzatore si sintonizza su altro programma. una stazione regionale diversa dalla stazione ! È... -
Page 70: Elenco Pty
Sezione Funzionamento dell’unità Lettore incorporato Note ! La funzione TA può essere attivata e disattiva- Riproduzione di un disco ta anche dal menu visualizzato premendo Inserire un CD nel vano d’inserimento FUNCTION. dei CD. ! Dopo la ricezione di un notiziario sul traffico, il La riproduzione viene avviata automaticamen- sistema torna alla sorgente originale. -
Page 71: Riproduzione Di Brani In Ordine Casuale
Sezione Funzionamento dell’unità Riproduzione di brani in ordine Regolazione dell’audio casuale Uso della regolazione del La riproduzione casuale consente di riprodurre bilanciamento i brani di un CD in ordine casuale. L’impostazione della dissolvenza/bilanciamen- Premere FUNCTION per selezionare to consente di realizzare un ambiente di ascol- RDM. -
Page 72: Regolazione Delle Curve D'equalizzazione
Sezione Funzionamento dell’unità ! Le impostazioni sono basate sul livello di Regolazione delle curve volume del sintonizzatore FM, che rimane d’equalizzazione immutato. L’impostazione della curva d’equalizzazione ! Con le regolazioni del livello della sorgente correntemente selezionata può essere modifi- è anche possibile regolare il livello di volu- cata in base alle proprie esigenze. -
Page 73: Impostazione Del Passo Di Sintonizzazione Fm
Attivazione/disattivazione ! Quando una guida vocale viene emessa della ricerca automatica PI dall’unità di navigazione Pioneer collegata L’unità può ricercare automaticamente una a questa unità. stazione diversa con la stessa programmazio- Il suono viene disattivato, viene visualizzata ne, anche durante il richiamo delle preselezio- l’indicazione MUTE e non è... -
Page 74: Informazioni Supplementari
Linee guida per l’uso dei Quando si contatta il rivenditore o il Centro as- dischi e del lettore sistenza Pioneer più vicino, accertarsi di ripor- tare il messaggio di errore. ! Utilizzare esclusivamente i dischi su cui è riportato il seguente logo. -
Page 75: Dual Disc
Appendice Informazioni supplementari ! Non attaccare etichette, non scrivere e non ! Fare riferimento alle informazioni fornite applicare prodotti chimici sulla superficie dal produttore del disco per informazione dei dischi. dettagliate sui Dual Disc. ! Per pulire un CD, passare delicatamente un panno morbido sul disco procedendo dal centro verso l’esterno. -
Page 76: Dati Tecnici
Rapporto segnale/rumore ... 65 dB (rete IEC-A) Bassi Frequenza ....100 Hz Guadagno ....±13 dB Questi prodotti DEH-1920R e DEH-1900R sono Medi conformi al DM 28/8/1995, N° 548, ottempe- Frequenza ....1 kHz rando alle prescrizioni di cui al DM 25/6/1985 Guadagno .... - Page 77 Inhoud Hartelijk dank voor het aanschaffen van dit Pioneer- product. Lees de instructies in deze handleiding goed door zodat u het toestel op de juiste manier leert te bedienen. Als u de instructies heeft gelezen, bewaar deze handleiding dan op een veilige plaats zodat u hem altijd bij de hand heeft voor later.
-
Page 78: Vóór U Begint
! De Pioneer CarStereo-Pass wordt alleen in recycling van gebruikte elektronische produc- Duitsland gebruikt. ten. ! Houd deze handleiding bij de hand zodat u de bedieningsprocedures en de te nemen voor- zorgsmaatregelen kunt opzoeken. -
Page 79: Het Toestel Tegen Diefstal Beveiligen
Hoofdstuk Vóór u begint Het toestel tegen diefstal beveiligen Het voorpaneel kan worden verwijderd om diefstal te ontmoedigen. Belangrijk ! Wees voorzichtig bij het verwijderen en terug- plaatsen van het voorpaneel. ! Stel het voorpaneel niet aan grote schokken bloot. ! Stel het voorpaneel niet bloot aan direct zon- licht en hoge temperaturen. -
Page 80: Bediening Van Het Toestel
Hoofdstuk Bediening van het toestel 3 3 3 4 4 4 8 8 8 7 7 7 8 DETACH-toets Wat is wat Druk op deze toets om het voorpaneel van Hoofdtoestel het hoofdtoestel te verwijderen. 1 SOURCE-toets 9 EQ-toets Het toestel wordt ingeschakeld zodra u een Druk op deze toets om de verschillende signaalbron selecteert. -
Page 81: Lcd-Display
Hoofdstuk Bediening van het toestel 5 TA-indicator LCD-display Deze geeft aan of de functie TA (stand-by voor verkeersberichten) is ingeschakeld. 6 RPT-indicator Deze geeft aan of herhaalde weergave is in- geschakeld. 7 LOUD-indicator Deze verschijnt in het display als de loud- ness is ingeschakeld. -
Page 82: Het Volume Afstellen
Hoofdstuk Bediening van het toestel Het volume afstellen Frequenties van zenders opslaan en oproepen % Gebruik VOLUME om de geluidssterkte te regelen. % Wanneer u heeft afgestemd op een fre- quentie die u in het geheugen wilt op- slaan, houdt u een van de Het toestel uitschakelen voorkeuzetoetsen 1 t/m 6 ingedrukt tot % Houd SOURCE ingedrukt tot het toestel... -
Page 83: Frequenties Van De Sterkste Zenders Opslaan
Hoofdstuk Bediening van het toestel # De PTY-informatie en de frequentie van de hui- Frequenties van de sterkste dige zender worden acht seconden op het display zenders opslaan getoond. Met de functie BSM (Best Stations Memory, geheugen voor de beste zenders) kunt u auto- PTY-nooduitzendingen ontvangen matisch de zes sterkste zenders opslaan onder de voorkeuzetoetsen 1 t/m 6. -
Page 84: Verkeersberichten Ontvangen
Hoofdstuk Bediening van het toestel PI-zoeken gebruiken Verkeersberichten ontvangen Als de tuner geen geschikte zender kan vin- Met de functie TA (stand-by voor verkeersbe- den, of als de ontvangst verslechtert, gaat het richten) kunt u automatisch verkeersberichten toestel automatisch op zoek naar een andere ontvangen, ongeacht de signaalbron waarnaar zender van hetzelfde programmatype. -
Page 85: Pty-Lijst
Hoofdstuk Bediening van het toestel ! Als de functie TA is ingeschakeld, wordt er bij # Plaats de CD met de bedrukte kant naar automatisch afstemmen of gebruik van de boven. # Nadat u de CD in het toestel heeft geplaatst, BSM-functie alleen afgestemd op TP-zenders drukt u op SOURCE om de ingebouwde CD-speler en uitgebreide TP-zenders van een ander net-... -
Page 86: Fragmenten Op Een Cd Scannen
Hoofdstuk Bediening van het toestel Druk op a of b om de functie willekeu- Audio-instellingen rige weergave in of uit te schakelen. De balansinstelling gebruiken Als willekeurige weergave is ingeschakeld, ver- schijnt RDM in het display. U kunt de fader/balansinstelling aanpassen # Druk op BAND om terug te keren naar het voor een optimale geluidsweergave voor alle normale display. -
Page 87: De Loudness Aanpassen
Hoofdstuk Bediening van het toestel Lage, hoge en middentonen aanpassen Vergelijk het volumeniveau van de sig- naalbron die u wilt aanpassen met dat van U kunt het niveau van de lage, hoge en mid- de FM-tuner. dentonen aanpassen. Druk op AUDIO en selecteer SLA. Druk op AUDIO en selecteer BASS/MID/ TREBLE. -
Page 88: De Fm-Afstemstap Instellen
Druk op c of d en selecteer de FM-af- ! Er is een navigatiesysteem met spraakbe- stemstap. geleiding van Pioneer op dit toestel aange- Druk op c om 50 (50 kHz) te selecteren. Druk sloten. op d om 100 (100 kHz) te selecteren. -
Page 89: Aanvullende Informatie
Schrijf een foutmelding altijd nauwkeurig op van discs en de speler en houd deze bij de hand als u contact op- neemt met uw leverancier of het dichtstbij- ! Gebruik uitsluitend discs met onderstaand zijnde Pioneer servicecentrum. logo. Melding Oorzaak Maatregel... -
Page 90: Dual Discs
Aanhangsel Aanvullende informatie ! Bewaar discs niet in een hete ruimte of in problemen te voorkomen wordt u aangera- direct zonlicht. den om geen Dual Discs te gebruiken met ! Plak geen labels op discs, schrijf er niet op dit toestel. ! Raadpleeg de informatie van de fabrikant en breng het oppervlak niet in aanraking met chemische middelen. -
Page 91: Technische Gegevens
Aanhangsel Aanvullende informatie Technische gegevens Signaal-tot-ruisverhouding ............. 94 dB (1 kHz) (IEC-A net- Algemeen werk) Dynamisch bereik ....92 dB (1 kHz) Spanningsbron ......14,4 V gelijkstroom (10,8 tot Aantal kanalen ......2 (stereo) 15,1 V toelaatbaar) Aarding ......... Negatief FM-tuner Max. - Page 92 Содержание Pioneer. – Перед началом эксплуатации – – – – Эксплуатация данного устройства – – – – – – – – – – – – – – – – PI 103 – – RDS 98 – – RDS 98 Дополнительная информация...
- Page 93 Раздел Перед началом эксплуатации RDS ( RDS. ВНИМАНИЕ ! “ 1” - 25 ! Pioneer CarStereo-Pass Pioneer. Сведения об этом устройстве...
- Page 94 Поместите переднюю панель в при- лагающийся защитный футляр для безопасного хранения. Установка передней панели Переместите переднюю панель влево до щелчка. Нажмите на правый край передней Pioneer панели и зафиксируйте ее. Corporation Защита Вашего устройства от кражи Важно Снятие передней панели...
- Page 95 Раздел Эксплуатация данного устройства 3 3 3 4 4 4 8 8 8 7 7 7 Описание элементов 7 Кнопка FUNCTION устройства Основное устройство 8 Кнопка DETACH 1 Кнопка SOURCE 9 Кнопка EQ a Кнопка DISPLAY 2 VOLUME b Кнопки 1 - 6 3 Щель...
- Page 96 Раздел Эксплуатация данного устройства Жидкокристаллический дисплей 5 Индикатор TA 6 Индикатор RPT 7 Индикатор LOUD 1 Основной сектор дисплея 8 Индикатор режима стерео (5) 9 Индикатор LOC ! RDS Основные операции , PTY- Включение устройства и выбор источника сигнала . 100). % Нажмите...
- Page 97 Раздел Эксплуатация данного устройства Запоминание и повторный вызов радиочастот % Если Вы нашли частоту, которую хотели бы сохранить в памяти, нажмите одну из кнопок предварительной на- Регулировка громкости стройки с 1 по 6 и удерживайте ее, пока % Используйте кнопку VOLUME для номер...
- Page 98 Раздел Эксплуатация данного устройства Запоминание частот самых Переключение режима RDS мощных трансляций дисплея BSM ( % Нажмите кнопку DISPLAY. DISPLAY — — PTY ( 100. Нажмите кнопку FUNCTION, чтобы Прием радиопередач выбрать функцию BSM. аварийного сигнала PTY Нажмите кнопку a, чтобы включить функцию...
- Page 99 Раздел Эксплуатация данного устройства Ограничение станций региональными программами F2.) Нажмите кнопку FUNCTION, чтобы выбрать функцию REG. Нажмите кнопку a или b, чтобы включить или выключить функцию региональных программ. Примечания ( . . Использование функции Поиск PI (по идентификатору программы) PI SEEK Использование...
- Page 100 Раздел Эксплуатация данного устройства Нажмите кнопку TA, чтобы включить JAZZ режим ожидания дорожных сводок. COUNTRY NAT MUS OLDIES FOLK MUS В начале приема дорожной сводки L.CLASS отрегулируйте громкость TA (дорожных CLASSIC сводок) с помощью кнопки VOLUME. EDUCATE DRAMA CULTURE SCIENCE VARIED Во...
- Page 101 Раздел Эксплуатация данного устройства Сканирование дорожек ERROR-11, компакт-диска 105. Повторное воспроизведение Нажмите кнопку FUNCTION, чтобы выбрать функцию SCAN. Нажмите кнопку a, чтобы включить сканирующее воспроизведение. Нажмите кнопку FUNCTION, чтобы SCAN. выбрать функцию RPT. Нажмите кнопку c или d, чтобы вы- брать...
- Page 102 Раздел Эксплуатация данного устройства Регулировка нижних, средних и Нажмите кнопку AUDIO, чтобы вы- брать функцию FAD. верхних звуковых частот Нажмите кнопку a или b, чтобы от- регулировать баланс передних и задних громкоговорителей. Нажмите кнопку AUDIO, чтобы вы- брать BASS, MID или TREBLE. FAD F15 FAD R15.
- Page 103 Раздел Эксплуатация данного устройства MW/LW- SOURCE Сравните уровень громкости FM- Установка шага настройки в тюнера с уровнем источника сигнала, FM-диапазоне который Вы хотите настроить. Нажмите кнопку AUDIO, чтобы вы- брать функцию SLA. Нажмите кнопку a или b, чтобы от- регулировать громкость источника сиг- нала.
- Page 104 Раздел Эксплуатация данного устройства Важно Нажмите кнопку FUNCTION, чтобы выбрать функцию SAVE. Нажмите a или b, чтобы включить или выключить функцию энер- госбережения. Приглушение звука Pioneer, MUTE,...
- Page 105 Приложение Дополнительная информация Устранение неисправностей Общие Признак Причина Действием. Сообщения об ошибках Рекомендации по обращению с дисками и проигрывателем Pioneer, Сообщение Причина Действие ERROR-11, 12, 17, 30 ERROR-11, 12, 17, 30 ERROR-10, 11, 12, 15, 17, 30, ERROR-15 ERROR-22, 23...
- Page 106 Приложение Дополнительная информация Двойные диски – DVD –...
- Page 107 Приложение Дополнительная информация Технические характеристики Проигрыватель компакт-дисков ........Общие ....14,4 ..10,8 15,1 ) ............. 44,1 ........... 16; ............. 10,0 × × ): ............. 20 000 (±1 ....... 178 × 50 × 162 ..94 IEC-A) ......... 188 × 58 × 16 .............
- Page 108 Приложение Дополнительная информация Примечание: “ ” № 16.06.97 Pioneer Europe . .): 5 Примечание...
- Page 109 TEL: (03) 9586-6300 PIONEER ELECTRONICS OF CANADA, INC. 300 Allstate Parkway, Markham, Ontario L3R OP2, Canada TEL: 1-877-283-5901 PIONEER ELECTRONICS DE MEXICO, S.A. de C.V. Blvd.Manuel Avila Camacho 138 10 piso Col.Lomas de Chapultepec, Mexico, D.F. 11000 TEL: 55-9178-4270 先鋒股份有限公司...