Table of Contents
Advertisement
Quick Links
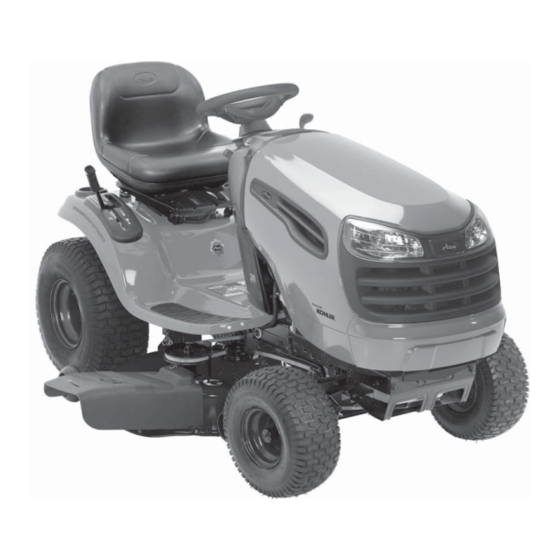
AUTOMATIC TRACTOR
Operator Manual
Models
936065 42" Automatic Tractor
Gasoline containing up to 10% ethanol (E10) or up to 10% MTBE (methyl tertiary butyl
ether) is acceptable for use in this machine. The use of any gasoline exceeding 10%
ethanol (E10) or 10% MTBE will void the product warranty.
ENGLISH
581 52 60-24 (21548080 ) Rev. 3 03.04.13
Printed in the U.S.A.
Advertisement
Table of Contents

Related Manuals for Ariens Lawn Tractor 20/42


Summary of Contents for Ariens Lawn Tractor 20/42
- Page 1 AUTOMATIC TRACTOR Operator Manual Models 936065 42" Automatic Tractor Gasoline containing up to 10% ethanol (E10) or up to 10% MTBE (methyl tertiary butyl ether) is acceptable for use in this machine. The use of any gasoline exceeding 10% ethanol (E10) or 10% MTBE will void the product warranty. ENGLISH 581 52 60-24 (21548080 ) Rev.
- Page 2 SAFETY RULES Safe Operation Practices for Ride-On Mowers DANGER: THIS CUTTING MACHINE IS CAPABLE OF AMPUTATING HANDS AND FEET AND THROW ING OBJECTS. FAILURE TO OBSERVE THE FOLLOWING SAFETY INSTRUCTIONS COULD RESULT IN SERIOUS INJURY OR DEATH. • Never leave a running machine unattended. Always turn WARNING: In order to prevent ac ci den tal off blades, set parking brake, stop engine, and remove starting when setting up, trans port ing,...
- Page 3 SAFETY RULES Safe Operation Practices for Ride-On Mowers III. CHILDREN • If fuel is spilled on clothing, change clothing immediately. • Never overfill fuel tank. Replace gas cap and tighten securely. WARNING. CHILDREN CAN BE INJURED BY THIS EQUIPMENT. The American Academy GENERAL SERVICE of Pediatrics recommends that children be a •...
-
Page 4: Table Of Contents
PRODUCT SPECIFICATIONS CONGRATULATIONS on your purchase of a new tractor. It has been designed, engineered and manu fac tured to give you the best possible dependability and performance. Gasoline Capacity 2.5 Gallons/9,46 L And Type: Unleaded Regular Should you experience any problem you cannot easily remedy, please contact your nearest authorized service Oil Type (API: SG-SL): SAE 10W30 (Above32°F/0°C) -
Page 5: Assembly
UNASSEMBLED PARTS Keys Slope Sheet (1) Oil Drain Tube (1) Quick Connect Key(s) ASSEMBLY Your new tractor has been assembled at the factory with exception of those parts left unassembled for shipping purposes. TOOLS REQUIRED FOR ASSEMBLY • For battery and battery cable installation see "RE- PLACING BATTERY"... - Page 6 ASSEMBLY NOTE: You may now roll your tractor off the skid. Continue ✓ CHECKLIST using the instructions that follow to remove the tractor from the skid. BEFORE YOU OPERATE YOUR NEW TRAC TOR, WE WARNING: Before start ing, read, un der stand and fol- WISH TO ENSURE THAT YOU RECEIVE THE BEST low all in struc tions in the Op er a tion section of this man u al.
-
Page 7: Operation
OPERATION These symbols may appear on your tractor or in literature supplied with the product. Learn and understand their meaning. indicates a hazard which, if not avoided, indicates a hazard which, if not avoided, indicates a hazard which, if not avoided, when used the alert symbol, indicates a situation that... - Page 8 OPERATION KNOW YOUR TRACTOR READ THIS MANUAL AND SAFETY RULES BEFORE OPERATING YOUR TRACTOR Compare the illustrations with your tractor to familiarize yourself with the locations of various controls and ad just ments. Save this manual for future reference. Fig. 3 Our tractors conform to the applicable safety standards of the American National Standards Institute.
-
Page 9: How To Use Your Tractor
OPERATION The operation of any tractor can result in foreign objects thrown into the eyes, which can result in severe eye dam age. Always wear safety glass es or eye shields while operating your tractor or per form ing any ad just ments or repairs. We rec om mend standard safety glasses or a wide vision safety mask worn over spectacles. - Page 10 OPERATION • Adjust mower to desired cutting height (See “TO AD- TO MOVE FORWARD AND BACKWARD JUST MOWER CUT TING HEIGHT” in the Operation (See Fig. 7) sec tion of this manual). • With mower in desired height of cut po si tion, gauge The direction and speed of movement is controlled by the wheels should be assembled so they are slightly off motion control lever(J).
- Page 11 OPERATION TO TRANSPORT (See Fig. 12) TO OPERATE ON HILLS When pushing or towing your tractor, ensure to disengage transmission by placing freewheel control in free wheel ing CAUTION: Do not drive up or down hills with slopes greater than 15° and do not po si tion.
-
Page 12: Before Starting The Engine
OPERATION TO START ENGINE (See Fig. 3) BEFORE STARTING THE ENGINE When starting the engine for the first time or if the engine CHECK ENGINE OIL LEVEL has run out of fuel, it will take extra cranking time to move fuel from the tank to the engine. - Page 13 OPERATION PURGE TRANSMISSION MOWING TIPS • DO NOT use tire chains when the mower hous ing is CAUTION: Never engage or disengage free- attached to tractor. wheel lever while the engine is run ning. • Mower should be properly leveled for best mowing performance.
-
Page 14: Maintenance
MAINTENANCE Check Brake Operation Check Tire Pressure Check Operator Presence & ROS Systems Check for Loose Fasteners Check/Replace Mower Blades Lubrication Chart Check Battery Level Clean Battery and Terminals Clean Debris Off Steering Plate ck Transaxle Cooling Check Mower Levelness ck V-Belts Check Engine Oil Level Change Engine Oil (models with oil filter) -
Page 15: Blade Care
MAINTENANCE TRACTOR BLADE CARE For best results mower blades must be kept sharp. Re place Always observe safety rules when per form ing any bent or damaged blades. main te nance. CAUTION: Use only a replacement blade ap- BRAKE OPERATION proved by the manufacturer of your tractor. -
Page 16: Clean Air Screen
MAINTENANCE V-BELTS OIL DRAIN VALVE Check V-belts for deterioration and wear after 100 hours CLOSED of operation and replace if necessary. The belts are not ad just able. Re place belts if they begin to slip from wear. LOCKED POSITION TRANSAXLE MAINTENANCE The transmission fan and cooling fins should be kept clean DRAIN... - Page 17 MAINTENANCE IN-LINE FUEL FILTER (See Fig. 17) DECK WASHOUT PORT (See Fig. 19) The fuel filter should be replaced once each season. If fuel Your tractor’s deck is equipped with a washout port as part filter becomes clogged, ob struct ing fuel flow to car bu re tor, of its deck wash system.
-
Page 18: Service And Ad Just Ments
SERVICE AND ADJUSTMENTS WARNING: TO AVOID SE RI OUS IN JU RY, BEFORE PERFORMING ANY SERVICE OR ADJUSTMENTS: • Depress brake pedal fully and set parking brake. • Place motion control lever in neutral position. • Place attachment clutch in “DISENGAGED” position. •... -
Page 19: Service And Adjustments
SERVICE AND ADJUSTMENTS • ATTACH MOWER SIDE SUSPENSION ARMS (A) TO • ATTACH FRONT LINK (E) - Work from left side of trac- CHASSIS - Position hole in arm over pin (B) on outside tor. Insert rod end of link assembly through front hole of tractor chassis and secure with retainer spring. - Page 20 SERVICE AND ADJUSTMENTS TO LEVEL MOWER • If adjustment is necessary, see step in Visual Adjust- ment instructions above. Ensure tires are properly inflated to the PSI shown on tires. • Recheck measurements, adjust if necessary until both If tires are over or under inflated, it may affect the appear- sides are equal.
- Page 21 SERVICE AND ADJUSTMENTS TO REPLACE MOWER BLADE DRIVE BELT TO REPLACE MOTION DRIVE BELT (See Fig. 30) (See Fig. 31) Park the tractor on level surface. En gage parking brake. MOWER DRIVE BELT REMOVAL For as sis tance, there is a belt installation guide decal on •...
- Page 22 SERVICE AND ADJUSTMENTS TRANSAXLE MOTION CONTROL LEVER NOTE: To seal tire punctures and prevent flat tires due to slow leaks, tire sealant may be purchased from your NEUTRAL ADJUSTMENT (See Fig. 32) local parts dealer. Tire sealant also prevents tire dry rot The motion control lever has been pre set at the factory and corrosion.
- Page 23 SERVICE AND ADJUSTMENTS REPLACING BATTERY (See Fig. 35) TO REMOVE HOOD AND GRILL ASSEMBLY (See Fig. 36) WARNING: Do not short battery • Raise hood. ter mi nals by allowing a wrench or any • Unsnap headlight wire connector. other object to contact both terminals •...
-
Page 24: Storage
STORAGE ENGINE Immediately prepare your tractor for storage at the end of the season or if the tractor will not be used for 30 days or more. FUEL SYSTEM IMPORTANT: IT IS IMPORTANT TO PREVENT GUM DEPOSITS WARNING: Never store the trac tor with FROM FORMING IN ES SEN TIAL FUEL SYSTEM PARTS SUCH gas o line in the tank inside a building AS CARBURETOR, FUEL FIL TER, FUEL HOSE, OR TANK... -
Page 25: Trou Ble Shoot Ing
TROUBLESHOOTING PROBLEM CAUSE CORRECTION 1. Out of fuel. 1. Fill fuel tank. Will not start 2. Engine not “CHOKED” properly. 2. See “TO START ENGINE” in Operation section. 3. Engine flooded. 3. Wait several minutes before attempting to start. 4. Bad spark plug. 4. - Page 26 TROUBLESHOOTING PROBLEM CAUSE CORRECTION Engine continues to 1. Faulty operator-safety presence control 1. Check wiring, switches and connections. If not run when operator system. corrected, contact an authorized service center/ department. leaves seat with attachment clutch CAUTION: DO NOT operate machine until engaged problem is corrected.
- Page 27 SERVICE NOTES...
-
Page 28: Warranty
In the event you have a claim under this Warranty, you must return the product to an authorized service dealer. Should you have any unanswered questions concerning this Warranty, please contact: Ariens 655 W. Ryan Street Brillion, WI 54110 1-877-257-6920 www.ariens.com... - Page 30 Ariens Company 655 West Ryan Street Brillion, WI 54110-1072 1-877-257-6920 www.ariens.com WARNING The engine exhaust from this product contains chemicals known to the State of California to cause cancer, birth defects or other reproductive harm.
- Page 31 à malformations cancer, cause étant comme Californie l’État reconnus chimiques produits contient produit moteur ’échappement AVERTISSEMENT www.ariens.com 1-877-257-6920 54110-1072 Brillion, Street Ryan West Company Ariens...
- Page 33 CETTE acheté. l’avez vous chez autorisé naire concession- l’adresse ainsi machine votre d’achat date série, numéro modèle, numéro donnant nous www.ariens.com 1-877-257-6920 54110 Brillion, Street Ryan Ariens contactez: plaît vous s’il garantie, cette concernant réponse sans question aucune auriez vous autorisé.
- Page 34 D’ENTRETIEN REMARQUES...
- Page 35 arrière marche sseen tracteur elorsque s’arrêt- accessoire) 'OFF'. position dans (ROS) tondeuse 'ON'. position dans Tournez arrière marche fonctionnement Système (OFF). coupé moteur. moteur. couper avant lent) ('FAST') moteur quand ieux couper avant lent) rapide (entre intermédiaire rapide (entre intermédiaire position dans silenc-...
- Page 36 endommagées. pièces Remplacez lâches. pièces Serrez endommagées. lâches sont pièces tondeuse excessives lame. mandrin Remplacez tordu. lame mandrin Vibrations lame. boulon fond à Serrez lame. Remplacez lâche. tordue, usée, lame autorisé. d’entretien centre Contactez unréglage. demandent moteur soupapes câblage. tout Vérifiez endommagé.
- Page 37 CHAUDS. ENCORE SONT D’ÉCHAPPEMENT ENDROITS MOTEUR QUAND TRACTEUR JAMAIS COUVREZ IMPORTANT: tracteur. rouiller fera condensation formation permet d’air circulation obstrue plastique plastique. couverture N’uti perméable. couverture avec tracteur Couvrez • saleté. poussière protéger pour couvrez-le possible, l’intérieur, à tracteur Entreposez •...
- Page 38 bord. bleau derrière ment situé porte-fusible 20A. automobile, type enfichable fusible Remplacez FUSIBLE REMPLACER POUR câblage. Vérifiez • tracteur. non-démarrage l'arrêt fonctionnement, mauvais cause être peut avarié desserré câblage moteur. manuel RELAIS VERROUS voir né réglage nécessaire. être devrait réglage l’usine à...
- Page 39 Fig. MENT) ARRIÈRE (ROUE CARRÉE CLÉ ESSIEU COUVRE- Fig. RETENUE CHARGÉE DÉCHARGÉE BAGUE MENT TIÈ BATTERIE FAIBLE BATTERIE couvre-essieu. Réinstallee • d’essieu. rainure dans retenue bague fond à insérez rondelles Réinstallee • carrée. clé Insérez l’essieu. arrière roue moyeu dans rainures alignez seulement:...
- Page 40 Fig. electric 02953 professionnel. d’entretien centre avec Communiquez vérifiés. être doivent freins tournent, arrière roues l’avant. vers tracteur pousser tentez vous lorsque déraper bloquées être doivent arrière roues désenclenchée. position dans soit qu’il à façon relâchez-le rainure dans placez- libre roue contrôle Tirez...
- Page 41 réglage. l’écrou contre fermement contre-écrou Fig. serrez clé avec place réglage l’écrou Maintenez • arrière. pointe à inférieure 1/2" à 1/8" lame avant pointe jusqu’à nécessaire ajustez mesures, nouveau Vérifiez • 1/8". d’environ tondeuse hauteur modifie réglage l’écrou complet tour Chaque REMARQUE: 02966...
- Page 42 Fig. manuel. Fonctionnement section dans montré tondeuse, d’utiliser avant réglage roues ajustez nécessaire, • Fig. haute. plus position à levage levier Soulevez • tondeuse. poulies sillons dans place bien courroie Assurez-vous IMPORTANT: Fig. ressort-arrêtoir. d’un rondelle d’une l’aide à fermement fixez tondeuse arrière...
- Page 43 Fig. tracteur. dessous tondeuse Glissez • position. changez vous lorsque levier fermement Tenez ressort. à mécanisme celui-ci. centre possède d’accrochage levier bielles, soit qu’elle jusqu’à tracteur, sous tondeuse Glisser • désengagé avoir Après ATTENTION tracteur. sous tondeuse glisser avant l’avant vers pointent tondeuse...
- Page 44 d’arrêt. écrous boulons avec tondeuse trous tous Obstruez • tondeuse. réutiliser avant manquant cassé lavage raccord immédiatement Remplacez • lame. contact venus d’objets projection à personnes d’autres tondeuse. tracteur débris feuilles l’herbe, vous exposer vous peut manquant retirer pour feuilles à...
- Page 45 montrée. comme verrouillée position soit cheville jusqu’à montre d’une aiguilles sens dans tournant rieur manuel. PRODUIT’’ TIONS té- l’in vers poussant vidange soupape verrouillez “SPÉ section à référez-vous d’écartement, réglage serrez complètement, écoulée soit l’huile Après • d’allumage bougie type Pour premier.
- Page 46 endommagées. bées cour lames Remplacez tranchantes. être toujours vent manuel). REGLAGES RÉVISION section dans doi- tondeuse lames résultats, meilleurs obtenir Pour BATTERIE” “REPLACER (Voir Réins • LAMES ENTRETIEN pétrolatum. graisse avec bornes Enduisez • Fig. brillent. qu’ils jusqu’à métallique brosse avec batterie câbles...
- Page 47 GRAPHITE. TYPE POUDRE SEC, LUBRIFIANT MODÉRATION AVEC SEULEMENT UTILISEZ LUBRIFIÉS, ÊTRE DOIVENT QU’ILS PENSEZ VOUS AUTOMATIQUE. LUBRIFICATION À PALIERS DURABILITÉ DIMINUENT SALETÉS POUSSIÈRE ATTIRENT LUBRIFIANTS NYLON. PALIERS PIVOT POINTS GRAISSE HUILE METTEZ IMPORTANT: ➁ moteur sous ENTRETIEN section à Référez-vous ➀...
- Page 48 tion l’uti pour prêt purgé maintenant transmission Votre fois. trois procédé Répétez mort. point position à déplacement commande levier retournez pieds), environ bouge tracteur Après arrière. marche position à levier ment déplacez pieds), environ bouge tracteur quand ensuite avant marche position à...
- Page 49 ajouté. été stabilisateur carburateur carburant réservoir videz carburateur. parvenir stabilisateur permettre afin stabilisateur l’ajout après minutes moins moteur tourner Faites stabilisateur. contenant indiquées mélange proportions toujours Respectez remisage. contenant dans réservoir dans l’essence à stabilisateur Ajoutez remisage. pendant d’essence gomme formation chaude.
- Page 50 Fig. NORMALE) (OPÉRATION MOTEUR POSITION pas. tourne moteur lorsque "STOP" position clé assurez-vous précise, lecture Pour "STOP". sauf position toutes dans contact clé lorsque fonctionne d'entretien rappel REMARQUE: manuel. Entretien section horaire sens contact clé tourner à référez-vous tondeuse, moteur courant l'entretien faites...
- Page 51 plat. terrain tracteur quand roue Réglez REMARQUE: terrains. plupart égazonnement prévenir pour place carter gardent roues cas, Dans désirée. coupe hauteur à tondeuse borsque au-dessus légèrement trouvent elles quand réglées bien sont jauge roues Fig. (Voir Fig. JAUGE ROUES RÉGLER POUR désirée.
- Page 52 flammes". "retour provoquer risquez vous intermédiaire, position manette placer oubliez vous REMARQUE: lent). rapide (entre intermédiaire position commande Placez • MOTEUR mort point tion à déplacement commande levier Déplacez • "Frein". position à frein pé complètement, abaisser l'entraînement, arrêter Pour •...
- Page 53 moteur. couper saire. démarrer permet D’ALLUMAGE CONTACTEUR néces- tondeuse moteur l’entretien lorsque Indique D’ENTRETIEN/HOROMÈTRE INDICATEUR tracteur. montés autres tondeuse lames engager pour sé pas. fonctionne moteur quand D'ATTACHEMENT D'EMBRAYAGE LEVIER tracteur remorquage transport pour mission trans- débraye LIBRE ROUE COMMANDE moteur.
- Page 54 évité, n'est s'il qui, risque indique propriété. votre endommager et/ou blessures sérieuses mort, résultats pour avoir peuvent évité, n'est risques, propos à sécurité s'il qui, risque indique informations identifier pour utilisé sécurité à d'alerte symbole mort. même blessures sérieuses résulter pourrait sécurité...
- Page 55 manuel.) Réglages Entretien section dans FREINS" VÉRIFIER "POUR (Voir correctement. fonctionnent freins vérifiez tracteur, votre fonctionnement avec familiarisé être vous Après FREIN SYSTÈME VÉRIFIER l'utilisateur.) nuel dans TRANSMISSION” “PURGER MOTEUR” guides-courroie. dans position ment DÉMARRER “POUR sections (Référez-vous sion soient courroies toutes Assurez-vous...
- Page 56 Fig. manuel). Entretien section dans "BATTERIE" (Voir amps. 6-10 à heure d'une minimum pour batterie chargez nes), entre localisée (Étiquette l'étiquette indiquée l'année mois après service mise batterie cette REMARQUE: elevée. position à siege Levez • Fig. (Voir BATTERIE VÉRIFIER PALETTE TRACTEUR RETIRER...
- Page 57 ..........D'ENTRETIEN GUIDE ..............GARANTIE 7-13 ............UTILISATION 25-26 ........DÉPANNAGE GUIDE ..............MONTAGE ............ENTREPOSAGE ......... CLIENT RESPONSABILITÉS 18-23 ........RÉGLAGES RÉVISION ........ PRODUIT SPÉCIFICATIONS 14-17 ............ENTRETIEN ..........SÉCURITÉ RÈGLES SOMMAIRE proche. plus autorisé d’entretien centre disponible silencieux pour pare-étincelles l’opérateur.
- Page 58 15°. recommandé maximal fonctionnement l'angle dépasser ouverte. buse machine, décharger charger moment • verrouillage dispositif N’utilisez remplissage. l’opération jusqu’à récipient l’ouverture descente. dans progressivement lentement tournez dans nécessaire, strictement d’essence réservoir bord contact buse Laissez • n’est cela pentes dans virage N’effectuez •...
- Page 59 s’éboule. bord précipiter bord gravillonnées. allées traversez vous lorsque lames par-dessus l’improviste à culbuter risque machine talus. Arrêtez l’opérateur. vers rebondir risque matériau tacle. fossés ravins, proximité à jamais tondez • obs- contre matériau décharger Evitez terre. à soit. vers déchargé...
- Page 60 É.-U. Imprimé 03.04.13 Rev. (21548080 60-24 produit. garantie annulera MTBE d’éthanol plus contenant d’essence ’utilisation appareil. avec méthyl-tertiobutylique) (éther MTBE (E10) d’éthanol jusqu’à contenant l’essence utiliser pouvez Vous Automatique Tracteur 42" 936065 Modèles l’Opérateur Manuel AUTOMATIQUE TRACTEUR...