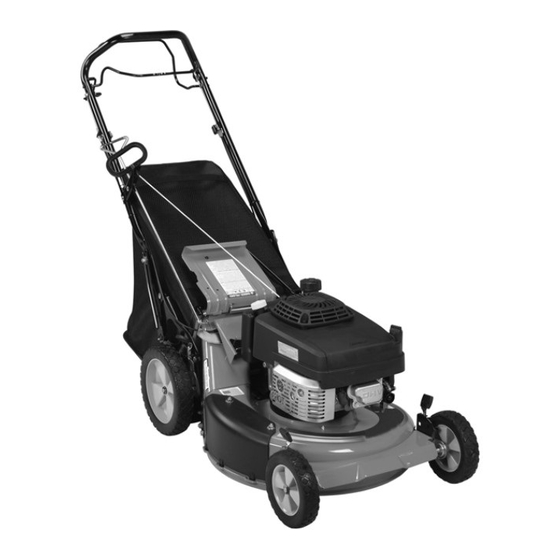
Ariens Classic LM 21 Manual
Walk behind lawn mower
Hide thumbs
Also See for Classic LM 21:
- Owner's/operator's manual (66 pages) ,
- Illustrated parts list (5 pages) ,
- Owner's and operator's manual (28 pages)
Table of Contents
Advertisement
Walk Behind Lawn Mower
Owner/Operator Manual
Manuel Du Propriétaire/Utilisateur
Gasoline containing up to 10% ethanol (E10) or up to 10% MTBE (methyl tertiary butyl ether) is acceptable
for use in this machine.
The use of any gasoline exceeding 10% ethanol (E10) or 10% MTBE will void the product warranty.
Il est possible d'utiliser de l'essence contenant jusqu'à 10% d'éthanol (E10) ou 10% de MTBE (éther
méthyl-tertiobutylique) sur cette machine.
L'utilisation d'une essence contenant plus de 10% d'éthanol (E10) ou de 10% de MTBE annulent la
garantie.
911170 – LM21 Classic
911192 – LM21 Classic
911193 – LM21S Classic
911194 – LM21SW Classic
ENGLISH
FRANÇAIS
Models
04502200 2/12
Printed in USA
Advertisement
Table of Contents

Related Manuals for Ariens Classic LM 21


Summary of Contents for Ariens Classic LM 21
- Page 1 Walk Behind Lawn Mower Owner/Operator Manual Manuel Du Propriétaire/Utilisateur Models 911170 – LM21 Classic 911192 – LM21 Classic 911193 – LM21S Classic 911194 – LM21SW Classic Gasoline containing up to 10% ethanol (E10) or up to 10% MTBE (methyl tertiary butyl ether) is acceptable for use in this machine.
-
Page 2: Table Of Contents
équipement. Rendez-vous chez votre revendeur ou allez sur le site www.ariens.com pour consulter la liste des langues disponibles pour votre équipement. GB - 2... -
Page 3: Product Registration
1. Check that all assembly and adjustments have been properly completed. 2. Fill out Original Purchaser Registration Card and return the card to Ariens. 3. Explain Ariens Limited Warranty Policy. 4. Explain recommended lubrication and maintenance. Advise customer on adjustments. Remind customer to... -
Page 4: Safety
SAFETY CAUTION: POTENTIALLY WARNING: This cutting machine HAZARDOUS SITUATION! If not is capable of amputating hands avoided, MAY RESULT in minor or and feet and throwing objects. moderate injury. It may also be Failure to observe the safety used to alert against unsafe instructions in the manuals and practices. -
Page 5: Safety Decals And Locations
Read the operator’s manual. unauthorized personnel may result in severe fines or penalties. Emission controls and components can only be adjusted by an Ariens Company dealer or an authorized OL1801 engine manufacturer's service center. Contact your Ariens Company Equipment Keep children and others away Retailer concerning emission controls and from unit while operating. - Page 6 ALWAYS remove key (if equipped) and NEVER operate mower barefoot or when disconnect wire from spark plug before wearing open sandals or canvas shoes. assembly. Unintentional engine start up can NEVER wear loose clothes, long hair or cause death or serious injury. jewelry that may get caught in rotating parts.
- Page 7 Do NOT put battery in fire or mutilate. or federal laws. A spark arrestor, if used, must be maintained in effective working order Explosive Gases! by the operator. See your Ariens Dealer or NO flames, NO sparks, NO smoking, near engine manufacturer’s service center. battery.
- Page 8 Battery posts, terminals and related Use only accessories which have been accessories contain lead and lead approved by Ariens and are properly compounds, chemicals known to the State of installed. California to cause cancer and reproductive Use only accessories or attachments that are harm.
-
Page 9: Assembly
ASSEMBLY ASSEMBLY CAUTION: AVOID INJURY. Read 1. Unfold and adjust handlebar. See and understand the entire Safety HANDLEBAR HEIGHT on page 20. section before proceeding. NOTE: DO NOT bend the speed control rod (if equipped) when unfolding the handlebars. CARTON CONTENTS 2. -
Page 10: Controls And Features
CONTROLS AND FEATURES OM3195 Figure 4 1. Engine/Blade Control 12. Primer Bulb (911192, 193, 194) 2. Wheel Drive Control (911193, 194) 13. Air Filter 3. Adjustable and Folding Handlebars 14. Side Discharge Cover 4. Swivel Wheel Lock (911194) 15. Side Discharge Deflector 5. -
Page 11: Operation
OPERATION CONTROLS AND FEATURES Handlebar Adjust handlebar to a safe and comfortable See Figure 4 for locations. height. See HANDLEBAR HEIGHT on page 20. WARNING: Improper operation Recoil Starter Handle can lead to injury. Learn what the controls do and how they work. When pulled, handle will turn engine over. - Page 12 Standard Models Swivel Wheel Models (911194) To change cutting height, move cutting height levers one notch at a time on each wheel to To change front wheel cutting height, insert set desired height (Figure 5). height adjuster pin into the holes that match the desired cutting height and fasten with key NOTE: Each wheel on mower must be set at the same height for a level cut.
- Page 13 Speed Control (self-propelled Wheel Drive Control (self-propelled models) models) Speed control rod changes the mower’s forward travel speeds. CAUTION: Unit will move forward at engine start if wheel drive Fast – Push rod all control is engaged. ALWAYS the way forward. release wheel drive control before starting unit.
-
Page 14: Filling The Fuel Tank
Fuel Stabilizer Unlock - Wheel Gasoline left in the fuel system for extended Swivels periods without a stabilizer will deteriorate, resulting in gum deposits in the system. These deposits can damage the carburetor and the fuel hoses, filter and tank. Prevent deposits from forming in the fuel system during storage by adding a quality fuel stabilizer to the fuel. - Page 15 Make sure deflector covers frequently for wear or discharge opening. deterioration. Replace worn or 6. Secure with cover hardware from step 4. damaged bag with Ariens original equipment replacement bag only. Side Discharge Deflector 1. Shut off unit. 2. Install side discharge cover.
-
Page 16: Emergency Stopping
EMERGENCY STOPPING Shut Off 1. Release wheel drive control and allow To stop the mower in an emergency: unit to stop completely (self-propelled 1. Release the engine/blade control. models). 2. Release the wheel drive control (self- 2. Release engine/blade control. propelled models). -
Page 17: Maintenance
SCHEDULE and understand the entire Safety section before proceeding. Before Service Each Ariens Dealers will provide any service, parts Performed or adjustments which may be required to keep your unit operating at peak efficiency. Check • Should engine require service, contact an... -
Page 18: Check Wheel Drive Control
NEVER weld or straighten bent Check grass bag frequently for wear or blades. deterioration. Replace worn or damaged bag with an Ariens original equipment replacement bag only. 1. Remove mower blade from unit. Discard mower blade if: CLEAN UNIT •... -
Page 19: General Lubrication
3. Check mower blade balance. GENERAL LUBRICATION Slide mower blade on an unthreaded Swivel Wheels (911194) bolt. A balanced blade should remain in See Figure 13. a horizontal position. If either end of mower blade moves downward, sharpen Use Mix Hi-Temp Grease or equivalent on the the heavy end until blade is balanced lube fittings. -
Page 20: Service And Adjustments
SERVICE AND ADJUSTMENTS DRIVE BELT REPLACEMENT CAUTION: AVOID INJURY. Read (Self-Propelled Models) and understand the entire Safety section before proceeding. To remove drive belt: 1. Disconnect spark plug wire. SERVICE POSITION 2. Set the right rear wheel to its lowest cutting height, and the left rear wheel to Put unit into service position for easy access the third cutting height. - Page 21 ENGINE/BLADE CONTROL 4. Tighten lower cable nut to ADJUSTMENT (911192, 193, 194) 3 mm below To adjust engine/blade control: bracket. Release z-bend 1. Loosen cable nuts away from bracket. bracket. OM1020 5. Tighten upper cable nut until bracket is secure between cable nuts.
- Page 22 WHEEL DRIVE CONTROL To increase the gap, ADJUSTMENT loosen the lower (Self-Propelled Models) cable nut. See Figure 16. NOTE: When the wheel drive control is disengaged, the gap between the friction disc and the aluminum drive plate should be approximately .030" (.7mm). See Figure 16. Friction Disc Aluminum Drive Plate...
-
Page 23: Speed Control Bell Crank
SPEED CONTROL BELL CRANK To decrease the gap, (Self-Propelled Models) loosen the upper cable nut. The speed control bell crank holds the speed control rod in position after a speed has been set. The spring washers may become loose with normal wear. If the speed control rod does not stay firmly in position, adjust the speed control bell crank. -
Page 24: Storage
To treat the fuel system for storage: to prevent rust. Matching touch-up paint is 1. Add fuel stabilizer according to available from your Ariens Dealer. Do not use manufacturer’s instructions. abrasives, solvents, or harsh cleaners. 2. Run engine for at least 10 minutes after... -
Page 25: Troubleshooting
TROUBLESHOOTING PROBLEM PROBABLE CAUSE CORRECTION Engine will not 1. Fuel tank empty or low. 1. Check fuel level. Fill tank if necessary. start 2. Spark plug wire loose or off. 2. Check connection. 3. Engine/Blade control cable 3. Check cable. Adjust, repair detached, broken, or not or replace as necessary. -
Page 26: Service Parts
SERVICE PARTS ACCESSORIES Always use genuine Ariens parts to keep See your authorized Ariens Dealer to add your mower running like new. these optional accessories. Description Part Number 71102400 Dethatcher Air Filter 21543500 (911170) 71102700 Mulchmaster Plug Air Filter 21541000 (911192, 193, 194) -
Page 27: Specifications
SPECIFICATIONS Model Number 911193 911194 911170 911192 Description LM21S LM21SW LM21 LM21 Length – in. (cm) 61.5 (156) Height – in. (cm) 38 (96.5) Width – in. (cm) 23 (58.4) Actual Weight – lbs (kg) 109 (49.4) 125 (56.7) 99 (44.9) 99 (44.9) Cutting Width –... -
Page 28: Warranty
Register the product immediately at the time of sale. If the dealer does not register the product, the customer must complete the product registration card in the literature package and return it to the Ariens Company, or register the unit online at www.ariens.com, www.gravely.com, www.countax.com. - Page 29 Exclusions - Items Not Covered by This Warranty • Parts that are not genuine Ariens, Gravely or Countax service parts are not covered by this warranty and may void the warranty. • Damages resulting from the installation or use of any part, accessory, or attachment which is not approved by the Ariens Company for use with product(s) identified herein are not covered by this warranty.
-
Page 30: Warranty Statement
Ariens Company cannot deny warranty solely for the lack of receipts. • As the small off-road equipment owner, you should however be aware that the Ariens Company may deny you warranty coverage if your evaporative emission control system part has failed due to abuse, neglect, or improper maintenance or unapproved modifications. - Page 31 (4.) Repair or replacement of any warranted part under the warranty provisions of this article must be performed at no charge to the owner at an authorized Ariens, Gravely, or Parker service representative. (5.) Notwithstanding the provisions of subsection (4) above, warranty services or repairs must be provided at authorized Ariens, Gravely, or Parker service representatives that are franchised to service the subject small off-road equipment.
- Page 32 Ariens 655 West Ryan Street Brillion, WI 54110-1072 920-756-4688 Fax 920-756-2407 www.ariens.com...