Table of Contents
Advertisement
Advertisement
Table of Contents

Related Manuals for Visioneer Mobility


Summary of Contents for Visioneer Mobility
- Page 1 Visioneer ® Mobility User's Guide...
- Page 2 Information is subject to change without notice and does not represent a commitment on the part of Visioneer. The software described is furnished under a licensing agreement. The software may be used or copied only in accordance with the terms of such an agreement. It is against the law to copy the software on any medium except as specifically allowed in the licensing agreement.
- Page 3 IF YOU FIND PHYSICAL DEFECTS IN THE MATERIALS OR THE WORKMANSHIP USED IN MAKING THE PRODUCT DESCRIBED IN THIS DOCUMENT, VISIONEER WILL REPAIR, OR AT ITS OPTION, REPLACE THE PRODUCT AT NO CHARGE TO YOU, PROVIDED YOU RETURN IT (POSTAGE PREPAID, WITH PROOF OF YOUR PURCHASE FROM THE ORIGINAL RESELLER) DURING THE 90-DAY PERIOD AFTER THE DATE OF YOUR ORIGINAL PURCHASE OF THE PRODUCT.
-
Page 5: Table Of Contents
Visioneer Mobility Scanner Specifications ........ - Page 6 ABLE OF ONTENTS...
-
Page 7: Welcome
Welcome Thank you for purchasing the Visioneer Mobility sheetfed scanner. With this scanner you can scan directly to a memory card or USB flash drive without connecting the scanner to a computer. ’ S IN THE Before proceeding, check the contents of the box. If items are missing or damaged, contact the dealer where you purchased the scanner. -
Page 8: The Visioneer Mobility Scanner
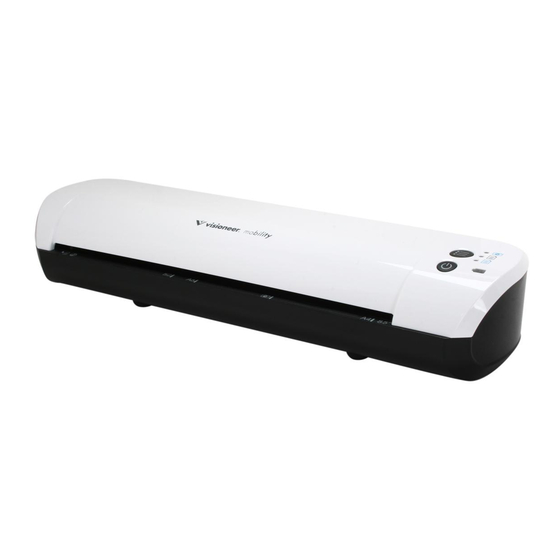
’ ISIONEER OBILITY CANNER UIDE ISIONEER OBILITY CANNER Status LEDs Function button Scan functions Power button Battery LED Glass release button USB flash drive port Alignment arrow Paper feed slot USB cable Memory Battery port card slot compartment Paper feed slot—Insert an item face up in the scanner, aligned to the arrow at the end of the paper feed slot. - Page 9 ELCOME Scans in black & white at 300dpi and creates an Adobe PDF (*.pdf ) file. Scans in color at 300dpi and creates an Adobe PDF (*.pdf ) file. • Battery LED—This light indicates the scanner’s power status. The scanner is not plugged in, the battery is not in the scanner, or the scanner is turned off. The scanner power is on.
-
Page 10: Insert The Battery
’ ISIONEER OBILITY CANNER UIDE NSERT THE ATTERY The battery comes pre-installed in the scanner’s battery compartment. Simply turn the scanner over and remove the protective plastic strip from the battery compartment. If the battery is not pre-installed in your unit, or if you need to replace the battery for any reason, please follow these instructions for installing the battery. -
Page 11: Connect The Scanner To Charge The Battery
ELCOME ONNECT THE CANNER TO HARGE THE ATTERY Important! • Allow the battery to charge for at least 8 hours before using the scanner the first time. Note that recharging the battery, after using the scanner, takes only 4 hours for a completely drained battery. - Page 12 ’ ISIONEER OBILITY CANNER UIDE Plug the power supply into a wall outlet. Note: You can also charge the scanner battery by plugging both ends of the USB cable into two USB ports on your computer.
-
Page 13: Register Your Scanner
Press Enter on your computer’s keyboard or click the option on screen to go to the web address. When the Visioneer web page loads, click on the Support & Drivers link at the top of the page. Click on Register Your Product at the bottom of the Support & Drivers page. - Page 14 ’ ISIONEER OBILITY CANNER UIDE...
-
Page 15: Scanning
Scanning You can scan approximately 300 pages on each battery charge. You can scan items between 2”x2” and 8.5”x11.69”, and the scanner will automatically crop the scanned image to the width and height of the item scanned. USB F EMORY ARD OR LASH RIVE... -
Page 16: Retrieving The Scanned Images
’ ISIONEER OBILITY CANNER UIDE Insert an item face up in the paper feed slot, aligned to the left side of the scanner. The scanner detects the page and starts to feed it through the scanner. Note that there will be a short pause after you insert the page before the scanner starts to feed the page. -
Page 17: Smartphones
CANNING MARTPHONES You can connect the scanner to your Smartphone and scan directly to the phone’s storage. When the phone is connected to the scanner, the scanner detects the phone’s memory card as the USB flash drive. If a memory card is in the scanner, remove it before proceeding with these instructions. Connect the phone’s USB cable to the phone. -
Page 18: Retrieving The Scanned Images
’ ISIONEER OBILITY CANNER UIDE The scanner detects the page and starts to feed it through the scanner. Note that there will be a short pause after you insert the page before the scanner starts to feed the page. This pause allows you to straighten the item in the paper feed slot. 10. -
Page 19: Ipad
CANNING Turn on the scanner. Select the “disc drive” option on your phone when prompted. At this time the scanner LEDs just continuously flash. Change the phone’s USB connection type from the “disc drive” option to the “sync” option. Immediately change the phone’s USB connection type back to “disc drive”. The phone should now initialize its storage properly and the scanner LEDs should stop flashing. -
Page 20: Other Tablets
’ ISIONEER OBILITY CANNER UIDE Insert an item face up in the paper feed slot, aligned to the left side of the scanner. The scanner detects the page and starts to feed it through the scanner. Note that there will be a short pause after you insert the page before the scanner starts to feed the page. -
Page 21: Maintenance
Maintenance This section contains scanner information about regular maintenance, specifications and spare parts. ALIBRATING CANNER The scanner needs to be calibrated as part of your monthly maintenance of the scanner. If your scanned images have black or colored vertical lines this may be a sign that you need to perform a calibration. If calibrating the scanner does not resolve the problem, please go to the next section and follow the steps for cleaning the scanner. -
Page 22: Cleaning Your Scanner
’ ISIONEER OBILITY CANNER UIDE LEANING CANNER If you still see streaks or lines in the scanned image after calibrating the scanner, use the cleaning swab to clean the scanner glass. Dampen the tip of the cleaning swab with some Isopropyl rubbing alcohol (95%) Facing the back of the scanner, press and hold the button on the side of the scanner. -
Page 23: Visioneer Mobility Scanner Specifications
- 32-bit XP (Service Pack 2 or 3) - 32-bit or 64-bit Vista (with or without Service Pack 1 or 2) - 32-bit or 64-bit 7 Bundled Software Visioneer® Mobility PC Connector Nuance PaperPort® Nuance OmniPage® NewSoft Presto! BizCard Adobe® Reader®... -
Page 24: Visioneer Mobility Spare Part List
’ ISIONEER OBILITY CANNER UIDE ISIONEER OBILITY PARE Please use the following part name and number when ordering a replacement part for your scanner. Part Name Part Number Carrying bag 88-0630-000 Battery 28-0008-000 USB Y-Cable 35-0232-000 Memory card 51-0002-0000 35-0095-000 Power Supply 35-0095-001 35-0096-000 (U.S.) - Page 25 05-0822-000 Copyright © 2011 Visioneer, Inc.