Table of Contents
Advertisement
Advertisement
Table of Contents

Related Manuals for Zanussi ZDC68560W


Summary of Contents for Zanussi ZDC68560W
- Page 1 User manual Tumble Dryer ZDC68560W...
-
Page 2: Table Of Contents
Contents Important safety information _ _ _ _ _ _ _ _ _ _ _ _ _ 2 Sorting and preparing laundry _ _ _ _ _ _ _ _ _ _ _ _ 9 Environment _ _ _ _ _ _ _ _ _ _ _ _ _ _ _ _ _ _ _ _ 4 Daily use _ _ _ _ _ _ _ _ _ _ _ _ _ _ _ _ _ _ _ _ _ 10 Installation _ _ _ _ _ _ _ _ _ _ _ _ _ _ _ _ _ _ _ _ _ 4 Cleaning and maintenance _ _ _ _ _ _ _ _ _ _ _ _ _ 12... - Page 3 • Only wash fabrics which are designed to be machine Warning! dried. Follow the instructions on each garment label. • Risk of fire! Never stop a tumble dry before the end of the drying cycle unless all items are • Do not dry unwashed items in the tumble dryer. quickly removed and spread out so that the heat •...
-
Page 4: Environment
Environment markings, e.g. >PE<, >PS<, etc. Please dispose of the The symbol on the product or on its packaging packaging materials in the appropriate container at the indicates that this product may not be treated as community waste disposal facilities. household waste. - Page 5 Connect the machine to an earthed socket, in accordance Important! with current wiring regulations. • The hot air emitted by the tumble dryer can reach tem- peratures of up to 60°C. The appliance must therefore Warning! The manufacturer declines any not be installed on floors which are not resistant to responsibility for damage or injury through failure high temperatures.
- Page 6 front loaded) as a space-saving washer/dryer stack. Permanent connection The washing machine is at the bottom and the dryer is In the case of permanent connection it is necessary that at the top. you install a double pole switch between the appliance Read carefully the instructions supplied with the kit.
-
Page 7: Product Description
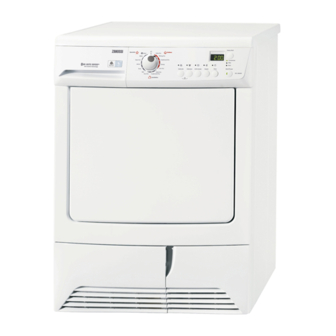
Product description Description of the appliance Worktop Control panel Water reservoir Fluff filters Rating Plate Loading door Heat exchanger Ventilation grille Heat exchanger door Adjustable feet Control panel Display Programme knob and OFF switch... -
Page 8: Before First Use
Delay Start button SYMBOL DESCRIPTION Function status led Time to end (time of time programm, – Condenser light time of start delay) – Filter light Child lock – Tank light Anticrease guard phase Start/Pause button Function buttons Error, wrong selection What is shown in the display Before first use In order to remove any residues which may have been... -
Page 9: Sorting And Preparing Laundry
Additional Programme functions/op- Application/properties tions Thorough drying of thick or multi-layered fabrics, e.g. pullovers, Extra Dry 3 kg all except bedding, table linen. For thin fabrics which are not ironed, e.g. easy care shirts, table Cupboard Dry 3 kg all except linen, baby clothes, socks, lingerie with bones or wires. -
Page 10: Daily Use
– Mixtures and synthetics for programmes in SYN- Important! Do not overload the appliance. Observe max. THETICS programme group. loading volume. • Sort by care label: The care labels mean: Laundry weights Drying in the tumble dryer possible in prin- Type of laundry Weight ciple... - Page 11 Door opening and laundry Selecting the programme audible confirmation of: loading Turn the programme se- • cycle end lector dial to the required Open the door. • anti-crease phase start and end programme. The light Load your laundry • cycle interruption START/PAUSE starts to (do not force it in).
-
Page 12: Cleaning And Maintenance
The programme can no longer be changed directly rotates at intervals during this phase. This keeps the laun- once the programme has started. If nevertheless dry loose and free of creases. The laundry can be removed there is an attempt to change the programme on the pro- at any time during the anti-crease phase. - Page 13 operation when the machine is next used. The Water res- ervoir light reminds you to perform this operation. 1. To open the door, push 2. Turn the two red stops the catch as per picture. downwards. During the drying cycle or 1.
-
Page 14: What To Do If
What to do if ... Troubleshooting by yourself Possible cause Remedy Problem Plug in at mains socket. Check fuse in fuse box Dryer not connected to mains supply. (domestic installation). Dryer does not work. Loading door opened. Close loading door The START PAUSE button not pressed. -
Page 15: Technical Data
5) only dryers with the LCD Drying cycle complete section). 6) Note: After around 5 hours the drying cycle ends automatically (see Technical data height x width x depth 85 x 60 x 58 cm drum volume 108 l depth with the load door opened 109 cm adjustable height 1.5 cm... - Page 16 Water hardness Turn the programme selector to any programme. Water contains, a variable quantity Press simultaneously the ANTI-CREASE and START/PAUSE buttons of limestone and mineral salts of and hold down for approx. 5 seconds. The current setting is on the display: which quantities vary according to –...
- Page 20 www.zanussi.com/shop...