Singer 580 ROTARY STEAM PRESS Instruction Manual
Rotary steam iron
Hide thumbs
Also See for 580 ROTARY STEAM PRESS:
- Instruction manual (47 pages) ,
- Instruction manual (88 pages)
Table of Contents
Advertisement
Available languages
Available languages
Advertisement
Chapters
Table of Contents

Related Manuals for Singer 580 ROTARY STEAM PRESS


Summary of Contents for Singer 580 ROTARY STEAM PRESS
- Page 1 ROTARY STEAM IRON INSTRUCTION MANUAL (ENGLISH) ....1 ROULEAU DE REPASSAGE À LA VAPEUR MANUEL D’INSTRUCTION (FRANÇAIS) ....25 PLANCHA DE RODILLO CON VAPOR MANUAL DE INSTRUCCIONES (ESPAÑOL) .
- Page 3 ROTARY STEAM IRON INSTRUCTION MANUAL...
-
Page 4: Introduction
Rotary Steam Iron! You have acquired an extremely user-friendly, quality product off ering unique advantages for ironing. Your new SINGER® Rotary Steam Iron enables you to iron when sea- ted, without exertion. You will experience top-class ironing comfort! Take time to read your Instruction Manual thoroughly. It will help you get to know all the features and how to fully use them. -
Page 5: Table Of Contents
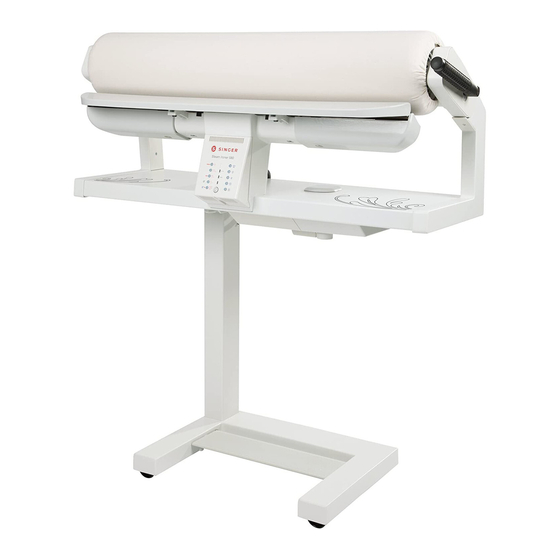
TABLE OF CONTENTS • Introduction CARE & MAINTENANCE • Part list for the rotary steam iron • General Care • Important safety instructions • Replacing or Renewing the Ironing Roller Covers FUNCTIONS • Unwinding the Ironing Covers • Setting Up the Rotary Steam Iron •... - Page 6 PARTS LIST FOR THE ROTARY STEAM IRON Ironing roller Heating shoe with steam slot Operator’s console control buttons Filler opening with lime descaling cartridge Support plate Manual release lever Free heating shoe ends Bolt for unfolding Water tank 10 Drain plug 11 Collecting table 12 Foot pedal 13 Power button...
-
Page 7: Important Safety Instructions
IMPORTANT SAFETY INSTRUCTION 1. Read all instructions. 12. If an extension cord is absolutely necessary, be sure the cord has an ampere rating in accordance with the 2. Use appliance only for its intended use. ampere rating of the Rotary Steam Iron. Cords rated for 3. -
Page 8: Functions
Functions SETTING UP THE ROTARY STEAM IRON 1. To set up your Rotary Steam Iron, fi rst unhook the power cable. With your left hand, tightly grip the Connecting Rod (A) in the lower third area. With your right hand, push the Locking Lever forward and hold it pressed. -
Page 9: Using The Foot Pedal
USING THE FOOT PEDAL The Foot Pedal is used to control the raising and lowering of Note: The SINGER® Rotary Steam Iron is fi tted with an the ironing roller, as well as its speed. There are 3 positions: energy-saving circuit. If the foot pedal is not operated for up A, B and C. -
Page 10: Manual Release Lever
Functions MANUAL RELEASE LEVER Your Rotary Steam Iron is equipped with a manual lever. Use it only when needed and according to the instructions. The manual lever has two functions: Manual Release Manual release lever is used in the event of an unexpected interruption of the ironing roller, for example, if there is a power failure. - Page 11 Functions Manual Release for Service Case When needed, it is possible to raise the iron roller to a service position. You can raise the iron roller to this position only when the power is turned Off . The roller must be in non-ironing position (roller up).
-
Page 12: Preparing For Steam Generation
The SINGER® Rotary Steam Iron can be operated without water, but for a crease-free result, the steam should be switched on. The steam is applied from below and ensures complete steam penetration of the items being ironed. -
Page 13: General Information On Descaling Granulate
CHECKING DESCALING CARTRIDGE PLACEMENT FOR INITIAL MACHINE USE The SINGER® Rotary Steam Iron is supplied with a lime descaling cartridge inserted in the water tank. The cartridge is placed below the cap of the fi ller. 1. Switch off the power and unplug the Rotary Steam Iron before removing/re- placing the cartridge. -
Page 14: Functions & Settings For Ironing
Functions & Settings FUNCTIONS & SETTINGS FOR IRONING This chapter provides information on all the electronic functions of your SINGER® Rotary Steam Iron, as well as recommended settings for ironing various garments and other items. Heat Settings buttons The red LED of the preselected Heat Setting (14) fl ashes when the Rotary Steam Iron is switched on. -
Page 15: Ironing Settings
Functions & Settings IRONING SETTINGS is now switched off but your Rotary Steam Iron remains ready Ironing without Steam for used. Immediately after the Power Switch is switched on, the green (Illustration 2 – heating shoe will be cooling off but the roller LED Power On illuminates. -
Page 16: How To Use
How to use HOW TO USE This chapter contains step-by-step instructions on how to iron various types of garments and home décor items with your SINGER® Rotary Steam Iron. GENERAL INFORMATION Before ironing with your Rotary Steam Iron, check the care ing or ironing is not recommended. -
Page 17: Ironing Larger Flat Items
How to use IRONING LARGE FLAT ITEMS To iron larger, fl at items such as tablecloths, the center 3. Softly fold the tablecloth in half and place the tablecloth section of the fabric is pressed fi rst, then the sides of the so that the ironed part hangs over at one end of the tablecloth are pressed. -
Page 18: Ironing T-Shirts And Knit Tops
How to use IRONING T-SHIRTS OR KNIT TOPS 1. When ironing T-shirts or other types of knit tops, begin 4. Now pull the T-shirt over one end of the heating shoe, with the sleeves. Insert the sleeve of the T-shirt at a slant fi rst iron the back, then the side seam. -
Page 19: Ironing Shirts Or Blouses
How to use IRONING SHIRTS OR BLOUSES 1. Place the cuff on the end of the heating shoe and iron it. Repeat the process for the second cuff . 2. Now insert the sleeve of the shirt to elbow height and iron it, while maintaining a slight pull, from the center of the sleeve up to the cuff , making sure that the cuff opening is facing upwards. - Page 20 How to use IRONING SHIRTS OR BLOUSES 5. Pull the shirt outwards and iron over the side seam to approximately 6 inches (15cm) into the back. Repeat the process for the other front. 6. Place the hem of the back on the heating shoe and iron the back up to the start of the sleeve.
-
Page 21: Ironing Trousers
How to use IRONING TROUSERS 1. Iron the legs separately on both sides from the bottom up to the crotch seam. 2. Pull the top part of the trousers over one free end of the heating shoe. Make sure that the zipper is facing upwards toward the iron roller. -
Page 22: Care & Maintenance
CARE & MAINTENANCE This chapter contains information with regard to the care and maintenance of your SINGER® Rotary Steam Iron. For your own safety, always switch off the power switch of the Rotary Steam Iron and unplug when servicing the machine. -
Page 23: Winding The Ironing Covers
Care & Maintenance WINDING THE IRONING COVERS Note: All layers must project evenly and be centered at both sides of the ironing roller so that the roller remains open for ventilation. 1. Unwind the jute cover (C) approximately 10 inches (25cm). - Page 24 Care & Maintenance WINDING THE IRONING COVERS 5. After the tenth turn, the end of the padding cover must lie on the top of the ironing roller. As pictured, place the ironing cloth (A) on the padding cover with the wrong side upwards making sure that the cord ends project evenly.
-
Page 25: Empty The Water Tank
Care & Maintenance EMPTY THE WATER TANK Switch off the power and unplug. After use, the water tank should be emptied. Do this before folding and storing the Rotary Steam Iron. 1. Place a bucket under the water tank. Using a suitable coin, undo the drain plug and unscrew it completely. -
Page 26: Technical Specs & Warranty Information
2. Service under the warranty may be obtained by returning the appliance, along with a Proof of Purchase (such as the purchase receipt) to: Singer Sewing Company ATTENTION: SERVICE DEPARTMENT 1224 Heil Quaker Blvd. - Page 27 ROULEAU DE REPASSAGE À LA VAPEUR MANUEL D’INSTRUCTION...
- Page 28 Votre nouveau Rouleau de Repassage à la Vapeur de SINGER ® vous permet de repasser tout en étant assis et sans eff ort. Expérimentez le repassage en tout confort! Prenez le temps de lire entièrement le Mode d’emploi.
- Page 29 TABLE DES MATIÈRES • Introduction ENTRETIENT DE L’APPAREIL • Liste de pièces pour • Entretient Général le fer à rouleau à la vapeur • Mise en Place ou Remplacement • Consignes de sécurité importantes des Housses du Rouleau de Repassage à la Vapeur FONCTIONS •...
-
Page 30: Liste De Pièces Pour Le Ferà Rouleau À La Vapeur
LISTE DE PIÈCES POUR LE FER À ROULEAU À LA VAPEUR Rouleau à Repasser Plaque chauff ante avec évent pour la vapeur Boutons de commande de la console de l’ o pérateur Bec de remplissage avec cartouche antitartre et anticalcaire Plaque de support Levier de débrayage manuel Extrémités non chauff ante de la plaque chauff ante... -
Page 31: Consignes De Sécurité Importantes
CONSIGNES DE SÉCURITÉ IMPORTANTES 1. Lire toutes les instructions. à la Vapeur comme indiqué sur la plaque descriptive et aussi garantir la mise à la terre appropriée. Pour éviter de 2. Utilisez l’appareil exclusivement pour ce à quoi il a été surchargez l’appareil, ne branchez pas d‘autres appareils conçu. -
Page 32: Fonctions
Fonctions INSTALLATION DU ROULEAU DE REPASSAGE À LA VAPEUR 1. Pour installer votre Rouleau de Repassage à la Vapeur, premièrement débranchez le cordon d’alimentation. Tenez fermement de la main gauche la partie inférieure de la Barre de Connexion (A). À l’aide de la main droite, poussez le Levier de Débrayage vers l’avant et maintenez la pression. -
Page 33: Utilisation De La Pédale Au Pied
UTILISATION DE LA PÉDALE AU PIED La Pédale au Pied est utilisée pour contrôler la monter et la Remarque: le Rouleau de Repassage à la Vapeur de SINGER® descente du rouleau à repasser, ainsi que sa vitesse. est équipé d’un circuit écoénergétique. Si la pédale n’a Il y a 3 positions: A, B et C. -
Page 34: Levier De Débrayage Manuel
Fonctions LEVIER DE DÉBRAYAGE MANUEL Votre Rouleau de Repassage à la Vapeur est équipé d’un levier de débrayage manuel. Utilisez-le seulement lorsque le besoin se fait sentir en accordance avec les instructions. Le levier de débrayage manuel a deux fonctions: Débrayage Manuel Le débrayage Manuel est utilisé... - Page 35 Fonctions Débrayage Manuel pour l’Entretien Au besoin, il est possible de relever le rouleau de repassage en position d’ e ntretien. Vous pouvez relever le rouleau de repassage dans cette position seulement si l’appareil est fermé (Off ). Le rouleau ne doit pas être en position de repassage (le rouleau doit être relevé).
-
Page 36: Préparation Pour La Production De Vapeur
Le Rouleau de Repassage à la Vapeur de SINGER® peut être utilisé sans eau, mais pour obtenir un repassage sans faux-plis, la va- peur devrait être activée. La vapeur est appliquée par le dessous et assure une pénétration complète de celle-ci dans le vêtement. -
Page 37: Information Général Sur Les Granulés Antitartre
VÉRIFICATION DE LA POSE DE LA CARTOUCHE ANTITAR- TRE ANTICALCAIRE AVANT LA PREMIÈRE UTILISATION Le Rouleau de Repassage à la Vapeur de SINGER® est fourni avec une cartouche antitartre anticalcaire pleine déjà insérée dans le réservoir d’ e au. La cartouche se trouve sous le bouchon de remplissage. -
Page 38: Fonctions & Réglages Pour Le Repassage
FONCTIONS & RÉGLAGES POUR LE REPASSAGE Ce chapitre vous renseigne sur les toutes les fonctions électroniques de votre Rouleau de Repassage à la Vapeur de SINGER® ainsi que les réglages recommandés pour le repassage de divers vêtement et autre items. -
Page 39: Réglages Pour Le Repassage
Fonctions & Réglages pour le repassage RÉGLAGES POUR LE REPASSAGE rouge s’ é teindra. Dans ce cas le chauff age est maintenant arrêter mais votre Rouleau de Repassage à la Vapeur demeure toujours Repassage sans Vapeur prêt à l’ e mploi. Immédiatement après avoir placer le bouton Marche/Arrêt en po- (Illustration 2 –... -
Page 40: Comment Utiliser
COMMENT UTILISER Ce chapitre contient des instructions étape par étape sur comment repasser diff érent types de vêtements et de décorations avec votre Rouleau de Repassage à la Vapeur de SINGER®. INFORMATION GÉNÉRAL Avant de repasser avec votre Rouleau de Repassage (tel que le velours ou le corduroy) n’... -
Page 41: Repassages De Plus Grands Articles Plat
Comment utiliser REPASSAGES DE GRANDS ARTICLES PLAT Pour repasser de plus grands articles plats, tel que des nap- 3. Pliez délicatement la nappe en deux et placer la de façon pes, repassez d’abord la partie centrale du tissus et ensuite à... -
Page 42: Repassage De T-Shirts Et Haut De Maille
Comment utiliser REPASSAGE DE T-SHIRTS ET HAUT DE MAILLE 1. Lorsque vous repassez un T-shirts ou tout autre type de en oblique (le côté de la couture parallèlement au haut de maille, Commencez par les manches. Insérez rouleau) et repassez du centre jusqu’à l’ e mmanchure. la manche du T-shirt en oblique (le côté... -
Page 43: Repassage De Chemises Ou De Chemisiers
Comment utiliser REPASSAGE DE CHEMISES OU DE CHEMISIERS 1. Placez le poignet sur l’ e xtrémité de la plaque chauff ante et repassez-le. Répétez l’ o pération pour l’autre poignet. 2. Insérez maintenant la manche de la chemise à la hauteur du coude et repassez la demi-manche en direction du poignet en tirant légèrement et en vous assurant que la fente du poignet est dirigée vers le haut. - Page 44 Comment utiliser REPASSAGE DE CHEMISES OU DE CHEMISIERS 5. Sortez le haut de la chemise de la semelle et repassez la couture du côté jusqu’à environ 15 cm (6 pouces) dans le dos. Répétez l’ o pération pour l’autre devant. 6.
-
Page 45: Repassage De Pantalons
Comment utiliser REPASSAGE DE PANTALONS 1. Repassez les jambes séparément des deux côtés, en allant du bas jusqu’à l’ e ntrejambes. 2. Placez la partie supérieure du pantalon sur l’une des extrémités libres de la plaque chauff ante. Assurez-vous que la fermeture à glissière est dirigée vers le rouleau. Repassez le haut du pantalon en allant de la partie centrale du dos vers le devant. -
Page 46: Entretient De L'appareil
ENTRETIEN DE L’APPAREIL Ce chapitre contient les informations nécessaires pour l’ e ntretien de votre Rouleau de Repassage à la Vapeur SINGER ®. Pour votre sécurité, toujours éteindre le Rouleau de Repassage à la Vapeur et débranchez-le pour en eff ectuer l’ e ntretien. -
Page 47: Comment Enrouler Les Housses
Entretien de l’appareil COMMENT ENROULER LES HOUSSES DE REPASSAGES Remarque: toutes les housses de repassage doivent dépasser également des deux côtés du rouleau pour ne pas en obstruer la ventilation. 1. Dérouler la couverture de jute (C) approximativement 25cm (10 pouces). 2. -
Page 48: De Repassage
Entretien de l’appareil COMMENT ENROULER LES HOUSSES DE REPASSAGES 5. À la fin du dixième tour, le bout de la housse en molleton doit reposer sur le dessus du rouleau à repasser. Tel que montrer sur la photo, placez la housse de repassage (A), l’... -
Page 49: Vidange Du Réservoir D'eau
Entretien de l’appareil VIDANGE DU RÉSERVOIR D’EAU Éteignez l’appareil et débranchez-le. Après usage, le réservoir d’ e au doit être vidé. Faite cette opération avant de replier et de remiser le l’appareil. 1. Placez un seau sous le réservoir d’ e au. En vous servant d’une pièce de monnaie approprier, débloquer le bouchon de vidange et dévissez-le complètement. -
Page 50: Caractéristiques Techniques & Information Sur La Garantie
2. Le service peut être obtenu, conformément à la garantie, en apportant l‘appareil, ainsi que la Preuve d‘Achat (comme le reçu d‘achat) à: La Compagnie de Machine à Coudre Singer À l’ATTENTION: DU SERVICE D‘ENTRETIEN 1224 Quaker Heil Blvd. - Page 51 PLANCHA DE RODILLO CON VAPOR MANUAL DE INSTRUCCIONES...
- Page 52 Vapor SINGER® ! Ha adquirido un producto de calidad extremadamente fácil de usar que le ofrece ventajas únicas en el planchado. Su nueva Plancha de Rodillo SINGER ® le permite planchar sentada, sin esfuerzo. Experimentará una comodidad sin igual en el planchado.
- Page 53 TABLA DE CONTENIDO • Introduccion CUIDADO Y MANTENIMIENTO • Lista de partes de la plancha de rodillo • Cuidado General • Instrucciones importantes de seguridad • Remplazando o Renovando las Cubiertas del Rodillo de Planchado FUNCIONES • Desenrollando las Cubiertas •...
-
Page 54: Lista De Partes De La Plancha De Rodillo
LISTA DE PARTES DE LA PLANCHA DE RODILLO Rodillo de planchado Suela de calentamiento con ranura de vapor Botones de control de la consola de operador Abertura de llenado con cartucho eliminador de residuos de cal Placa de soporte Palanca de liberación manual Extremos de la suela de calentamiento libre Perno para desdoblado Tanque de agua... -
Page 55: Instrucciones Importantes De Seguridad
INSTRUCCIONES IMPORTANTES DE SEGURIDAD 1. Lea todas las instrucciones. 12. Si un cable de extensión es absolutamente necesario, asegúrese que resista el amperaje de acuerdo con el de 2. Use el aparato sólo para el uso previsto. la Plancha de Rodillo con Vapor. Los cables con menos 3. -
Page 56: Funciones
Funciones PREPARANDO LA PLANCHA DE RODILLO CON VAPOR 1. Para preparar su Plancha de Rodillo con Vapor, desenganche primero el cable de corriente. Con su mano izquierda, sujete con fi rmeza el Poste Unión (A) en el área tercer inferior. Consu mano derecha, mantenga presionada la Palanca de Bloqueo. - Page 57 USANDO EL PEDAL El pedal se usa para controlar el levantamiento y descenso Nota: La Plancha de Rodillo SINGER ® tiene un circuito de del rodillo de planchado, así como su velocidad. Hay tres ahorro de energía. Si el pedal no se opera por 8 minutos, posiciones: A, B y C.
-
Page 58: Palanca De Liberación Manual
Funciones PALANCA DE LIBERACIÓN MANUAL Su Plancha de Rodillo con Vapor está equipada con una palanca manual. Usela sólo cuando sea necesario y según las instrucciones. La palanca manual tiene dos funciones: Liberación Manual La palanca de liberación manual se usa en el caso de una in- terrupción inesperada del rodillo de planchado, por ejemplo, en una falla de energía. - Page 59 Funciones Liberación manual para Servicio Cuando sea necesario, es posible levantar el rodillo de hierro a una posición de servicio. Puede levantar el roldillo de hierro a est posición cuando la alimentación esté apaga, no obstante el rodillo debe estar hacia arriba. (En posición sin planchar).
-
Page 60: Preparando Para La Generación De Vapor
En este capítulo, cubriremos la información sobre el agua adecuada para la generación de vapor, como usar el agua del tanque, cartucho eliminador de cal y granulado eliminador de cal. La Plancha de Rodillo con Vapor SINGER ® puede usarse sin agua, pero para un resultado libre de arrugas, debe activarse el vapor. -
Page 61: Información General Sobre El Granulado Eliminador De Cal
REVISANDO LA COLOCACIÓN DEL CARTUCHO ELIMINADOR DE CAL PARA USO INICIAL DE LA MÁQUINA La Plancha de Rodillo con Vapor SINGER ® viene provista con un cartucho elimina- dor de cal insertado en el tanque de agua. El cartucho está colocado debajo de la tapa del llenador. -
Page 62: Funciones Y Ajustes Para Planchado
Funciones y ajustes para planchado FUNCIONES Y AJUSTES PARA PLANCHADO Este capítulo proporciona información sobre las funciones electrónicas de su Plancha de Rodillo con Vapor SINGER®, así como los ajustes recomendados para planchado de varias prendas y otros artículos. Botones de Ajuste de Calor El LED rojo del Ajuste de Calor preseleccionado (14) destella cuando la Plancha de Rodillo está... -
Page 63: Ajustes De Planchado
Funciones y ajustes para planchado AJUSTES DE PLANCHADO tador se apaga ahora pero la Plancha de Rodillo permanece lista para usarse. (Ilustración 2 - la suela de calentamiento se Planchando sin Vapor enfriará pero el rodillo aún se moverá) Inmediatamente después de encender el interruptor, el LED Cuando se presiona el botón de Vapor a Demanda, se ilumina verde Power On se ilumina. -
Page 64: Como Usar
Como usar CÓMO USAR Este capítulo contiene instrucciones paso a paso sobre como planchar diferentes tipos de prendas y decorados con su Plancha de Rodillo con Vapor SINGER®. INFORMACIÓN GENERAL Antes de planchar con su Plancha de Rodillo, revise las eti- El área grande de planchado permite también planchar ropa... -
Page 65: Planchando Ropa De Cama
Como usar PLANCHANDO ARTÍCULOS PLANOS GRANDES Para planchar, artículos planos más grandes como manteles, 3. Doble suavemente el mantel a la mitad y colóquelo de la sección del centro de la tela se plancha primero, luego los modo que la parte planchada cuelgue sobre un extremo lados son planchados. -
Page 66: Planchando Playeras Y Tops De Punto
Como usar PLANCHANDO PLAYERAS O TOPS DE PUNTO 1. Cuando planche playeras u otros tipos de tops de punto, paralelo al rodillo) y plánchela desde el centro hasta la comience con las mangas. Inserte la manga de la playera costura de la manga. con una inclinación (lado de la costura paralela al rodillo) 4. -
Page 67: Planchando Camisas O Blusas
Como usar PLANCHANDO CAMISAS O BLUSAS 1. Coloque el puño en el extremo de la suela de calenta- miento y plánchelo. Repita el proceso para el segundo puño. 2. Inserte ahora la manga de la camisa hasta el codo y plánchela, mientras jala un poco, desde el centro de la manga hasta el puño asegurándose que la apertura del puño esté... - Page 68 Como usar PLANCHANDO CAMISAS O BLUSAS 5. Jale la camisa hacia afuera y planche sobre el lado de la costura a aprox. 15 cm hacia la parte posterior. Repita el proceso para el otro frente. 6. Coloque el dobladillo de revés en la suela de calenta- miento y planche el revés hasta el inicio de la manga.
-
Page 69: Planchando Pantalones
Como usar PLANCHANDO PANTALONES 1. Planche las piernas por separado en ambos lados desde la bastilla hasta entrepierna. 2. Jale la parte superior de los pantalones sobre un extremo libre de la suela de calentamiento. Asegúrese que el cie- rre esté cara arriba hacia el rodillo de planchado. Planche la parte superior de los pantalones trabajando desde la parte central posterior hacia el centro frontal. -
Page 70: Cuidado Y Mantenimiento
Cuidado y mantenimiento CUIDADO Y MANTENIMIENTO Este capítulo contiene información sobre el cuidado y mantenimiento de su Plancha de Rodillo con Vapor SINGER®. Por su propia seguridad, siempre apague la Plancha de Rodillo y desconéctela cuando le dé servicio. CUIDADO GENERAL Para limpiar la Plancha de Rodillo, use un paño seco, limpio... - Page 71 Cuidado y mantenimiento ENROLLANDO LAS CUBIERTAS DE PLANCHADO Nota: Todas las capas deben sobresalir uniformemente y estar centradas en ambos lados del rodillo de plan- chado de modo que el rodillo permanezca abierto para ventilación. 1. Desenrolle la cubierta de yute (C) aproximadamente 25 2.
- Page 72 Cuidado y mantenimiento ENROLLANDO LAS CUBIERTAS DE PLANCHADO 5. Después de la décima vuelta, el extremo de la cubierta acojinada debe descansar en la parte superior del rodillo de planchado. Como se ilustra, coloque la tela de planchado (A) en la cubierta acojinada con el lado anverso hacias arriba asegurándose que los extremos de las cuerdas sobresalgan de forma uniforme.
-
Page 73: Vaciado Del Tanque De Agua
Cuidado y mantenimiento VACIADO DEL TANQUE DE AGUA Apague y desconecte. Después de usar, el tanque de agua debe vaciarse. Haga esto antes de plegar y guardar la Plancha de Rodillo con Vapor. 1. Coloque una cubeta debajo del tanque de agua. Usando una moneda, quite el tapón y destorníllelo. -
Page 74: Especificaciones Técnicasy Garantía
2. El servicio bajo la garantía puede obtenerse regresando el aparato, junto con una prueba de compra (como el recibo) a: Singer Sewing Company ATENCIÓN: DEPARTAMENTO DE SERVICIO 1224 Heil Quaker Blvd.