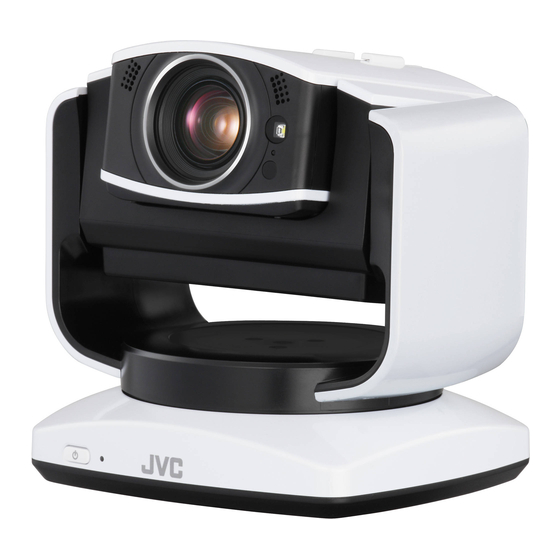
JVC GV-LS2 User Manual
For windows
Hide thumbs
Also See for GV-LS2:
- User manual (172 pages) ,
- Connection manual (32 pages) ,
- Specification sheet (2 pages)
Table of Contents
Advertisement
Quick Links
Download this manual
See also:
User Manual
Advertisement
Table of Contents

Summary of Contents for JVC GV-LS2
-
Page 1: User Guide
JVC CAM Control (for Windows) User Guide English This is the instruction manual for the software (for Windows) for Live Streaming Camera GV-LS2/GV-LS1 made by JVC KENWOOD Corporation. The operating system compatible with this application is Windows 7. -
Page 2: Table Of Contents
JVC CAM Control (for Windows) User Guide Table of Contents Chapter 1 Quick Operation Guide 1. Have You Completed the Camera Setup?....2. Installation ......... . . -
Page 3: Chapter 1 Quick Operation Guide
Chapter 1 Quick Operation Guide 1. Have You Completed the Camera Setup? Camera setup must be performed before JVC CAM Control is used. Be sure to check that the camera video and audio can be played from the Web browser before proceeding to the next step. -
Page 4: Viewing Video
Chapter 1 Quick Operation Guide 5. Viewing Video Click the Back button in the top left of the [CAMERA REGISTRATION] screen to display the monitor display. In this screen, you can operate the camera and view video. (For details on the functions of each button, refer to "Chapter 3 Screen Descriptions".) 6. -
Page 5: Cameras
Chapter 2 Advanced Operations Viewing Video from Multiple Cameras JVC CAM Control (for Windows) enables you to switch between multiple cameras when viewing video. [Caution] To view video from multiple cameras, first you need to purchase the additional cameras. 1. On the left side of the [CAMERA REGISTRATION] screen, select the slot in which to register the camera. -
Page 6: Remote Location
Chapter 2 Advanced Operations Using the Internet to View Video from a Camera in a Remote Location You can view video from a camera in a remote location via the Internet. 1. Assign a URL to the camera, for example by using the camera's DDNS function. -
Page 7: Viewing High Quality Video
Chapter 2 Advanced Operations Viewing High Quality Video In the Windows version, you can view high quality, smooth video by using the monitor display (enlarged display). You can select from two types of image quality; Full HD quality or standard quality. Characteristics of Full HD Quality The image quality is higher than standard quality, but the load on the computer is also higher and more data is transmitted across the network. - Page 8 Chapter 2 Advanced Operations Click the Back button in the top left to return to the monitor display. Click the button in the top right of the monitor display to enlarge the video. You can view high quality video.
-
Page 9: [Camera Registration]
Chapter 3 Screen Descriptions - [CAMERA REGISTRATION] Screen [CAMERA REGISTRATION] Screen & " " Back button • [MPEG-2 TS(SD) + MotionJPEG] Use to stream via the Internet in standard quality Returns to the monitor display. using "Camera Driver". Recording onto the camera cannot be performed # Camera registration slots in this mode. -
Page 10: Monitor Display
Chapter 3 Screen Descriptions - Monitor Display Monitor Display ) *+ , - & " " [ZOOM] - Power indicators # Pan/tilt : When battery power used : When AC power used Changes the direction of the camera. . To the setting screen Click to change the movement speed. -
Page 11: Monitor Display (Enlarged Display)
Chapter 3 Screen Descriptions - Monitor Display (Enlarged Display) Monitor Display (Enlarged Display) In the enlarged display, you can view higher quality and smoother video than in the normal monitor display. To view high-quality video in the enlarged display, you need to change the camera settings. For details on the settings, refer to "Viewing High Quality Video"... -
Page 12: [Camera Settings]
Chapter 3 Screen Descriptions - [CAMERA SETTINGS] Changing the Camera Settings 1. Click 2. Click [CAMERA SETTINGS]. 3. Select the item to set by clicking it. -
Page 13: [App Settings]
Chapter 3 Screen Descriptions - [APP SETTINGS] Changing the Application Settings 1. Click 2. Click [APP SETTINGS]. " [ZOOM SPEED] Sets the speed for zooming the camera. # [BACKGROUND] You can change the background color of the application. $ [Language] % [CAMERA RESOURCE SETTING] [VIDEO]: When registering the camera, set whether to use video. -
Page 14: Chapter 4 Streaming In Real-Time With Ustream
To perform a live broadcast, you need an account to use in USTREAM. Create an account by following the instructions on the USTREAM website. [Caution] JVC KENWOOD and LoiLo do not accept any inquiries regarding USTREAM operations. Please contact USTREAM. Installing USTREAM Producer Install USTREAM Producer by following the instructions on the USTREAM website. -
Page 15: Setting The Camera Driver
2. Start the setup application. Start the setup application from the Start menu or the [JVC CAM driver setup] shortcut on the desktop. 3. Register the cameras. After starting the application, select a registration slot... - Page 16 Chapter 4 Streaming in Real-Time with USTREAM 5. Set the image quality. After successfully logging in, the window for selecting the image quality to use for streaming is displayed. The image quality setting can be changed later at any time using the [IMAGE QUALITY SETTINGS] button.
- Page 17 9. Start USTREAM Producer. Video In the same way as for normal webcams and other 1: JVC CAM Video 1 devices, add a camera from "Add Shot". 2: JVC CAM Video 2 The camera names correspond to the numbers set in the 3: JVC CAM Video 3 setup application.


