Toshiba AT300 User Manual
Hide thumbs
Also See for AT300:
- User manual (122 pages) ,
- User manual (131 pages) ,
- User manual (86 pages)
Table of Contents
Advertisement
Advertisement
Table of Contents

Related Manuals for Toshiba AT300


Summary of Contents for Toshiba AT300
- Page 1 User's Manual TOSHIBA AT300...
-
Page 2: Table Of Contents
TOSHIBA AT300 Table of Contents Chapter 1 Legal & Regulatory Copyright ....................1-1 Disclaimer ....................1-1 Trademarks .................... 1-2 H.264/AVC, VC-1 and MPEG-4 License Notice ........1-2 FCC information ..................1-3 CE compliance ..................1-4 Working environment ................1-4 Additional environments not related to EMC ........1-5 REACH - Compliance Statement ............ - Page 3 Downloads ..................... 5-6 Email ....................... 5-6 Gallery ....................5-7 Play Music ....................5-8 People ..................... 5-9 Service Station ..................5-10 TOSHIBA Media Player ............... 5-12 TOSHIBA File Manager ............... 5-12 Online Manual ..................5-15 Chapter 6 Settings Wireless & networks ................6-1 Device .....................
- Page 4 TOSHIBA AT300 TOSHIBA Support .................. 8-4 Chapter 9 Specifications Physical Dimensions ................9-1 Environmental Requirements .............. 9-1 Chapter 10 Information for Wireless Devices Wireless LAN Interoperability ............10-1 Bluetooth wireless technology Interoperability ....... 10-1 CAUTION about Wireless Devices ............. 10-1 Wireless Devices and your health .............
-
Page 5: Legal & Regulatory Copyright
Chapter 1 Legal & Regulatory Copyright © 2012 by TOSHIBA Corporation. All rights reserved. Under the copyright laws, this manual cannot be reproduced in any form without the prior written permission of TOSHIBA. No patent liability is assumed, with respect to the use of the information contained herein. -
Page 6: Trademarks
Until the date that is three years after you acquired the Software, you may obtain a copy of the source code corresponding to the binaries for GPL- licensed file by sending a request to TOSHIBA customer service at [http:// support.toshiba-tie.co.jp/android/index_e.htm], and TOSHIBA will send you a link to such source code. -
Page 7: Fcc Information
Only peripherals complying with the FCC class B limits may be attached to this equipment. Operation with non-compliant peripherals or peripherals not recommended by TOSHIBA is likely to result in interference to radio and TV reception. Shielded cables must be used between the external devices and the device’s Universal Serial Bus (USB 2.0) ports, HDMI port and... -
Page 8: Ce Compliance
Residential, Commercial & Light Industry Environment. Any other working environment has not been verified by Toshiba and the use of this product in these working environments is maybe restricted or cannot be recommended. Possible... -
Page 9: Additional Environments Not Related To Emc
Medical environment: The compliance to the Medical Product Directive has not been verified by Toshiba, therefore this product cannot be used as a medical product without further verification. The use in usual office environments e.g. -
Page 10: Following Information Is Only Valid For Eu-Member States
For more detailed information about the collection and recycling programmes available in your country, please visit our website (http://eu.computers.toshiba-europe.com) or contact your local city office or the shop where you purchased the product. Disposal of batteries and/or accumulators... -
Page 11: Following Information Is Only For India
Note that Canadian Department of Communications (DOC) regulations provide, that changes or modifications not expressly approved by TOSHIBA Corporation could void your authority to operate this equipment. This Class B digital apparatus meets all requirements of the Canadian Interference-Causing Equipment Regulations. - Page 12 TOSHIBA AT300 The number of possible pixel failures of your display is defined according to ISO 9241-307 standards. If the number of pixel failures is less than this standard, they will not be counted as defect or failure. Battery is a consumption product, since the battery time depends on the usage of your tablet.
-
Page 13: Introduction
Introduction Welcome and thank you for choosing a TOSHIBA product. About the guide For your convenience, your TOSHIBA product is furnished with two guides: a Quick Start Guide, and this comprehensive PDF User’s Manual We recommend making a backup of this User's Manual in case of future reference. -
Page 14: Chapter 3 Getting Started
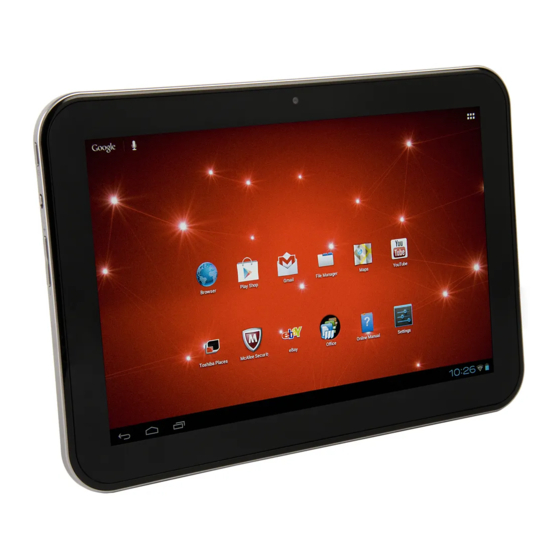
Some of the features described in this manual may not function properly if you use an operating system that was not pre-installed by TOSHIBA. Check the components Check to make sure you have all of the following items:... - Page 15 TOSHIBA AT300 Figure 3-1 Grand tour of the tablet 1. Display screen 2. Web Camera (front) 3. Ambient light sensor 4. Web Camera indicator 5. Microphone 6. Power button 7. Multi function switch 8. Volume down/up button 9. Headphone/Microphone combo 10.
- Page 16 TOSHIBA AT300 Camera Your tablet is equipped with a front Web Camera and a back camera used for recording video or taking photographs. Ambient light sensor Ambient light sensor can detect the light quality and intensity outside and can use this information to automatically adjust the display screen brightness.
- Page 17 TOSHIBA AT300 Micro USB port The tablet acts both as a host and a client via this port. It allows you to connect the tablet to a computer for transferring data. When acting as a host, the tablet can fast and directly communicate with other portable devices without the assistance of a computer.
-
Page 18: Hardware
TOSHIBA AT300 Function Description Lock screen Switch to lock/unlock automatic rotation of the orientation screen orientation. Lock hardware Switch to lock/unlock the Power & Volume buttons(Power/ buttons on the tablet. Even if the Power button is Volume) locked, you can still press & hold it for about 6 seconds to force power off. - Page 19 TOSHIBA AT300 AC adaptor The AC adaptor provides power to the system and charges the battery when it is low. As the AC adaptor is universal, it can receive a range of AC voltages from 100 to 240 volts, however you should note that the output current varies among different models.
-
Page 20: Using The Tablet For The First Time
Connecting the AC adaptor When battery power becomes low, you must charge it. Use only the tablet connected to an AC power source or TOSHIBA Tablet Dock to charge the battery. Never attempt to charge the battery with any other charger. - Page 21 Always use the TOSHIBA AC adaptor that was included with your tablet, or use AC adaptors specified by TOSHIBA to avoid any risk of fire or other damage to the tablet. Use of an incompatible AC adaptor could cause fire or damage to the tablet possibly resulting in serious injury.
-
Page 22: Turning On The Power
TOSHIBA AT300 Figure 3-3 Connecting the AC adaptor 1 2-pin 3-pin Plug the power connector of the power cable into the docking interface on your tablet. Figure 3-4 Connecting the AC adaptor 2 Plug the AC adaptor into a live wall outlet. -
Page 23: Initial Setup
TOSHIBA AT300 Initial Setup The Setup Screen will be the first screen displayed when you turn on the power. Setup your tablet according to the following steps: Choose your preferred system language and tap Start to start the initial setup process. -
Page 24: Care And Use Of The Battery
TOSHIBA AT300 Turning the LCD off/on You can turn the LCD off (while the system is still running) in one of the following ways: Press Power button. Set the sleep timeout in Settings app. To turn the LCD on: Press Power button once again. -
Page 25: Charging The Battery
TOSHIBA AT300 Never try to remove or replace the battery by yourself which may possibly result in serious injury. Please contact an authorized Toshiba service provider, if necessary. Charging the battery When the battery power becomes low, you must charge it to avoid losing any data. - Page 26 TOSHIBA AT300 Please be aware that the battery exhausted time will be affected by how you are using the tablet. Battery charging notice The battery may not begin charging immediately under the following conditions: The battery is extremely hot or cold (if the battery is extremely hot, it might not charge at all).
-
Page 27: Basics
TOSHIBA AT300 Chapter 4 Basics This chapter describes the basic operations of your tablet and the Home screen. Using the touch screen You can use your finger to manipulate icons, buttons, menu items, the onscreen keyboard, and other items on the touch screen. - Page 28 TOSHIBA AT300 Figure 4-1 Home screen 1. All Apps 2. App shortcuts 3. Back 4. Home 5. Recent apps 6. System bar Item Description Tap to see all your apps and All Apps widgets. Application shortcuts Tap to open an app.
-
Page 29: Opening And Switching Applications
TOSHIBA AT300 Opening and switching applications The All Apps main screen holds icons for all the apps and widgets on your tablet. Tap WIDGETS tab on the top of the screen to view widgets that you have downloaded and installed. Widgets show you the latest updates of apps. -
Page 30: Managing Notifications
TOSHIBA AT300 Video enhancement Switch to the ON position to enable video enhancement. Audio enhancement Switch to the ON position to enable audio enhancement. Auto-rotate screen Switch to the ON position to enable automatic screen orientation as you turn your tablet sideways. -
Page 31: Locking Your Screen
Power and Volume down button for about 2 seconds. The tablet will show the preview for a few seconds and save it. All the screenshots you captured can be viewed in Gallery or TOSHIBA File Manager. For more information, please refer to Chapter 5, Applications. -
Page 32: Removing An Item From The Home Screen
TOSHIBA AT300 Adding an item to the Home screen To add an item to the Home screens, follow the steps listed below: Tap All Apps on the Home screen. Tap APPS or WIDGETS tab. You can also swipe left or right to move between screens. -
Page 33: Changing The Screen Orientation
TOSHIBA AT300 Creating a grouped folder Folders provide an easy way to organize and manage your apps shortcuts. You can group several app icons into a folder. Drag and drop app icons on top of each other to automatically create a grouped folder. -
Page 34: Factory Reset
TOSHIBA AT300 Plug the Micro USB connector of a USB cable into the Micro USB port on this tablet. Figure 4-2 Connecting an USB cable 1. Micro USB port 2. Micro USB connector Plug the other end of the USB cable into the USB port on the computer. - Page 35 TOSHIBA AT300 Data in the removable media will not be erased. User's Manual...
-
Page 36: Analog Clock
TOSHIBA AT300 Chapter 5 Applications This chapter describes the usage of applications & widgets. Your tablet has some Google Mobile™ services installed depending on the model you purchased. Analog clock Analog clock is a widget to display a clock on the Home screen based on the system time so that you can watch time directly from the clock. -
Page 37: Open A New Browser Window
TOSHIBA AT300 Zoom in or zoom out on a webpage You can zoom in or out a webpage in either of the following ways. Double tap at the area where you want to zoom. Pinch two fingers together or apart to zoom out or zoom in on a webpage. -
Page 38: Calculator
TOSHIBA AT300 Tap the bookmark icon ( ) at the upper right corner of the screen. Tap the HISTORY tab. The pages you’ve visited are grouped chronologically. Bookmarked pages have a star. Tap a time period to view the pages you’ve visited. -
Page 39: Camera
TOSHIBA AT300 Add events to Calendar You can add events to Calendar by following these steps: Tap any blank period on your calendar or the New Events icon ( on the top right corner of Calendar screen. Enter Event name and set details for this date. -
Page 40: Clock
TOSHIBA AT300 After the camera is set to panorama mode, you will select how shots will be stitched - slowly move the camera left to right or right to left. Review your pictures/videos You can review the pictures/videos you’ve taken in Camera. -
Page 41: Downloads
TOSHIBA AT300 Tap an existing alarm clock to change its time and other attributes. Or tap Add alarm to add a new one. Tap Turn alarm on to activate this new alarm. Tap Time to set the time of the alarm. -
Page 42: Gallery
TOSHIBA AT300 Tap ( ) to add attachments. When you enter text in the To: field, your tablet shows possible matches from your Contacts list, if any exist. Respond to an email You can reply to or forward an email that you’ve received. You can also delete emails and manage them in other ways. -
Page 43: Play Music
TOSHIBA AT300 View and browse pictures/videos All the albums are displayed in the screen. Tap an album to open it and view its contents. The pictures and videos in the album are displayed in chronological order. You can view the pictures and videos in your albums in stacks, sorted By album, times, locations, people and tags. -
Page 44: People
Contacts on your tablet. You can also copy contacts from SD card by TOSHIBA File Manager. You can export contacts in vCard format onto an SD card for backup using TOSHIBA File Manager. You can also send a contact via email or Bluetooth. -
Page 45: Service Station
The agreement authorizes the utility to collect certain basic information about your tablet and send it to the TOSHIBA servers as part of the process of obtaining updates. Accept or Decline the agreement by tapping the buttons. While it is possible to... -
Page 46: Downloading Updates
TOSHIBA AT300 Check for Updates button, and the application will refresh the list of available updates. It is not normally necessary to check for updates manually, as the utility checks for them automatically and informs you when one is available. -
Page 47: Toshiba Media Player
(e.g. H.264/AVC, MPEG-4), music (e.g. MP3, AAC-LC) and photo (e.g. JPEG, PNG). To open TOSHIBA Media Player, tap All Apps -> Media Player from the Home screen. TOSHIBA does not guarantee that all the audio/video files with the above coding will be played correctly. -
Page 48: Basic Operations
TOSHIBA AT300 System files cannot be accessed by TOSHIBA File Manager. TOSHIBA File Manager may not be able to open a file without its associated application. Navigation The main window of TOSHIBA File Manager is divided into four panels. Each panel’s function is described as below. -
Page 49: Creating A Folder
Adding folder shortcut Folder shortcut makes it faster to access the folder. TOSHIBA File Manager is designed to create folder shortcut in the Device panel. Press & hold a folder and tap to open the menu. -
Page 50: Online Manual
OK. However, the storage device icon cannot be removed. Storage Structure The following table lists the description of each storage device icon in the Device panel. TOSHIBA File Manager only shows the storage device connected to the tablet. Name Description Internal Storage All contents (excluding system files) in the tablet’s internal storage are shown. -
Page 51: Settings
TOSHIBA AT300 Chapter 6 Settings This chapter describes the Settings app - a quick and easy access to four groups of global options that allows you to configure how your tablet communicates and functions. A scrollbar is displayed on the right side of the screen. This scrollbar is only used to show the position of the displaying area. - Page 52 TOSHIBA AT300 Tethering & portable hotspot settings You can share your tablet’s mobile data connection with other devices (up to 8) via USB, Bluetooth, or by turning your tablet into a portable Wi-Fi hotspot. Tap to adjust these settings. This function is only supported by 3G models.
- Page 53 TOSHIBA AT300 Open the Settings app from All Apps. Under Wireless & networks, tap Wi-Fi. Slide the Wi-Fi switch to the ON position. The tablet scans for available Wi-Fi networks and displays the names of those it finds. Secured networks are indicated with a lock icon.
-
Page 54: Advanced Wi-Fi Settings
TOSHIBA AT300 Modifying a Wi-Fi network You can modify each connected Wi-Fi network settings including credentials, proxy server settings and IP settings. Proxy server settings may be required for some internal or external network connection. By default, the Wi-Fi networks you add are not configured to connect via a proxy server, but you can change that for each Wi-Fi network you've added. -
Page 55: Turning Bluetooth On Or Off
TOSHIBA AT300 Keep Wi-Fi on during sleep By default, your tablet stays connected to Wi-Fi when the screen goes to sleep. Tap this option to change this default setting: either to stay connected to Wi-Fi only when the tablet is connected to the AC adaptor or never to stay connected to Wi-Fi during sleep. -
Page 56: Connecting To A Bluetooth Device
TOSHIBA AT300 Pairing your tablet with a Bluetooth device You must pair your tablet with another device before you can connect to it. Once you pair your tablet with another device, they stay paired unless you unpair them. Open the Settings app from All Apps. -
Page 57: Mobile Networks
TOSHIBA AT300 Mobile networks This section only applies to models with 3G modules. When you assemble your tablet with a SIM card from your wireless service provider, your tablet is configured to use your provider’s mobile networks for transmitting data. -
Page 58: Device
TOSHIBA AT300 Set data usage warning level View or restrict data usage by app It is suggested that you check your wireless service provider’s plan and determine what data usage limit may apply before adjusting the data usage settings. The information displayed on the data usage settings screen is measured by your tablet. - Page 59 TOSHIBA AT300 Sound You tablet uses sounds and vibrations to communicate with you. You can configure and customize any of those including notifications, ringtones, alarms and feedback on your navigations. Sound contains the following options: Volumes Tap to open a dialog where you can drag a slider to set the volume separately for games, multimedia, ringtones &...
- Page 60 Tap to switch between HDMI video output mode. Video enhancement You can switch to the ON position to enable video enhancement with Adaptive Display powered by Toshiba Technologies. Some contents and applications may not be supported by the video enhancement function.
-
Page 61: Internal Storage
TOSHIBA AT300 Storage Storage shows your internal storage and external storage status. Internal storage Internal storage contains the following options: Total Space Shows the total memory space of internal storage in your tablet. Apps The amount of application data of internal storage. -
Page 62: Personal
You can tap the Menu icon ( ) and select Sort by size to switch the order of the lists in Downloaded or All tabs. This tablet does not support another Operating System. TOSHIBA cannot guarantee or support applications that are installed by a user. Personal Options under Personal allow you to manage personal accounts, data backup and security. -
Page 63: Location Services
TOSHIBA AT300 Tap ADD ACCOUNT on the top right of the screen to add a mail account or an exchange account. You can sync your contacts, calendar or other applications data via an exchange account. You can tap to edit an account. Settings vary with different account type. - Page 64 TOSHIBA AT300 SIM Card Lock Set up SIM card lock Tap to open a screen where you can configure the tablet to require entering the SIM PIN to use the tablet and where you can change the SIM PIN. This function is only supported by 3G models.
- Page 65 TOSHIBA AT300 Spelling correction Tap to enable automatic spelling correction to fix misspelled words more easily. Tap the Quick settings icon ( ) besides the option to select the target language. Personal dictionary Tap to open your personal dictionary. To add your words, tap ADD on the top of the screen.
-
Page 66: System
TOSHIBA AT300 Personal Data Factory data reset Tap to erase all user data in the internal storage. Follow the on- screen instructions to reset it. Please note that data in the removable media won’t be erased. Please refer to the section Factory Reset in "Basic"... -
Page 67: Developer Options
TOSHIBA AT300 Accessibility You can use Accessibility settings to enable accessibility functions, such as reading or enlarging text on the screen. Talkback Check to enable Talkback which provides spoken feedback to help blind and low-vision users. Auto-rotate screen Check to enable automatic screen orientation as you turn your tablet sideways. - Page 68 TOSHIBA AT300 Baseband version Display the baseband version. This function is only supported by 3G models. Kernel version Display the kernel version. Build number Display the build number. User's Manual 6-18...
-
Page 69: Optional Accessories
TOSHIBA AT300 Chapter 7 Optional Accessories Optional devices can expand the tablet's capabilities and its versatility. This section describes the connection or installation of the following devices: Cards Memory media slot Secure Digital™ (SD) Card (SD/SDHC/SDXC card) SIM card Peripheral devices... -
Page 70: Media Care
TOSHIBA AT300 Memory media format New media cards are formatted according to specific standards. If you wish to reformat a media card, be sure to do so with a device that uses media cards. Formatting SD/SDHC/SDXC memory cards SD/SDHC/SDXC memory cards are sold already formatted in conformity to specific standards. -
Page 71: Removing A Memory Media
TOSHIBA AT300 Figure 7-1 Removing the dummy card 1. Memory media slot 2. Dummy card Turn the memory media so that the contacts (metal areas) are facing down. Insert the memory media into the memory media slot on the tablet. -
Page 72: Sim Card Slot
TOSHIBA AT300 Do not remove the memory media while the tablet is in Sleep mode. The tablet could become unstable or data in the memory media could be lost. SIM card slot Some models are equipped with a SIM card slot that allows you to assemble a SIM card from your wireless service provider to use your provider’s mobile networks for transmitting data. -
Page 73: Usb Device
USB 2.0 standard. To connect a USB device, you must purchase a Micro A plug - A receptacle cable. This item is available from your reseller or TOSHIBA dealer. Make sure the connector is properly aligned with the socket. Do not try to force the connection, doing so can damage the connecting pins. -
Page 74: Toshiba Tablet Dock
HDMI cable. Toshiba Tablet Dock Your tablet can accommodate below docks with extra features making your tablet even more powerful and convenient to use. The items are available from your reseller or TOSHIBA dealer. Dock Type Feature Toshiba Standard Dock... -
Page 75: Troubleshooting
In reality many problems can be solved simply, but a few may require help from TOSHIBA Support - if you find you need to consult others, be prepared to describe the problem in as much detail as possible. -
Page 76: Hardware And System Checklist
Always try to make detailed notes of your observations and keep them in a permanent error log - this will help you to describe your problems to TOSHIBA Support. In addition, if a problem recurs, the log you have made will help to identify the problem faster. -
Page 77: Sound System
TOSHIBA AT300 Problem Procedure You cannot read a Check to ensure the required file is actually on the file memory media card that is inserted into the tablet. If you are still unable to resolve the problem, contact TOSHIBA Support. -
Page 78: Toshiba Support
-> Bluetooth. TOSHIBA Support If you require any additional help using your tablet or if you are having problems operating the tablet, you may need to contact TOSHIBA for additional technical assistance. Before you call Some problems you experience may be related to software or the operating system so it is important that you investigate other sources of assistance first. - Page 79 TOSHIBA AT300 TOSHIBA technical support If you are still unable to solve the problem and suspect that it is hardware related, visit TOSHIBA technical support website http://www.toshiba.co.jp/ worldwide/. User's Manual...
-
Page 80: Specifications
TOSHIBA AT300 Chapter 9 Specifications This chapter summarizes the tablet’s technical specifications. Physical Dimensions Size 261 (w) x 179 (d) x 9.0 (h) millimeters (not including parts that extend beyond the main body). Environmental Requirements Conditions Ambient temperature Relative humidity Operating 5°C (41°F) to 35°C... -
Page 81: Information For Wireless Devices Wireless Lan Interoperability
TOSHIBA AT300 Chapter 10 Information for Wireless Devices Wireless LAN Interoperability The Wireless LAN is compatible with other LAN systems Direct Sequence Spread Spectrum (DSSS) /Orthogonal Frequency Division Multiplexing (OFDM) radio technology, and is compliant to: The IEEE 802.11 Standard on Wireless LANs (Revision a/b/g/n or b/g/ n), as defined and approved by the Institute of Electrical and Electronics Engineers. -
Page 82: Wireless Devices And Your Health
If you should experience any such problem, immediately turn off either one of your Bluetooth or Wireless LAN. Please visit http://www.pc.support.global.toshiba.com, if you have any questions about using Wireless LAN or Bluetooth Card from TOSHIBA. In Europe visit http://www.toshiba-europe.com/computers/tnt/bluetooth.htm Your Bluetooth product is not compatible with devices using Bluetooth Version 1.0B specifications... - Page 83 TOSHIBA AT300 Europe Restrictions for Use of 2400.0-2483.5MHz Frequencies in Europe France: Outdoor use Military Radiolocation use. limited to 10mW Refarming of the 2.4GHz band has e.i.r.p. within the been ongoing in recent years to band allow current relaxed regulation Full 2454-2483.5MHz...
- Page 84 TOSHIBA AT300 Russian Limited e.i.r.p 100mW. Permitted to use Federation: only for indoor applications, closed industrial and warehouse areas, and on board aircraft. Permitted to use for local networks of aircraft crew service communications on board aircraft in area of the airport and at all stages of flight.
- Page 85 TOSHIBA AT300 contact the applicable national spectrum regulator to request a license for outdoor operation. Canada - Industry Canada (IC) This device complies with RSS 210 of Industry Canada. Operation is subject to the following two conditions: (1) this device may not cause interference, and (2) this device must accept any interference, including interference that may cause undesired operation of this device.
-
Page 86: Important Notice
If this equipment causes RF interference to other radio stations, promptly change the frequency being used, change the location of use, or turn off the source of emissions. Contact an authorized TOSHIBA service provider if you have problems with interference caused by this product to Other Radio Stations. -
Page 87: Device Authorization
TOSHIBA AT300 : This equipment uses a frequency bandwidth from 2,400MHz to 2,483.5MHz. It is possible to avoid the band of mobile object identification systems. 3. Indication for Bluetooth The indication shown below appears on this equipment. 2.4 : This equipment uses a frequency of 2.4 GHz. - Page 88 TOSHIBA AT300 Do not use this equipment in the countries/regions which are not listed in the table below. As of April 2012 Argentina Australia Austria Bangladesh Belgium Bolivia Bulgaria Cambodia Canada Chile China Colombia Costa Rica Croatia Cyprus Czech Republic...