Canon iR4570 User Manual
Hide thumbs
Also See for iR4570:
- Service manual (1008 pages) ,
- Printer manual (62 pages) ,
- Product description (2 pages)
Table of Contents
Advertisement
Advertisement
Table of Contents

Related Manuals for Canon iR4570


Summary of Contents for Canon iR4570
- Page 1 User's Guide...
-
Page 2: Manuals For The Machine
Manuals for the Machine The manuals for this machine are divided as follows. Please refer to them for detailed information. The manuals supplied with optional equipment are included in the list below. Depending on the system configuration and product purchased, some manuals may not be needed. Guides with this symbol are printed manuals. - Page 3 Adobe Systems Incorporated website. Considerable effort has been made to ensure that this manual is free of inaccuracies and omissions. However, as we are constantly improving our products, if you need an exact specification, please contact Canon.
-
Page 4: Table Of Contents
Contents Preface ............vi How To Use This Manual . - Page 5 Optional Equipment........... . 1-13 External View and Internal View .
-
Page 6: Preface
Preface Thank you for purchasing the Canon iR4570/iR3570/iR2870/iR2270. Please read this manual thoroughly before operating the machine in order to familiarize yourself with its capabilities, and to make the most of its many functions. After reading this manual, store it in a safe place for future reference. -
Page 7: Legal Notices
Legal Notices This CE Marking shows compliance of this equipment with Directive 73/23/EEC and Divective 89/336/EEC both as amended by Directive 93/68/EEC. Laser Safety This product is certified as a Class I laser product under IEC60825-1:1993 and EN60825-1:1994. This means that the product does not produce hazardous laser radiation. Since radiation emitted inside the product is completely confined within protective housings and external covers, the laser beam cannot escape from the machine during any phase of user operation. -
Page 8: Additional Information
Additional Information When servicing or adjusting the optical system of the product, be careful not to place screwdrivers or other shiny objects in the path of the laser beam. Also, accessories such as watches and rings should be removed before working on the product. The reflected beam, even though visible or invisible, can permanently damage your eyes. -
Page 9: International Energy Star Program
International Energy Star Program ® As an Partner, Canon Inc. has determined that this machine NERGY ® meets the Program for energy efficiency. NERGY ® The International Office Equipment Program is an NERGY international program that promotes energy saving through the use of computers and other office equipment. -
Page 10: R&Tte Directive
Use of shielded cable is necessary to comply with the technical requirements of EMC Directive. If you move to another EU country and are experiencing trouble please call the Canon Help Desk. (For Europe Only) Canon Inc./Canon Europa N.V. Super G3 Super G3 is a phrase used to describe the new generation of fax machines that use ITU-T V.34 standard 33.6 Kbps* modems. -
Page 11: Trademarks
Trademarks Canon, the Canon logo, iR, MEAP, MEAP logo, and NetSpot Accountant are trademarks of Canon Inc. Adobe, Adobe Acrobat, PostScript, and PostScript 3 are trademarks of Adobe Systems Incorporated. Macintosh and Mac OS are trademarks of Apple Computer, Inc. -
Page 12: Legal Limitations On The Usage Of Your Product And The Use Of Images
Legal Limitations on the Usage of Your Product and the Use of Images Using your product to scan, print or otherwise reproduce certain documents, and the use of such images as scanned, printed or otherwise reproduced by your product, may be prohibited by law and may result in criminal and/or civil liability. -
Page 13: Important Safety Instructions
OFF the main power switch, and disconnect the power cord from the power outlet. Then, contact your local authorized Canon dealer. - Necklaces and other metal objects - Cups, vases, flowerpots, and other containers filled with water or liquids... -
Page 14: Power Supply
CAUTION Do not install the machine in unstable locations, such as unsteady platforms or inclined floors, or in locations subject to excessive vibrations, as this may cause the machine to fall or tip over, resulting in personal injury. Never block the ventilation slots and louvers on the machine. -
Page 15: Handling
If the machine makes strange noises, or gives off smoke, heat, or strange smells, immediately turn OFF the main power switch, and disconnect the power cord from the power outlet. Then, contact your local authorized Canon dealer. Continued use of the machine in this condition may result in a fire or electrical shock. - Page 16 CAUTION Do not place heavy objects on the machine, as they may tip over or fall resulting in personal injury. Close the feeder/platen cover gently to avoid catching your hands, as this may result in personal injury. Do not press down hard on the feeder/platen cover when using the platen glass to make copies of thick books.
- Page 17 Never open covers other than those instructed in this manual. Do not remove the following caution labels which are attached to the machine. This product is certified as a Class I laser product under IEC60825-1:1993. If the laser beam escapes from the machine, exposure may cause serious damage to your eyes.
-
Page 18: Maintenance And Inspections
Maintenance and Inspections WARNING When cleaning the machine, first turn OFF the main power switch, then disconnect the power cord. Failure to observe these steps may result in a fire or electrical shock. Disconnect the power cord from the power outlet regularly, and clean the area around the base of the power plug's metal pins and the power outlet with a dry cloth to ensure that all dust and grime is removed. - Page 19 CAUTION The fixing unit and its surroundings inside the machine may become hot during use. When removing jammed paper or when inspecting the inside of the machine, do not touch the fixing unit and its surroundings, as doing so may result in burns or electrical shock.
-
Page 20: Consumables
Consumables WARNING Do not burn or throw used toner cartridges into open flames, as this may cause the toner remaining inside the cartridges to ignite, resulting in burns or a fire. Do not store toner cartridges or copy paper in places exposed to open flames, as this may cause the toner or paper to ignite, resulting in burns or a fire. -
Page 21: About The Instruction Manual Cd-Rom
About the Instruction Manual CD-ROM Contents of Instruction Manual CD-ROM Instruction Manual CD-ROM This contains the English, French, Italian, and German versions of the following guides. Easy Operation Guide • Basic Features Contains the basic operation instructions of the Copy, Mail Box, Send, Fax, Remote UI, and Printer functions. -
Page 22: User Manual Cd-Rom Menu
User Manual CD-ROM Menu The User Manual CD-ROM Menu is software that enables you to select and view PDF Manuals included on the CD-ROM via your computer screen. Follow the instructions below to use the User Manual CD-ROM Menu. System Requirements The User Manual CD-ROM Menu can be used in the following system environments. -
Page 23: Using The Cd-Rom Menu
Using The CD-ROM Menu This section describes how to use the CD-ROM Menu. When you insert the User Manual CD-ROM provided into the CD-ROM drive, the Language Selection screen is displayed. Clicking a language on this screen displays the following menu. (The sample screen shot shown here is for Windows users.) NOTE For Macintosh users, double-click the [START] icon to start the CD-ROM Menu. -
Page 24: Periodic Inspection Of The Breaker
IMPORTANT Make sure that the main power is turned OFF, before inspecting the breaker. If a malfunction occurs after an inspection, contact your local authorized Canon dealer. Checking the Breaker Push the test button with the tip of a ball-point pen, or similar object. - Page 25 Move the breaker lever to ON ("I" side). Press the main power switch to ON ("I" side). Fill in the check sheet, located on p. 4-6, to document your periodic inspections of the breaker.
- Page 26 xxvi...
- Page 27 Before You Start Using This Machine CHAPTER This chapter describes what you should know before using this machine, such as parts and their functions, and how to turn ON the main power. Installation Location and Handling ...........1-2 Installation Precautions .
-
Page 28: Installation Location And Handling
Installation Location and Handling This section describes precautions for installation location and handling. We recommend that you read this section prior to using this machine. Installation Precautions Avoid Installing the Machine in the Following Locations Avoid locations subject to extremes of temperature and humidity, whether low or high. - Page 29 Avoid poorly ventilated locations. This machine generates a slight amount of ozone during normal use. Although sensitivity to ozone may vary, this amount is not harmful. Ozone may be more noticeable during extended use or long production runs, especially in poorly ventilated rooms.
-
Page 30: Select A Safe Power Supply
Avoid exposing the machine to rapid changes in temperature. If the room in which the machine is installed is cold but rapidly heated, water droplets (condensation) may form inside the machine. This may result in a noticeable degradation in the quality of the copied image, the inability to properly scan an original, or the copies having no printed image at all. - Page 31 Do not connect the power cord to a multiplug power strip, as this may cause a fire or electrical shock. The power cord may become damaged if it is often stepped on or if heavy objects are placed on it. Continued use of a damaged power cord can lead to an accident, such as a fire or electrical shock.
-
Page 32: Provide Adequate Installation Space
Provide Adequate Installation Space Provide enough space on each side of the machine for unrestricted operation. The optional Feeder (DADF-N1), Finisher-S1, No optional equipment is attached. and Paper Deck-Q1 are attached. The optional Feeder (DADF-N1), Saddle Finisher-Q4, Puncher Unit-L1, Buffer Pass Unit-E1, and Paper Deck-Q1 are attached. -
Page 33: Moving The Machine
Moving the Machine If you intend to move the machine, contact your local authorized Canon dealer beforehand. Handling Precautions Do not attempt to disassemble or modify the machine. Some parts inside the machine are subject to high-voltages and temperatures. Take adequate precautions when inspecting the inside of the machine. - Page 34 If there is smoke, or unusual noise, immediately turn the main power switch OFF, disconnect the power cord from the outlet, and call your local authorized Canon dealer. Using the machine in this state may cause a fire or electrical shock. Also, avoid...
- Page 35 Neither Canon nor any service provider will be liable for damages for loss of data stored on the product's hard disk drive. (See the terms of the product's Limited Warranty for more details.)
-
Page 36: What This Machine Can Do
The iR4570/iR3570/iR2870/iR2270 incorporates a rich array Copy of input and output features that can greatly enhance your efficiency. Equipped with features that meet the needs of document work in a digitized office, the iR4570/iR3570/ Scan Mail Box iR2870/iR2270 represents the ultimate in digital multitasking machines. - Page 37 You can upgrade this machine to a high-speed network printer by installing the optional UFR II Printer Kit. This kit incorporates UFR II (Ultra Fast Rendering II) Technology, which utilizes Canon's original printing algorithm to minimize file processing and achieve maximum Sending data performance.
- Page 38 See the Scanning image data into computers is a function that is available if the iR4570/iR3570/iR2870/iR2270 is upgraded with printer and network capabilities. You can scan images of up to A3 in size at a resolution of 600 x 600 dpi.
-
Page 39: System Configuration And Parts
System Configuration and Parts Optional Equipment a Platen Cover Type H k Finisher-S1 b Feeder (DADF-N1) l Envelope Feeder Attachment-C1 c Card Reader-C1 m Buffer Pass Unit-E1 d Copy Tray-J1 n Puncher Unit-L1 e 3 Way Unit-A1 o Staple Cartridge-D2/D3 f Paper Deck-Q1 p Staple-J1 g Cassette Feeding Unit-Y2... -
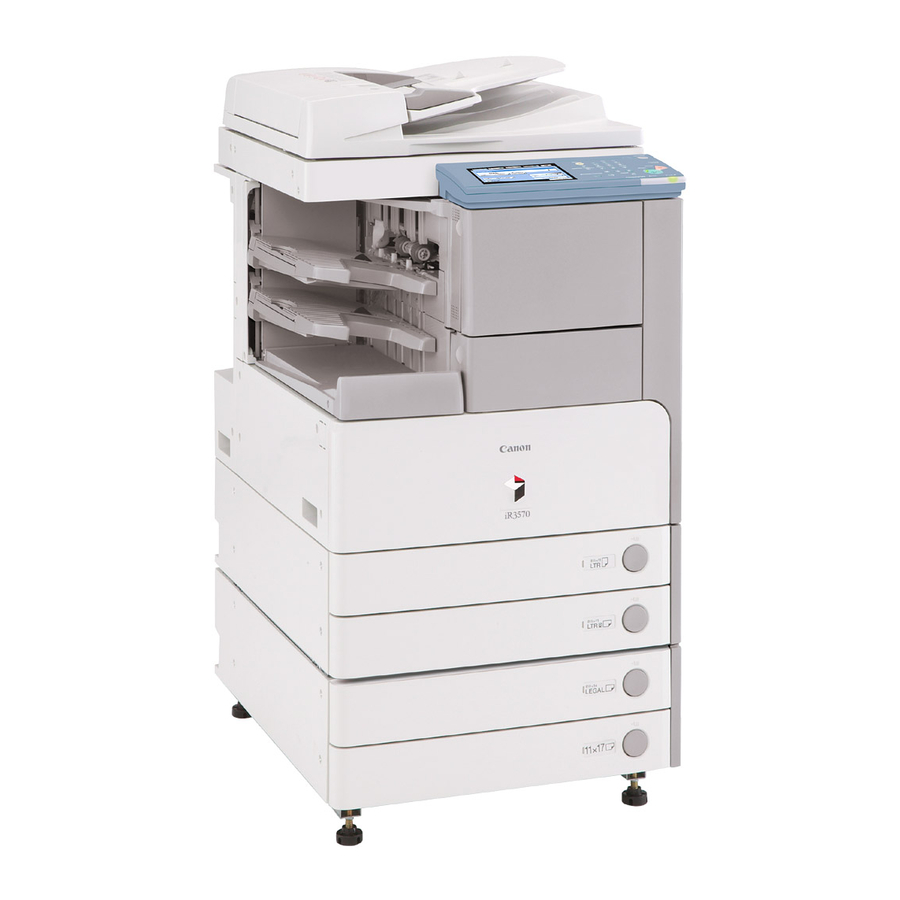
Page 40: External View And Internal View
External View and Internal View The optional Feeder (DADF-N1) and Cassette Feeding Unit-Y2 are attached. a Feeder (DADF-N1) b Control Panel c Main Unit's Right Cover d Stack Bypass e Main Power Switch f Test Button g Breaker h Paper Drawer's Right Cover i Paper Drawer 2 j Paper Drawer 1 k Output Tray... -
Page 41: Control Panel Parts
If you lose the edit pen, contact your Press to clear entered values or characters. local authorized Canon dealer. Do not use an object with a sharp end, such as a pencil or ballpoint pen, instead of the edit pen. -
Page 42: Touch Panel Display
Touch Panel Display a Copy i Special Features Press this key to access the machine's copying functions. Press to select a Special Features mode. b Send j System Monitor Press this key to access the machine's sending and Press to check the progress of a copy job, change the order facsimile functions if the Universal Send Kit is activated, or of printing, or cancel printing. - Page 43 The top of the touch panel display may differ according to the optional equipment that is attached to the machine. Attached Optional Equipment Displayed Function Keys None (initial status of the iR4570/iR3570/iR2870/ iR2270) UFR II Printer Kit, Printer Kit, or Multi-PDL Printer Kit is attached...
- Page 44 The meanings of the icons that appears in the Job/Print Status Display Area (on the bottom left of the screen) are described below: Icon (Type of Job) Description Copy Job Send/Fax Job Mail Box Job Printer Job Report Job Network Scan Job Remote Copy Job Additional Functions Job Icon (Machine Status)
-
Page 45: Main Power And Control Panel Power
Main Power and Control Panel Power The machine is provided with two power switches, a main power switch and a control panel power switch, as well as a breaker that detects excess current or leakage current. How to Turn ON the Main Power Make sure that the power plug is firmly inserted into the power outlet. - Page 46 The screens on the right are displayed while the system software is loading. If login authentication by a login service (SDL (Simple Device Login) or SSO (Single Sign-on)) is not set, and an application other than MEAP is selected as the initial function in Common Settings (from the Additional Functions screen): The Start Up screen is displayed until the machine is...
- Page 47 If login authentication by the SDL or SSO login service is not set, and MEAP is selected as the initial function in Common Settings (from the Additional Functions screen): The Start Up screen is displayed until the machine is ready to scan. After the Start Up screen disappears, the MEAP Start Up screen is displayed.
- Page 48 If login authentication by the SDL or SSO login service is set: The Start Up screen is displayed until the machine is ready to scan. After the Start Up screen disappears, the MEAP Start Up screen is displayed regardless of the Initial Function settings.
-
Page 49: Things You Must Do Before Using This Machine
Things You Must Do Before Using This Machine This section describes the important setting registrations and procedures that must be done before the machine is used for sending operations. For the further details of the operations, see "Things You Must Do Before Using This Machine" in the Sending and Facsimile Guide. IMPORTANT If you attempt to use the machine without registering the necessary information correctly, the machine may not function properly. - Page 50 Press [User Settings] under <Fax Settings>. Press [Tel Line Type]. Select the type of telephone line press [OK]. The selected mode is set. Press [Done] repeatedly until the Basic Features screen appears. 1-24 Things You Must Do Before Using This Machine...
-
Page 51: Setting The Current Date And Time
Setting the Current Date and Time You can set the current date and time. The current date and time settings are used as standard timer settings for functions that require them. GMT: The time at the Greenwich Observatory in England is called GMT (Greenwich Mean Time). - Page 52 Enter the current date (day, month, year) and time using (numeric keys). If you are setting the Time Zone: Press the Time Zone drop-down list select the time zone where the machine is located. NOTE The default setting is 'GMT 00:00'. If the desired time zone is not displayed, press [ ] or ] to scroll through the list.
- Page 53 Select the month and day from the Month and Day drop-down lists, respectively. Press [-] or [+] to enter the time of day you want Daylight Saving Time to take effect press [OK]. Press [End Date] make the settings in the same way as [Start Date] press [OK].
-
Page 54: Registering This Machine's Fax Number
Registering This Machine's Fax Number You must store the machine's fax number. This number is printed on the document that you fax to the receiving party. The number may also be displayed on the touch panel display of the receiving party's machine, depending on their type of machine. -
Page 55: Registering Sender Names
Registering Sender Names You can register any name as the sender's name, such as the section or department's name, or an individual's name. The registered sender's name can be displayed on the touch panel display of the recipient's machine and/or printed at the top of the documents that you send as the sender's information. NOTE You can set to display and print the sender's name instead of the name stored as the unit's name with the Sender's Names setting from the Send Settings screen. - Page 56 Press [Communications Settings] [TX Settings] under <Common Settings>. Press [Sender's Names (TTI)]. Select the number under which you want to register the sender's name press [Register/Edit]. Enter the sender's name press [OK]. You can enter up to 24 characters for the sender's name. To cancel registering the sender's name, press [Cancel].
-
Page 57: Registering The Unit's Name
Registering the Unit's Name Your name or company's name must be registered as the unit's name (a department name is optional). When you send a document, the recipient's machine displays or prints your name or company's name (and department's name, if applicable) as the sender's information on the recording paper. - Page 58 Press [Communications Settings] [TX Settings] under <Common Settings>. Press [Unit Name]. Enter a name press [OK]. The selected mode is set. Press [Done] repeatedly until the Basic Features screen appears. 1-32 Things You Must Do Before Using This Machine...
-
Page 59: Displaying A Help Screen
Displaying a Help Screen Pressing brings up a guidance screen with information about the various features that are available with your machine. Usage Help Pressing after selecting a mode brings up a guide screen with an explanation of that mode. Use this help function if you do not understand how to use the mode you are setting. - Page 60 Press [Making Copies] [Various originals]. Press [Photo original] or [Originals with Text/Photo] press [ ] or [ ] to read the detailed information on the selected mode. Press [Done] to return to the Various Originals screen. Press [Done] to return to the Help Menu screen. 1-34 Displaying a Help Screen...
-
Page 61: Routine Maintenance
Routine Maintenance CHAPTER This chapter describes how to load paper, and replace toner. Loading Paper..............2-2 Replacing the Toner Cartridge . -
Page 62: Loading Paper
Loading Paper If the selected paper has run out during printing, a screen prompting you to load paper appears on the touch panel display. IMPORTANT A screen prompting you to load paper also appears if the selected paper drawer is not fully inserted into the machine. - Page 63 NOTE For high-quality printouts, use paper recommended by Canon. Before loading paper, always fan the sheets several times, and align the edges to facilitate feeding. Also, you should always fan paper that has just been removed from a newly opened paper package.
- Page 64 Load the paper stack into the paper drawer. Even out the edges of the paper stack. Load the paper stack against the right wall of the paper drawer. When loading paper into the paper drawer for the first time, set the paper size dial to match the paper size being loaded.
-
Page 65: Replacing The Toner Cartridge
Replacing the Toner Cartridge When there is only a small amount of toner remaining inside the machine, the following message appears on the touch panel display, as shown. You can continue printing, but at this time you should purchase new toner cartridge so that you have it available when needed. - Page 66 IMPORTANT Use only the toner cartridges intended for use with this machine. Do not replace toner cartridges until the message prompting you to do so appears. Do not replace toner cartridges while the machine is in the process of printing. NOTE When the message <Toner is low.
- Page 67 Pull the toner cartridge out of the toner supply port. Pull the toner cartridge out halfway, then remove it completely while supporting it with your other hand from underneath. WARNING Do not burn or throw used toner cartridges into open flames, as this may cause the toner remaining inside the cartridges to ignite, resulting in burns or a fire.
- Page 68 Push the new toner cartridge in as far as possible. Support the new toner cartridge with your hand from underneath while pushing it into the machine with your other hand. Push the lever down until it becomes horizontal. IMPORTANT Make sure that the on the lever is aligned with the the 'Lock' position.
-
Page 69: Chapter 3 Troubleshooting
Troubleshooting CHAPTER This chapter explains what to do in response to a paper jam and an error message display. Clearing Paper Jams............. .3-2 List of Error Messages . -
Page 70: Clearing Paper Jams
Clearing Paper Jams The screen indicating the location of the paper jam and instructions on how to clear the paper jam appear on the touch panel display. This screen repeatedly appears on the touch panel display until the paper jam is entirely cleared. The location of the paper jam is indicated, by a red circle, on the top right corner of the screen. - Page 71 Inspect all paper jam locations indicated on the touch panel display, and remove any jammed paper. See the appropriate pages below for instructions on finding and removing jammed paper. Or, you can follow the instructions on the touch panel display. If jammed paper tears while it is being removed, be sure to remove any remaining pieces from inside the machine.
- Page 72 If a paper jam occurs inside an optional unit: See the instructions on the following section. a Feeder (DADF-N1) (See "Feeder (DADF-N1) (Optional)," in the Reference Guide.) b Inner 2 Way Tray-D1 (See "Inner 2 Way Tray-D1 (Optional)," in the Reference Guide.) c Cassette Feeding Unit-Y2 (See "Cassette Feeding Unit-Y2 (Optional),"...
- Page 73 After you have removed all of the jammed paper at the locations indicated on the touch panel display, restore all levers and covers to their original positions. Continue to follow the procedure and instructions displayed on the touch panel display. Once you have removed all of the jammed paper in locations other than the feeder, printing or copying resumes.
-
Page 74: List Of Error Messages
List of Error Messages List of Error Codes without Messages If a job or operation does not complete successfully, check the error code, and perform the necessary operations according to the error code displayed. You can check the error code on the Details screen under [Log] from the System Monitor screen. - Page 75 # 037 Cause Documents could not be received because there was insufficient memory available. Remedy Erase unwanted documents and documents with errors from memory in order to increase the amount of available memory. (See "Introduction to the Mail Box Functions," in the Copying and Mail Box Guide, or "Receiving Documents,"...
- Page 76 Turn the main power OFF, wait for three or more seconds, and turn the main power back ON. If the machine still does not work normally, turn the main power OFF, disconnect the machine, and contact your local authorized Canon dealer. # 816 Cause You cannot print because the set page Limit total has been reached.
- Page 77 # 851 Cause 1 There is insufficient memory remaining in the system. Remedy Check the system's available memory, and delete any unnecessary documents stored in the inboxes. Cause 2 The scanned document cannot be stored because there are more than 2,000 documents in the specified inbox.
- Page 78 Try delivering device information again after setting Restrictions for Receiving Device Info. to 'Off'. # 855 Cause Device information could not be delivered because a language that the client machine cannot handle was included in the device information. Remedy Contact your local authorized Canon dealer. 3-10 List of Error Messages...
-
Page 79: Chapter 4 Appendix
Appendix CHAPTER This chapter provides other useful information. Multifunctional Operations ............4-2 Available Paper Stock . -
Page 80: Multifunctional Operations
Multifunctional Operations The iR4570/iR3570/iR2870/iR2270 offers the user many functions, such as printing, scanning, copying, and sending, which can be used together. The following table provides you with the details of multifunctional operations. : Available : Unavailable : Available, but with conditions... - Page 81 *1 The machine's performance may be affected if image processing, such as compression, enlargement/reduction, and rotation, are carried out. *2 The output order of competing jobs varies, depending on whether an optional finisher is attached. When an optional finisher is attached: one set is output alternately for each job When an optional finisher is not attached: one page is output alternately for each job *3 The machine's processing speed may be lowered.
-
Page 82: Available Paper Stock
Available Paper Stock The paper types that can be used with this machine are shown in the following table. Icons indicating the type of paper loaded in each paper drawer can be displayed on the paper selection screen if you store that information in the machine beforehand. (See "Identifying the Type of Paper in a Paper Source,"... - Page 83 Paper Source Paper Size Width x Length Paper Paper Stack Paper Deck Drawer 1 Drawer 2, 3, 4 Bypass 297 mm x 420 mm 297 mm x 210 mm 210 mm x 297 mm 148 mm x 210 mm ISO-B5 176 mm x 250 mm ISO-C5 162 mm x 229 mm...
-
Page 84: Check Sheet For The Periodic Inspection Of The Breaker
Fill in the date of inspection and the name of the inspector. When the inspection is completed successfully, write a check mark under "OK." If not, contact your local authorized Canon dealer. (Also, write a check mark under "NG" (No Good).) Result...