Dell B2375dfw User Manual
Mono mfp
Hide thumbs
Also See for B2375dfw:
- User manual (359 pages) ,
- Quick reference manual (11 pages) ,
- Specifications (4 pages)
Table of Contents
Advertisement
Quick Links
Advertisement
Table of Contents
Troubleshooting

Related Manuals for Dell B2375dfw


Summary of Contents for Dell B2375dfw
- Page 1 Dell™ B2375dfw Mono MFP Dell™ B2375dnf Mono MFP User’s Guide...
-
Page 2: Dell™ B2375Dfw/ B2375Dnf Mono Mfp User's Guide
Dell provides several online and telephone-based support and service options. Availability varies by country and product, and some services may not be available in your area. To contact Dell for sales, technical support, or customer service issues: Visit www.dell.com/support... - Page 3 Dimension, OptiPlex, Latitude, PowerEdge, PowerVault, PowerApp, Dell OpenManage and the YOURS IS HERE logo are trademarks of Dell Inc.; Intel, Pentium, and Celeron are registered trademarks of Intel Corporation in the U.S. and other countries; Microsoft, Windows, Windows Server, MS-DOS , Windows Vista, ,Windows 7, Windows8 are either trademarks or registered trademarks of Microsoft Corporation in the United States and/or other countries.
- Page 4 Refer to the 'LICENSE.txt' file in the provided CD-ROM for the open source license information. Rev.1.00 ____________________ ...
-
Page 5: Finding Information
• How to use my printer Quick Reference Guide Dell™ B2375dfw / B2375dnf Mono MFP Quick Reference Guide HMCWMA01 JC68-03031A00 About Your Printer Operator Panel Button Functions... - Page 6 • Downloads - Drivers • Reference - Printer documentation and product specifications You can access Dell Support at www.dell.com/support. Select your region on the WELCOME TO DELL SUPPORT page, and fill in the requested details to access help tools and information. ...
-
Page 7: Table Of Contents
Contacting Dell ........ - Page 8 Menu Overview ....... . . 58 Dell™ B2375dfw/ B2375dnf Mono MFP Menu Functions ..59 Printing the Printer Setting and Op-panel Menu Setting.
- Page 9 Scan to SharePoint® Online ....... . 63 My Files ............64 Creating a My Files .
- Page 10 Using the Dell Supplies Ordering Utility......84 Using the Dell Printer Manager ....... . . 85 Understanding Dell Printer Manager .
- Page 11 Dell Tab ........
- Page 12 Printing Posters ..........170 Printing Booklets .
- Page 13 Useful network programs ........211 Dell Printer Configuration Web Tool ......211 SetIP wired network setup .
- Page 14 Setup using Windows (Dell B2375dfw Mono MFP only)... 223 Dell Printer Easy Wi-Fi Install ....... 223 Access point via USB cable in Windows .
- Page 15 Sending a Fax ..........249 Adjusting the Document Darkness .
- Page 16 Printing a Document ........270 Changing Printer Settings .
- Page 17 Uninstalling the printer driver ....... . . 292 Setting up the printer ......... 292 Printing a Document.
- Page 18 General Specifications ........353 Dell technical support policy ........354 China only .
-
Page 19: About
About Unpacking Your Printer About Your Printer Introducing the Screen Internal Fonts Setting up the hardware Installing the Toner Cartridge Loading Paper Making Connections Powering on the Printer Using USB memory device Managing the USB Memory Setting up Address Book Using Favorite Menu (Administrator only) Email Setup (Administrator only) - 18... -
Page 20: Unpacking Your Printer
NOTE: Leave the printer in the box until you are ready to install it. In addition to the Dell B2375dfw Mono MFP or Dell B2375dnf Mono MFP, ensure that you have the following items in the box. If there is a missing item, contact Dell:... - Page 21 The Drivers and Documentation CD contains Dell printer drivers, Scan drivers, Printer Settings Utility, Set IP, Mac driver, Linux driver, Dell Toner Management System and a User’s Guide. c Quick Reference Guide may not be provided with your product depending on your country.
-
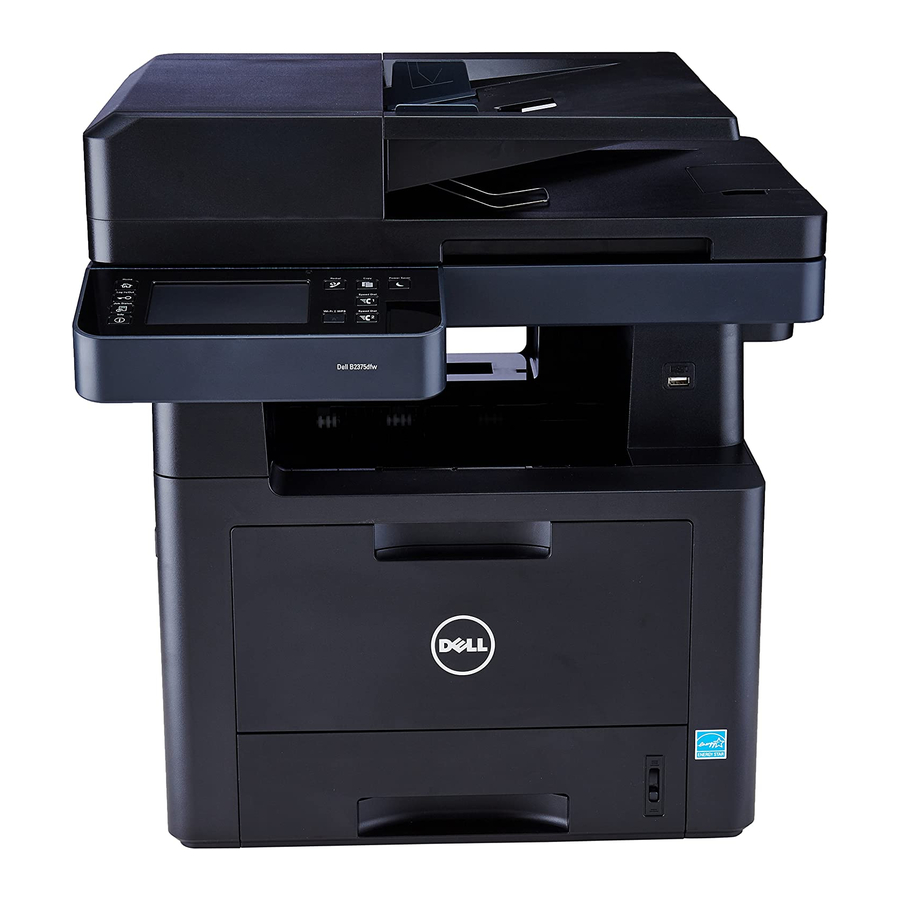
Page 22: About Your Printer
About Your Printer These are the main components of your printer. The following illustrations show the standard Dell B2375dfw Mono MFP or Dell B2375dnf Mono MFP and an optional tray 2 attached: Front View document width document input tray DADF (Duplex Automatic... -
Page 23: Rear View
Rear View extension telephone socket (EXT) LINE telephone line socket (Line) EDI port Network port USB port 5V output port for IEEE OUTPUT 1284 parallel connectorab power switch power receptacle rear door If you want to connect the extension phone or answering machine, see "Making Connections". -
Page 24: Operator Panel Button Functions
Fax image to destination from stored speed dial1. Speed Dial1( Fax image to destination from stored speed dial2. Speed Dial2 ( Configures the wireless network connection easily Wi-Fi/WPS ( without a computer. Dell B2375dfw only) Mono MFP - 23 ... -
Page 25: Understanding The Status Led
Understanding the Status LED When the problem occurs, the Status LED indicates the machine's condition by the light color of it's action. Status Description • The machine is off-line. • The machine is in power save mode. When data is received, or any button is pressed, it switches to on-line automatically. -
Page 26: Introducing The Screen
Introducing the Screen Home screen mode The home screen on the control panel allows user-friendly operation of the machine. Once you press the home button( ) on the panel, it shows the home screen. • Scan to Email: You can send a scanned image through your email account. see "Scan to Email"... - Page 27 • My Forms: You can scan forms or print pre-set form templates from internal or external storage. see "My Forms" • My Calender: You can print the calendar from your Google Calendar account. see "My Calendar" • My Settings: You can browse current machine settings or change machine values. • Scan to USB: You can save the scanned image onto a USB memory device.
- Page 28 Notification Bar : Press the black bar on top of the display screen. The following • screen appear: If you want to close the Notification Bar, re-press the black bar. – Toner: Shows the amount of remaining toner capacity. – Screen Brightness: Adjusts brightness of the display screen.
-
Page 29: All Applications Screen Mode
All Applications screen mode Press the All Applicatons ( ) from the home screen, it shows the applications screen. • USB : You can connect to USB. • Scan to Fax Server: You can save the scanned image via a Fax Server. Scan to Network Folder: You can save the scanned image onto a network folder. -
Page 30: Editing The Home Screen
Editing the Home Screen You can edit the applictions on the home screen using Edit Mode and favorite function. Edit Mode Touch and hold the home display area (excluding the icon) until Edit Mode appears. NOTE: You need to Log in to use this function. • Add Apps : You can add applications. -
Page 31: Searching Application For An Entry
Press Check( ) from the screen. You can find ID Copy short cut menu on the home Screen. Searching application for an entry You can search using Search ( ) , Category ( Press All Applicatons ( ) from the home screen. •... -
Page 32: User Profile
User Profile Administrator can register 20 users. General user can register himself. Create ID Press My Settings Machine Setup User Profile Add ( ) button from the home screen. Input ID, Password, Confirm Password you want. Press Check ( ) from the screen. Delete ID You can delete your ID only. -
Page 33: Setting The Job Management
) to return to Home Screen. Internal Fonts The Dell B2375dfw Mono MFP or Dell B2375dnf Mono MFP Laser printer supports the PCL and PS fonts. If you want to see the PCL and PS font list, follow these steps:... -
Page 34: Setting Up The Hardware
Setting up the hardware This section shows the steps to set up the hardware which is explained in the Placemat. Make sure you read the Placemat and complete the following steps: Select a stable location. Select a level, stable place with adequate space for air circulation. Allow extra space to open covers and trays. -
Page 35: Installing The Toner Cartridge
Load paper. See "Loading Paper". Make sure that all the cables are connected to the printer. Turn the printer on. NOTE: When you move the printer, do not tilt or turn it upside down. Otherwise, the inside of the printer may be contaminated by toner, which can cause damage to the printer or result in bad printing quality. - Page 36 Remove and discard the packing foam. Pull the toner cartridge straight out. Remove the label and the protective film from the toner cartridge. - 35 ...
- Page 37 Thoroughly shake the cartridge from side-to-side to distribute the toner evenly inside the cartridge. NOTE: If toner comes into contact with your clothing, wipe the toner off with a dry cloth and wash your clothing in cold water. Hot water sets toner into fabric.
-
Page 38: Loading Paper
Loading Paper Load up to 250 sheets of plain paper (80 g/m , 20lb bond) in the paper tray. NOTE: Set the paper type and size after loading paper into the paper tray. See "Setting the Paper Type" and "Setting the Paper Size" for the paper used in copying and faxing, or "Paper Tab"... - Page 39 Slide in the paper length guide until it rests against the end of the paper stack. For paper smaller than Letter size, adjust the rear paper length guide so that it lightly touches the paper stack. 4 Pinch the paper width guide, and move it towards the stack of paper until it touches the side of the stack.
- Page 40 Flex the sheets back and forth to loosen them, and then fan them out. Do not fold or crease the print media. Align the edges on a level surface. 6 Insert the paper stack into the paper tray with the side to be printed on facing down. 7 Do not exceed the maximum stack height indicated by the paper limit marks on both the inside walls of the tray.
- Page 41 Slide the paper tray back into the printer. Set the paper type and size. For more information, see "Setting the Paper Type" and "Setting the Paper Size". - 40 ...
-
Page 42: Making Connections
Making Connections Connecting the Telephone Line RJ11 telephone line socket (Line) To the wall jack 1 Plug one end of a telephone line cord into the RJ11 telephone line socket (FAX) and the other end into an active wall jack. To connect a telephone and/or answering machine to your printer, remove the plug from the extension telephone socket (EXT.) ( ) and plug the telephone or answering machine into the extension telephone socket (EXT.). - Page 43 If connecting a FAX using an answering machine or telephone answering device (TAD): Computer LINE Telephone Answering Device NOTE: Set rings to answer to digit greater than the "Using an Answering machine" setting for the telephone answering device (TAD). If connecting a FAX using a computer modem: LINE Telephone Answering Device NOTE: Set rings to answer to digit greater than the "Using an Answering...
- Page 44 NOTE: Phone adaptor not supplied for the United Kingdom. You are advised to buy from local suppliers. If the phone communication is serial in your country (such as Germany, Sweden, Denmark, Austria, Belgium, Italy, France, and Switzerland), connect the telephone or answering machine as shown in the following figure.
-
Page 45: Connecting The Printer Cable
"Connecting the Printer to the Network". NOTE: USB cables are sold separately. Contact Dell to purchase a USB cable. NOTE: Connecting the printer to the USB port of the computer requires a certified USB cable. - Page 46 Connecting the Printer to the Network Ensure that the printer, computer, and any other attached devices are powered off and unplugged. Connect one end of a standard category 5 Unshielded Twisted Pair (UTP) network cable to a LAN drop or hub, and the other end to the Ethernet network port on the back of the printer.
-
Page 47: Powering On The Printer
Powering on the Printer CAUTION: The fusing area at the rear part of the inside of your printer becomes hot once the printer is powered on. CAUTION: Be careful not to be burned when you access this area. CAUTION: Do not disassemble the printer when it is powered on. If you do, it may give you an electric shock. -
Page 48: Setting Fax Setup Boot Sequence
Setting fax setup boot sequence Set the language. See "Changing the Display Language (Administrator only)". Select the country. See "Selecting Country (Administrator only)". Set the date and time. See "Setting the Time and Date (Administrator only)". When fax setup confirmation window appears, select If you selected , your printer restores the fax settings as default. -
Page 49: Direct Usb
Insert a USB memory key into the USB memory port on the front of your printer. CAUTION: Do not remove the USB memory device while the machine is in operation or writing to or reading from USB memory. The machine warranty does not cover damage caused by user’s misuse. -
Page 50: Scan To Usb
Scan to USB Insert a USB memory device into the USB memory port on your machine. Load the document(s) face up with top edge in first into the DADF. Place a single document face down on the document glass. For details about loading a document, see "Loading an Original Document". Press All Applicatons Scan to USB from the home screen. -
Page 51: Changing The Scan Feature Settings
Changing the Scan Feature Settings The following table shows the options you can select. Original Type Original Size Resolution Color Format Duplex Text, DADF : Letter, 100, 200, Color, JPEG, BMP, Off, Short Text & Photo, A4, A5, JIS 300, 600 Gray, TIFF, PDF, Edge, Long... -
Page 52: Managing The Usb Memory
Managing the USB Memory You can delete image files stored in the USB memory. Deleting an Image File To delete an image file that you scanned and saved on your USB memory stick. Insert the USB memory key into the USB memory port on your printer. NOTE: Insert the USB memory key as soon as the pop-up window appears. -
Page 53: Viewing The Usb Memory Status
Insert the USB memory key into the USB memory port on your printer. NOTE: Insert the USB memory key as soon as the pop-up window appears. Press All Applicatons USB from the home screen. Press Print From USB. Press the up/down arrows to select the folder or file you want. Select the number of copies to be printed or enter the number. -
Page 54: Export (Administrator Only)
Export (Administrator only) Insert the USB memory device into the USB memory port on your machine. NOTE: Insert the USB memory key as soon as the pop-up window appears. Press All Applicatons USB from the home screen. Press Export. Select Setup Data, Address Book and press OK. Select the file you want to restore and press OK. -
Page 55: Storing Group Address
NOTE: For a two- or three-digit speed dial number, press the first digit button(s) and then hold down the last digit button for more than 2 seconds. NOTE: You can print the address book list by selecting Press My Settings Address Book Print Start ( ) from the home screen. -
Page 56: Exporting Address Book (Administrator Only)
Exporting Address Book (Administrator only) You can edit the exported address book in CSV file format and send it back to the machine by exporting to the machine from your computer. 1 Access the Embedded Web Service. See "Embedded Web Service". 2 Click Address Book Export in task drop down list. -
Page 57: Printing Address Book
4 Setting the option you want and click the Import button. • Decryption – No Decryption : Imports non-decrypted address list. – No Decryption without confidential : Imports non-decrypted address list without confidential. – Decryption : Imports decrypted address list. Printing Address Book You can check your email address book list by printing it on the paper. -
Page 58: Email Setup (Administrator Only)
Email Setup (Administrator only) To use email features such as Scan to Email and Fax Forward to email addresses, you first need to configure the SMTP server settings under network settings. See "Network setup (Administrator only)" for network parameters. Setting up the Email Press My Settings Machine Setup Email Setup from the home screen. -
Page 59: Menu Overview
Menu Overview Dell™ B2375dfw/ B2375dnf Mono MFP Menu Functions Printing the Printer Setting and Op-panel Menu Setting Access Google Drive Scan to SharePoint Online My Files My Forms My Calendar Machine Setup - 58 ... -
Page 60: Dell™ B2375Dfw/ B2375Dnf Mono Mfp Menu Functions
Dell™ B2375dfw/ B2375dnf Mono MFP Menu Functions The control panel provides access to various menus to set up the machine or use the machine's functions. These menus can be accessed by touching them on the display screen. NOTE: Some menus may not appear in the display depending on options or setup. - Page 61 My Forms My Calender My Settings Print from My files Troubleshooting Machine Setup Default Setting Paper Setup Tray Behavior Reports Fax Setup Email Setup Network Setup Security User Profile Initial Setup Quick Dial Setup Restore Options Factory Reset Job Management Stamp Application Management - 60...
-
Page 62: Printing The Printer Setting And Op-Panel Menu Setting
Printing the Printer Setting and Op-panel Menu Setting NOTE: This will be helpful for the users to maneuver through the op-panel setting and tree in changing the defaults. Printing the Printer Setting Press My Settings Machine Setup Reports Printer Settings from the home screen. -
Page 63: Scan To Google Drive
• Logout : Logs out from the Access Google Drive. CAUTION: If you do not log out, other people can use your ID. Scan to Google Drive Load the document(s) face up with top edge in first into the DADF. Place a single document face down on the document glass. -
Page 64: Scan To Sharepoint Online
Scan to SharePoint Online You can use Scan to SharePoint Online in the machine. You should be registered to the Microsoft office 365 account to use this function. Scan to SharePoint Online follow Microsoft Log in policy. 1 Press Scan to SharePoint Online from the home screen. Press All Applicatons Scan to SharePoint Online from the home screen. -
Page 65: My Files
My Files This feature allows you to use the device shared folder as a My Files. The advantage of this feature is that you can conveniently use the shared folder through your computer’s window. Creating a My Files Open the Windows Explore window from the computer. Enter the printer’s \\[ip address] (example:\\169.254.133.42) in the address field, and press the enter key or click Go. -
Page 66: My Forms
My Forms This feature allows you to use scan to My Files, Network Folder, FTP and print from My Files, Network location(HTTP, HTTPS, Network Folder, FTP) and also manage My Files. Scanning a Form Load the document(s) face up with top edge in first into the DADF. Place a single document face down on the document glass. - Page 67 – Preview ( ) : Preview a document. Select the file for print. Press Start ( ) from the screen. Print from Network Location You can print on Network location (HTTP, HTTPs, Network Folder, FTP). Press My Forms Browse to Print Select from Network Location from the home screen.
-
Page 68: My Calendar
My Calendar You should be registered to the Google Calendar account to use this function. My Calendar follow Google Log in policy. Press My Calendar from the home screen. Press All Applicatons My Calendar from the home screen. 2 Enter Email and Password, press the Sign in from the screen. I f you want to log in automatically, check Remember me. -
Page 69: Machine Setup
Machine Setup Setting the Machine ID (Administrator only) You can set the machine ID and fax number which will be printed at the top of each page. If you have installed the fax multi-line kit, you need to select a line first, follow these steps: Press My Settings Machine Setup Initial Setup... -
Page 70: Power Save Mode (Administrator Only)
Power Save Mode (Administrator only) If your country switches to Daylight Savings Time each year, use this procedure to automatically switch to Daylight Savings Time and to Standard time. Press My Settings Machine Setup Initial Setup Power Save from the home screen. -
Page 71: Setting The Sound/Volume (Administrator Only)
Setting the Sound/Volume (Administrator only) You can set the volume for key sounds, alarm sounds, and the sound that occurs during a fax job. Press My Settings Machine Setup Initial Setup Sound/Volume from the home screen. Press the appropriate option you want. •... -
Page 72: Setting The Timing Of Toner Status Alert (Administrator Only)
Setting the Timing of Toner Status Alert (Administrator only) You can customize the level to alert toner low or toner almost empty. If the current toner amount drops below the setting level, the printer will display a warning message on the operator panel. -
Page 73: Setting The Quick Dial (Administrator Only)
Setting the Quick Dial (Administrator only) Set the speed dial numbers. Press My Settings Machine Setup Speed Dial Setting from the home screen. Press and hold the Speed Dial1( ) or Speed Dial2 ( ) button on the control panel for less than 2 seconds. Select number you want. -
Page 74: Setting The Security (Administrator Only)
Setting the Security (Administrator only) Authentication This feature allows you to choose the authentication method for user authentication. Press My Settings Machine Setup Security Authentication from the home screen. 2 Select the Mode. • Device Mode: Activate device authentication. Device authentication requests a user to login before being able to use the device. -
Page 75: Setting The Altitude Adjustment (Administrator Only)
Setting the Altitude Adjustment (Administrator only) You can choose the altitude of the place where your machine is located. The print quality is affected by atmospheric pressure, which is determined by the height of the machine above sea level. Therefore, it is important to set the right altitude. 1 Press My Settings Machine Setup Initial Setup... -
Page 76: Checking The Firmware Version (Administrator Only)
Checking the Firmware Version (Administrator only) You can check the firmware version used in the machine. Press My Settings Machine Setup Initial Setup Firmware Version from the home screen. You can check the firmware version used in the machine. Reports The following reports are available: Printer Settings Report This list shows the status of the user-selectable options. -
Page 77: Printing A Report
Demo Page Report Prints a demo page to ensure that the printer is operating correctly. PCL Font List or PS Font List Report This report shows the PCL or PS font list. Network Settings Report This list shows the status of the network options. You may print this list to confirm your changes after changing any settings. -
Page 78: Setting The Application Management (Administrator Only)
Setting the Application Management (Administrator only) You can add/delete/enable/disable applications.But, OOB features cannot be added or deleted. Adding an application You can add applications. Press My Settings Machine Setup Application Management Click the Install ( ) icon. Find the application file by entering the URL in Manual Input(URL) or by using the USB Stick. -
Page 79: Software
Software Overview ® ® Installing Software in Microsoft Windows Operating System Accessing management tools Firmware Update Utility Using the Dell Supplies Ordering Utility Using the Dell Printer Manager Using Dell Printer Status Using Wireless Setup Utility Uninstalling Software - 78 ... -
Page 80: Software Overview
• SetIP- Use this program to set your printer's TCP/IP addresses. • Dell Printer Manager - Dell Printer Manager is an application that combines Dell machine settings into one location. • Dell Printer Status- This program allows you to monitor the printer’s status and alerts you when an error occurs during printing. -
Page 81: Installing Software In Microsoft ® Windows ® Operating System
, Windows 7 and Windows Server ® 2008 R2, Windows 8 the system ® Vista administrator should install Dell software. Supported Operating Systems • Windows XP Home edition or Professional • Windows Server 2003, Windows Server 2008, Windows Server 2008 R2 •... -
Page 82: Installing Dell Software For Local Printing
A local printer is a printer attached to your computer using a USB cable. If your printer is attached to a network instead of your computer, skip this step and go on to "Installing Dell Software for Network Printing" or attached to a network instead of your computer,go on to A printer driver is a software that lets your computer communicate with your printer. - Page 83 Select USB on the Select a Connection Method. Enter the your printer name. Then click Next. Follow the instructions in the installation window. - 82 ...
-
Page 84: Accessing Management Tools
Accessing management tools Dell provides a variety of management tools for Dell printers. Make sure that the machine is connected to your computer and powered on. From the Start menu, select Programs or All Programs. • For Windows 8, from the Charms, select Search Apps. -
Page 85: Using The Dell Supplies Ordering Utility
Using the Dell Supplies Ordering Utility To order replacement toner cartridges or supplies from Dell: NOTE: Availabe for Windows or Mac OS users only. Double-click the Dell Supplies Ordering Utility icon on your desktop. From the Start menu, select Programs Dell Printers... -
Page 86: Using The Dell Printer Manager
• For Mac, Open the Applications folder Dell folder Dell Printer Manager. The Dell Printer Manager interface is comprised of various basic sections as described in the table that follows: NOTE: The screenshot may differ depending on the operating system you are using. - Page 87 Printer list The Printer List displays printers installed on your computer and network printers added by network discovery (Windows only). Printer This area gives you general information about your machine. You can check information, such as the machine’s model name, IP information address (or Port name), and machine status.
-
Page 88: Advanced Settings User Interface Overview
Advanced settings user interface overview The advanced user interface is intended to be used by the person responsible for managing the network and machines. NOTE: Some menus may not appear in the display depending on options or models. If so, it is not applicable to your machine. Device Settings You can configure various machine settings such as machine setup, paper, layout, emulation, network, and print information. -
Page 89: Using Dell Printer Status
Available for Windows OS users only Dell Printer Status overview If an error occurs while operating, you can check the error from the Dell Printer Status. Dell Printer Status is installed automatically when you install the machine software. You can also launch Dell Printer Status manually. Go to the Printing Preferences, click the Basic tab Printer Status button. - Page 90 Toner Level You can view the level of toner remaining in each toner cartridge. The machine and the number of toner cartridge(s) shown in the above window may differ depending on the machine in use. Some machines do not have this feature. Option You can set printing job alert related settings.
-
Page 91: Using Wireless Setup Utility
Connect the USB cable to your machine. Print the Network Configuration page of the printer to see the current network configuration. From the Start menu, select Programs Dell Printers Dell B2375dfw Mono MFP Wireless Setup Utility. Follow the instructions in the installation window. - 90 ... -
Page 92: Uninstalling Software
From the Start menu, select Programs Dell Printers Dell B2375dnf Mono MFP or Dell B2375dfw Mono MFP Uninstall. Select the software you want to remove. Click Next. The selected driver and all of its components are removed from your computer. -
Page 93: Embedded Web Service
Embedded Web Service Embedded Web Service What is Embedded Web Service Required web browser Logging into Embedded Web Service Embedded Web Service overview - 92 ... -
Page 94: Embedded Web Service
Embedded Web Service This chapter gives you step-by-step instructions for setting up the network environment through Embedded Web Service. Enables you to monitor the status of your network printer without leaving your desk. What is Embedded Web Service If you have connected your machine to a network and set up TCP/IP network parameters correctly, you can manage the machine via Embedded Web Service. -
Page 95: Logging Into Embedded Web Service
Logging into Embedded Web Service Before configuring options in Embedded Web Service, you need to Log in as an administrator. You can still use Embedded Web Service without Logging in but you won’t have access to Settings tab and Security tab. 1 Click Login on the upper right of the Embedded Web Service website. -
Page 96: Address Book Tab
Usage Counters You can check the billing information and usage counter of the machine. • Billing Information : Shows the billing information such as machine’s serial number. • Counters : Shows the usage counter information by job types. Current Settings Shows the current settings of the machine and network. - Page 97 From the Embedded Web Service, select the Address Book tab Individual. Click the Add button above the list. A pop-up window appears. Enter the General information. Enter the Email address. Enter the Phone No.. Select the server(s) you are using among Network Folder, FTP and enter the necessary server information.
- Page 98 1 From the Embedded Web Service, select the Address Book tab Individual. Select Import from the Task drop down list. A pop-up window appears. Select the way to find the location for address book. File : Click the Browse button to find the path for where the address book is •...
-
Page 99: Settings Tab
Deleting a group NOTE: You need to Log in as an administrator to manage the address book. See "Logging into Embedded Web Service" 1 From the Embedded Web Service, select the Address Book tab Groups. Check the checkbox(es) of the group(s) you want to delete from the list and click the Delete Group button above the list. - Page 100 • Layout : You can set paper layout related settings. For more information about the options, refer to the setting this option from the machine. • PCL: You can set PCL font related settings. • PostScript : You can set PostScript related settings. • PDF : You can set PDF related settings.
- Page 101 Adding a fax forwarding setting From the Embedded Web Service, select the Settings tab Machine Settings Send Foward. Enter the necessary information. – General - Send Foward : Enable the send forward function. - Attachment Format : Select the file format for the fax attachment. – Fax Forward To Email - Default [From:] Address : Enter the sending person’s default address.
- Page 102 Adding a fax forwarding setting From the Embedded Web Service, select the Settings tab Machine Settings Receive Forward. Enter the necessary information. – General - Receive Forward : Enable the receive forward function. - Attachment Format : Select the file format for the fax attachment. - Forward &...
- Page 103 Scan To Email You can settings for scan to email feature. NOTE: If outgoing email server is not configured, click the link under Outgoing Mail Server (SMTP and configure the outgoing email server first. – General : Set the general scan to email settings. - Default [From:] Address : Enter the default address to appear in the From Address field.
- Page 104 Scan To FTP You can settings for scan to FTP feature. – General - General : You can set the Server Connection Timout.You can set the time that the system will wait before the server connection fails due to timeout. You can set the time value between 1-300 second(s).
-
Page 105: Network Settings Tab
Email & Fax You can settings for Scan to Email and Fax. – Change Default You can set scan to network folder related settings such as Email Settings-From:, Email Settings-Subject:, Resolution, Color, Format, Duplex, Original Size, Original Type, Darkness, Qualty. Email Notification When an error occurs or the consumables are running out, the machine sends a notification to the administrator via Email. - Page 106 - Manually : Select to enter IP address/Subnet Mask/ Gateway Address manually. - Automatically : IP address/Subnet Mask/ Gateway Address are automatically allocated by BOOTP/DHCP Server. NOTE: If you check Auto IP, when the BOOTP or DHCP fail to allocate IP address/Subnet Mask/ Gateway Address after 2 minutes, the machine automatically allocates a Link-Local IP address, which is the 169.254.0.0/16 set of addresses defined in RFC 3927.
- Page 107 • Domain Name System version 6 (DNSv6) – Host Name : Shows the machine's host name. – IPv6 Domain Name : Enter the domain name. You can enter up to 128 characters. – Primary DNSv6 Server Address : Enter the address of the DNSv6 server you want to use primarily.
-
Page 108: Google Cloud Print
• Supplies Information : You can check the Supplies Information. Google Cloud Print You can set Google Cloud Print related settings. • Anonymous Registration – Printer Name : Enter the printer name you want. – Printer Description : Enter the printer description. –... - Page 109 • Registration Lifetime : Enter the life time of service registration when registering services with DA. • SLP MTU : Enter the MTU(Maximum Transmission Unit) value. • Multicast Address : Shows the multicast address. UPNP Simple Service Discovery Protocol (SSDP) is the basic discovery protocol in UPnP and provides a mechanism which network clients can use to discover network services.
- Page 110 SNMP You can set SNMP related settings. SNMPv1/v2 You can set SNMPv1/v2 settings. • General – SNMPv1/v2 Protocol : Check to enable SNMPv1/v2 protocol. • Community Name : Adding the SNMP Community – From the Embedded Web Service, select the Settings tab Network Settings SNMP SNMPv1/v2...
- Page 111 – Deleting the SNMP traps From the Embedded Web Service, select the Settings tab Network Settings SNMP SNMPv1/v2 SNMP Traps. Check the checkbox of the name(s) you want to delete from the list and click the Delete button above the list. A confirmation window appears.
- Page 112 Outgoing Mail Server (SMTP) You can set server settings for outgoing emails. If this setting is not configured, you cannot use scan to email feature. Outgoing emails will be sent through SMTP server you set here. • Simple Mail Transfer Protocol (SMTP) – SMTP Server : Enter the SMTP server address.
- Page 113 – User ID : Enter the user ID for proxy server authentication. – Password : Enter the password for proxy server authentication. Wireless only) Dell B2375dfw Mono MFP You can set Wireless and WiFi settings. Wireless • General – Wireless : Check to enable wireless.
- Page 114 • Connection Status – Link Status : You can check the link status. Wi-Fi Direct • Wi-Fi Direct – Wi-Fi Direct : Select Wi-Fi On / Off. – Device Name : Enter the device name. – IP Address : Enter the IP address. – Group Owner : You can active group owner.
- Page 115 – You can check and delete the auto Login lists. Scan to SharePoint Online • General – Send Confirmation Report : You can set your printer to print and scan confirmation report automatically. – File Prefix Name : You can set the file prefix name. – Allow user to enter filename : You can set to allow users to enter the filename On/Off.
- Page 116 – URL : Enter the URL path. – Server Port : Enter the server port. – Domain : Enter the domain name. • – Bookmark Name : Enter the bookmark name you want. – URL : Enter the URL path. –...
-
Page 117: Security Tab
My Files NOTE: All files stored in My Files are not encrypted and can be accessed by all users. • Change Default – Scan to My Files : You can set Resolution, Color, Format, Duplex, Original Size, Original Type and Overwrite. – Print from My Files : You can set Number of Copies, Auto Fit and Duplex. - Page 118 NOTE: If you reboot the machine, all the current jobs will be deleted. Close jobs before rebooting. Network Security From the Embedded Web Service, select the Security tab Network Security. Digital Certificate You can manage digital certificates. A digital certificate is an electronic certificate that verifies the secure association between communication nodes.
- Page 119 • Create Certificate Signing Request (CSR) From the Install/Create Device Certificate or CSR, select Create Certificate Signing Request (CSR) and click Next. Refer to the section on creating a new certificate and enter the necessary values. Copy the Certificate Signing Request information and acquire the certificate from the certification server.
- Page 120 SNMPv3 See "SNMPv3". IP Security You can set to enable or disable IPSec connection. Also you can check IPSec status. IP/MAC Filtering You can set filtering options for IP and MAC addresses. If the administrator does not add a filtering rule for IPv4, IPv6, and MAC addresses, nothing is filtered. If the administrator has added a filtering rule, filtering will be applied to the entered IPv4, IPv6, and MAC addresses.
- Page 121 – Backup Server : Enter the back up server address. – Port Number : Enter the backup port number. 88 is set as a default value. Click Apply. Deleting a Kerberos server From the Embedded Web Service, select the Security tab Network Security External Authentication Server Kerberos Server.
-
Page 122: Ldap Server
– Port Number : Enter the default port number from 1 to 65535. 445is set as a default value. • Standard port number for SMB over NetBIOS is 139. • Standard port number SMB over TCPIP direct is 445. – Make to Default Server : Select to make it a default server. •... - Page 123 Click the Add button. A pop-up window appears. Enter the necessary information. • LDAP Server – LDAP Server : Enter the server address. – Port Number : Enter the server port number from 1 to 65535. 389 is set as a default value.
-
Page 124: User Access Control
Editing a LDAP server From the Embedded Web Service, select the Security tab Network Security External Authentication Server LDAP Server. From the LDAP server list, check the server(s) you want to edit and click Edit. A pop-up window appears. Change the necessary information. Click Apply. - Page 125 Authentication (Activating access control) From the Embedded Web Service, select the Security tab User Access Control Authentication. You can choose the authentication method for user authentication. Select a mode and click on the Options button. • Mode – Basic Authentication : Activate basic authentication. Users are asked to Log in when they select options that are only available to administrators.
- Page 126 User profile You can store user information on the machine’s hard drive. You can use this feature to manage the users using the machine. You can also group the users and manage them as a group. You can add up to 20 entries. User identified by user ID and password are allowed to modify their password.
- Page 127 System Log You can keep logs of events that have happened in the machine. The administrator can record and manage the machine usage information by keeping the system log files. The system log files are stored on the machine’s HDD (hard disk drive), and when it is full, it will erase old data.
- Page 128 Log Viewer You can view, delete, and search log files. Viewing the log file You can view, delete, and search log files. From the Embedded Web Service, select the Security tab System Log Viewer. Click the log file or click the Expand All button. Click the Collapse All button to close the log file.
-
Page 129: Maintenance Tab
This tab allows you to maintain your machine by upgrading firmware, managing applications, and setting contact information for sending emails. You can also connect to the Dell website or download manuals and drivers by selecting the Link menu. Firmware Upgrade You can check the firmware version used in the machine. - Page 130 Enabling/Disabling an application You can enable or disable applications. From the Embedded Web Service, select the Maintenance tab Application Management Application. From the list, select the application you want to view in details and press Setting. A window where you can choose to enable/disable appears. Select the option you want.
-
Page 131: Paper Handling
Paper Handling Print Media Guidelines Storing Print Media Identifying Print Media Sources and Specifications Selecting an Output Location Loading Print Media in the Paper Tray Using the MPF (Multi purpose feeder) Setting the Paper Size Setting the Paper Type Setting the Paper Margin Setting the Paper Tray - 130 ... -
Page 132: Print Media Guidelines
Print Media Guidelines Print media is paper, card stock, transparencies, labels, and envelopes. Your printer provides high quality printing on a variety of print media. Selecting the appropriate print media for your printer helps you to avoid printing problems. This chapter provides information on how to help you make print media selections, how to care for the print media, and how to load it in the tray 1, optional tray 2, or MPF. -
Page 133: Recommended Paper
Moisture Content The amount of moisture in the paper affects both print quality and the ability of the printer to feed the paper properly. Leave the paper in its original wrapper until you are ready to use it. This limits the exposure of the paper to moisture changes that can degrade its performance. -
Page 134: Selecting Paper
Selecting Paper Proper paper loading helps prevent jams and ensures trouble-free printing. To help avoid jams or poor print quality: • Always use new, undamaged paper. • Before loading paper, know the recommended print side of the paper you are using. This information is usually indicated on the paper package. - Page 135 Printing on a Letterhead paper Check with the manufacturer or vendor to determine whether the preprinted letterhead paper that you have chosen is acceptable for laser printers. Page orientation is important when printing on a letterhead paper. Use the following table for help when loading a letterhead paper in the print media sources.
-
Page 136: Transparencies
Transparencies Try a sample of any transparencies you are considering using with the printer before buying large quantities: • Use transparencies designed specifically for laser printers. Transparencies must be able to withstand temperatures of 180°C (356°F) without melting, discoloring, offsetting or releasing hazardous emissions. - Page 137 • Use envelopes that can withstand temperatures of 180°C (356°F) without sealing, excessive curling, wrinkling, or releasing hazardous emissions. If you have any doubts about the envelopes you are considering using, check with the envelope supplier. • Adjust the width guide to fit the width of the envelopes. • Load an envelope with the flap side down and with the stamp area on the top left side.
-
Page 138: Labels
Labels Your printer can print on many labels designed for use with laser printers. These labels are supplied in letter size, A4 size, and legal size sheets. Label adhesives, face sheet (printable stock), and topcoats must be able to withstand temperatures of 180°C (356°F) and pressure of 25 pounds per square inch (psi). -
Page 139: Storing Print Media
Storing Print Media Use the following guidelines for proper print media storage. These help avoid print media feeding problems and uneven print quality: • For best results, store print media in an environment where the temperature is approximately 21°C (70°F) and the relative humidity is 40%. • Store cartons of print media on a pallet or shelf, rather than directly on the floor. - Page 140 The face up is mainly for envelope and thick paper. Push the two blue pressure levers down for better printing quality of envelope, label, card, and thick paper. Print Media Sizes and Support Legend Dimensions Paper Tray Duplex Y- indicates Support (tray 1 and printing optional tray 2)
- Page 141 Legend Dimensions Paper Tray Duplex Y- indicates Support (tray 1 and printing optional tray 2) Print Media Size Envelope DL 4.33 x 8.66 in. (110 x 220 mm) EnvelopeC5 6.38 x 9.01 in. (162 x 229 mm) EnvelopeC6 4.49 x 6.38 in. (114 x 162 mm) Custom 3.86 x 5.85 in.
- Page 142 Print Media Types and Weights Print Media Type Print Media Weight Tray 1 and Optional Tray 2 MPF Plain paper Xerographic or 70 to 85 g/m2 70 to 85 g/m2 business paper (19 to 23 lbs bond) (19 to 23 lbs bond) Envelopes 100% Sulfite, 75-90 g/m...
-
Page 143: Selecting An Output Location
Selecting an Output Location The printer has two output locations; the output tray (face down) and the rear door (face up). Output Tray Rear Cover To use the output tray, ensure that the rear door is closed. To use the rear door, open it. NOTE: If paper coming out of the output tray has problems, such as excessive curl, try printing to the rear door. -
Page 144: Printing To The Output Tray (Face Down)
Printing to the Output Tray (Face down) The output tray collects printed paper face-down, in the correct order. The tray should be used for most print jobs. If necessary, expand the paper output extension to keep the print media from falling off the output tray. -
Page 145: Loading Print Media In The Paper Tray
CAUTION: The fuser area inside of the rear door of your printer becomes very hot when in use. Take care when you access this area. Loading Print Media in the Paper Tray You can load approximately 250 sheets of plain paper in the tray 1 or the optional tray 2. If you purchased the optional tray 2, see "Installing an Optional Tray 2"... -
Page 146: Using The Mpf (Multi Purpose Feeder)
Using the MPF (Multi purpose feeder) Use the MPF to print transparencies, labels, envelopes or postcards in addition to making quick runs of paper types or sizes that are not currently loaded in the paper tray. Postcards, 3.5 by 5.83 in. (index) cards and other custom-sized materials can be printed with this printer. - Page 147 Load the print material with the side to be printed on facing up. Depending on the paper type you are using, keep the following loading method: • Envelopes: load them with the flap side down and with the stamp area on the top left side.
- Page 148 5 After loading paper, set the paper type and size for the MPF. See "Setting the Paper Type" for copying and faxing or "Paper Tab" for Computer printing. NOTE: The settings made from the printer driver override the settings on the operator panel.
-
Page 149: Setting The Paper Size
Setting the Paper Size After loading paper in the paper tray, you need to set the paper size from the operator panel. This setting will apply to Fax and Copy modes. For Computer printing, you need to select the paper type in the application program you use. Press My Settings Machine Setup Paper Setup from the main screen. -
Page 150: Setting The Paper Tray
Setting the Paper Tray This feature allows you to select the tray and paper that you want to use for a printing job. Paper size and paper tray are adjusted here. Setting the Tray linking If tray 1 and tray 2 are filled with letter size paper, when tray1 is empty and this option is On, then the machine continues printing using the paper in tray 2. -
Page 151: Setting The Paper Feeding Flow
Setting the paper feeding flow Press My Settings Machine Setup from the home screen. Press the Tray Behavior. Press the Configure MPF. Press the left/right arrows to select the paper tray you are using. • Tray Mode: When sending a print job from the computer, the printer uses paper in the tray which you have already set in Printer properties. -
Page 152: Bypass Mode
Bypass Mode In this mode the printer pulls the paper from MPF first unless it is closed or empty. MPF gets the highest priority and pulls whatever media is present in the MPF. NOTE: You can use this feature in print and copy job. Tray Mode In this mode the MPF is treated as another paper tray. -
Page 153: Printing
Printing Printing a Document Opening printing preferences Printing Multiple Pages on One Sheet of the Paper Change Percentage of Your Document Printing Posters Printing Booklets Printing on Both Sides of Paper Using Watermarks Using Overlays - 152 ... -
Page 154: Printing A Document
Printing a Document The following Printing Preferences window is for Notepad in Windows 7. Open the document you want to print. Select Print from the File menu. Select your machine from the Select Printer list. Ensure that your printer is selected. -
Page 155: Opening Printing Preferences
Opening printing preferences • The Printing Preferences window that appears in this user’s guide may differ depending on the machine in use. • When you select an option in Printing Preferences, you may see a warning mark . an mark means you can select that certain option but it is not recommended, and an mark means you cannot select that option due to the machine’s setting or environment. -
Page 156: Basic Tab
Basic Tab The Basic tab provides options for you to adjust how the document appears on the printed page. The Layout Options section includes advanced printing options, such as Multiple Pages Per Side and Poster Printing. Property Description ... -
Page 157: Paper Tab
Property Description Double-Sided Double-Sided Printing allows you to print on both sides of paper. For Printing details, see "Printing on Both Sides of Paper". Paper Tab Use the following options to set the paper handling needs when you access the printer properties. - Page 158 Property Description Print Mode Print Mode allows you to select how to print or save the printing file by using the storage(mass storage device,printer memory,internal flash drive, RAM Disk). Select the desired one of the following settings: Print Mode •...
- Page 159 Property Description Print Mode Password : Enter the password in which will be used for Confidential (Continue) setting. This setting is available only when you select Confidential, Store or Store and Print with selecting any private document box. If you set the password a specific file, you must enter the password to print or delete the file.
-
Page 160: Graphic Tab
Graphic Tab Use the following graphic options to adjust the print quality for your specific printing needs. Click the Graphic tab to display the properties shown below. Property Description Quality You can select the printing resolution by choosing from Best or Normal. - Page 161 Property Description Font / Text All Text Black When the All Text Black option is checked, all text in your document is allowed to print solid black, regardless of the color it appears on the screen. When it is not checked, colored text is allowed to print in shades of gray.
- Page 162 Property Description Font / Text Use Printer Fonts (continue) When Use Printer Fonts is checked, the printer uses the fonts that are stored in its memory (resident fonts) to print your document, rather than downloading the fonts that have been used in your document.
-
Page 163: Advanced Tab
Advanced Tab Property Description Watermark You can create a background image of text to print on each page of your document. See "Using Watermarks". Overlay This feature is available only when using the PCL driver. Overlays are often used to take the place of preprinted forms and letterhead paper. - Page 164 Property Description Output Options Print Order You can set the sequence for the pages to print. Select the print order from the drop-down list. • Normal: Your printer prints all pages from the first page to the last page. •...
- Page 165 Property Description Output Options • PostScript PassThrough : specifies whether to print a PostScript (Continue) data created by the application that can create the PostScript code for printing. The default is Auto. If selecting Auto or On, some print options such as multiple page per side, watermark, booklet, scaling (or output size) and poster may not work correctly when printing from the application that can create the PostScript code for printing.
- Page 166 Property Description Job Accounting Job Accounting enables you to associate User and Account identification information with each document you print. • Admin Job Accounting Settings : You can enable this option and configure job accounting settings to share job accounting information with clients.
-
Page 167: Dell Tab
Dell Tab Use the Dell tab to display the copyright notice and the version number of the driver. If you have an Internet browser, you can connect to the Internet by clicking the Dell Website icon. Using a Favorite Setting The Favorite option, which is visible on each properties tab, allows you to save the current properties settings for future use. -
Page 168: Using Help
Click the option you want to know on the Printing Preferences window and press F1 on your keyboard. If you want to search information via a keyword, click the Dell tab in the Printing Preferences window, and enter a keyword in the input line of the Help option. - Page 169 Select the number of pages you want to print per sheet (2, 4, 6, 9, or 16) on the Pages per Side drop-down list. If necessary, select the page order on the Page Order drop-down list. Left, Then Down, Then Down, Then Right, Then Down...
-
Page 170: Change Percentage Of Your Document
Change Percentage of Your Document You can scale your print job on a page. When you change the print settings from your software application, access the printer properties. From the Paper tab. Enter the scaling rate in the Percentage input box. You can also click the button. -
Page 171: Printing Posters
Printing Posters 2 x 2 You can print a single-page document onto 4, 9, or 16 sheets of paper, for the purpose of pasting the sheets together to form one poster-size document. When you change the print settings from your software application, access the printer properties. - Page 172 3 Select the page layout you want. Specification of the page layout: • Poster 2x2: Document will be enlarged and be divided into 4 pages. • Poster 3x3: Document will be enlarged and be divided into 9 pages. Poster 4x4: Document will be enlarged and be divided into 16 pages. •...
-
Page 173: Printing Booklets
Printing Booklets This printer feature allows you to print your document on both sides of the paper and arranges the pages so that the paper can be folded in half after printing to produce a booklet. When you change the print settings from your software application, access the printer properties. -
Page 174: Printing On Both Sides Of Paper
Printing on Both Sides of Paper Your printer prints on both sides of the paper automatically. Before printing, decide on which edge you will be binding your finished document. The binding options are: • Long Edge, which is the conventional layout used in book binding. Short Edge, which is the type often used with calendars. - Page 175 From the Double-Sided Printing section, select the desired binding option. Click the Paper tab and select the paper source, size and type. Click OK and print the document. Your printer prints on both sides of the paper automatically. - 174 ...
-
Page 176: Using Watermarks
Using Watermarks The Watermark option allows you to print text over an existing document. For example, you may want to have large gray letters reading “DRAFT” or “CONFIDENTIAL” printed diagonally across the first page or all pages of a document. There are several predefined watermarks that come with your printer. -
Page 177: Creating A Watermark
Creating a Watermark When you change the print settings from your software application, access the printer properties. Click the Advanced tab and click Edit... in the Watermark section. The Edit Watermarks window appears. 3 Enter the text message you want to print in the Watermark Message box. The message displays in the preview image window. -
Page 178: Using Overlays
Using Overlays What is an Overlay? An overlay is text and/or images stored in the computer hard disk drive (HDD) as a special file format that can be printed on any document. Overlays are often used to take the place of preprinted forms and letterhead paper. - Page 179 Click the Advanced tab and click Edit... in the Overlay section. In the Edit Overlays window, click Create. - 178 ...
-
Page 180: Using A Page Overlay
In the Save As window, type a name of up to eight characters in the File name box. Select the destination path, if necessary. (The default is C:\FormOver). Click Save. You can see the name in the Overlay List. Click OK or Yes until you complete creating. The file is not printed out;... - Page 181 5 If the overlay file you want does not appear in the Text drop-down list, select Edit... from the list and click Load. Select the overlay file you want to use. If you have stored the overlay file you want to use in an external source, you can also load the file when you access the Load window.
-
Page 182: Deleting A Page Overlay
Deleting a Page Overlay You can delete page overlays that are no longer used. In the printer properties window, click the Advanced tab. Click Edit... in the Overlay section. Select the overlay you want to delete from the Overlay List box. Click Delete. -
Page 183: Copying
Copying Loading Paper for Copying Selecting the Paper Tray Preparing a Document Loading an Original Document Making Copies Using Copy and Setting Options Changing the Default Settings - 182 ... -
Page 184: Loading Paper For Copying
Loading Paper for Copying The instructions for loading print materials are the same whether you are printing, faxing, or copying. For further details, see "Loading Paper" for loading paper in the paper tray and "Using the MPF (Multi purpose feeder)" for loading paper in the multi purpose tray. Selecting the Paper Tray After loading the print media for copy output, you have to select the paper tray that you will use for the copy job. -
Page 185: Loading An Original Document
• Remove all staples and paper clips before loading documents. • Ensure that any glue, ink or correction fluid on the paper is completely dry before loading documents. • Do not load documents containing different sizes or weights of paper. • Do not load booklets, pamphlets, transparencies or documents having other unusual characteristics. - Page 186 2 Adjust the document width guides to the correct document size. Ensure that the bottom of the document stack matches the paper size marked on the document input tray. For detailed guidelines for preparing an original document, see "Preparing a Document".
- Page 187 Place the document face down on the document glass and align it with the registration guide on the top left corner of the glass. For detailed guidelines for preparing an original document, see "Preparing a Document". Close the document cover. NOTE: If you are copying a page from a book or magazine, lift the cover until its hinges are caught by the stopper and then close the cover.
-
Page 188: Making Copies
Making Copies NOTE: A computer connection is not required for copying. NOTE: Contaminating on the document glass may cause black spots on the printout. For best results, clean the document glass before use. See "Cleaning the scanner". Load the document(s) face up with the top edge in first into the DADF. Place a single document face down on the document glass. -
Page 189: Duplex
Duplex You can set the printer to print copies on both sides of paper. Load the documents to be copied in the DADF. For details about loading a document, see "Loading an Original Document". Press Copy from the home screen Press the left/right arrows to select Duplex. -
Page 190: Original Size
NOTE: You can cancel the copy job at any time. Press ( ) on screen, and the copying will stop. Original Size You can set the size of a copied image, when you copy original documents from the documents glass or the DADF. Press Copy from the home screen. -
Page 191: Booklet Copying
2-Up or 4-Up copying (N-up) 2-up copying 2-up copying 4-up copying 4-up copying (Portrait) (Landscape) (Portrait) (Landscape) The machine reduces the size of the original images and prints 2 or 4 pages onto one sheet of paper. This special copy mode can be applied when you load a document using only the DADF. - Page 192 To make the booklet copying: Place a single document face down on the document glass. For details about loading a document, see "Loading an Original Document". Press Copy Layout Booklet from the home screen. Press the appropriate option. • Off: Disables this feature. •...
-
Page 193: Clone Copying
Press Start ( ) from the screen. Turn the original over and place it on the document glass, where arrows indicate as shown then, close the scanner lid. Press Start ( ) from the screen. NOTE: You can cancel the copy job at any time. Press ( ) on screen, and the copying will stop. -
Page 194: Poster Copying
Poster Copying This special copy mode can be applied when you load a document using only the document glass. If a document is detected in the DADF, the Poster copying feature does not work. NOTE: You cannot adjust the copy size using the Zoom menu button for making a poster. -
Page 195: Book Copying
Book Copying Use this feature to copy a book. If the book is too thick, lift the scanner lid until its hinges are engaged by the stopper and then close the scanner lid. If the book or magazine is thicker than 30 mm (1.18 inches), start copying with the scanner lid open. -
Page 196: Collation
Collation Set the machine to sort the copy job. For example, if you make 2 copies of a 3 page original, one complete 3 page document will print followed by a second complete document. To make the Collate copying: NOTE: The menu items of Collate Copy, 2-Up, and 4-Up may be available only when you loaded the document in the DADF. -
Page 197: Watermark
3 Select the options you want. • Item : Prints the time and date, IP address, page number, device information, comment, or user ID, to the copy output. Opacity : You can select the transparent or opaque. • • Position : Sets the position. Watermark The watermark option allows you to print text over an existing document. -
Page 198: Changing The Default Settings
Changing the Default Settings The copy options, including darkness, image quality, copy size, and the number of copies, can be set to the most frequently used modes. When you copy a document, the default settings are used unless they are changed by using the operator panel. To create your own default settings: Press My Settings Machine Setup... -
Page 199: Scanning
Scanning Scanning Overview Scan to Email Scan to PC/Network PC Scan to Network Folder/FTP Server Scan to Fax Server Scan to WSD Email & Fax Scanning from image editing program Scanning using the WIA driver - 198 ... -
Page 200: Scanning Overview
The scanning methods are scan to email, scan to computer (local and network), and scan to USB. Use your Dell B2375dfw Mono MFP or Dell B2375dnf Mono MFP to convert pictures and text into editable images on your computer. After you install the software from the Drivers... -
Page 201: Scan To Email
Scan to Email Setting up an email account Access the Embedded Web Service. See "Required web browser" Select Settings Network Settings Outgoing Mail Server(SMTP). Enter the IP address in dotted decimal notation or as a host name. Enter the server port number, from 1 to 65535. Check the box next to SMTP Requires Authentication to require authentication. -
Page 202: Scan To Pc/Network Pc
3 Press the up/down arrows until the application program you want. If you select Scan to Network PC, select your computer ID and password using the pop-up keyboard. NOTE: ID is the same ID/Password as the registered scan ID for Dell Printer → →... -
Page 203: Scan To Network Folder/Ftp Server
NOTE: You can use Twain driver to scan quickly in Dell Scan Manager program. Scan to Network Folder/FTP Server Setting up an Network Folder/FTP server Access the Dell Printer Configuration Web Tool. See "Embedded Web Service" Select Address Book Individual Add. -
Page 204: Scanning And Sending To Network Folder/Ftp Server
Scanning and sending to Network Folder/FTP server Make sure that your machine is connected to a network. Load the document(s) face up with top edge in first into the DADF. Place a single document face down on the document glass. For details about loading a document, see "Loading an Original Document". -
Page 205: Scan To Fax Server
Scan to Fax Server Fax server will deliver the fax/Email data to send out the job. The Email is automatically processed by fax server and sent to the given recipient. First, the printer sends the scanned data to the fax server. Then, the fax server uses PSTN to send a fax/Email data to recipient. -
Page 206: Scan To Wsd
Scan to WSD Scans the originals and saves the scanned data on a connected computer if the computer supports the WSD (Web Service for Device) feature. To use the WSD feature, you need to install the WSD printer driver on your computer. For Windows 7, you can install the WSD driver by Control Panel Devices and Printers Add a printer. -
Page 207: Email & Fax
Email & Fax Scans the originals and send the scanned data to Email and Fax at once. Load the document(s) face up with top edge in first into the DADF. Place a single document face down on the document glass. For details about loading a document, see "Loading an Original Document". -
Page 208: Scanning From Image Editing Program
Scanning from image editing program You can scan and import documents in the image editing software such as Adobe Photoshop, if the software is TWAIN-compliant. Follow the steps below to scan with TWAIN-compliant software: Make sure that the machine is connected to your computer and powered on. Load the document(s) face up with top edge in first into the DADF. -
Page 209: Scanning Using The Wia Driver
Scanning using the WIA driver Your machine supports the Windows Image Acquisition (WIA) driver for scanning images. WIA is one of the standard components provided by Microsoft Windows 7 and works with digital cameras and scanners. Unlike the TWAIN driver, the WIA driver allows you to scan and easily adjust images without using additional software: NOTE: The WIA driver works only on Windows OS with a USB port. -
Page 210: Networking
Installing driver over the network IPv6 configuration Wireless network setup (Dell B2375dfw only) Using the WPS button (Dell B2375dfw Mono MFP only) Setup using Windows (Dell B2375dfw Mono MFP only) Turning the Wi-Fi network on/off (Dell B2375dfw Mono MFP only) -
Page 211: Network Setup (Administrator Only)
Network setup (Administrator only) NOTE: You can also use this feature from the Dell Printer Configuration Web Tool. Open the Web browser from your networked computer and type the IP address of your machine. When Dell Printer Configuration Web Tool opens, click Settings Network Settings. -
Page 212: Useful Network Programs
NOTE: Before using the programs below, set the IP address first. Dell Printer Configuration Web Tool The web server embedded on your network machine allows you to do the following tasks. • Check the supplies information and status. -
Page 213: Printing Across A Network
Printing Across a Network Whether the printer is locally connected or network-connected, you need to install the Dell B2375dfw Mono MFP or Dell B2375dnf Mono MFP software on each computer that prints documents using the printer. Setting IP address First, you have to set up an IP address for network printing and managements. In most cases a new IP address will be automatically assigned by a DHCP (Dynamic Host Configuration Protocol) server located on the network. -
Page 214: Installing Driver Over The Network
Configuring Network Parameters on the Operator Panel Item Requirements Network Interface • Ethernet 10/100/1000 Base-TX Wired Lan • 802.11b/g/n Wireless LAN (Dell B2375dfw Mono MFP only) Network Operating • Windows® XP, Windows Server® 2003, Windows Vista®, System Windows® 7, Windows® 8, Windows Server® 2008 R2 •... - Page 215 Select Setup... in New Printer area. Select Ethernet. - 214 ...
- Page 216 7 Follow the instructions in the installation window. From the Windows 8 Start Screen • Dell Printer Experience app can only be used in the Start screen when V4 driver is installed. The V4 driver is automatically downloaded from the Windows Update if your computer is connected to the Internet.
-
Page 217: Ipv6 Configuration
• If you install the driver using the supplied software CD, V4 driver is not installed. If you want to use the V4 driver in the Desktop screen, you can download from the Dell website, www.dell.com find your product Support or downloads. -
Page 218: Activating Ipv6
Activating IPv6 Connect your machine to the network with a network cable. Press My Settings Machine Setup Network Setup TCP/IP (IPv6) Press the left/right arrows to select Select On and press Turn the machine off and turn it on again. Reinstall your printer driver. -
Page 219: Wireless Network Setup (Dell B2375Dfw Only)
Wireless network setup (Dell B2375dfw only) NOTE: Make sure your machine supports wireless networking. Wireless networking may not be available depending on the model. (Dell B2375dfw Mono MFP only) Getting started Understanding your network type Typically, you can only have one connection between your computer and the machine at a time. -
Page 220: Introducing Wireless Set Up Methods
NOTE: Some wireless network installation types may not be available depending on the model or country. Set up method Connecting method Description & Reference Using the WPS • See "Using the WPS button (Dell From the machine’s (recommended) B2375dfw Mono MFP only)". control panel Access point via USB •... -
Page 221: Using The Wps Button (Dell B2375Dfw Mono Mfp Only)
Using the WPS button (Dell B2375dfw Mono MFP only) If your machine and an access point (or wireless router) support Wi-Fi Protected Setup™ (WPS), you can easily configure the wireless network settings by pressing the (WPS) button on the control panel without a computer. - Page 222 The Personal Identification Number (PIN) method helps you connect your machine to a wireless network by entering the supplied PIN information on a Wi-Fi Protected Setup™ WPS-enabled access point (or wireless router). Connecting in PBC mode Press and hold the (WPS) button on the control panel for more than 2 seconds.
-
Page 223: Using The Menu Button
Re-connecting to a network When the wireless function is on, the machine automatically tries to re-connect to the access point (or wireless router) with the previously used wireless connection settings and address. If not successful after two minutes, the wireless connection will be stopped and Wi-Fi setting is turned off. -
Page 224: Setup Using Windows (Dell B2375Dfw Mono Mfp Only)
Setup using Windows (Dell B2375dfw Mono MFP only) Dell Printer Easy Wi-Fi Install Before Using Dell Printer Easy Wi-Fi Install, please ensure that OS of your computer should be Windows 7 and above. • Items to prepare – Access point –... - Page 225 Click New Printer . Choose Wireless. - 224 ...
- Page 226 The software searches for printers. Set your printer name and click Next. - 225 ...
- Page 227 Setup installing printer software. After the installation is finished, a window asking you to print a test page appears. If you want to print a test page, click Print a test page. Otherwise, just click Next and go to step 10. Click Finish.
-
Page 228: Access Point Via Usb Cable In Windows
Access point via USB cable in Windows • Items to prepare – Access point – Network-connected computer – Software CD that was provided with your machine – The machine installed with a wireless network interface – USB cable Check whether the USB cable is connected to the machine. Turn on your computer, access point, and machine. - Page 229 Select New Printer . Choose Wireless. - 228 ...
- Page 230 6 Click Next. 7 The software searches the wireless network. NOTE: If the search has failed, you may check if the USB cable is properly connected between the computer and machine, and follow the instructions on the window. 8 After searching, the window shows the wireless network devices. Select the name (SSID) of the access point you are using and click Next.
- Page 231 – Confirm Network Key: Confirm the encryption network key value. – WEP Key Index: If you are using WEP Encryption, select the appropriate WEP Key Index. NOTE: The wireless network security window appears when the access point has security settings. The wireless network security window appears.
- Page 232 – Wi-Fi Direct option appears on the screen only if your printer supports this feature. – Can start to build Wi-Fi Direct by using Dell Printer Manager – Network Name(SSID): The default Network Name is the model name and the maximum length is 22 characters (not including "Direct-xx-").
-
Page 233: Ad Hoc Via Usb Cable In Windows
Ad hoc via USB cable in Windows If you do not have an access point (AP), you may still connect the machine wirelessly to your computer by setting up an ad-hoc wireless network by following the simple steps below. • Items to prepare –... - Page 234 7 After searching the wireless networks, a list of wireless networks your machine has searched appears. If you want to use the Dell default ad hoc setting, select the last wireless network on the list, Network Name(SSID) is Dell_device and Dell_Signal is Printer Self Network.
- Page 235 – Encryption: Select the encryption (None, WEP64, WEP128). – Network Key: Enter the encryption network key value. – Confirm Network Key: Confirm the encryption network key value. WEP Key Index: If you are using WEP Encryption, select the appropriate WEP Key Index.
-
Page 236: Using A Network Cable
– Wi-Fi Direct option appears on the screen only if your printer supports this feature. – Can start to build Wi-Fi Direct by using Dell Printer Manager – Network Name(SSID): The default Network Name is the model name and the maximum length is 22 characters (not including "Direct-xx-"). -
Page 237: Turning The Wi-Fi Network On/Off (Dell B2375Dfw Mono Mfp Only)
If you do not know about your wireless environment, please ask the person who set up your network. Turning the Wi-Fi network on/off (Dell B2375dfw Mono MFP only) There are two methods available to disconnect the wireless network on your machine. -
Page 238: Setting The Wi-Fi Direct For Mobile Printing
You can enable Wi-Fi Direct feature by one of the following methods. From the USB cable-connected computer(recommended) After the driver installation is complete, Dell Printer Manager can be set and changes in the Wi-Fi Direct can be made. NOTE: Dell Printer Manager is Available for Windows and Mac OS users only. -
Page 239: Setting Up The Mobile Device
Wi-Fi Direct. • After setting up Wi-Fi Direct, you need to download the mobile printing application (For example: Dell Mobile printer) to print from your smartphone. NOTE: If your mobile device does not support WPS, you need to enter the "Network Password"... -
Page 240: Troubleshooting For Wireless Network
Troubleshooting for wireless network Problems during setup or driver installation Connecting Failure - Verify Wireless Network Name • The machine is unable to find the network name (SSID) you have selected or entered. Check the network name (SSID) on your access point and try connecting again. • Your access point is not turned on. -
Page 241: Other Problems
If the computer’s network information is as shown below: • IP address: 169.254.133.42 • Subnet Mask: 255.255.0.0 Then the machine’s network information should be as below: • IP address: 169.254.133.43 • Subnet Mask: 255.255.0.0 (Use the computer’s subnet mask.) • Gateway: 169.254.133.1 Other problems If problems occur while using the machine on a network, check the following:... - Page 242 • When using the ad hoc mode, in operating systems such as Windows Vista, you might need to set the wireless connection setting every time you use the wireless machine. • You cannot use infrastructure mode and ad hoc mode at the same time for Dell wireless network machines.
-
Page 243: Mobile Printing
Android™ OS • Download the Dell Mobile Print app for free from Google Play™. Easy to use and navigate, the Dell Mobile Print app enables direct printing of photos, documents, web content and more, to supported Dell Printers on a Wi-Fi or Ethernet network. -
Page 244: Airprint
AirPrint NOTE: Only AirPrint certified machines can use the AirPrint feature. Check the box your machine came in for the AirPrint certified mark. AirPrint allows you to wirelessly print directly from an iPhone, iPad, and iPod touch running the latest version of iOS. Setting up AirPrint Bonjour(mDNS) and IPP protocols are required on your machine to use the AirPrint feature. -
Page 245: Google Cloud Print
Google Cloud Print™ Google Cloud Print™ is a service that allows you to print to a printer using your smart phone, tablet, or any other web-connected devices. Just register your Google account with the printer, and you are ready to use the Google Cloud Print™ service. You can print your document or email with Chrome OS, Chrome browser, or a Gmail™/ Google Docs™... -
Page 246: Printing With Google Cloud Print
Printing with Google Cloud Print™ The printing procedure varies depending on the application or the device you are using. You can see the application list that supports Google Cloud Print™ service. NOTE: Make sure the printer is turned on and connected to a wired or wireless network that has access to the Internet. -
Page 247: Faxing
Faxing Setting the Printer ID Setting up the Fax System Sending a Fax Receiving a Fax Automatic Dialing Other Ways to Fax Additional Features - 246 ... -
Page 248: Setting The Printer Id
Setting the Printer ID In most countries, you are required by law to indicate your fax number on any fax you send. The printer ID, containing your telephone number and name or company name, will be printed at the top of each page sent from your printer. Press My Settings Machine Setup Initial Setup... -
Page 249: Testing Fax Line Connection
Testing Fax line connection Press My Settings Maintenance Fax Line Test from the home screen. Press Check( ) from the screen. The printer display the test result. If the fax line connection test has failed, check the telephone line cord connection or contact your telephone service provider. -
Page 250: Sending A Fax
Sending a Fax Adjusting the Document Darkness Use the darkness setting to fax your documents lighter or darker. Press Fax from the home screen. Press the Setting( ) from the screen. Press the left/right arrows to select Darkness. Select the darkness level(-5 ~ 5) you want. •... -
Page 251: Sending A Fax
Sending a Fax Load the document(s) face up with top edge in first into the DADF (Duplex Automatic Document Feeder). Place a single document face down on the document glass. For details about loading a document, see "Loading an Original Document". Press Fax from the home screen. -
Page 252: Speed Dial Fax
Speed Dial Fax Load the document(s) face up with top edge in first into the DADF (Duplex Automatic Document Feeder). Place a single document face down on the document glass. For details about loading a document, see "Loading an Original Document". Press Speed Dial Fax from the home screen. -
Page 253: Group Dial Fax
Group Dial Fax Load the document(s) face up with top edge in first into the DADF (Duplex Automatic Document Feeder). Place a single document face down on the document glass. For details about loading a document, see "Loading an Original Document". Press Group Dial Fax from the home screen. -
Page 254: On Hook Fax
On Hook Fax Load the document(s) face up with top edge in first into the DADF. Place a single document face down on the document glass. For details about loading a document, see "Loading an Original Document". Press On Hook Fax from the home screen. Press All Applicatons On Hook Fax from the home screen. -
Page 255: Automatic Redialing
Automatic Redialing When the number you have dialed is busy or there is no answer when you send a fax, the machine automatically redials the number. The redial time depends on the country's factory default setting. To change the time interval between redials and the number of redial attempts, see "Available Fax Defaults Options". -
Page 256: Receiving A Fax
Receiving a Fax About Receiving Modes NOTE: To use the Ans/Fax mode, attach an answering machine to the extension telephone socket ( ) on the back of your printer. When the memory is full, the printer can no longer receive any incoming fax. Secure free memory to resume by canceling printing received faxes. -
Page 257: Receiving Faxes Using The Drpd Mode
The printer receives the document. Press the buttons slowly in sequence. If you still hear the fax tone from the remote printer, try pressing *9* once again. *9* is the remote receive code preset at the factory. The first and the last asterisks are fixed, but you can change the middle number to whatever you choose. -
Page 258: Receiving Faxes In The Memory
Receiving Faxes in the Memory Since your printer is a multi-tasking device, it can receive faxes while performing other tasks. If you receive a fax while you are copying, printing, or run out of paper or toner, your printer stores incoming faxes in the memory. As soon as you finish copying, printing, or resupply the consumables, the printer automatically prints the fax. - Page 259 2 Press Fax from the home screen. Press the Direct Input from the screen. If necessary, adjust the document darkness and resolution to suit your fax needs. See "Adjusting the Document Darkness" or "Adjusting the Document Quality" 5 Enter the remote fax speed dial number and holding when entering last number until shows dial number.
-
Page 260: Group
Group If you frequently send the same document to several destinations, you can create a group of these destinations and set them under a one. This enables you to use a group setting to send the same document to all the destinations in the group. NOTE: You cannot include one group dial number within another group dial number. -
Page 261: Other Ways To Fax
Select Print from the File menu. The Print window will be displayed. It may look slightly different depending on your application. Select Dell Network PC Fax from the Print window Click Print or OK. Enter the recipients’ numbers and select the option NOTE: Select the Help menu from the window and click on any option you want to know about. -
Page 262: Fax Forward To Email Addresses
Press Start ( ) from the screen. When the document is loaded on the document glass, the display asks if you want to send another page. Select Yes to add more documents or No to begin sending the fax immediately. Fax Forward to Email addresses You can set the printer to forward all outgoing or incoming faxes to the Email addresses. -
Page 263: Using The Secure Receiving Mode (Administrator Only)
Once Toll Save mode is activated, your printer stores all of the documents to be faxed into its memory and sends them at the programmed time. To turn Toll Save mode off, follow steps 1 in "Toll Save Mode (Administrator only)" and then press the left/right arrows until Off displays. -
Page 264: Using Advanced Fax Settings
Using Advanced Fax Settings Your printer has various user-selectable setting options for sending or receiving faxes. These options are preset at the factory, but you may need to change them. To find out how the options are currently set, print the System Data list. For details about printing the list, see "Reports". - Page 265 Option Description Junk Fax Setup Using the Junk Fax Setup feature, the system will not accept faxes sent from remote stations. Their numbers are stored in the memory as junk fax numbers. This feature is useful for blocking any unwanted faxes. Select Off to turn the feature off.
- Page 266 Telephone Answering Device Line Line Phone LINE Dell B2375dfw Mono MFP Dell B2375dnf Mono MFP Figure 1 You can connect a telephone answering device (TAD) directly to the back of your printer as shown in Figure 1. Set your printer to Ans/Fax mode and set the Ring to Answer to a digit greater than the Rings to Answer setting for the TAD.
-
Page 267: Using A Computer Modem
• To fax via the computer modem, follow the instructions provided with your computer modem and fax application. • You can capture images using your printer and Dell ScanDirect and send them using your fax application with the computer modem. -
Page 268: Mac
Mac Installing Software for Mac Printing Scanning Wireless network setup - 267 ... -
Page 269: Installing Software For Mac
Your printer supports Mac systems with a built-in USB interface or network interface card. When you print a file from a Mac computer, you can use the PostScript driver by installing the PPD file. Installing Software for Mac The Drivers and Documentation CD that came with your printer provides you with the PPD file that allows you to use the PostScript driver, for printing on a Mac computer. -
Page 270: Reinstallation The Printer Driver
ReInstallation the printer driver If the printer driver does not work properly, uninstall the driver and reinstall it. Open the Applications folder Dell Printer Software Uninstaller. To uninstall printer software, click Continue. Check the program you want to delete and click Uninstall. -
Page 271: Changing Printer Settings
Printing Printing a Document When you print with a Mac, you need to check the printer software setting in each application you use. Follow these steps to print from a Mac. Open the document to print. Open the File menu and click Page Setup (Document Setup in some applications). Choose your paper size, orientation, scaling, and other options and click OK. - Page 272 Select a binding orientation from Two Sided option. Select the other options to use. Click Print and the printer prints on both sides of the paper. Using help Click the question mark on the bottom-left corner of the window and click on the topic you want to know about.
-
Page 273: Wireless Network Setup
Scanning You can scan documents using Image Capture. Mac OS offers Image Capture. Make sure that the machine is connected to your computer and powered on. Load the document(s) face up into the DADF. Place a single document face down on the document glass. For details about loading a document, see "Loading an Original Document". - Page 274 The wireless network security window appears when the access point has security enabled. – Can start to build Wi-Fi Direct by using Dell Printer Manager. See "Using the Dell Printer Manager" – Network Name(SSID): The default Network Name is the model name and the maximum length is 22 characters (not including "Direct-xx-").
- Page 275 NOTE: After completing the wireless network connection, you need to install a machine driver to print from an application. See "Installing Software for Mac" Ad hoc via USB cable in Mac If you do not have an access point (AP), you may still connect the machine wirelessly to your computer by setting up an ad hoc wireless network by following these simple directions.
- Page 276 Open System: Authentication is not used, and encryption may or may not be used, depending on the need for data security. Shared Key: Authentication is used. A device that has a proper WEP key can access the network. – Encryption: Select the encryption (None, WEP64, WEP128). – Network Password: Enter the encryption Network Password value.
- Page 277 Then, the machine’s network information should be as follows: - IP address: 169.254.133.43 - Subnet Mask: 255.255.0.0 (Use the computer’s subnet mask.) - Gateway: 169.254.133.1 When the window that tells you that the network cable connection is confirmed appears, disconnect the network cable and click Next. If the network cable is connected, it may have trouble finding the machine when configuring the wireless network.
-
Page 278: Linux
Linux Getting Started Installing the MFP Driver Installing driver over the network Printing a Document Printing Files Scanning a Document - 277 ... -
Page 279: Getting Started
The supplied Drivers and Documentation CD provides you with Dell's MFP driver package for using your printer with a Linux computer. Dell's MFP driver package contains printer and scanner drivers, providing the ability to print documents and scan images. The package also delivers powerful applications for configuring your printer and further processing of the scanned documents. -
Page 280: Reinstalling The Mfp Driver
NOTE: You must log in as a super user (root) to install the printer software. If you are not a super user, ask your system administrator. From the Dell website, download the Unified Linux Driver package to your computer. Right-click the Unified Linux Driver package and extract the package. -
Page 281: Install The Linux Driver And Add Network Printer
Installing driver over the network You need to download Linux software packages from the Dell website to install the printer software (http://www.dell.com find your product Support or Downloads). Install the Linux driver and add network printer Make sure that the machine is connected to your network and powered on. Also, your machine’s IP address should have been set. -
Page 282: Using The Unified Driver Configurator
Opening Unified Driver Configurator Double-click Unified Driver Configurator on the desktop. You can also click the Startup Menu icon and select DELL Unified Driver and then DELL Unified Driver Configurator. Click each button on the left to switch to the corresponding configuration window. -
Page 283: Printers Configuration
Printers Configuration Printers configuration has the two tabs; Printers and Classes. Printers Tab You can see the current system’s printer configuration by clicking on the printer icon button on the left side of the Unified Driver Configurator window. Switches to Printer configuration. - Page 284 Classes Tab The Classes tab shows a list of available printer classes. Shows all of the printer classes. Shows the status of the class and the number of printers in the class. • Refresh: Renews the classes list. • Add Class...: Allows you to add a new printer class. •...
-
Page 285: Mfp Ports Configuration
The Dell MFP driver package provides an appropriate port sharing mechanism that is used by Dell printer and scanner drivers. The drivers address their devices via so-called MFP ports. The current status of any MFP port can be viewed via the MFP Ports Configuration. The port sharing prevents you from accessing one functional block of the MFP device, while another block is in use. -
Page 286: Printing From Applications
Printing a Document Printing from Applications There are a lot of Linux applications that you are allowed to print from using Common UNIX Printing System (CUPS). You can print on your machine from any such application. Open the document to print. Open the File menu and click Page Setup (Print Setup for some applications). -
Page 287: Configuring Printer Properties
Configuring Printer Properties Using the Printer Properties window provided by the Printers configuration, you can change the various properties for your machine as a printer. Open the Unified Driver Configurator. If necessary, switch to Printers configuration. 2 Select your printer on the available printers list and click Properties. 3 The Printer Properties window opens. -
Page 288: Scanning A Document
Scanning a Document Make sure that the machine is connected to your computer and powered on. Double-click the Unified Driver Configurator on your desktop. button to switch to Scanners Configuration. Click the Select the scanner on the list. Click your scanner. Click Properties. - Page 289 The document is scanned and the image preview appears in the Preview Pane. Drag the pointer to set the image area to be scanned. Drag the pointer to set the image area to be scanned in the Preview Pane. Select the option you want. Scan and save your scanned image.
-
Page 290: Editing An Image With Image Manager
Editing an image with Image Manager The Image Manager window provides you with menu commands and tools to edit your scanned image. Use these tools to edit the image. - 289 ... -
Page 291: Unix
Unix Installing driver over the network Uninstalling the printer driver Setting up the printer Printing a Document Changing the machine settings - 290 ... -
Page 292: System Requirements
1 GB (2 GB) Install the Unix driver and add network printer The installation procedure is common for all variants of UNIX OS mentioned. From the Dell website, download and unpack the UNIX Printer Driver package to your computer. Acquire root privileges. -
Page 293: Uninstalling The Printer Driver
8 Run “installprinter” from the command line. This will bring up the Add Printer Wizard window. Setup the printer in this window referring to the following procedures. • On some UNIX OS, for example on Solaris 10, just added printers may not be enabled and/or may not accept jobs. -
Page 294: Changing The Machine Settings
Check the Collate option to receive copies already sorted. Check the Reverse Order option to receive copies in the reverse order. Check the Make Default option to set this printer as default. Click OK to add the printer. Select the option you want. Scan and save your scanned image. -
Page 295: Image Tab
• Paper Type: Choose the type of the paper. Options available in the list box are Printer Default, Plain, and Thick. • Paper Source: Select from which tray the paper is used. By default, it is Auto Selection. • Orientation: Select the direction in which information is printed on a page. • Duplex: Print on both sides of paper to save paper. -
Page 296: Maintenance
Maintenance Clearing the printer NVRAM Backing up Data Cleaning Your Printer Maintaining the Toner Cartridge Replacement Parts Ordering Supplies - 295 ... -
Page 297: Clearing The Printer Nvram
Clearing the printer NVRAM CAUTION: Before clearing the memory, make sure that all fax jobs have been completed, or you will lose those jobs. You can selectively clear information stored in your printer’s memory. Press My Settings Machine Setup from the home screen. 2 Scroll to select Restore Options. -
Page 298: Backing Up Data
Backing up Data Date in the printer's memory can be accidentally erased due to power failure or storage failure. Backup helps you protect your Email/Fax List entries and the system settings by storing them as backup files on a USB memory key. NOTE: In case of the phonebook, you can save the phonebook in csv file format. -
Page 299: Cleaning Your Printer
Cleaning Your Printer To maintain the print quality, follow the cleaning procedures below, each time the toner cartridge is replaced or if print quality problems occur. NOTE: Do not touch the transfer roller located under the toner cartridge when cleaning inside the printer. Oil from your fingers may cause print quality problems. CAUTION: Cleaning solvents that contain alcohol or other strong substances may discolor or crack the printer cabinet. - Page 300 With a dry and lint-free cloth, wipe away any dust and spilled toner from the toner cartridge area and the toner cartridge cavity. CAUTION: Do not touch the transfer roller inside the printer. Oil from your fingers may cause print quality problems. Reinsert the toner cartridge and close the front cover.
-
Page 301: Cleaning The Scanner
Cleaning the scanner Keeping the scanner and DADF glass clean ensure the highest quality copies, scans, and sent faxes. Dell recommends cleaning the scanner at the start of each day and during the day, as needed. NOTE: If there are lines present on copied or faxed documents, check your scanner and DADF glass for any particles. -
Page 302: Maintaining The Toner Cartridge
Maintaining the Toner Cartridge Storing the Toner Cartridge Store the toner cartridge in the original packaging until you are ready to install it. Do not store the toner cartridge in: • Temperatures greater than 40°C (104°F) • An environment with extreme changes in humidity or temperature •... - Page 303 2 Pull the toner cartridge out. 3 Thoroughly shake the cartridge from side-to-side 5 or 6 times to distribute the toner evenly inside the cartridge. NOTE: If toner comes into contact with your clothing, wipe the toner off with a dry cloth and wash your clothing in cold water. Hot water sets toner into fabric.
-
Page 304: Replacing The Toner Cartridge
Order an extra toner cartridge so you will have it on hand when the current cartridge no longer prints satisfactorily. See "Ordering Supplies" to order toner cartridges. CAUTION: For best results, use Dell toner cartridge. Print quality and printer reliability are not guaranteed if you do not use Dell supplies. -
Page 305: Cleaning The Drum
CAUTION: Do n o t t o u c h t h e g re e n u n d e r s i d e o f t he toner cartridge. Use the handle on the cartridge to avoid touching this area. Holding the toner cartridge by the handle and slowly insert the cartridge into the opening in the printer. -
Page 306: Replacement Parts
Approx. 20,000 pages (DADF) rubber pad Fuser unit Approx. 90,000 pages To purchase replacement parts, contact your Dell dealer or the retailer where you bought your printer. We strongly recommend that these items be installed by a trained service professional. - 305... -
Page 307: Ordering Supplies
Ordering Supplies You can order supplies using the Dell Toner Management System or the Dell Printer Configuration Web Tool. If your printer is connected to a network, type your printer’s IP address in your Web browser and click the toner supplies link. -
Page 308: Troubleshooting
Troubleshooting Clearing Jams in the DADF Clearing Jams in the Paper Tray Clearing LCD Error Messages Solving Problems - 307 ... -
Page 309: Clearing Jams In The Dadf
Clearing Jams in the DADF When a document jams while it passes through the DADF, a warning message appears on the display. NOTE: To prevent document jams, use the document glass for thick, thin or mixed documents. Remove the remaining documents from the DADF. If the document is jammed in the paper feed area: Open the DADF cover. - Page 310 Close the DADF cover. Then reload the document into the DADF. If the document is jammed in the paper exit area: Open the DADF cover. Remove the document by gently pulling it out. Close the DADF cover and the document input tray. Then load the documents back into the DADF.
- Page 311 Open the DADF cover. Open the DADF inner cover. Remove the document by gently pulling it out. Close the DADF inner cover and the DADF cover. Then load the documents back into the DADF. - 310 ...
-
Page 312: Clearing Jams In The Paper Tray
If you cannot see the paper or cannot pull the jammed paper out, open the document cover. Remove the document from the feed area by carefully pulling it gently to the right. Close the document cover. Then load the documents back into the DADF. Clearing Jams in the Paper Tray When a paper jam occurs, Paper Jam appears on the display. -
Page 313: Paper Feed Jam (Tray 1)
Paper Feed Jam (tray 1) Open and close the front cover. The jammed paper automatically exits the printer. If the paper does not exit, go to the next step. Pull the paper tray open. Remove the paper by gently pulling it straight out. If you cannot see the paper or the paper does not move when pulled, check the fuser area. -
Page 314: Paper Feed Jam (Optional Tray 2)
4 Insert the paper tray into the printer until it snaps into place. Printing automatically resumes. Paper Feed Jam (optional tray 2) 1 Pull the optional tray 2 open. 2 Remove the jammed paper from the printer. If you cannot see the paper in this area or the paper does not move when pulled, go to the next step. - Page 315 Pull the paper straight up and out. 5 Insert the trays back into the printer. Printing automatically resumes. MPF Jam 1 If the paper is not feeding properly, pull the paper out of the printer. 2 Open and close the front cover to resume printing. - 314 ...
-
Page 316: Fuser Area Jam
Fuser Area Jam NOTICE: The fuser area is hot. Take care when removing paper from the printer. Open the front cover and lightly pull the toner cartridge straight out. 2 Remove the paper by gently pulling it straight out. 3 Replace the toner cartridge and close the front cover. Printing automatically resumes. -
Page 317: Paper Exit Jam
Paper Exit Jam Open and close the front cover. The jammed paper automatically exits the printer. If the paper does not exit, go to the next step. Gently pull the paper out of the output tray. 3 If you cannot see the paper in the output tray or the paper does not move when pulled, open the rear door. - Page 318 If you see the jammed paper, push the two blue pressure levers down and remove the paper. Skip to step 7. If you do not see the paper, go to the next step. While pushing the fuser lever to the down, open the fuser door. NOTE: Ensure that to unfold the duplex guide before opening the fuser door or you may damage the fuser door.
- Page 319 Pull the jammed paper out. If the jammed paper does not move when you pull, push the two blue pressure levers up to loosen the paper, and then remove it. Return the fuser door, and duplex guide to their original position. Close the rear door.
-
Page 320: Duplex Jam
Duplex Jam Duplex Jam 0 Pull the duplex unit out of the printer. Remove the jammed paper from the duplex unit. If the paper does not come out with the duplex unit, remove the paper from the bottom of the printer. - 319 ... - Page 321 Push the duplex unit to the printer. Open and close the front cover. Printing automatically resumes. CAUTION: If you do not push the duplex unit correctly, paper jam may occur. Duplex Jam 1 Open the rear door. Unfold the duplex guide fully. Pull the jammed paper out.
-
Page 322: Clearing Lcd Error Messages
Tips for Avoiding Paper Jams By selecting the correct paper types, most paper jams can be avoided. When a paper jam occurs, follow the steps outlined in "Clearing Jams in the Paper Tray". • Follow the procedures in "Loading Print Media in the Paper Tray". Ensure that the adjustable guides are correctly positioned. - Page 323 Low Heat Error service. Over Heat Error Fuser unit Error Invalid Cartridge The toner cartridge Install a Dell-genuine toner cartridge, you have installed is designed for your printer. not for your printer. IP Conflict The IP address is used Check the IP address or obtain a new IP by another user.
- Page 324 Display message Meaning Suggested solutions Main Motor Locked There is a problem in Unplug the power cord and plug it back. the main motor. If the problem persists, please call for service. Paper jam in MPF Paper has jammed in Clear the jam.
- Page 325 Display message Meaning Suggested solutions Tray 2 Open The tray2 is not Close the Tray 2. securely latched. Replace pickup roller The life of the tray Replace the tray pickup roller with a new pickup roller will be one. Contact the service expired.
-
Page 326: Solving Problems
Solving Problems The following chart lists some conditions that may occur and the recommended solutions. Follow the suggested solutions until the problem is corrected. If the problem persists, contact Dell. Paper Feeding Problems Condition Suggested solutions Paper is jammed during Clear the paper jam. - Page 327 Condition Suggested solutions Paper does not feed • Remove any obstructions from inside the printer. See into the printer. "Cleaning the Interior". • Paper has not been loaded correctly. Remove paper from the tray and reload it correctly. • There is too much paper in the paper tray. Remove excess paper from the tray.
-
Page 328: Printing Problems
Check the power cord connections. Check the not print. receiving power. power switch and the power source. The printer is not Select Dell B2375dfw Mono MFP or Dell selected as the B2375dnf Mono MFP as your default printer in default printer. your Windows. - Page 329 Condition Possible cause Suggested solutions The printer selects The paper source For many software applications, the paper print materials selection in the source selection is found under the Paper tab from the wrong printer properties within the printer properties. Select the correct paper source.
- Page 330 The machine If you are under Suggested solutions: Change the language prints, but the text the DOS setting. See "Using the Dell Supplies Ordering is wrong, garbled, environment, the Utility". or incomplete. font setting for your machine may be set incorrectly.
-
Page 331: Printing Quality Problems
Printing Quality Problems The inside of the printer may be dirty or improper paper loading may reduce the print quality. See the table below to clear the problem. Condition Suggested solutions Light or faded print If a vertical white streak or faded area appears on the page: •... - Page 332 Condition Suggested solutions White spots appears on the page: • The paper is too rough and a lot of dirt from a paper falls to the inner devices within the machine, so the transfer roller may be dirty. Clean the inside of your machine. Contact a service representative.
- Page 333 Condition Suggested solutions Vertical repetitive If marks repeatedly appear on the printed side of the page at defects even intervals: • The toner cartridge may be damaged. If a repetitive mark occurs on the page, print a cleaning sheet several times to clean the cartridge;...
- Page 334 Condition Suggested solutions Page skew • Ensure that the paper is loaded properly. • Check the paper type and quality. See "Identifying Print Media Sources and Specifications". • Ensure that the paper or other material is loaded correctly and the guides are not too tight or too loose against the paper stack.
- Page 335 Condition Suggested solutions Black pages • The toner cartridge may not be installed properly. Remove the cartridge and reinsert. • The toner cartridge may be defective and need replacing. Install a new toner cartridge. See "Replacing the Toner Cartridge". • The printer may require repair. Contact a service representative.
-
Page 336: Fax Problems
Fax Problems Condition Suggested solutions Receiving fax calls are • Receive Mode set to Tel mode. (manual receive mode) not being answered by • The rings-to-answer setting might not be set correctly. (Under the printer Ans/Fax mode, set the Ring to Answer to a digit greater than the Ring to Answer setting for the TAD.) •... - Page 337 Condition Suggested solutions Receiving faxes are too The printer might be running out of toner while printing a fax. light. Under Toner empty conditions, the printer will store the fax job into memory, as soon as possible, replace the print cartridge, and then reprint the fax.
- Page 338 Condition Suggested solutions Faxes stop during • The fax machine to which you are sending might be sending. malfunctioning. • Your telephone line might not be working. • A communication error might be interrupting the fax job. • A poor telephone connection might exist. •...
-
Page 339: Copying Problems
Condition Suggested solutions The document stops The maximum length of a page that you can load is 381 mm (15 feeding in the middle inches). Faxing of a longer page stops at 381 mm (15 inches). of faxing. Voice calls are not •... -
Page 340: Scanning Problems
Condition Suggested solutions Fewer copies from the • Your originals may contain pictures, solids or heavy lines. For toner cartridge than example, your originals may be forms, newsletters, books or expected prints out. other documents that use more toner. • The document cover may be left open while copies are being made. -
Page 341: Global Address Problems
Condition Suggested solutions Message appears on • There may be a copying or printing job in progress. When the your computer screen: current job is complete, try the job again. • “Device can't be set • The selected port is currently being used. Restart your to the H/W mode computer and try again. -
Page 342: Common Windows Problems
Condition Suggested solutions LDAP Server Not It could be a wrong IP address setup or Server is not working Found... correctly. Administrator can suspect the physical condition, device (client) configuration and server status. In case of device configuration, administrator should check IP address or hostname or port number. -
Page 343: Common Linux Problems
Common Linux Problems Condition Suggested solutions The printer doesn’t • Check if the printer driver is installed in your system. Open MFP print. configurator and switch to the Printers tab in Printers configuration window to look at the list of available printers. Ensure that your printer is displayed on the list. - Page 344 Condition Suggested solutions The printer does not • Check if your printer is attached to your computer. Ensure that appear on the it is connected properly via the USB port and is turned on. scanners list. • Check if the scanner driver for your printer is installed in your system.
- Page 345 Condition Suggested solutions The printer doesn’t • Check if a document is loaded into the printer. scan. • Check if your machine is connected to the computer. Ensure that if it is connected properly if I/O error is reported while scanning.
-
Page 346: Common Mac Problems
Condition Suggested solutions I encounter error Avoid changing print job parameters (via SLPR utility, for “Unable to open MFP example) while a print job is in progress. Known versions of port device file!” when CUPS server break the print job whenever print options are printing a document. -
Page 347: Troubleshooting Postscript (Ps) Errors
Troubleshooting PostScript (PS) Errors NOTE: To receive a printed or screen displayed message when PS errors occur, open the Print Options window and click the desired selection next to the PostScript errors section. Problem Possible Cause Solution PostScript file The PostScript option Print a configuration page and verify that cannot be printed. -
Page 348: Installing Accessories
Installing Accessories Installing Printer Accessories Installing an Optional Tray 2 - 347 ... -
Page 349: Installing Printer Accessories
Installing Printer Accessories Never remove the control board while the printer is plugged in. To avoid the possibility of an electrical shock, always disconnect the power cord when installing or removing ANY internal or external printer option. The control board is sensitive to static electricity. Before installing or removing an internal cord, discharge static electricity from your body by touching something metal on any device plugged into a grounded power source. - Page 350 Grasp the control board cover and open it. Connect the cable as below. - 349 ...
- Page 351 Close the control board cover. Combine machine and optional tray 2 as below. - 350 ...
- Page 352 Connect a necessary cable and power on the machine. Load paper in the optional tray 2. For information about loading paper in this tray, see "Loading Paper". Reconnect the power cord and cables and then power the printer on. After installing the optional tray 2, printer drivers will automatically sense tray 2. - 351 ...
-
Page 353: Specifications
Specifications General Specifications Dell technical support policy Contacting Dell Warranty and return policy - 352 ... -
Page 354: General Specifications
General Specifications NOTE: The specification values listed below are subject to change without notice. See www.dell.com or www.dell.com/support for possible changes in information. Item Description Dimension Width x Length x Height 447 x 462 x 420 mm (18.8 x 18.2 x 16.5... -
Page 355: Dell Technical Support Policy
Operating System, application software, and hardware drivers to the original default configuration as shipped from Dell, as well as the verification of appropriate functionality of the printer and all Dell-installed hardware. In addition to this technician assisted technical support, online technical support is available at Dell Support. -
Page 356: Contacting Dell
Contacting Dell You can access Dell Support at www.dell.com/support. Select your region on the WELCOME TO DELL SUPPORT page, and fill in the requested details to access help tools and information. You can contact Dell electronically using the following addresses: World Wide Web – www.dell.com/... - Page 357 Index , 53 Address Book, use DADF (duplex automatic fax system, setting , 263 document feeder), advanced , 254 automatic redialing , 184 , 247 loading basic , 69, date and time, setting faxing 77, 261 , 250-251 automatically , 251 manually dayliging saving, , 335...
- Page 358 in MPF (multi purpose , 145 feeder) , 143 layout properties, rear output , 37 in paper tray , 155 printing reduced/enlarged paper size, setting , 196 Linux copying , 148 paper tray , 278 installing driver , 158 print replacing toner , 285 printer properties...
- Page 359 USB memory , 51 managing , 175 watermarks, printing - 358 ...