Sennheiser DW Pro1 Instruction Manual
Sennheiser wireless headset system
Hide thumbs
Also See for DW Pro1:
- Setup instructions (4 pages) ,
- Product sheet (4 pages) ,
- Setup information (3 pages)
Table of Contents
Advertisement
Advertisement
Table of Contents

Related Manuals for Sennheiser DW Pro1


Summary of Contents for Sennheiser DW Pro1
- Page 1 Comfort DECT calls DW Pro1/Pro2 Instruction manual...
-
Page 2: Table Of Contents
Contents Contents Important safety information ................... 2 The DW Pro1/Pro2 wireless headset system ............4 Delivery includes ......................5 Product overview ......................6 Base station ......................... 6 Pro1/Pro2 headset ....................7 Overview of the buttons ....................8 Overview of the LEDs ..................... -
Page 3: Important Safety Information
– properly plugged into the wall socket, – only operated within the permissible temperature range, The DW series comprises the following products: DW Office, DW Office USB, DW Pro1/ Pro2, DW Pro1/Pro2 USB. The DW 800 is not part of the DW series. - Page 4 37). • Do not operate the product near any heat sources. • Only use attachments/accessories specified by Sennheiser Communi- cations (see “Accessories” on page 36). • Keep plastic wrap and plastic bags of the packaging out of reach of chil- dren –...
-
Page 5: The Dw Pro1/Pro2 Wireless Headset System
The DW Pro1/Pro2 wireless headset system The DW Pro1/Pro2 wireless headset system The Sennheiser Communications DW Pro1/Pro2 is a wireless DECT headset system which is intended for professional call center and office use. • Can be used with a fixed line phone or PC (VoIP) •... -
Page 6: Delivery Includes
Delivery includes Delivery includes 1 base station 1 headset with built-in rechargeable battery: – Pro1 variant: covers one ear (monaural) – Pro2 variant: covers both ears (binaural) 1 power supply unit 1 telephone cable 1 USB cable 1 safety guide (booklet with important safety information) 1 quick guide 1 CD ROM (including, among other things, the HeadSetup... -
Page 7: Product Overview
Product overview Product overview Base station · ¶ ³ ² º » ¾ µ ¿ ´ ¹ ¸ µ ACC ³ socket PC button with LED ¸ · DIP switch row Charging contacts ¹ DC IN » socket PHONE button with LED ¿... -
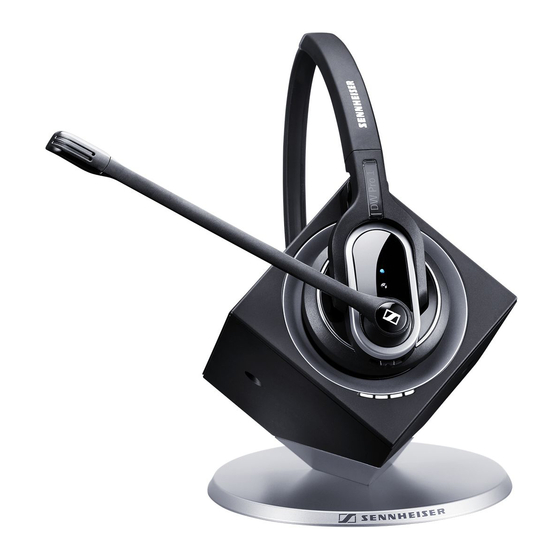
Page 8: Pro1/Pro2 Headset
Product overview Pro1/Pro2 headset Pro1 Pro2 Microphone Headband Windshield Battery compartment cover Name plate Ear pad HEADSET LED Charging contacts LINK button AUDIO button... -
Page 9: Overview Of The Buttons
Overview of the buttons Overview of the buttons Base station ³ Action Button Functions Page » Selects the Phone mode Press the » PHONE button Establishes/disconnects the link between headset and base station Accepts/ends a call (with electronic call control/ handset lifter) Selects the PC mode Press the... -
Page 10: Overview Of The Leds
Overview of the LEDs Overview of the LEDs Base station ³ LED of the PC button ³ Meaning » lights up PC mode flashes Incoming PC call LED of the PHONE button » Meaning lights up Phone mode ¿ flashes Incoming telephone call ´... -
Page 11: Putting The Headset System Into Operation
Putting the headset system into operation Putting the headset system into operation Putting the base station into operation You can use the headset system with your fixed line phone (Phone mode) and/or your PC mode). The base station controls the wireless commu- nication between the products. - Page 12 Putting the headset system into operation Connecting the base station to the mains power supply The base station is ready for operation as soon as it is connected to the mains power supply. Connect the DC IN connector of the power supply unit to the DC IN socket ¹.
- Page 13 Putting the headset system into operation Connection to a fixed line Disconnect the handset cable from the telephone. phone without headset socket ¾. Connect the handset cable to the Handset socket º Use the telephone cable to connect the Phone socket to the handset socket on the telephone.
- Page 14 Putting the headset system into operation Connection of an optional You can also connect the HSL 10 mechanical handset lifter from Sennheiser mechanical handset lifter Communications (see “Accessories and spare parts” on page 36): (with connection possibili- Connect the base station to the fixed line phone as described under...
- Page 15 Set the DIP switch to the lower position. The necessary connection and adapter cables are available from your Sennheiser partner. For additional information, please visit our website at www.senncom.com/headsetselector. Setting up the base station Place the base station at a minimum distance of 15 to 20 cm from the fixed line phone.
- Page 16 Putting the headset system into operation Installing the HeadSetup software HeadSetup software enables the headset system to communicate with a wide variety of softphones and allows you to use the call control func- tions. Even without the HeadSetup software, the headset system can still be used as an audio input and output device.
-
Page 17: Putting The Headset Into Operation
Putting the headset system into operation Putting the headset into operation The microphone boom of the Pro1/Pro2 headset can be swiveled, allowing the microphone to be worn on the left or right-hand side (see page 24). 20 min Before using the headset for the first time, charge the rechargeable battery for at least 20 minutes (see page 22). -
Page 18: Testing The Headset System In Phone Mode And Adjusting It
Putting the headset system into operation Push the AUDIO button in the direction in which you want to increase the volume until the HEADSET LED goes off. The headset switches to standby mode. Right Left Testing the headset system in Phone mode and adjusting it... - Page 19 Putting the headset system into operation Adjusting the audio signal/dial tone Set the switch to (default setting), so that you can hear a clear dial tone in the headset. ² Adjusting the microphone sensitivity ¶ By default, the microphone volume control is set to between position and position 5.
-
Page 20: Testing The Headset System In Pc Mode And Adjusting It
Putting the headset system into operation Testing the headset system in mode and adjusting it Testing the PC connection » When Phone mode is selected (the LED of the PHONE button lights up white): ³ Press the PC button on the base station. ³... -
Page 21: Adjusting Advanced Settings
Manual operation Lifts/hangs up the handset manually or using the handset lifter. Electronic hook switch (DHSG standard) Call control via the DW Pro1/Pro2 headset system. Electronic hook switch (MSH standard) Call control via the DW Pro1/Pro2 headset system. Manual operation Lifts/hangs up the handset manually or using the handset lifter. - Page 22 Putting the headset system into operation Automatically establishing the wireless link between headset and base station (Auto Link) – DIP switch 4 Switch position Function Switched off You have to manually establish the wireless link (see page 23). Switched on When taking the headset out of the base station, a wireless link is automatically established between headset and base station (Auto Link).
-
Page 23: Using The Headset System
Using the headset system Using the headset system Charging the headset rechargeable battery If you charge the rechargeable battery for the first time, allow charging for at least 20 minutes without interruption. A complete charging process takes about 60 minutes. You can interrupt charging at any time without damaging the rechargeable battery. -
Page 24: Switching The Headset On/Off
Using the headset system When the battery is about to run flat ..only the LED segment 1 lights up weakly or flashes (see page 9)..the HEADSET LED flashes red..you hear a low battery warning (three beeps)in the headset.. -
Page 25: Putting The Headset On And Adjusting It
Using the headset system ³ You can also establish or disconnect the wireless link by pressing » ³ » the PC button or the PHONE button on the base station (depending on the selected mode or Phone), see page 28). If your telephone has a built-in electronic hook switch supporting the MSH standard (see page 13), you can only disconnect the wire- less link between headset and base station by placing the headset... -
Page 26: Calling Via The Fixed Line Phone Using The Headset
Using the headset system Calling via the fixed line phone using the headset Accepting an incoming call You hear the ring tone of the fixed line phone: Put on the headset and establish a wireless link between headset and base station (see page 23). If you are using a handset lifter/electronic hook switch, the call is auto- matically accepted. -
Page 27: Calling Via The Pc Using The Headset
Using the headset system Ending a call Disconnect the wireless link between headset and base station (see page 23). If you are using handset lifter/electronic hook switch, the call is auto- matically ended. If you are using a handset lifter/electronic hook switch: Hang up the handset or press the “end call”... - Page 28 Using the headset system Making a PC call Establish a wireless link between headset and base station (see page 23). Make the call using your softphone. Ending a PC call Disconnect the wireless link between headset and base station (see page 23).
-
Page 29: Switching Between Phone And Pc Mode
Using the headset system If the “Always Audio” function is activated, you can still accept calls via the Phone mode. After ending the call, the base station auto- matically switches back to mode and all PC audio is reproduced via the headset. Switching between Phone mode... -
Page 30: Adjusting The Volume
Using the headset system To start the conference call using the master headset: Establish a wireless link between headset and base station (the LINK ¿ flashes blue). To add a guest headset to the conference call: Place the guest headset to be added to the conference call into the base station of the master headset. -
Page 31: Muting The Headset's Microphone
If pairing was successful, the HEADSET LED lights up blue. You can now use the newly paired headset. The DW series comprises the following products: DW Office, DW Office USB, DW Pro1/ Pro2, DW Pro1/Pro2 USB. The DW 800 is not part of the DW series. -
Page 32: If You Leave The Dect Range
Using the headset system Pairing the headset to third party DECT GAP telephones Place the DW Pro1/Pro2 headset at a maximum distance of 1 m from the third party base station. Simultaneously press and hold the headset’s LINK button AUDIO button for 5 seconds. -
Page 33: Cleaning And Maintaining The Headset System
Replacing the ear pad(s) You can replace the ear pad(s). Spare ear pads are available from your Sennheiser partner. Carefully remove the old ear pad Attach the new ear pad to the ear cup by pressing firmly around the ear... -
Page 34: Replacing The Headset's Rechargeable Battery
Cleaning and maintaining the headset system Replacing the headset’s rechargeable battery You can replace the rechargeable battery. Spare rechargeable batteries are available from your Sennheiser partner. Only use spare rechargeable batteries recommended by Sennheiser Communications. CAUTION Damage to the product due to improper handling The cable connections can be damaged when subjected to mechanical stress. - Page 35 Cleaning and maintaining the headset system Pro2 headset Carefully remove the ear pad from the ear cup where the battery compartment is located. Open the battery compartment cover using your finger nail (see first diagram). Remove the battery compartment cover Remove the rechargeable battery and carefully loosen the connector plug of the battery cable.
-
Page 36: If A Problem Occurs
If a problem occurs that is not listed in the above table or if the problem cannot be solved with the proposed solutions, please contact your local Sennheiser partner for assistance. To find a Sennheiser partner in your country, search at www.senncomm.com under “Service & Support”. -
Page 37: Accessories And Spare Parts
Accessories and spare parts Accessories and spare parts For additional information on accessories and spare parts, please contact your Sennheiser partner or visit our website at www.sennheiser.com. Accessories • HSL 10 handset lifter – mechanical handset lifter – incl. ring tone detection –... -
Page 38: Specifications
Microphone type electret microphone, ultra noise canceling Operating temperature range +5°C to +45°C (+41°F to +113°F) −20°C to +70°C (–4°F to +158°F) Storage temperature range Type approvals (DW Pro1/Pro2 headset system) In compliance with Europe: EN 301489-6 Radio EN 301406... - Page 39 USA: 47 CFR Part 15 (d) FCC ID: DMOCDBDIB (base station) FCC ID: DMOCDHDFC (Pro1 headset) FCC ID: DMOCDHDEC (Pro2 headset) DW Pro1/Pro2 power supply unit Nominal input voltage 100 to 240 V~ Nominal input current max. 0.2 A Mains frequency...
-
Page 40: Manufacturer Declarations
Manufacturer Declarations Manufacturer Declarations Warranty Sennheiser Communications A/S gives a warranty of 24 months on this product. For the current warranty conditions, please visit our web site at www.senncom.com or contact your Sennheiser partner. In compliance with the following requirements •... - Page 41 Section 2.1093 of the FCC rules. Trademarks Sennheiser is a registered trademark of Sennheiser electronic GmbH & Co. KG. Other product and company names mentioned in this instruction manual may be the trademarks or registered trademarks of their respective...
-
Page 42: Index
Index Index Buttons base station 8 ABC switch headset 8 adjusting 18 overview 8 ACC socket connection of an optional mechanical handset lifter 13 Calling Accessories accepting an incoming fixed line connection of an optional phone call 25 mechanical handset lifter 13 accepting an incoming PC call 26 Acoustic signals ending a fixed line phone call 26... -
Page 43: Testing The Headset System In Pc Mode And Adjusting It
Index testing 19 Phone and PC mode Headset switching between Phone and PC adjusting 24 mode 28 charging 22 labeling 16 Phone mode overview 7 adjusting 17 pairing additional headsets for testing 17 shared use 30 Phone socket pairing to third party DECT GAP connecting the base station to a telephone 31 fixed line phone with headset... - Page 44 Printed in China Publ. 06/10 Sennheiser Communications A/S Langager 6, 2680 Solrød Strand, Denmark www.senncom.com...