Miele KM-5600 Operating And Installation Instruction
Hide thumbs
Also See for KM-5600:
- Operating and installation instructions (64 pages) ,
- Operating and installation instructions (72 pages)
Table of Contents

Related Manuals for Miele KM-5600


Summary of Contents for Miele KM-5600
- Page 1 Operating and installation instructions Ceramic hobs KM 5600 KM 5617 en - GB To avoid the risk of accidents or damage to the appliance it is essential to read these instructions before it is installed and used for the first time. M.-Nr.
-
Page 2: Table Of Contents
Contents Guide to the appliance ..........4 Models . - Page 3 Contents Safety features ........... 30 Safety lock / System lock .
-
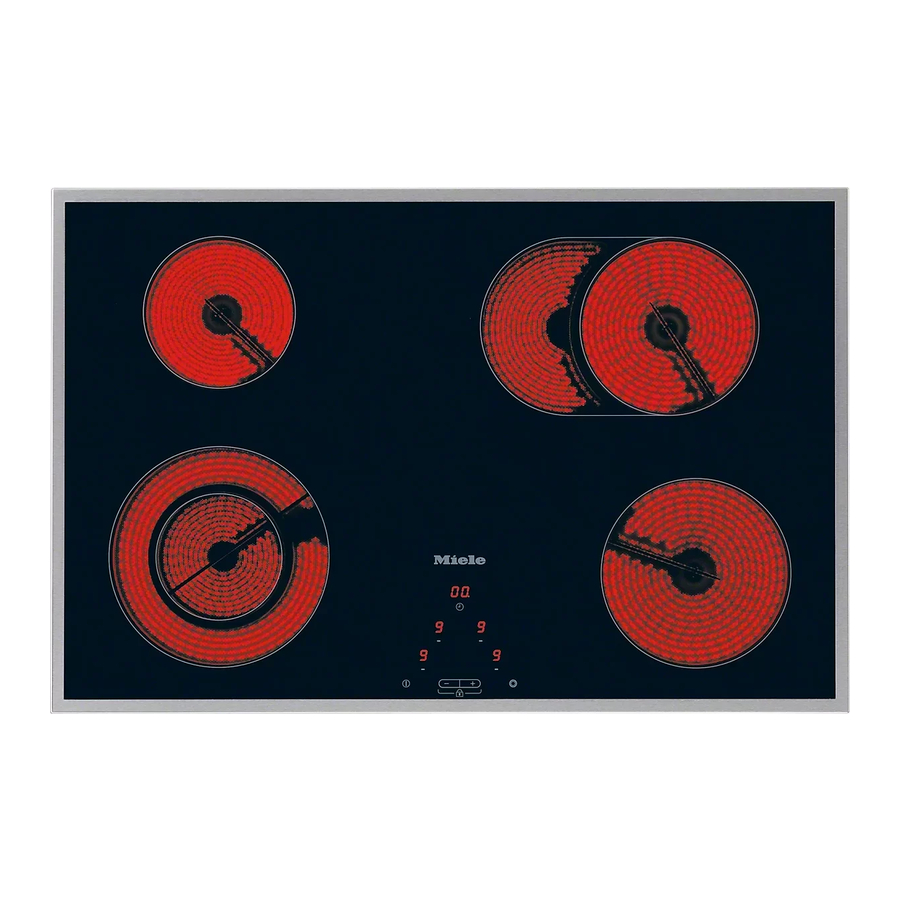
Page 4: Guide To The Appliance
Guide to the appliance Models KM 5600 abcd Single circle zones Control panel... - Page 5 Guide to the appliance KM 5617 Double circle zone bd Single circle zones Extended cooking zone Control panel...
-
Page 6: Control Panels
Guide to the appliance Control panels KM 5617 (Hob with double circle/extended zone) KM 5600 (Hob with single circle zones only) - Page 7 Guide to the appliance Sensors for a Switching the hob on and off b - Setting the power level - Safety lock (on models with double circle/extended zone) - Setting the time (on models with a timer) c n Switching on the outer circle of a double circle/extended zone $ Safety lock d Selecting the cooking zone e - Selecting the timer...
-
Page 8: Cooking Zones
Guide to the appliance Cooking zones Zone KM 5600 C in cm Rating in watts for 230 V 18.0 1800 14.5 1200 21.0 2200 14.5 1200 Total: 6400 Zone KM 5617 C in cm Rating in watts for 230 V 12.0 / 21.0 750 / 2200 14.5... -
Page 9: Warning And Safety Instructions
Any other use is not supported by the familiar with the content. Pass them manufacturer and could be dangerous. on to any future owner. Miele cannot be held liable for damage resulting from incorrect or improper use or operation. This hob is not intended for outdoor use. - Page 10 Warning and Safety instructions Safety with children Packaging, e.g. cling film, polystyrene and plastic wrappings, Use the safety lock to prevent must be kept out of the reach of babies children operating the appliance or and young children. Danger of altering the settings.
- Page 11 Ensure that power is not supplied to the Miele cannot be held liable for the appliance until after it has been consequences of an inadequate installed or until after any maintenance earthing system (e.g.
- Page 12 Switch it off immediately, and damage to the ceramic surface for disconnect it from the mains electricity which Miele cannot be held liable. supply. Danger of electric shock. Boiling fat or oil could ignite and cause In areas which may be subject to a fire.
- Page 13 Warning and Safety instructions Do not flambé under a cooker hood. Never heat an empty pan unless the The flames could set the cooker hood manufacturer of the pan expressly on fire. states that you can do so. This could damage the appliance.
- Page 14 Miele cannot be held liable for Spray canisters, aerosols and other inflammable substances should not be damage caused by non-compliance with these Warning and Safety stored in a drawer under the hob.
-
Page 15: Caring For The Environment
Caring for the environment Disposal of the packing Disposal of your old appliance material Electrical and electronic appliances often contain materials which, if The transport and protective packing handled or disposed of incorrectly has been selected from materials which could be potentially hazardous to are environmentally friendly for human health and to the environment. -
Page 16: Before Using For The First Time
Before using for the first time Please stick the extra data plate for the appliance supplied with this documentation in the space provided in the "After sales service, data plate" section of this booklet. Cleaning for the first time ^ Remove any protective wrapping and adhesive labels. ^ Before using for the first time, clean the appliance with a damp cloth only and then wipe dry. -
Page 17: How The Cooking Zones Work
How the cooking zones work Single circle cooking zones have one heating element, whilst double circle (vario) cooking zones and extended zones have two. Depending on model, the heating elements may be separated by an isolating ring. Each cooking zone has overheating protection (a temperature limiter), which stops the ceramic surface from becoming too hot (see "Overheating protection"). -
Page 18: Operation
Operation How the hob is operated The hob is equipped with electronic sensor controls which react to finger contact. To operate the hob, touch the relevant sensor. Each time you touch a sensor, an audible tone sounds. In order to set or alter a power level or the time, the cooking zones and the timer must be "active". -
Page 19: Switching On
Operation Switching on The hob must be switched on before any of the zones can be used. Do not leave the appliance unattended whilst it is being used. To switch the hob on ^ Touch the s sensor. 0 will appear in each of the cooking zone displays. 00 will appear in the timer display. -
Page 20: Power Level Range
Operation Power level range The appliance is delivered with 9 power levels programmed in. If you wish to fine tune a setting, you can extend the power level range (see "Programming"). The intermediate setting will be represented by an illuminated dot next to the number. Cooking process Power levels* Standard... -
Page 21: Auto Heat-Up
Operation Auto heat-up When Auto heat-up has been activated, the cooking zone switches on automatically at the highest power setting and then switches to the continued cooking setting selected. The heat-up time depends on which continued cooking setting has been chosen (see chart). As the higher continued cooking settings are generally used for frying food, only a relatively short heat-up time is needed to heat up the pan initially. - Page 22 Operation Continued Heat-up time cooking setting* in minutes and seconds (approx.) 1 : 20 2 : 00 2 : 45 3 : 25 4 : 05 4 : 45 5 : 30 6 : 10 6 : 50 7 : 10 1 : 20 2 : 00 2 : 45...
-
Page 23: Switching The Outer Circle Of A Double Circle / Extended Zone On And Off
Operation Switching the outer circle of a double circle / extended zone on and off When cooking with larger pans, the outer circle of a double circle/extended zone (see "Guide to the appliance") can be switched on to provide an extended cooking area. When the outer circle of a double circle/extended zone has been switched on, the indicator lamp will light up while the power level is flashing in the cooking zone display. -
Page 24: Switching Off And Residual Heat Indicators
Operation Switching off and residual heat indicators Switching off a cooking zone ^ Touch the sensor for selecting the cooking zone you want twice. A 0 will flash in the cooking zone display for a few seconds. If the cooking zone is still hot, the residual heat indicator will then appear in the display. -
Page 25: Suitable Pans
Suitable pans – Most suitable The best pans for use on a ceramic hob are those with a thick base which is very slightly concave when cold. When heated, the base flattens to rest evenly on the hob, optimising the conduction of the heat. cold –... -
Page 26: Tips On Saving Energy
Tips on saving energy – Check that the diameter of the pan base is wide enough for the cooking zone so that heat is not lost unnecessarily. too small suitable – Use a pan lid whenever possible to minimise heat loss. uncovered covered –... -
Page 27: Timer
Timer The hob must be switched on to use the timer. The timer can be used for two different functions: - to set the minute minder - to set a cooking zone to switch off automatically. You can select a time from 1 minute (01) to 9 hours (9.^). -
Page 28: To Switch A Cooking Zone Off Automatically
Timer To switch a cooking zone off automatically You can set a time at the end of which a cooking zone will switch off automatically. All the cooking zones can be programmed at the same time. If the time programmed is longer than the maximum operational time allowed, the cooking zone will switch off after the maximum time allowed (see "Safety switch-off"). -
Page 29: To Use Both Timer Functions At The Same Time
Timer If more than one switch-off time is programmed, the shortest time remaining will show in the display, and the indicator lamp for that particular cooking zone will flash. All the other indicator lamps will light up constantly. If you want to check on the time remaining for another zone, touch the m sensor repeatedly until the indicator lamp for the zone you require flashes. -
Page 30: Safety Features
Safety features Safety lock / System lock Keep children away from the hob for their own safety. Your appliance is equipped with a safety lock and a system lock to prevent the hob and the cooking zones being switched on or any settings being altered. - Page 31 Safety features Hobs with single circle zones only Activating ^ Touch the $ sensor until the relevant indicator lamp comes on and a tone sounds. The indicator lamp will go out after a short while. Deactivating ^ Touch the $ sensor until the indicator lamp goes out. Hobs with a double circle/extended zone Activating ^ Touch the - and + sensors at the same time until a long...
-
Page 32: Safety Switch-Off
Safety features Safety switch-off Safety switch-off with an over-long cooking time If one of the cooking zones is heated for an unusually long period of time (see chart) and the power level is not altered, the hob will switch itself off automatically and the relevant residual heat indicator will light up. -
Page 33: Overheating Protection
Safety features Overheating protection Cooking zones Each zone is equipped with overheating protection (internal temperature limiter). This switches off the heating elements in the cooking zone before the ceramic surface overheats. If the heating element switches on and off even when the highest power level is selected, this indicates that the overheating protection mechanism has triggered. -
Page 34: Cleaning And Care
Cleaning and care For Miele branded cleaning and conditioning products see "Optional accessories". Do not use a steam cleaning appliance to clean this appliance. The steam could reach electrical components and cause a short circuit. The appliance should be cleaned after each use. Let it cool down to room temperature before cleaning. - Page 35 Then clean the hob with Miele ceramic and stainless steel hob cleaner (see "Optional accessories") applied with kitchen paper or a clean cloth. Do not apply cleaner whilst the hob is still hot, as this could result in marking.
-
Page 36: Additional Functions
Additional functions Reset The hob has a reset function. This allows you to restore all settings changed using the programming function to their original factory default settings. To activate the reset function ^ Switch the hob on. ^ Touch the sensors for selecting the front left and front right cooking zones at the same time for 10 seconds. -
Page 37: Programming
Additional functions Programming You can change the default settings of programme options (see chart). Several settings can be altered in succession. After programming mode has been called up, P (Programme), S (Status) and numbers will appear in the cooking zone displays. These show the current settings. To call up programming mode ^ With the hob switched off, touch the s and $ or n sensors at the same time until the relevant indicator lamp... - Page 38 Additional functions Programme* Status** Setting Demonstration mode Demonstration mode on and factory default (after the hob is switched on, "d" will settings appear in the front left cooking zone display and "E" in the front right cooking display for a few seconds). Demonstration mode off Factory default settings reinstated Power level range...
-
Page 39: Problem Solving Guide
- switch off at the isolator, – disconnect the mains fuse. Reset the trip switch in the mains fuse box, and switch the appliance back on. If it still will not switch on, contact a qualified electrician or the Miele Service Department. - Page 40 Problem solving guide Problem Possible cause Remedy After the hob is The appliance is in Deactivate demonstration switched on "d" appears demonstration mode. mode (see in the front left cooking "Programming"). zone display and "E" appears in the front right cooking zone display.
- Page 41 Problem solving guide Problem Possible cause Remedy The hob switches off One or more of the Clean the control panel or while it is in use, an F sensors have been remove the obstruction (see appears in every covered, e.g. by finger "Safety switch-off").
- Page 42 Interrupt the power supply to numbers appear the hob for approx. 1 minute. in the displays at the front. If this does not solve the problem, please call the Miele left right Service department. A calibration fault has occurred after the reset...
-
Page 43: To Test The Power Level
To test the power level You can test the power level of a cooking zone by measuring how long it takes to bring a specific amount of water to the boil. The pan (and lid) must be stainless steel or enamel. The diameter of the pan must match the cooking zone, and be flat-bottomed or slightly concave. - Page 44 To test the power level C Cooking zone Rating in watts for Quantity of water Time* in in cm 230 V in litres minutes 10.0 11.0 12.0 700 / 750 13.0 14.5 1000 / 1100 14.5 1200 14.5 1350 17.0 1500 18.0 1250...
-
Page 45: Optional Accessories
Optional accessories Miele offer a comprehensive range of useful accessories as well as cleaning and conditioning products for your appliance. These products can be ordered online: or from Miele (see back cover for contact details) Ceramic and stainless steel hob cleaner... -
Page 46: Safety Instructions For Installation
Safety instructions for installation After installing the hob, ensure that The appliance must only be installed the connection cable cannot come into and connected to the electricity contact with the underside of the supply by a suitably qualified and appliance. Make sure that there is no competent person in strict mechanical obstruction, such as a accordance with current national... - Page 47 Safety instructions for installation Safety distance above an interim Safety distance above the hob shelf It is not necessary to fit an interim shelf underneath the hob. If an interim shelf is fitted underneath the hob, a minimum safety distance of 110 mm must be maintained between the top of the worktop and the top of the interim shelf.
- Page 48 Safety instructions for installation Safety distances to the sides and back of the hob Ideally the hob should be installed with plenty of space on either side. There may be a wall at the rear and a tall unit or wall on one side (right or left) (see illustrations).
- Page 49 Safety instructions for installation Safety distance when installing the appliance near a wall with additional niche cladding A minimum safety distance must be maintained between the worktop cut-out and any niche cladding to protect it from heat damage. If the niche cladding is made from a combustible material (e. g. wood) a minimum safety distance e of 50 mm must be maintained between the cut-out and the cladding.
- Page 50 Safety instructions for installation Hob with frame or bevelled Tiled worktop edges Seal between the hob and the worktop Grout lines a and the hatched area underneath the hob frame must be smooth and even. If they are not the hob will not sit flush with the worktop and the sealing strip underneath the hob will not provide a good seal...
-
Page 51: Building-In Dimensions
Building-in dimensions KM 5600 a Spring clamps b Casing depth c Building-in depth including mains connection box. Mains connection cable, L = 1440 mm d Front... - Page 52 Building-in dimensions KM 5617 a Spring clamps b Casing depth c Building-in depth including mains connection box. Mains connection cable, L = 1440 mm d Front...
-
Page 53: Installation
Installation Worktops made of wood The exact positions of the spring ^ Seal the cut surfaces with a suitable clamps, and the safety brackets for heat-resistant sealant to avoid hobs with bevelled edges, are shown swelling caused by moisture. in the building-in dimensions for the particular hob. - Page 54 Installation Granite and marble worktops You will require double-sided tape and silicone (not supplied). ^ Apply silcone to the side edges and the lower edges of the spring clamps and safety brackets. ^ Fix the spring clamps (or safety brackets for hobs with bevelled edges) in place using double-sided tape c.
-
Page 55: Installing The Hob
Installation Installing the hob ^ Feed the hob connection cable down through the cut-out. ^ Position the hob on the spring clamps. ^ Using both hands, press down evenly on the sides of the hob until it clicks into position. When doing this, make sure that the seal under the hob sits flush with the worktop on all sides. -
Page 56: Electrical Connection
3 mm in type H 05 VV-F, available from the isolator switch (including switch, Miele. fuses and relays). Ensure power is not supplied to the Important U.K. appliance until after installation or The appliance is supplied for repair work has been carried out. -
Page 57: Wiring Diagram
Electrical connection Wiring diagram The electrical safety of this appliance can only be guaranteed when continuity is complete between it and an effective earthing system, which complies with current local and national safety regulations. It is most important that this basic safety requirement is present and regularly tested and where there is any doubt, the electrical wiring in the home should be inspected by a... -
Page 58: After Sales Service, Data Plate
Please note that telephone calls may be monitored and recorded to improve our service. When contacting Miele, please quote the model and serial number of your appliance. These are given on the data plate. N.B. A call-out charge will be applied for service visits where the problem could have been resolved as described in these instructions. - Page 60 Alteration rights reserved / 0811 M.-Nr. 07 570 840 / 03...