Garmin GPSMAP 76 Owner's Manual
Chartplotting receiver
Hide thumbs
Also See for GPSMAP 76:
- Owner's manual & reference manual (81 pages) ,
- Owner's manual and reference manual (81 pages) ,
- Specification sheet (2 pages)
Table of Contents
Advertisement
Advertisement
Table of Contents

Related Manuals for Garmin GPSMAP 76


Summary of Contents for Garmin GPSMAP 76
- Page 1 GPSMAP ® chartplotting receiver owner’s manual...
- Page 2 Garmin. Garmin hereby grants permission to download a single copy of this manual onto a hard drive or other electronic storage medium to...
-
Page 3: About This Manual
There are also step-by-step directions to assist you in these operations. The Main Pages chapter provides detailed explanations about each page in the GPSMAP 76 and step-by-step directions on using the pages. The Main Menu chapter provides detailed explanations about the Main Menu and how to use it to configure your unit. -
Page 4: Table Of Contents
Care Information ...iv Getting Started ...1 Unit Basics ...1 Interface Keys ...3 Basic Operation ...4 Turning on the GPSMAP 76 ...4 Adjusting Backlight and Contrast ...5 Selecting and Entering Data ...5 Simulator Mode ...5 Initializing the GPS Receiver ...7 Initialization Options ...8 Creating a Waypoint ...9... - Page 5 Proximity Options ...48 Celestial ...49 Tides...49 Sun and Moon ...50 Hunt and Fish ...51 MapSource and System Info ...51 Setup Menu ...52 GPSMAP 76 Owner’s Manual ntroductIon General Tab ...52 Time Tab ...53 Units Tab ...54 Location Tab ...54 Interface Tab ...57 Appendix...58...
-
Page 6: Care Information
PC (transferring it to MapSource). Immersing the Unit in Water The GPSMAP 76 is waterproof to IEC Standard 60529 IPX7. It can withstand immersion in 1 meter of water for 30 minutes. Prolonged submersion can cause damage to the unit. -
Page 7: Getting Started
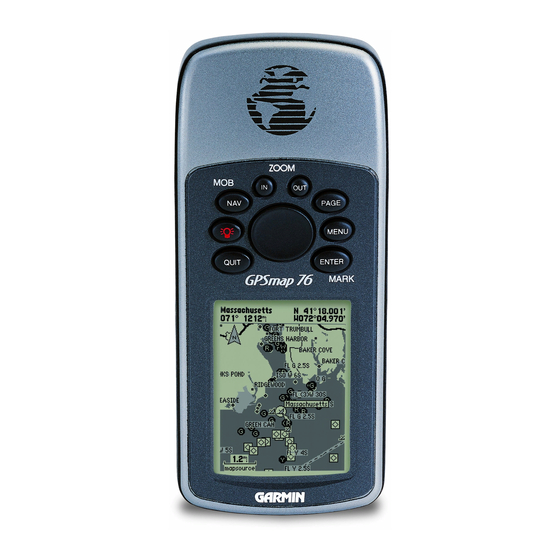
> ettInG tArted AsIcs ettInG tarted Unit Basics External Antenna Connection Internal Antenna Battery Compartment Interface keys External Data/ Auxilary Power Port 180 x 240 Four-Level Gray, Backlight Display GPSMAP 76 Owner’s Manual... - Page 8 D-ring clockwise. Remove the batteries from your GPSMAP 76 when you do not expect to use the unit for several months. Be sure to observe the proper polarity when inserting the batteries. Follow the battery manufacturer’s instructions on the proper care and handling of the batteries.
-
Page 9: Interface Keys
• Press and hold to turn unit On/Off • Press and release to adjust backlighting QUIT Key • Press and release to cancel data entry or exit a page GPSMAP 76 Owner’s Manual ettInG tArted nterfAce ROCKER Key • Move Up/Down or Right/Left to... -
Page 10: Basic Operation
Turning on the GPSMAP 76 When the GPSMAP 76 is turned on, the Welcome page is displayed, followed by the Information and Warning pages. Acknowledge each of these pages by pressing the PAGE key. The GPS Information page is now displayed. -
Page 11: Adjusting Backlight And Contrast
The Simulator Mode is great for practicing with the unit while inside and satellite signals are not available. When the GPSMAP 76 is in Simulator Mode, the GPS receiver is turned off, conserving battery power. The unit cannot be used for actual navigation. - Page 12 AsIc perAtIon urnInG on the To put the GPSMAP 76 in Simulator Mode: 1. With the GPS Information page displayed, press the MeNU key. 2. Using the ROCKeR key, highlight Start Simulator then press the eNTeR key. When the Simulator Mode is active, the message “Simulating GPS” is displayed along the top of the GPS Information page. To turn off the simulator: 1. With the GPS Information page displayed, press...
-
Page 13: Initializing The Gps Receiver
Initializing the GPS Receiver The GPSMAP 76 needs to be initialized the first time the unit is used, if it has been stored several months, or if it has been moved over 600 miles. The Almanac within unit stores each satellite’s orbital data that is supplied in the satellite signals. -
Page 14: Initialization Options
AsIc perAtIon nItIAlIzInG the Initialization Options If the GPSMAP 76 is unable to determine its location, an options menu is displayed. Select the appropriate option to help the unit acquire satellites. Highlight the option and then press ENTER to select. -
Page 15: Creating A Waypoint
(or simulating navigation) to mark a waypoint. There are three methods for creating waypoints in the GPSMAP 76. You can press the ENTER/MARK key while at a location, create a waypoint on the Map page, or enter coordinates for a waypoint manually. - Page 16 When you have adjusted all elements of the projected location, highlight Save and press Enter. Make any other desired changes to the new waypoint data such as name, symbol, and date. Highlight OK and then press ENTER. GPSMAP 76 Owner’s Manual...
-
Page 17: New, Mark, And Waypoint Page Options
New Route selection is displayed. If you select an existing route, the waypoint is added to the end of the route. If you select New Route, a new route is created and the waypoint is added to the route. GPSMAP 76 Owner’s Manual AsIc perAtIon editing Waypoints You can edit waypoints at the time they are created or at a later date. - Page 18 These are the same steps that you use to ENTER Depth names and change numbers and select options in all of the fields in the GPSMAP 76. • If you press and hold the ROCKER key while scrolling through the alpha-numeric list, it increases scrolling speed.
- Page 19 As you move around the map, the direction and distance from the Map Pointer to the current GPS location is displayed at the top of the map. GPSMAP 76 Owner’s Manual AsIc perAtIon Bearing and Distance from Pointer to current GPS location.
- Page 20 4. Highlight the desired waypoint and press eNTeR. 5. Highlight the Goto Button and press eNTeR. The GPSMAP 76 is now navigating to the waypoint. For a GPS to navigate, it has to be moving. Fortunately, you can simulate movement in the GPSMAP 76. Press the PAGE key until the Pointer Page is displayed.
-
Page 21: Creating A New Route
If you place the Map Pointer on a Map Feature, such as a road, park, or intersection, the GPSMAP 76 stores that location only to the route using the feature name as a reference. These points are not stored in the User Waypoint List. - Page 22 To change the Route Name, highlight the Name field, press ENTER, and use the ROCKER key to scroll through the alphanumeric list and enter the new name. Press ENTER to accept the changes. GPSMAP 76 Owner’s Manual...
-
Page 23: Editing A Route
To review information on a route waypoint, place the Map Pointer on the waypoint then press ENTER. This displays an options menu. Highlight Review and press ENTER. GPSMAP 76 Owner’s Manual AsIc perAtIon Inserting a New waypoint—There are two methods that can be used to insert a new waypoint into a route. - Page 24 Route page. With a waypoint highlighted, press MENU. Highlight Yes and press ENTER to remove the waypoint. Reverse Route—reverses the direction of the route placing the last waypoint at the top of the list. GPSMAP 76 Owner’s Manual...
- Page 25 Time to Point, and Leg Distance. To show a specific field, with the Active Route or Route page displayed, press the ROCKER key right or left to cycle through the fields. Plan Route Option Delete Route—removes the selected route from the Routes page. GPSMAP 76 Owner’s Manual...
-
Page 26: Starting To Navigate
3. Highlight CLeAR, then press eNTeR. 4. Highlight the YeS button then press eNTeR. 4. Press PAGe until the Map page is displayed. Begin walking holding the GPSMAP 76 in front of you with the top of the unit pointed toward the sky. As you move, you see that the unit leaves a bread crumb trail on the map indicating where you have been. Walk at least a two minutes in one direction and then make either a right or left turn. - Page 27 When starting to navigate, remember that GPS provides you with direct, straight line navigation. It is not always possible to navigate using the most direct route, so the GPSMAP 76 continuously updates your Track and Bearing, always pointing out the shortest route to your destination.
-
Page 28: Main
Press the MENU key to display the Options Menu. Use the ROCKER key to select and item from the options menu and press ENTER. Many of the menus in the GPSMAP 76 are arranged in a tab layout. Use the Left/ Right ROCKER key to move from tab to tab. -
Page 29: Gps Information Page
Acquiring Satellites—begins searching for satellites. The unit starts in this mode each time the unit is turned on. The GPS receiver remains in this mode until it has acquired at least three satellite signals. Satellite 2D GPS Location—indicates the receiver is only using... -
Page 30: Gps Information Page Options Menu
Simulating GPS—indicates the GPSMAP 76 is running in Simulator Mode and the GPS receiver is turned off. It is important to remember when using the Simulator, the GPSMAP 76 cannot be used for actual navigation. GPS Information Page Options Menu Press the MENU key to activate the Options Menu from the GPS Information page. -
Page 31: Map Page
Map Page The GPSMAP 76 comes with a built-in basemap that includes a database of Cities, Interstates, State and County Highways, Exit information, Lake and River outlines, and Railway Lines. The standard basemap can be enhanced using Garmin’s MapSource products. -
Page 32: Map Page Options
To change a data type, highlight the desired data field and press ENTER. Use the ROCKER key to scroll through the available selections. With the data type highlighted, press ENTER to accept the selection. GPSMAP 76 Owner’s Manual... -
Page 33: Setup Map
Otherwise, the item is displayed with a name in the text size selected. GPSMAP 76 Owner’s Manual • Zoom Setting—determines when items are displayed on the map. Use the Off setting to keep items from display on the Map page. -
Page 34: General Tab
If you select Water, the water portion of the display is lighter in color than the land. Auto Zoom—allows you to have the map automatically zoom in on a waypoint as you approach. GPSMAP 76 Owner’s Manual... -
Page 35: Map Tab
Auto setting does not display a Lat Lon Grid with the Basemap or MapSource options set to On. GPSMAP 76 Owner’s Manual Grid Labels—displays the coordinates on the Lat Lon grid on the map. The Lat Lon Grid must be set to Auto or a Zoom Range for the Grid Labels to appear. -
Page 36: Point Tab
MapSource software designed for water navigation such as BlueChart. Navaids—are aids to navigation such as landmarks, mile markers, hazards, light houses, and buoys. Tide Stations—are stations where tide information is gathered. Services—include Marinas, Gas Stations, etc. GPSMAP 76 Owner’s Manual... -
Page 37: Line Tab
Line and Course Line. Bearing Line—shows the bearing from your current location to the active waypoint. GPSMAP 76 Owner’s Manual Area Tab The Area tab contains the Text and Zoom settings for defined areas to appear shaded on the map. -
Page 38: City Tab
The Road tab contains the Text and Zoom settings for Local Road Names and Zoom settings for Freeway, Highway, and Local Roads. Freeway—Interstate and U.S. Highways Highway—State Highways and Local Highways Local Roads—All Other Roads Local Road Names—Name Labels for Local Roads GPSMAP 76 Owner’s Manual... -
Page 39: Other Tab
The Other tab contains the Text and Zoom settings for Railroad and Text setting for the Accuracy Circle, Heading Line, and Lock to Roads. GPSMAP 76 Owner’s Manual Railroad—controls the display of railways lines. Accuracy Circle—is displayed around the Location Triangle on the Map page. -
Page 40: Pointer Page
To change a data type, highlight the desired data field and press ENTER. Use the ROCKER key to scroll through the available selections. Highlight the desired item and press ENTER to accept. GPSMAP 76 Owner’s Manual... -
Page 41: Highway Page
If the highway moves to the right, turn right until the triangle is aligned with the white line in the middle of the highway and the highway is pointed toward the top of the display. GPSMAP 76 Owner’s Manual AGes Status Bar Highway... -
Page 42: Highway Page Options
Active Route—determines if the Graphic Highway is displayed. The graphic highway is only displayed when a route or Goto is active. Track Log—determines if the Track Log is displayed. Saved Tracks—determines if Saved Tracks are displayed. GPSMAP 76 Owner’s Manual... -
Page 43: Waypoint Tab
If this selection is set to Off, route waypoints are not displayed on the graphic highway. Other—determines if nearby waypoints are displayed. GPSMAP 76 Owner’s Manual Active Route/Goto Page The Active Route/Goto page shows the waypoints in current use for navigation. If you are navigating using a Goto, the active waypoint is shown with the distance remaining displayed on the right side of the screen. -
Page 44: Main Menu
Main Menu, highlight the menu item and press ENTER. Note: The power indicator is calibrated for Alkaline batteries. If you choose to use another type of battery, the gauge may not reflect the actual energy level of those batteries. Main Menu Page GPSMAP 76 Owner’s Manual... -
Page 45: Trip Computer
Moving Avg (Speed)—displays an average based on the time the unit was in motion since the Trip Computer was last reset. GPSMAP 76 Owner’s Manual Moving Time—displays the total time the unit was in motion since the Trip Computer was last reset. -
Page 46: Tracks
Note: If you know that you are going to want to use the TracBack feature for a return trip, clear the Track Log before you start the trip. This ensures that you are only navigating along the most recent track. GPSMAP 76 Owner’s Manual... -
Page 47: Track Information Page
Press ENTER to display the Track Information page. Name—allows you to change the Saved Track Name. When tracks are saved, the GPSMAP 76 uses the a date as the default track name. Distance—shows the total distance of the Saved Track. -
Page 48: Points
Find By Name / Find Nearest—selects how the Waypoint List is displayed. Find Nearest—displays a list containing the nearest waypoints within a 100-mile radius. The waypoints are listed with the nearest waypoint at the top of the list. GPSMAP 76 Owner’s Manual... -
Page 49: Points Of Interest
Waypoints. Waypoints are selected by entering the waypoint name in the data field or scrolling through the Waypoint List. As you enter a waypoint name, the GPSMAP 76 updates the waypoint list to show waypoint names that coincide with the letters entered. When the desired name appears, press ENTER to select. -
Page 50: Cities
The Exits option displays a list of exit options. To select a exit option from the list, highlight the selection and press ENTER. When the exit option is selected, a list containing the selected data is displayed. GPSMAP 76 Owner’s Manual... -
Page 51: Exit Options
With a list of exit options displayed, press MENU, highlight Select Map, then press ENTER. You can now select from the available options. GPSMAP 76 Owner’s Manual Addresses This option is only available when MapSource CD data that contains addresses is loaded in the unit. -
Page 52: Intersections
Map and press ENTER. Highlight OK and press ENTER to exit the page. You also have the option of saving the intersection as a waypoint by pressing the MENU key, highlighting Save as Waypoint, and pressing ENTER. Find Intersection Page GPSMAP 76 Owner’s Manual... -
Page 53: Routes
A route must have at least two waypoints, but can contain as many as 50 waypoints. The GPSMAP 76 can store 50 routes. On the Routes page, you can create new routes, determine how many empty routes you have left, and review a list of existing routes. -
Page 54: Proximity
A waypoint is added by highlighting the dashed entry line and pressing ENTER. Remove Point—Removes the highlighted waypoint from the Proximity List. Remove All—Removes all waypoints from the Proximity List. GPSMAP 76 Owner’s Manual... -
Page 55: Celestial
24-hour block of local time (LCL) for your position, with the reported station time (STA) appearing at the bottom. GPSMAP 76 Owner’s Manual Daylight (light bar) and night (dark bar) show across the time scale, with the time progressing from left to right. -
Page 56: Sun And Moon
Location field press ENTER. The unit defaults to the current date and time, or enter a date and time of your choice. Date Location Data Fields Horizon Position (0°) GPSMAP 76 Owner’s Manual Time Moon Phase View Moon Position Overhead (90°) 45°... -
Page 57: Hunt And Fish
Data Fields GPSMAP 76 Owner’s Manual MapSource and System Info The MapSource Info page displays a list of the MapSource data stored in the unit and description of the highlighted list item. -
Page 58: Setup Menu
ROCKER key (right/left). To select a data field on a tab, use the ROCKER key (up/down) to highlight the selection and press ENTER. To restore the GPSMAP 76 setup menu to the factory settings, press MENU and with Restore Defaults highlighted press ENTER. General Tab... -
Page 59: Time Tab
Time. To change a setting, highlight the field and press ENTER. Make your selection then press ENTER to activate the selection. GPSMAP 76 Owner’s Manual Time Format—displays time in a 12 or 24 hour format. Time Zone—allows you to select your time zone. The option Other creates the field UTC Offset. -
Page 60: Units Tab
Elevation—displays in Feet or Meters. Depth—displays in Feet, Fathoms, and Meters. The GPSMAP 76 cannot measure depth on its own. The depth input has to come from a NMEA device providing the “DPT” sentence. Distance and Speed—displays in Nautical, Statute, or Metric. - Page 61 For more information on grids and datums, we recommend that you visit the National Imagery and Mapping Agency at http://www.nima.mil GPSMAP 76 Owner’s Manual WARNING: Selecting the wrong map datum can result in substantial position errors. When in doubt, use the default WGS 84 datum for best overall performance.
-
Page 62: Alarms Tab
Deep Water—requires input form a NMEA device supplying the “DPT” sentence. The Deep Water Alarm alerts you when the water is deeper than the depth set. GPSMAP 76 Owner’s Manual... -
Page 63: Interface Tab
DGPS beacon. • NMEA—causes the unit to transmit NMEA data. It also allows the GPSMAP 76 to accept NMEA data from another NMEA device, like a echo sounder. The baud (speed of communication in bits per second) is displayed in the Baud field. -
Page 64: Appendix
Battery life: Up to 16 hours External: 8-35V DC *The temperature rating for the GPSMAP 76 may exceed the usable range of some batteries. Alkaline batteries can rupture at high temperatures. Alkaline batteries lose a significant amount of their capacity as temperature decreases. Use lithium batteries when operating the GPSMAP 76 in below-freezing conditions. -
Page 65: Connecting The Power/Data
Approved sentences—GPRMC, GPGGA, GPGSA, GPGSV, GPGLL, GPBOD, GPRTE, and GPWPL; Proprietary sentences—PGRME, PGRMZ, and PSLIB. The GPSMAP 76 will accept NMEA input with support for the DBT, DPT, MTW, and VHW sentences. You can dowload a copy of Garmin’s proprieatry communication protocol on the Help and Support section of our Web site at www.garmin.com... -
Page 66: Satellite Information
Date, Time, and Current Location The GPS gets date and time information from the satellites on-board atomic clock. When the GPS receiver has achieved a 2D or 3D GPS Location, the current location is displayed in the selected Location Format. GPSMAP 76 Owner’s Manual... -
Page 67: What Is Waas
U.S. and portions of Alaska. For more information, go to http://gps.faa.gov/Programs/WAAS/waas.htm Note: If you are using the GPSMAP 76 outside of the U.S., it is recommended that you turn off WAAS for the most accurate location fix. -
Page 68: Map Datums
Midway Ast ‘61 Midway Astro ‘61- Midway Minna Minna- Nigeria NAD27 Alaska North American 1927- Alaska NAD27 Bahamas North American 1927- Bahamas NAD27 Canada North American 1927- Canada and Newfoundland NAD27 Canal Zn North American 1927- Canal Zone GPSMAP 76 Owner’s Manual... - Page 69 Flores Islands (Azores) Old Egyptian Old Egyptian- Egypt Old Hawaiian Old Hawaiian- Mean Value Oman Oman- Oman GPSMAP 76 Owner’s Manual Ord Srvy GB Old Survey Great Britain- England, Isle of Man, Scotland, Shetland Isl., Wales Pico De Las Nv Canary Islands...
-
Page 70: Navigation Terms
Leg Time—The time required to travel from a route waypoint to the next waypoint (in sequence) in the route. Max Speed—The maximum second-by-second speed recorded since last reset. Moving Average Speed—Average speed while the unit is moving. GPSMAP 76 Owner’s Manual... - Page 71 Goto destination, or the final waypoint in a route. Time to Next—The estimated time required to reach a Goto destination, or the next waypoint in a route. GPSMAP 76 Owner’s Manual ppendIx To Course—The recommended direction to steer in order to reduce course error or stay on course. Provides the most efficient heading to get back to the desired course and proceed along your route.
-
Page 72: Messages
The unit found too many items to display. Narrow the search using the city or postal code. Database Error—Internal problem with the unit. Contact your dealer or Garmin Product Support to have the unit repaired. Deep Water—The water is deeper than the amount set in the Deep Water Alarm. - Page 73 This will only be displayed when the track recording setting is set to “Stop When Full.” GPSMAP 76 Owner’s Manual Track Truncated—A complete uploaded track will not fit in memory. The oldest track log points have been deleted.
-
Page 74: Loran Td System
LORAN chain number and secondary stations in the Setup TD field before storing the waypoint. After the waypoint is stored in unit memory, it will always reference the LORAN chain number and secondary stations GPSMAP 76 Owner’s Manual... - Page 75 Setup TD field, the active waypoint information will reflect those changes. Since the GPSMAP 76 does not rely on the LORAN signal for navigation, it can reference a different GRI chain and/or secondary stations and still navigate to the location stored in memory.
-
Page 76: Accessories
Automotive Mount power and to interface with other NMEA devices. PC Data Cable Allows for serial data transfer with a PC. Cigarette Lighter Adapter Allows the GPSMAP 76 to operate from external auto power. PC Cable GPSMAP 76 Owner’s Manual... -
Page 77: Fcc Compliance
FCC Compliance The GPSMAP 76 complies with Part 15 of the FCC interference limits for Class B digital devices FOR HOME OR OFFICE USE. These limits are designed to provide more reasonable protection against harmful interference in a residential installation, and are more stringent than “outdoor”... -
Page 78: Product Registration
Serial Number: ___ ___ ___ ___ ___ ___ ___ ___ Contact Garmin If you should encounter any difficulty while using your GPSMAP 76, or if you have any questions, in the U.S.A. contact Garmin Product Support by phone: 913/397-8200 or 800/800-1020, Monday–Friday, 8 am–5 pm Central Time;... -
Page 79: Limited Warranty
Garmin retains the exclusive right to repair or replace the unit or software or offer a full refund of the purchase price at its sole discretion. -
Page 80: Safety Information
Safety Information CAUTION: Use the GPSMAP 76 at your own risk. To reduce the risk of unsafe operation, carefully review and understand all aspects of this Owner’s Manual – and thoroughly practice operation using Simulator Mode prior to actual use. - Page 81 GPSMAP 76 Owner’s Manual ppendIx Because the Garmin GPSMAP 76 can be used for vehicular navigation, important safety considerations must be followed. Please read and observe the following instructions. Do Not Mount...
-
Page 82: Index
Initialize 4, 7, 8 Find Waypoint 42 Interface Formats 57 Follow Route 15 Interface Keys 3 Follow Track (TracBack) 41 Interface Settings 57 Full Screen Map 26 Interfacing 57, 59 Intersections 46 In Zoom Key 3 GPSMAP 76 Owner’s Manual... - Page 83 Map Page Options 25 POI. Map Range 25 Pointer Page 34 Map Zooming 25 Pointer Page Options 34 Mark Key 3 GPSMAP 76 Owner’s Manual Points of Interest 30, 43 Addresses 45 Cities 44 Exits 44, 45 Intersections 46 Power Key 3...
- Page 84 Proximity 48 Save 31, 36, 40 Reviewing 11 Setup 36, 40 Settings 37 Showing on Map 41 Symbols 11 Wide Area Augmentation System 52, 61 Wiring Installation 59 Zooming 25 Zoom Range 25 Zoom Settings 27, 28 GPSMAP 76 Owner’s Manual...
-
Page 85: Declaration Of Conformity
Garmin service center in the United Kingdom, the United States, Canada, or Taiwan for service. The Garmin GPSMAP 76 has no user-serviceable parts. Should you ever encounter a problem with your unit, please take it to an authorized Garmin dealer for repairs. - Page 86 For the latest free software updates (excluding map data) throughout the life of your Garmin products, visit the Garmin Web site at www.garmin.com. © Copyright 2006 Garmin Ltd. or its subsidiaries Garmin International, Inc. 1200 East 151 Street, Olathe, Kansas 66062, U.S.A.