Table of Contents
Advertisement
Advertisement
Table of Contents

Related Manuals for Garmin 400/500


Summary of Contents for Garmin 400/500
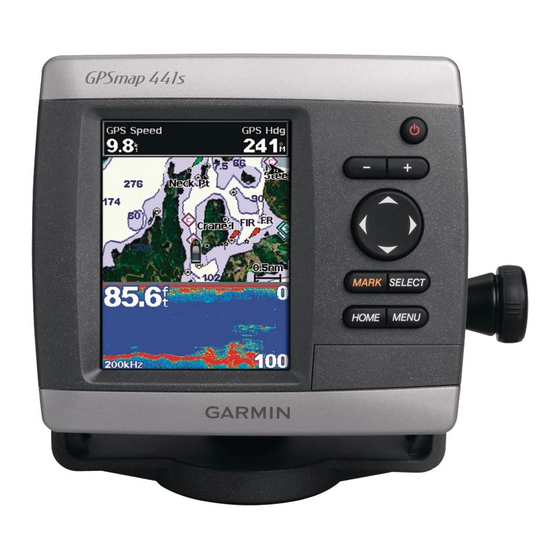
- Page 1 GPSMAP 400/500 series ® owner’s manual...
- Page 2 All rights reserved. Except as expressly provided herein, no part of this manual may be reproduced, copied, transmitted, disseminated, downloaded or stored in any storage medium, for any purpose without the express prior written consent of Garmin. Garmin hereby grants permission to download a single copy of this manual onto a hard drive...
-
Page 3: Tips And Shortcuts
SELECT key after each item. For example, if you see “select Charts Navigation Chart,” you should highlight Charts, and > GPSMAP 400/500 Series Owner’s Manual press SELECT. Then highlight Navigation SELECT again. Quick Links • Turning the Unit On or Off: page •... -
Page 4: Table Of Contents
Navigating to a Destination ... Creating and Using Waypoints... Creating and Using Routes ... Using Tracks ... Using BlueChart g2 Vision ... Navigating with a Garmin Autopilot ... Viewing Information ...34 Viewing a Compass ... Viewing Numbers ... Viewing Trip Information ... - Page 5 Man-Overboard Distress Calls Initiated from a VHF Radio ... Man-Overboard Distress Calls Initiated from the Chartplotter ... Position Tracking ... GPSMAP 400/500 Series Owner’s Manual Placing an Individual Routine Call ... Calling an AIS Target ... Using XM WX Weather and Audio Using XM WX Weather ...
-
Page 6: Declaration Of Conformity (Doc)
GPSMAP 500 series is in compliance with the essential requirements and other relevant provisions of Directive 1999/5/EC. To view the full Declaration of Conformity, see the Garmin Web site for your Garmin product: www.garmin.com. Product Registration Help us better support you by completing our online registration today. -
Page 7: Getting Started
Unit Overview NMEA 2000 Power/Data External GPS antenna GPSMAP 400/500 Series Owner’s Manual Getting Started GPSMAP 536/546 GPSMAP 531 POWER/ BACKLIGHT RANGE (-/+) ROCKER MARK SELECT MENU HOME SD card slot GPSMAP 546 shown... - Page 8 GPSMAP 530/535/540/545 GPSMAP 430x/440x NMEA 2000 ® XM antenna with audio adapter External GPS antenna Power/Data GPSMAP 441/541 External GPS antenna GXM 31 antenna Power/Data GPSMAP 430/431/440 GPSMAP 400/500 Series Owner’s Manual...
-
Page 9: Turning The Unit On Or Off
NOTE: The first time you turn on your unit, you must configure the initial settings. See “Initializing Unit Settings.” To turn off the unit, press and hold the Home Screen GPSMAP 400/500 Series Owner’s Manual Initializing Unit Settings Power key. When the The first time you turn on your unit, you must configure the initial settings. -
Page 10: Adjusting The Backlight
To switch between Day mode and Night mode: 1. Press and release the 2. Select Color 3. Press left or right on the Power key repeatedly to cycle between auto backlight (automatic backlight is Power key. Mode. Rocker to switch between modes. GPSMAP 400/500 Series Owner’s Manual... -
Page 11: Using The Keypad
Press to return to the previous screen when indicated. POWER/ Acquiring GPS Satellite Signals BACKLIGHT When you turn on the unit, the GPS receiver must collect satellite RANGE (-/+) data and establish the current location. When the unit acquires ROCKER... -
Page 12: Using Simulator Mode
For more information about GPS, visit the Garmin Web site at www.garmin.com/aboutGPS. Using Simulator Mode Simulator mode turns the GPS receiver off for use indoors or for practice. The unit does not track satellites in simulator mode. CaUTiON: Do not try to navigate using simulator mode because the GPS receiver is turned off. -
Page 13: Understanding The Home Screen
NOTE: If using an SD card to transfer waypoints from MapSource update to the most-current version of MapSource by clicking Help > Check for Software Updates, or check the Garmin Web site at www.garmin.com. Understanding the Home Screen Use the Home screen to access all other screens. Press any screen to return to the Home screen. -
Page 14: Using Charts
To access a Navigation chart, from the Home screen, select Charts > Navigation Chart. Your boat Exposed wreck Light Exposed rock Navigation Chart with g2 Vision GPSMAP 400/500 Series Owner’s Manual Tide station Beacon Marina services Zoom scale... -
Page 15: Navigation Chart Menu
Stop Navigation—stop navigating to your destination (only available while navigating). data bars—show or hide cruising, navigation, fishing, fuel, or sailing numbers. GPSMAP 400/500 Series Owner’s Manual Data bars • Cruising—turn the GPS Speed, GPS Heading, Depth, and GPS Position data bar on or off. Select data bar Setup the position of the data on the screen. -
Page 16: Understanding Chart Data
1. From the Home screen, select Charts. 2. Select Chart. 3. Use the want to go. 4. Press SELECT. Navigation Chart, Fishing Chart, or Split Navigation Rocker to select the point on the chart to which you GPSMAP 400/500 Series Owner’s Manual (page 12). -
Page 17: Zooming In And Out On The Map
As you move the map pointer, you can view the distance and bearing from your current location and the map pointer’s location coordinates in the lower-right corner of the map. GPSMAP 400/500 Series Owner’s Manual To pan the map, press up, down, right, or left on the Rocker. page... -
Page 18: Changing The Navigation Chart Settings
NOTE: This feature may not be available in all areas. Roses—displays a compass rose around your boat, indicating compass direction. True wind or apparent wind direction displays if the unit is connected to a compatible marine wind sensor. GPSMAP 400/500 Series Owner’s Manual ), and Charts >... -
Page 19: Changing The Chart Appearance
NOTE: If weather is set to Off, none of the weather options will be visible on the chart. Wind direction indicator GPSMAP 400/500 Series Owner’s Manual Changing the Chart Appearance From the Home screen, select MENU Chart Setup >... - Page 20 • Chart borders—turns chart borders on when using a BlueChart g2 Vision SD card and you want to see what area the maps cover. • Photo Points—turns camera icons using a BlueChart g2 Vision SD card. (page 21) on or off when GPSMAP 400/500 Series Owner’s Manual...
-
Page 21: Using The Split Navigation Chart
Press MENU to view additional settings GPSMAP 400/500 Series Owner’s Manual Using Perspective 3D Perspective 3D is a visual navigation aid that provides a view from above and behind the boat (according to your course). This view is helpful when navigating tricky shoals, reefs, bridges, or channels, and is beneficial when trying to identify entry routes and exit routes in unfamiliar harbors or anchorages. -
Page 22: Using Mariner's Eye 3D
(according to your course), and provides a visual navigation aid. This view is helpful when navigating tricky shoals, reefs, bridges, or channels, and is beneficial when trying to identify entry and exit routes in unfamiliar harbors or anchorages. Mariner's Eye 3D Navigation Chart GPSMAP 400/500 Series Owner’s Manual... - Page 23 MENU > Chart appearance. GPSMAP 400/500 Series Owner’s Manual Style—Selects how chart data is displayed over 3D terrain. • Classic—uses color schemes to indicate 3D terrain. • Charts—provides chart information in a 3D view. • Photos—provides satellite photo imagery in addition to chart information.
-
Page 24: Using Fish Eye 3D
Use the keys to adjust the view. NOTE: You must have an “s” series unit (such as a GPSMAP 430s) with a connected transducer or have a connection to a Garmin sounder via CANet. Fish Eye 3D Settings To access additional settings or options for the Fish Eye 3D screen, press MENU. -
Page 25: Using Fishing Charts
From the Home screen, select Charts > To access additional settings from the Fishing chart, press MENU. GPSMAP 400/500 Series Owner’s Manual Navaids—displays navigational aids, such as beacons, lights, and obstructions. For settings and options related to Full Screen Map, Waypoints &... -
Page 26: Viewing Aerial Photos
NOTE: Use the Range (-/+) keys to zoom in and out while viewing the aerial photo on the full screen. Aerial Photo GPSMAP 400/500 Series Owner’s Manual... -
Page 27: Viewing Current-Station Information
Select or the name of the station to display a current graph. GPSMAP 400/500 Series Owner’s Manual Detailed Road and POI Data BlueChart g2 Vision contains detailed road and points of interest (POI) data, which includes highly detailed coastal roads and POIs such as restaurants, lodging, local attractions and more. -
Page 28: Automatic Identification System
Lost AIS target Dangerous AIS target AIS target AIS Targeting on the Navigation Chart Tracking AIS target Lost dangerous AIS target Closest point and time of approach to dangerous target GPSMAP 400/500 Series Owner’s Manual... -
Page 29: Ais Targeting Symbols
If the AIS transmission from the vessel is lost, a message banner appears. GPSMAP 400/500 Series Owner’s Manual The location of this symbol indicates the closest point of approach to a dangerous target, and the numbers near the symbol indicate the time to the closest point of approach to that target. - Page 30 3D chart view are applied to all charts and to all 3D chart views. NOTE: The Fishing chart and Mariner’s Eye 3D are available with a preprogrammed BlueChart g2 Vision data card. 1. From the Home screen, select Charts. Projected course Activated target MMSI Heading GPSMAP 400/500 Series Owner’s Manual...
-
Page 31: Deactivating A Target For An Ais Vessel
3. Use the Rocker and SELECT button to select an AIS vessel. 4. Select AIS Vessel > Activate Target. GPSMAP 400/500 Series Owner’s Manual Viewing Information about a Targeted AIS Vessel Perspective 3D, or You can view the AIS signal status, MMSI, GPS speed, GPS Setup. -
Page 32: Viewing A List Of Ais Threats
BlueChart g2 Vision data card. 1. From the Home screen, select Charts. > Other Vessels > 2. Select Navigation Mariner’s Eye 3. Select MENU Chart, Fishing Chart, Perspective > Other Vessels > List. GPSMAP 400/500 Series Owner’s Manual 3D, or... -
Page 33: Where To
CaUTiON: guide To does not ensure obstacle and bottom clearance. For safety, always resolve any discrepancies or questions before continuing navigation. GPSMAP 400/500 Series Owner’s Manual Navigating to a Destination You can search for, and navigate to, waypoints, routes, tracks, and services such as nearby fuel, repairs, and ramps. - Page 34 50 nearest destinations that contain your search criteria. 4. Select the location > Navigate To > Go To Guide To when using a preprogrammed BlueChart g2 Vision card). GPSMAP 400/500 Series Owner’s Manual > Search by Name. Route To...
-
Page 35: Creating And Using Waypoints
NOTE: Selecting MaRK creates a waypoint only at your present location. GPSMAP 400/500 Series Owner’s Manual To edit an existing waypoint: 1. From the Navigation chart, use the map pointer ( the waypoint on the Navigation chart. From the Home screen, select Waypoints. -
Page 36: Creating And Using Routes
Information > User Data > Route. Use Chart Use Waypoint List. Chart, use the map pointer ( Use Waypoint List, select the first waypoint on the route. GPSMAP 400/500 Series Owner’s Manual > ) to select the... -
Page 37: Using Tracks
2. Select the route to delete. 3. Select Delete > OK. GPSMAP 400/500 Series Owner’s Manual To bypass a waypoint on a route: 1. Create a route as previously described. 2. Select the waypoint that follows the waypoint you are bypassing. - Page 38 • Change—sets the value of the interval. Track Color—sets the color of the track plot. MENU > > Active Track > Active Track Options. Change to set the value.) GPSMAP 400/500 Series Owner’s Manual...
-
Page 39: Using Bluechart G2 Vision
Navigating with a Garmin Autopilot When you start any type of navigation (go To, Route To, guide To, or follow Track), if you are connected to a compatible Garmin autopilot, you are prompted to engage the autopilot. (page 43). -
Page 40: Viewing Information
To view the Numbers screen from the Home screen, select dashboard > > information To customize the Numbers screen: 1. From the Home screen, select Numbers. 2. Press MENU > dashboard > Numbers. Information > Dashboard and select Configure. GPSMAP 400/500 Series Owner’s Manual >... -
Page 41: Viewing Trip Information
3. Select the number of fields to show (3, 4, 5, or 6). 4. Select information to show in each field. GPSMAP 400/500 Series Owner’s Manual Viewing Trip Information From the Home screen, select information To reset the trip information, maximum speed, odometer, or all... -
Page 42: Viewing Tide-Station Information
To view fuel information, your unit must be connected to an external fuel sensor, such as the Garmin GFS ™ To synchronize your fuel gauges with your fuel: From the Home screen, select Information > MENU. • Fill Up All Tanks—select when your tank is full. An estimate of the total fuel is shown. -
Page 43: Viewing User Data
Help > About MapSource. If the version is older than 6.12.2, update to the most-current version by clicking Help > Check for Software Updates, or check the Garmin Web site at www.garmin.com. 3. Insert the SD card into an SD card reader that is attached to the computer. - Page 44 SD card to the chartplotter. Card instead to create a new file. Enter the file name Information > User Data > Data Card instead to transfer data from the SD card to to overwrite items on your GPSMAP 400/500 Series Owner’s Manual...
- Page 45 Unique data is combined with existing data on every chartplotter. GPSMAP 400/500 Series Owner’s Manual To back up data to a computer: 1. Insert an SD card into the SD card slot on the front of the unit.
-
Page 46: Viewing Other Vessels
To add a DSC contact: Information > 1. Select 2. Use the Rocker 3. Use the Rocker page 55 for more Contact. to enter the MMSI number of the vessel. to enter the name of the vessel. GPSMAP 400/500 Series Owner’s Manual... -
Page 47: Configuring The Chartplotter
Setup settings. The Save to Card button is provided as a troubleshooting tool. A Garmin Product Support representative may ask you to use this feature to retrieve data about your chartplotter. Event Log—displays a list of system events. Select the event to view additional information. -
Page 48: Changing The System Language
NOTE: You must be receiving NMEA sonar depth data or using a Garmin sounder module to view depth and water temperature information. Heading—sets the reference used in calculating heading information. • auto Magnetic—automatically sets the magnetic declination for your location. - Page 49 Near, Normal, far, or farthest) are relative, not absolute. To ensure that the auto-guidance line is placed an appropriate distance from shore, you can assess the placement of the auto-guidance line GPSMAP 400/500 Series Owner’s Manual using one or more familiar destinations that require navigation to toggle between water through a narrow waterway.
-
Page 50: Configuring Communications Settings
2 to use when connecting your chartplotter to external NMEA devices, a computer, or other Garmin devices. > Preferences • garmin data Transfer—supports the input or output of Shoreline Distance > Garmin-proprietary data for communicating with Garmin software. -
Page 51: Setting Alarms
1. From the Home screen, select Configure NMEA 0183 Setup. 2. Select a setting (Sounder, Route, System, or Garmin). 3. Select the NMEA 0183 output sentence to toggle the output on or off. • Posn. Precision—adjust the number of digits (Two digits, Three digits, or four digits) to the right of the decimal point for transmission of NMEA output. - Page 52 NOTE: You must be receiving NMEA sonar depth data or using a Rocker to change Garmin sounder module to configure sonar alarms. Shallow water—set an alarm to sound when the depth is less than the specified value. deep water—set an alarm to sound when the depth is greater than the specified value.
-
Page 53: Setting The Total Fuel Onboard Alarm
Setting Weather Alarms NOTE: You must have a subscription to XM WX Weather and a connected Garmin XM WX weather receiver to view weather information (page 60). 1. From the Home screen, select Configure 2. Turn the following alarms on or off: marine, tornado, severe storm, flood, or flash flood. -
Page 54: Configuring Other Vessels
If the wheel turns freely, check the cable connections. If you continue to get the message, contact Garmin Product Support. fuel Capacity—enter the total fuel capacity of your boat. - Page 55 (from 1 to 24 minutes). • AIS Alarm—when On is selected, a message is displayed (“AIS: Dangerous Target”) when a vessel enters the safe zone. When Off is selected, the message will not be displayed. GPSMAP 400/500 Series Owner’s Manual > Other Vessels >...
-
Page 56: Using Sonar
Select the Full Screen option to view a full-screen graph of the transducer’s sonar readings. From the Home screen, select Sonar > full Depth Temperature Speed Suspended targets Transducer frequency or beam width Full Screen GPSMAP 400/500 Series Owner’s Manual Screen. Range... -
Page 57: Understanding The Split Frequency Screen
Depth, temperature, and speed Frequencies Split Frequency GPSMAP 400/500 Series Owner’s Manual Understanding the Split Zoom Screen Use the Split Zoom screen to view the full sonar data from the graph and a zoomed in portion on the same screen. -
Page 58: Understanding The Temp Log Screen
Show, and then press up or down on the Rocker. a-Scope—display a vertical flasher along the right side of the screen. Sonar Sonar Setup. > , fast, Medium, or Slow). If using a ™ auto to have the scroll speed GPSMAP 400/500 Series Owner’s Manual... -
Page 59: Advanced Sonar Settings
Suspended targets appear as symbols with no background information shown. The target depth of each symbol is displayed. GPSMAP 400/500 Series Owner’s Manual • whiteline—highlights the strongest signal from the bottom to help identify its hardness or softness. ◦ Off (default)—turns off whiteline. - Page 60 Manually adjusting the amount of noise that is rejected helps fine-tune the sonar to show the most detail with the least noise. When frequency is set to dual (and gain is set to Manual), you can individually adjust noise rejection for each frequency. GPSMAP 400/500 Series Owner’s Manual...
-
Page 61: Using Digital Selective Calling (Dsc)
The chartplotter can track the positions of vessels sending position reports. Quickly set up and send individual routine call details to your Garmin VHF radio. When you initiate a man-overboard distress call from your radio, the chartplotter displays the man- overboard screen and prompts you to navigate to the man-overboard point. -
Page 62: Adding A Dsc Contact
Other Vessels List. Receiving Distress Calls If your Garmin chartplotter and VHF radio are connected via NMEA 0183 or NMEA 2000, your chartplotter alerts you when your VHF radio receives a DSC distress call. If position information was sent with the distress call, that information is also available and recorded with the call. -
Page 63: Man-Overboard Distress Calls Initiated From A Vhf Radio
2. Select from the following options: • Select Call with Radio with the radio to call the vessel that sent the position report. This option is only available if you are using a Garmin NMEA 2000-compatible VHF radio. • Select Edit to edit the vessel name and the vessel symbol, and add a comment. -
Page 64: Placing An Individual Routine Call
• Select Trail Line Hours, all Placing an Individual Routine Call When you connect your Garmin chartplotter to a Garmin VHF NMEA 2000-compatible radio, you can use the chartplotter interface > > to set up an individual routine call. When setting up an individual routine call from your chartplotter, you can select one of the following channels on which you want to communicate. -
Page 65: Calling An Ais Target
GPSMAP 400/500 Series Owner’s Manual Calling an AIS Target When you connect your Garmin chartplotter to a Garmin VHF NMEA 2000-compatible radio, you can use the chartplotter interface to set up an individual routine call to an AIS target. For more... -
Page 66: Using Xm Wx Weather And Audio
Using XM WX Weather and Audio In order to use XM weather and audio, you must have a Garmin XM WX receiver, such as a GXM 31 or GXM 51, and an activated XM subscription. Visit http://www8.garmin.com/xm/ for more information. To connect the XM antenna and receiver and for subscription instructions, refer to the manual for your XM equipment. -
Page 67: Viewing Nexrad Precipitation Information
Precipitation shows NEXRAD radar, storm cells, lighting strikes, and hurricane warnings. NEXRAD shows very light rain and GPSMAP 400/500 Series Owner’s Manual snow up to strong thunderstorms in varying shades and colors. The time stamp in the upper-left corner of the screen indicates the elapsed time since the National Weather Service last updated the information. - Page 68 Understanding Lightning Information Lightning strikes are represented by lightning bolt icons. Lightning appears on the map if strikes were detected within the last seven minutes. The ground-based lightning detection network only detects cloud-to-ground lightning. Storm cell Lightning GPSMAP 400/500 Series Owner’s Manual...
- Page 69 The center provides four forecasts at 12-hour intervals (12 Hrs, 24 Hrs, 36 Hrs, and 48 Hrs), as well as the current conditions (Now). Hurricane GPSMAP 400/500 Series Owner’s Manual Understanding Marine Warnings When a Marine Warning is issued, the area for the warning is highlighted in red.
-
Page 70: Viewing Forecast Information
Moving away from a high-pressure center in any horizontal direction results in decreased pressure. Winds flow clockwise around high-pressure centers in North America. Cold Front Warm Front Stationary Front Occluded Front Trough GPSMAP 400/500 Series Owner’s Manual... -
Page 71: Viewing Fishing Information
The Fishing view contains current water temperature, surface pressure conditions, and fishing forecasts. information From the Home screen, select GPSMAP 400/500 Series Owner’s Manual Understanding Surface Pressure This feature shows pressure isobars and pressure centers. The isobars connect points of equal pressure. Pressure readings can help determine weather and wind conditions in an area. -
Page 72: Viewing Sea Conditions
Fishing Understanding Wave Height The Wave Height feature shows wave heights. The wave heights for an area are shown in color intensities. information > weather > Sea Wind Direction 15 knots 20 knots 50 knots GPSMAP 400/500 Series Owner’s Manual... -
Page 73: Viewing Visibility Information
The Wave Direction feature shows the direction in which a wave is moving, as indicated by the direction of the red arrow. GPSMAP 400/500 Series Owner’s Manual Viewing Visibility Information Visibility is the forecast maximum horizontal distance that can be seen at the surface, as indicated by the legend on the left of the screen. -
Page 74: Using Xm Audio
Using XM Audio When a Garmin XM receiver is connected to the audio input of your boat, you can listen to XM audio channels. To display the XM audio interface while navigating: From the any chart except a split screen chart, press Data Bars >... -
Page 75: Appendix
4,096 colors. Case: Fully gasketed, high-impact plastic alloy, waterproof to IEC 529 IPX7 standards. Temp. Range: From 5ºF to 131ºF (from -15ºC to 55ºC) GPSMAP 400/500 Series Owner’s Manual Compass-Safe distances: Model Number GPSMAP 536/546 GPSMAP 431/441 GPSMAP 531/541... - Page 76 Power: 1 kW Transducer (1 kW transducers are supported by the GPSMAP 535s/536s/545s/546s units only), 1,000 W (RMS), 8,000 W (peak to peak); Dual Frequency, 500 W (RMS), 4,000 W (peak to peak); Dual Beam, 400 W (RMS), 3,200 W (peak to peak) GPSMAP 400/500 Series Owner’s Manual...
-
Page 77: Alarms And Messages
MENU Can’t Read User Card—error reading card; remove and reinsert. Contact your dealer or Garmin Product Support if the problem persists. Can’t Read Voltages That High, Limited To Top Of Range—the voltage value in the Battery Alarm setup is higher than the unit can read. - Page 78 Position Report Received from—shows the MMSI or name associated with an MMSI. database Error—internal problem with the unit. Contact your dealer or Garmin Product Support to have the unit serviced. deep water alarm—the Deep Water Alarm depth has been reached.
- Page 79 Sonar Timeout—there is an internal problem with the unit. Contact your dealer or Garmin Product Support to have the unit serviced. Sonar Service Lost—the external sonar device you were connected to has either been disconnected or the unit has lost communication with the sonar device for some other reason.
-
Page 80: Capturing Screenshots
1. Remove the SD card from the chartplotter and insert it into an SD card reader that is attached to a computer. 2. From Windows Explorer, open the Garmin\scrn folder on the SD card. 3. Copy the appropriate .bmp file on the card and paste it to any location on the computer. -
Page 81: Weather Data Warranty
You assume the entire risk related to your use of the Services. XM and Garmin assume no responsibility for accidents resulting from or associated with use of the Services. -
Page 82: Software License Agreement
CONDITIONS OF THE FOLLOWING SOFTWARE LICENSE AGREEMENT. PLEASE READ THIS AGREEMENT CAREFULLY. Garmin grants you a limited license to use the software embedded in this device (the “Software”) in binary executable form in the normal operation of the product. Title, ownership rights, and intellectual property rights in and to the Software remain in Garmin. -
Page 83: Index
Appearance Communications Auto Magnetic Compass automatic guidance 21, 43 compass rose autopilot contact information, Garmin GPSMAP 400/500 Series Owner’s Manual course up current stations customizing chart settings dashboard 33–37 Data Bars fish eye 3D chart Navigation chart perspective 3D chart... - Page 84 Safe Height Safety Shading safe zone collision alarm satellite imagery enabling Save To Card 38, 39, 41 screenshots scroll speed SD cards inserting removing sea conditions SELECT key Serial Port setup 16, 18 Service Points GPSMAP 400/500 Series Owner’s Manual...
- Page 85 Trip Odometer split frequency True (north) split zoom turn the unit off temperature log Turn Transition specifications Speed Filter GPSMAP 400/500 Series Owner’s Manual unit ID number units of measure user data backing up clearing transferring viewing version (software) VHF radio...
- Page 88 For the latest free software updates (excluding map data) throughout the life of your Garmin products, visit the Garmin Web site at www.garmin.com. © 2010—2011 Garmin Ltd. or its subsidiaries Garmin International, Inc. 1200 East 151 Street, Olathe, Kansas 66062, USA Garmin (Europe) Ltd.