Chapters
Table of Contents

Related Manuals for Keurig OFFICEPro B145


Summary of Contents for Keurig OFFICEPro B145
- Page 1 USE & CARE GUIDE B145 SINGLE-CUP BREWING SYSTEM BREWING EXCELLENCE ONE CUP AT A TIME ™ Please read and save these instructions. Pour des directives en français, veuillez vous reporter à la page 13.
-
Page 2: Important Safeguards
12. Do not operate any appliance with a damaged cord or plug or after the appliance SAVE THESE malfunctions or is damaged in any manner. INSTRUCTIONS. Contact Keurig Customer Service to arrange for replacement or repair. -
Page 3: Table Of Contents
® Holder and the other in the bottom of the K-Cup ® Holder. Model B145 Use & Care Guide To avoid risk of injury, do not put your fingers in the K-Cup Chamber. TABLE OF CONTENTS SECTION 1 CAUTION: There is extremely hot water in SET-UP &... -
Page 4: Set-Up & Operation
5. Carefully pull the plastic bag (and 2. For the best tasting gourmet coffee or tea, packaging materials) toward you and out Keurig recommends using bottled or filtered of the box. The Brewer will still be encased water. in the polyfoam. -
Page 5: Features
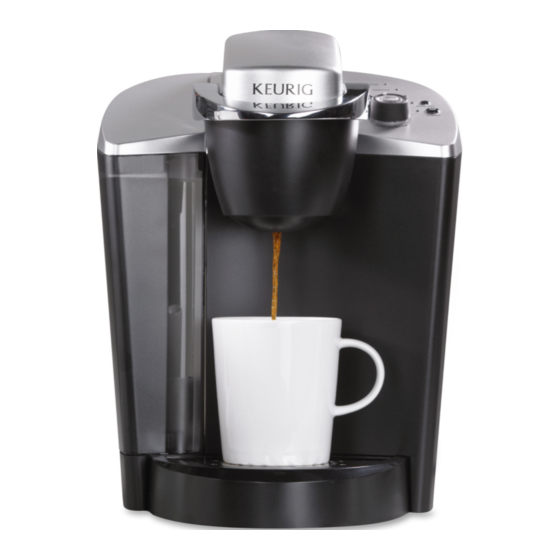
Features odel B145 Brewer Water Reservoir Lid Water Reservoir Water Reservoir Lock Tab Slots Handle K-Cup ® Portion Pack Holder (E and F are the K-Cup Holder Assembly) Funnel Controls and Indicators K-Cup ® Portion Pack Assembly Housing Brew Button... -
Page 6: Priming Your Brewer
Please note, a K-Cup ® should not be used for the Priming Sequence. IMPORTANT: You cannot use your Keurig brewer until it has been primed for its first use as set forth below. NOTE: If Brewer has been exposed to tempera-... -
Page 7: Ready To Brew First Cup
® will of the K-Cup Holder. To avoid risk of injury, be hot. do not put your fingers in the K-Cup Chamber. 12.Enjoy your first cup of Keurig Brewed ® gourmet coffee or tea! 4. Select a K-Cup ® portion pack. -
Page 8: Controls & Indicators
Draining the Brewer a. Press the Power Button to turn on the Brewer. The Hot Water tank of the B145 can be com- b. Press the black button above the Power pletely drained. We recommend that the Button to turn the Auto-Off Timer feature on. -
Page 9: Cleaning & Maintenance
SECTION 3 CLEANING & MAINTENANCE Cleaning External Parts using a paper clip or similar tool. Remove K-Cup ® Holder, insert the paper clip into the Regular cleaning of the Brewer’s external Needle to loosen the clog and remove it. The components is recommended. -
Page 10: Storage
while still on. (The Auto-Off feature should be turned off). c. RINSE Step 1: Now perform a drain process. Step 2: Empty and re-fill the water reservoir with fresh water. Step 3: Re-prime the brewer and re-fill the water reservoir. Step 4: Place a ceramic cup on the Drip Tray NOTE: The Brewer will continue to function even and run a regular brew cycle without using a... -
Page 11: Troubleshooting
SECTION 4 TROUBLESHOOTING SITUATION SOLUTION Brewer does not • Plug Brewer into an independent outlet. have power • Check to be sure that it is plugged in securely. • Plug into a different outlet. • Reset the power outlets’ circuit breaker if necessary. •... -
Page 12: Warranty
SECTION 5 WARRANTY Other Limitations Keurig warrants that your Keurig Model B145 Brewer will be free of defects in THIS WARRANTY IS EXCLUSIVE AND IS IN materials or workmanship under normal use LIEU OF ANY OTHER EXPRESS WARRANTY, for one year from the date of purchase. - Page 13 MANUEL D'UTILISATION ET D'ENTRETIEN FONCTIONNEMENT ET UTILISATION SANS DANGER RÈGLES DE SÉCURITÉ IMPORTANTES Lorsque vous utilisez des appareils électriques, 13. Ne pas laisser le cordon d’alimentation vous devriez suivre les mesures de sécurité de pendre d’une table ou d’un comptoir ni base suivantes : entrer en contact avec une surface chaude.
- Page 14 SYSTÈME D'INFUSION GOURMET ATTENTION : Le godet K-Cup est perforé UNE TASSE À LA FOIS DE KEURIG ® par deux aiguilles, une au-dessus du sup- port à K-Cup et l'autre au fond du support Manuel d'utilisation et d'entretien du à K-Cup .
-
Page 15: Réglages Et Fonctionnement De La Cafetière
La cafetière est encastrée dans le polymousse. 2. Pour obtenir le meilleur café gourmet ou thé de spécialité possible, Keurig recommande 6. Retirez l'emballage de polymousse. l'utilisation d'eau embouteillée ou filtrée. 7. Placez délicatement la cafetière debout sur la surface plane et uniforme. -
Page 16: Caractéristiques
Caractéristiques Modèle de cafetière B145 Couvercle du réservoir d'eau Réservoir d'eau Fentes pour languettes de verrouillage du réservoir d'eau Poignée Support à godet K-Cup (E et F forment l'assemblage du support à K-Cup) Entonnoir Commandes et voyants Couvercle Bouton d'infusion (BREW) Boîtier de l'assemblage du support... -
Page 17: Réglages Et Première Infusion
Réglages et première infusion pour indiquer que vous devez effectuer un cycle de préparation. Assurez-vous que la IMPORTANT : N'utilisez par votre cafetière Keurig poignée est complètement abaissée avant de avant de l'avoir préparée pour une première continuer. Veuillez noter que la procédure de utilisation, tel qu'indiqué... - Page 18 12. Il ne vous reste plus qu'à savourer votre pre- compartiment de la K-Cup. mière tasse de café gourmet ou de thé Keurig! 13. Le voyant de chauffage (HEATING) rouge de 4. Choisissez un godet K-Cup l'afficheur de messages à...
-
Page 19: Commandes Et Voyants Afficheur De Messages À Del
Pour régler la cafetière afin qu'elle s'arrête deux Vidanger la cafetière heures après la dernière infusion. Le réservoir d'eau chaude de la cafetière B145 a. Appuyez sur le bouton de mise en marche peut être complètement vidangé. Nous vous (POWER) pour allumer la cafetière. -
Page 20: Nettoyage Et Entretien
SECTION 3 NETTOYAGE ET ENTRETIEN Nettoyage des pièces 3. Nettoyage de l’aiguille de sortie L'aiguille de sortie se trouve au fond de l'assem- Il est recommandé de nettoyer régulièrement les blage du support à K-Cup. Si des grains de café éléments externes de la cafetière. -
Page 21: Entreposage
étape : Laissez ensuite la cafetière reposer en VOYANT DE DÉTARTRAGE marche pendant 4 heures. (La minuterie automatique ne doit pas être activée). c. RINÇAGE étape : Effectuez maintenant une vidange. étape : Videz et remplissez à nouveau le réservoir d'eau fraîche. étape : Effectuez un nouveau cycle de prépa- ration et remplissez encore une fois le réservoir. -
Page 22: Dépannage
SECTION 4 DÉPANNAGE PROBLÈME SOLUTION La cafetière ne • Branchez la cafetière séparément. • Vérifiez que la cafetière est bien branchée. fonctionne pas • Branchez la cafetière dans une autre prise. • Réenclenchez le disjoncteur au besoin. • Assurez-vous que le bouton de mise en marche (POWER) a été actionné et que le voyant est allumé. -
Page 23: Garantie
TOUTE GARANTIE IMPLICITE, Y COMPRIS réserve d'une utilisation normale, pendant un an MAIS NON DE FAÇON LIMITATIVE TOUTE à partir de la date d'achat. Keurig réparera ou GARANTIE IMPLICITE DE COMMERCIALITÉ OU remplacera, à son choix, la cafetière défectueuse D'ADAPTATION À DES FINS PARTICULIÈRES, sans frais à... - Page 26 TO CONTACT CUSTOMER SERVICE: www.keurig.com Made in China 1-866-901-BREW (2739) Keurig, Keurig Brewed, Brewing Excellence One Cup at a Time, and K-Cup are trademarks or registered trademarks of Keurig, Incorporated. All other trademarks used herein are the property of their respective owners.