DeLonghi Fully Automatic Coffee Center Machine ESAM6700 Instructions For Use Manual
Fully automatic coffee center
Hide thumbs
Also See for Fully Automatic Coffee Center Machine ESAM6700:
- Brochure & specs (29 pages) ,
- Instructions for use manual (7 pages)
Table of Contents
Advertisement
Quick Links
De'Longhi America, Inc.
Park 80 West, Plaza One
Saddle Brook, NJ 07663
1-866-528-8323 (1-866-Latte-Best)
De'Longhi Canada, Inc.
6150 McLaughlin Road
Mississauga, Ontario
L5R 4E1 Canada
1-888-335-6644
Fiducia Italiana S.A de C.V.
Pestalozzi 814
Col. Del Valle
Del. Benito Juarez
México D.F. 03100
tels: 5543 1447 y 5543 6492
Lada sin costo: 01800 711 8805
www.delonghi.com
5713212301/07.09
Advertisement
Table of Contents
Troubleshooting

Related Manuals for DeLonghi Fully Automatic Coffee Center Machine ESAM6700


Summary of Contents for DeLonghi Fully Automatic Coffee Center Machine ESAM6700
- Page 1 De’Longhi Canada, Inc. 6150 McLaughlin Road Mississauga, Ontario L5R 4E1 Canada 1-888-335-6644 Fiducia Italiana S.A de C.V. Pestalozzi 814 Col. Del Valle Del. Benito Juarez México D.F. 03100 tels: 5543 1447 y 5543 6492 Lada sin costo: 01800 711 8805 www.delonghi.com 5713212301/07.09...
- Page 2 FuLLy AutomAtIC CoFFEE CEntEr Instructions for use. Keep these instructions Mode d’emploi. Conservez cette notice mAChInE à CAFè AutomAtIquE Instrucciones para el uso. Repase y guarde CAFEtErA SupErAutomAtICA estas instrucciones. Lea cuidadosamente este instructivo antes de usar su aparato mACChInA pEr CAFFè SupErAutomAtICA Istruzioni per l’uso ESAm6700 Leggere e conservare queste istruzioni...
- Page 4 Ready espresso...
- Page 6 normal coffee normal coffee...
-
Page 8: Table Of Contents
InDEx hot WAtEr ........17 Preparation ............ 17 ImportAnt SAFEGuArDS ....8 Changing the quantity ........17 Short CorD InStruCtIonS ....8 CLEAnInG ........17 Cleaning the coffee maker ......17 IntroDuCtIon ......... 9 Cleaning the coffee grounds container ... 17 Symbols used in these instructions ....9 Cleaning the drip tray ........ -
Page 9: Short Cord Instructions
I m p o r t A n t S A F E G u A r D S When using electrical appliances, basic safety precautions should always be followed, inclu- ding the following. • Read all instructions carefully. • Make sure the voltage of your electrical system corresponds to the voltage shown on the bottom of the machine. • Do not touch hot surfaces. Use handles or knobs. -
Page 10: Introduction
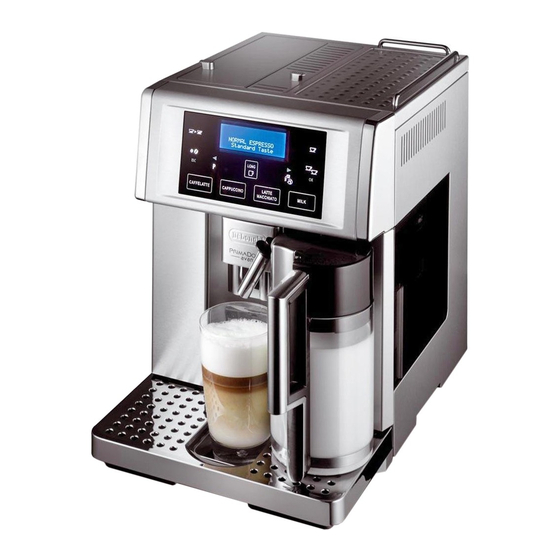
IntroDuCtIon DESCrIptIon Thank you for choosing the ESAM 6700 automatic Description of appliance coffee and cappuccino maker. (page 3 - We hope you enjoy using your new appliance. A1. Grinding coarseness regulator knob Take a few minutes to read these instructions. A2. -
Page 11: Preliminary Checks
prELImInAry ChECKS coffee. C5. oK icon: to enable and confirm the selected Controls after transport function. After removing the packaging, make sure the icon: to rinse or deliver hot water. product is complete and undamaged and that all C7. hot mILK icon: to deliver a cup of steamed accessories are present. -
Page 12: Setting Up The Appliance
turnInG thE AppLIAnCE on Setting up the appliance Information : Information: In models provided with main • Coffee has been used to factory test the switch, before turning the appliance on, make appliance and it is therefore completely sure the main switch on the back of the appliance normal for there to be traces of coffee in the is in the I position (fig. 1). -
Page 13: Changing The Menu Settings
ChAnGInG thE mEnu SEttInGS 5. Press the oK icon to confirm: the minutes flash on the display; Setting the language 6. Press the icon to change the To modify the language on the display, proceed minutes; as follows: 7. Press the OK icon to confirm: “Auto-start 1. -
Page 14: Resetting Default Values (Reset)
mAKInG CoFFEE number of hours of operation (30 minutes, 1 or 2 hours) is displayed; Selecting the coffee taste 5. Press the oK icon to confirm (or the ESC icon to cancel the operation); The appliance is preset to make coffee with a 6. -
Page 15: Programming The Long "My Coffee" Quantity
required level, press the icon again. making espresso coffee using coffee beans The quantity set has now been programmed. Important! Do not use caramelized or Information: This setting is valid for mak- candied coffee beans as they could stick to the ing both one and two cups. -
Page 16: Making Espresso Or Long Coffee Using Pre-Ground Coffee
mAKInG DrInKS WIth mILK the cup used. Put the cup for long coffee under the spouts (fig. 18); Filling and attaching the milk container 3. Choose the strength by hitting the 1. Turn the lid of the milk container clockwise and size by hitting the until it becomes noticeably difficult to turn, 4. -
Page 17: Making Cappuccino
making cappuccino Cleaning the milk container after use 1. After attaching the milk container, place Important! Danger of burns When cleaning frothed milk regulator (B1) on lid to position the internal tubes of the milk container, a little hot 2 for CAPPUCCINO (fig. 28). the quantity water comes out of the frothed milk tube (B5). -
Page 18: Hot Water
CLEAnInG 6. As soon as the coffee in the cup reaches the required level, press the icon. Coffee Cleaning the coffee maker delivery stops. The following parts of the appliance must be The machine is now reprogrammed with the new cleaned regularly: quantities. -
Page 19: Cleaning The Drip Tray
Cleaning the drip tray Cleaning the inside of the machine 1. Check regularly (about once a week) that the Important! If the drip tray is not emptied inside of the machine is not dirty. If neces- regularly, the water could overflow from the edge sary, remove coffee deposits with a dull knife and seep inside or around the machine. -
Page 20: Cleaning The Milk Container
DESCALInG Information! Descale the machine when the message If the brew group is “DESCALE!” flashes on the LCD display. difficult to insert, you must first adapt it to the Important! Descaler contains acids which right dimension may irritate the skin and eyes. It is vital to adhere pressing it forcefully from to the manufacturer’s safety warnings given on the bottom and top as shown in the figure. -
Page 21: Measuring Water Hardness
9. The appliance is now ready for rinsing Setting water hardness 1. Press the p icon to enter the programming through with clean water. menu. Remove the water tank, empty, rinse under 2. Press the icon and select “Water running water, fill with clean water and hardness”. -
Page 22: Displayed Messages
DISpLAyED mESSAGES DISpLAyED mESSAGE poSSIBLE CAuSE rEmEDy FILL TANK! • The water tank is empty or positioned • Fill the tank with water and/or insert it incorrectly. correctly, pushing it as far as it will go. GROUND TOO FINE • The grinding is too fine and the coffee is • Make the coffee again and turn the delivered too slowly. grinding adjustment knob one click ADJUST MILL! clockwise towards “7”... -
Page 23: Troubleshooting
DISpLAyED mESSAGE poSSIBLE CAuSE rEmEDy GENERAL ALARM! • The inside of the appliance is very dirty. • Clean the inside of the appliance thoroughly as described in the section “Cleaning the inside of the machine”. If the message is still displayed after cleaning, contact customer services. PRESS CLEAN • Milk has been delivered recently and the • Press the CLEAN button and keep it tubes inside the milk container must be pressed until the progress bar which BUTTON... - Page 24 proBLEm poSSIBLE CAuSE rEmEDy The milk contains • The milk is not cold enough or is not • You should ideally use skimmed or semi- semi-skimmed. skimmed milk at refrigerator temperature bubbles or squirts out (about 41°F). of the milk spout If the result is still disappointing, try another brand of milk. • The milk frother selector is incorrectly •...
-
Page 25: Limited Warranty
If repairs become necessary, see contact information below: u.S. residents: Please contact our toll free hotline at 1-866-528-8323 (1-866-Latte-Best) or log onto our website at www.delonghi.com. For all accessories, spare parts or replacement parts, please contact our parts division at 1-800-865- 6330.