Table of Contents
Advertisement
OPERATOR'S MANUAL
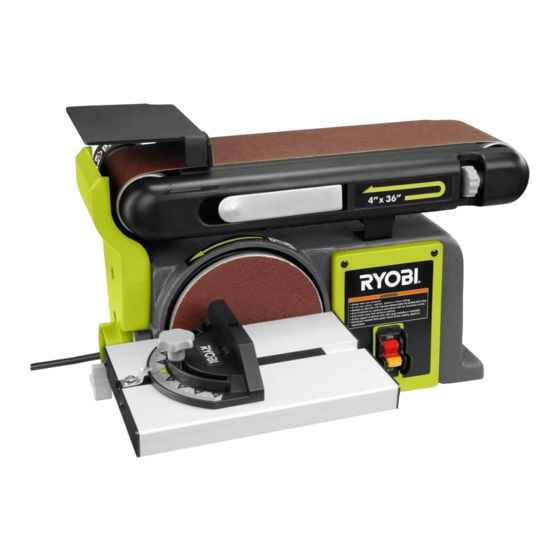
BELT/DISC SANDER
MANUEL D'UTILISATION
PONCEUSE À BANDE/DISQUE
MANUAL DEL OPERADOR
LIJADORA DE BANDA Y DISCO
BD4601
Your belt/disc sander has been engineered and manufactured to our high standard for dependability, ease of operation, and
operator safety. When properly cared for, it will give you years of rugged, trouble-free performance.
WARNING:
To reduce the risk of injury, the user must read and understand the operator's manual before using
this product.
Thank you for purchase.
SAVE THIS MANUAL FOR FUTURE REFERENCE
Cette ponceuse à bande/disque a été conçue et fabriquée conformé-
ment à nos strictes normes de fiabilité, simplicité d'emploi et sécurité
d'utilisation. Correctement entretenue, elle vous donnera des
années de fonctionnement robuste et sans problème.
AVERTISSEMENT :
blessures, l'utilisateur doit lire et veiller à bien comprendre le
manuel d'utilisation avant d'employer ce produit.
Merci de votre achat.
CONSERVER CE MANUEL POUR
FUTURE RÉFÉRENCE
Pour réduire les risques de
Su lijadora de banda y disco ha sido diseñado y fabricado de con-
formidad con nuestras estrictas normas para brindar fiabilidad,
facilidad de uso y seguridad para el operador. Con el debido cui-
dado, le brindará muchos años de sólido y eficiente funcionamiento.
ADVERTENCIA:
el usuario debe leer y comprender el manual del operador antes
de usar este producto.
Le agradecemos su compra.
GUARDE ESTE MANUAL PARA
FUTURAS CONSULTAS
Para reducir el riesgo de lesiones,
Advertisement
Table of Contents

Summary of Contents for Ryobi BD4601
- Page 1 MANUAL DEL OPERADOR LIJADORA DE BANDA Y DISCO BD4601 Your belt/disc sander has been engineered and manufactured to our high standard for dependability, ease of operation, and operator safety. When properly cared for, it will give you years of rugged, trouble-free performance.
-
Page 2: Table Of Contents
The replacement power tool will be covered by the limited warranty for the balance of the two year period from the date of the original purchase. WHAT THIS WARRANTY COVERS: This warranty covers all defects in workmanship or materials in your Ryobi power ®... -
Page 3: General Safety Rules
GENERAL SAFETY RULES MAINTAIN TOOLS WITH CARE. Keep tools sharp and WARNING: clean for best and safest performance. Follow instructions for lubricating and changing accessories. Read and understand all instructions. Failure to follow DISCONNECT TOOLS. When not in use, before servic- all instructions listed below, may result in electric shock, ing, or when changing attachments, blades, bits, cutters, fire and/or serious personal injury. -
Page 4: Specific Safety Rules
GENERAL SAFETY RULES INSPECT EXTENSION CORDS PERIODICALLY and NEVER START A TOOL WHEN ANY ROTATING COM- PONENT IS IN CONTACT WITH THE WORKPIECE. replace if damaged. KEEP TOOL DRY, CLEAN, AND FREE FROM OIL AND DO NOT OPERATE A TOOL WHILE UNDER THE GREASE. -
Page 5: Symbols
SYMBOLS The following signal words and meanings are intended to explain the levels of risk associated with this product. SYMBOL SIGNAL MEANING Indicates an imminently hazardous situation, which, if not avoided, will result DANGER: in death or serious injury. Indicates a potentially hazardous situation, which, if not avoided, could result WARNING: in death or serious injury. -
Page 6: Electrical
ELECTRICAL EXTENSION CORDS ELECTRICAL CONNECTION Use only 3-wire extension cords that have 3-prong ground- This tool is powered by a precision-built electric motor. It ing plugs and 3-pole receptacles that accept the tool’s plug. should be connected to a power supply that is 120 volts, When using a power tool at a considerable distance from AC only (normal household current), 60 Hz. -
Page 7: Features
FEATURES PRODUCT SPECIFICATIONS Table Size ..........8-7/8 in. x 6-1/4 in. Belt Size ............4 in. x 36 in. Table Tilt ..............0°- 45° Belt Speed ............1,900 SFM Belt Tilt ..............0°- 90° Input ........ 120 V, AC only, 60 Hz, 4.3 Amps Disc Size ...............6 in. -
Page 8: Assembly
ASSEMBLY LOOSE PARTS LIST WARNING: See Figure 3, page 15. The following items are included with the saw: Do not attempt to modify this product or create acces- sories not recommended for use with this tool. Any such alteration or modification is misuse and could result in a Description Qty. -
Page 9: Operation
ASSEMBLY MOUNTING THE WORK TABLE FOR USE WITH Mark holes on workbench where belt/disc sander is to be mounted using holes in the base as a template for hole THE DISC SANDER pattern. See Figure 6, page 16. Drill holes through workbench. ... - Page 10 OPERATION LOCKING THE SWITCH WARNING: See Figure 12, page 17. Place the switch in the OFF position. Applying the workpiece to the right side of the sanding disc could cause the workpiece to kickback and/or loss Wait until the belt/disc sander has come to a full and of control.
-
Page 11: Adjustments
OPERATION SURFACE SANDING ON THE SANDING BELT Sanding inside curves on the sanding belt: Always sand inside curves on the idler drum. See Figure 17, page 18. Hold the workpiece firmly, keeping fingers away from the Hold the workpiece firmly, keeping fingers away from the sanding belt. -
Page 12: Maintenance
MAINTENANCE LUBRICATION WARNING: All of the bearings in this tool are lubricated with a sufficient amount of high grade lubricant for the life of the unit under When servicing, use only identical replacement parts. normal operating conditions. Therefore, no further lubrica- Use of any other parts may create a hazard or cause tion is required.


