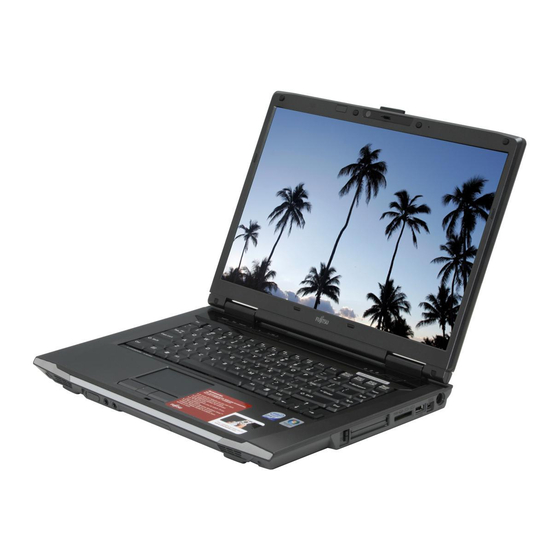
Fujitsu LifeBook A6110 Bios Manual
Lifebook a series
Hide thumbs
Also See for LifeBook A6110:
- User manual (189 pages) ,
- Getting started manual (2 pages) ,
- User manual (16 pages)
Table of Contents
Advertisement
Quick Links
Download this manual
See also:
User Manual
Advertisement
Table of Contents

Related Manuals for Fujitsu LifeBook A6110


Summary of Contents for Fujitsu LifeBook A6110
-
Page 1: Fujitsu Lifebook
Fujitsu LifeBook A Series BIOS Guide LifeBook A Series Model: A6110 Document Date: 10/05/2007 Document Part Number: FPC58-1808-01 F U J I T S U C O M P U T E R S Y S T E M S C O R P O R AT I O N... -
Page 2: A Series Bios
TrustedCore Menu, as detailed in the next section): 1. Turn on or restart your notebook. 2. Press [F2] once the Fujitsu logo appears on the screen. This will open the main menu of the BIOS Setup Utility with the current settings displayed. - Page 3 severe, it will give you an opportunity to modify the setup utility settings, as described in the following steps: 1. When you turn on or restart the computer there is a beep and/or the following message appears on the screen: Error message - please run SETUP program Press <F1>...
-
Page 4: Info Menu - Displays Basic System Information
Note that all of the fields on this screen are display only and are for reference. Note that the parameters listed may be different for your system, depending upon the system configuration. Product Name: A6110 Serial Number:: Not Defined BIOS Version: 1.0X (XX/XX/2007) -
Page 5: System Menu - Setting Standard System Parameters
–— the field’s function and any special information needed to help understand the field’s use. Phoenix TrustedCore(tm) Setup Utility Advanced Security Boot [14:57:01] [10/01/2007] [FUJITSU MHW2120BH] [TEAC DV-W28EC] [English (US)] -/Space Change Values Enter Select Sub-Menu Figure 2. System Menu... - Page 6 L i f e B o o k A S e r i e s B I O S Table 2: Fields, Options and Defaults for the System Menu Note that the parameters listed in the following table may vary depending upon your system’s configuration. Menu Field Options Drive0...
-
Page 7: Drive0 Submenu Of The System Menu
Drive0 Submenu of the System Menu The Drive0 submenu identifies what ATA devices are installed. Info System Drive0 [FUJITSU MHW2120BH] Type: Total Sectors: Maximum Capacity: Help Exit Table 3: Fields, Options and Defaults for the Drive0 Submenu of the System Menu... -
Page 8: Drive1 Submenu Of The System Menu
L i f e B o o k A S e r i e s B I O S Drive1 Submenu of the System Menu The Drive1 submenu allows you to configure secondary ATA devices. Info System Drive1 [TEAC Type: Transfer Mode: Ultra DMA Mode: Help... - Page 9 S y s t e m M e n u Exiting from System Menu When you have finished setting the parameters on this menu, you can either exit from the setup utility, or move to another menu. If you wish to exit from the setup utility, press the [Esc] key or use the cursor keys to go to the Exit menu.
-
Page 10: Advanced Menu - Setting Device Feature Controls
L i f e B o o k A S e r i e s B I O S ADVANCED MENU – SETTING DEVICE FEATURE CONTROLS The Advanced Menu allows you to: Set the keyboard and mouse features. ■ Select between the display panel and an external ■... -
Page 11: Menu Field
Table 5: Fields, Options and Defaults for the Advanced Menu Menu Field Description USB Features When selected, opens the USB Features submenu to allow you to enable or disable legacy USB devices and SCSI SubClass support. Miscellaneous Configurations When selected, opens the Miscellaneous Configurations submenu to allow you to enable or disable the power button, Wake Up On LAN, and control volume settings. -
Page 12: Keyboard/Mouse Features Submenu Of The Advanced Menu
L i f e B o o k A S e r i e s B I O S Keyboard/Mouse Features Submenu of the Advanced Menu The Keyboard/Mouse Features submenu is for turning NumLock on or off.. Info System Keyboard/Mouse Features Numlock: Help Exit... -
Page 13: Video Features Submenu Of The Advanced Menu
Video Features Submenu of the Advanced Menu The Video Features submenu is for setting the display parameters. Info System Display: Help Exit Table 7: Fields, Options and Defaults for the Video Features Submenu of the Advanced Menu Menu Field Options ■... -
Page 14: Internal Device Configurations Submenu Of The Advanced Menu
L i f e B o o k A S e r i e s B I O S Internal Device Configurations Submenu of the Advanced Menu The Internal Device Configuration submenu allows the user to enable or disable IDE, Bluetooth, LAN and Wireless LAN Controllers. -
Page 15: Cpu Features Submenu Of The Advanced Menu
CPU Features Submenu of the Advanced Menu The CPU Features submenu provides options for configuring the Intel Core Multi-Processing and SpeedStep power management features of the CPU. Info System Core Multi-Processing: SpeedStep(R) Technology: On Battery: On AC: XD Bit functionality: Virtualization Technology: [Disabled] Help Exit... -
Page 16: Usb Features Submenu Of The Advanced Menu
L i f e B o o k A S e r i e s B I O S USB Features Submenu of the Advanced Menu The USB Features submenu provides options for enabling or disabling the USB devices. Info System Legacy USB Support SCSI SubClass Support:... -
Page 17: Miscellaneous Configurations Submenu Of The Advanced Menu
Miscellaneous Configurations Submenu of the Advanced Menu The Miscellaneous Configurations submenu provides options for enabling or disabling the power button and the Wake Up On LAN feature, and setting the volume and video memory size. Info System Miscellaneous Configurations Power Button: Wake up on LAN: Force LAN Boot: Volume Setting:... -
Page 18: Event Logging Submenu Of The Advanced Menu
L i f e B o o k A S e r i e s B I O S Event Logging Submenu of the Advanced Menu The Event Logging submenu configures event logging features for DMI events. Info System Event Log Capacity: Event Log Validity: View Event Log: Event Logging:... -
Page 19: Security Menu - Setting The Security Features
Remember your passwords! If you set and forget your User and Master hard disk passwords, Fujitsu Computer Systems will not be able to reset it. You may lose data and have to replace your system board or hard disk drive. -
Page 20: Exiting From The Security Menu
L i f e B o o k A S e r i e s B I O S Table 13: Fields, Options and Defaults for the Security Menu Menu Field Options Supervisor –— Password is: User Password is: –— Set Supervisor –—... -
Page 21: Hard Disk Security Submenu Of The Security Menu
Hard Disk Security Submenu of the Security Menu The Hard Disk Security submenu is for configuring hard disk security features. Info System Drive0: Set Master Password Set User Password Password Entry on Boot: Help Exit Table 14: Fields, Options and Defaults for the Hard Disk Security Submenu of the Security Menu Menu Field Options Drive0:... -
Page 22: Owner Information Submenu Of The Security Menu
L i f e B o o k A S e r i e s B I O S Owner Information Submenu of the Security Menu The Owner Information submenu is for setting owner information. Note that the owner information cannot be set without having entered a Supervisor Password. -
Page 23: Boot Menu - Selecting The Operating System Source
Figure 16. Boot Menu Default Description [Disabled] Turns on and off the diagnostic screen instead of Fujitsu logo screen during Power On Self Test. [Enabled] When Disabled, the Boot Menu is disabled and the [F12] key is ignored. When Enabled, the Boot Menu is enabled. -
Page 24: Boot Device Priority Submenu Of The Boot Menu
The boot sequence ignores the new drive designations, however, your application software will use the new designations. Info Boot priority order: Floppy Disk Drive Drive0 HDD: FUJITSU MHW2120BH CD/DVD Drive NETWORK: Marvell LAN Excluded from boot order: USB MEMORY: None... -
Page 25: Exit Menu - Leaving The Setup Utility
EXIT MENU – LEAVING THE SETUP UTILITY The Exit Menu is used to leave the setup utility. Follow the instructions for Navigating Through the Setup Utility to make any changes. (See Navigating through the Setup Utility on page 2 for more information.) Info System Exit Saving Changes...