
Related Manuals for Dell Optiplex-620


Summary of Contents for Dell Optiplex-620
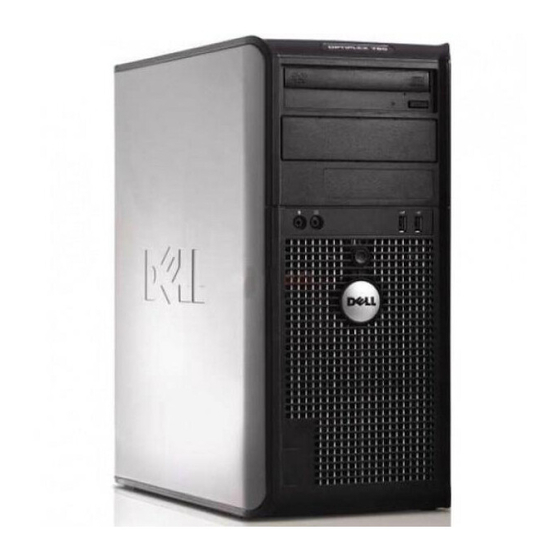
- Page 1 Dell™ OptiPlex™ GX620 Systems User's Guide Mini Tower Computer Desktop Computer Small Form Factor Computer Ultra Small Form Factor Computer ...
-
Page 2: Advanced Features
The system battery has reached a voltage of 2.2 V or lower. Battery Low For more information about Dell's ASF implementation, see the ASF User's Guide and the ASF Administrator's Guide, which are available on the Dell Support website at support.dell.com. -
Page 3: Password Protection
A managed system is one that has Dell OpenManage Client Instrumentation set up on a network that uses IT Assistant. For information about Dell OpenManage Client Instrumentation, see the Dell OpenManage Client Instrumentation User's Guide available on the Dell Support website at support.dell.com. -
Page 4: Option Settings
NOTICE: If you leave your computer running and unattended without having a system password assigned, or if you leave your computer unlocked so that someone can disable the password by changing a jumper setting, anyone can access the data stored on your hard drive. ... -
Page 5: Administrator Password
Deleting or Changing an Existing System Password Enter system setup. 2. Highlight System Password and press <Enter>. 3. When prompted, type the system password. 4. Press <Enter> twice to clear the existing system password. The setting changes to Not Set. ... -
Page 6: Disabling A Forgotten Password And Setting A New Password
Entering System Setup 1. Turn on (or restart) your computer. 2. When the blue DELL™ logo appears, press <F2> immediately. If you wait too long and the operating system logo appears, continue to wait until you see the Microsoft® Windows® desktop. Then shut down your computer and try again. -
Page 7: System Setup Options
setup field. System Setup Options NOTE: Depending on your computer and installed devices, the items listed in this section may or may not appear. System Lists the computer name, BIOS version, and service tag. System Info Identifies whether the computer's processor supports Hyper-Threading and identifies the CPU speed, bus speed, clock speed, and L2 cache. CPU Info Indicates amount of installed memory, computer memory speed, amount of video memory, size of the display cache, and channel mode (dual Memory Info... - Page 8 Controller Off - The USB controller is disabled On - the USB controller is enabled No Boot - The USB controller is enabled; however, the BIOS will not recognize USB storage devices. The factory default setting is On. Enables and disables the front-panel USB ports. Front USB Ports Off —...
-
Page 9: Changing Boot Sequence For The Current Boot
in the module bay, or if one is installed that does not support a hard-drive password, this option will not display. This option locks the system password field with the administrator password. When the field is locked, the option to disable password Password security by pressing <Ctrl><Enter>... -
Page 10: Booting To A Usb Device
You can use this feature, for example, to tell the computer to boot from the CD drive so that you can run the Dell Diagnostics on the Drivers and Utilities CD, but you want the computer to boot from the hard drive when the diagnostic tests are complete. You can also use this feature to restart your computer to a USB device such as a floppy drive, memory key, or CD drive. -
Page 11: Clearing Forgotten Passwords
Clearing Forgotten Passwords CAUTION: Before you begin any of the procedures in this section, follow the safety instructions located in the Product Information Guide. NOTICE: This process erases both the system and administrator passwords. 1. Follow the procedures in "Before You Begin."... -
Page 12: Clearing Cmos Settings
Jumper Setting Description PSWD Password features are enabled (default). Password features are disabled. RTCRST Real-time clock has not been reset (default). Resetting Real-time clock (jumpered temporarily). jumpered unjumpered Replace the computer cover. 4. Connect your computer and monitor to electrical outlets, and turn them on. ... -
Page 13: Hyper-Threading
2. Reset the current CMOS settings: a. Locate the password (PSWD) and CMOS (RTC_RST) jumpers on the system board. b. Remove the password jumper plug from its pins. c. Place the password jumper plug on the RTC_RST pins and wait approximately 5 seconds. d. - Page 14 NOTE: For more information on power management, see your operating system documentation. Back to Contents Page ...
-
Page 15: Replacing The Battery
Back to Contents Page Battery Dell™ OptiPlex™ GX620 User's Guide Replacing the Battery Replacing the Battery CAUTION: Before you begin any of the procedures in this section, follow the safety instructions in the Product Information Guide. NOTICE: To prevent static damage to components inside your computer, discharge static electricity from your body before you touch any of your computer's electronic components. - Page 16 1 system battery 2 positive side of battery connector 3 battery socket tab 4 battery socket NOTICE: To avoid damage to the battery connector, you must firmly support the connector while replacing the battery. 1. Install the new system battery. a.
-
Page 17: Before You Begin
Hold a component such as a processor by its edges, not by its pins. NOTICE: Only a certified service technician should perform repairs on your computer. Damage due to servicing that is not authorized by Dell is not covered by your warranty. - Page 18 4. If applicable, remove the computer stand (for instructions, see the documentation that came with the stand) and the cable cover, if attached. CAUTION: To guard against electrical shock, always unplug your computer from the electrical outlet before removing the cover. ...
-
Page 19: Removing The Chassis Intrusion Switch
Back to Contents Page Chassis Intrusion Switch Dell™ OptiPlex™ GX620 User's Guide Removing the Chassis Intrusion Switch Replacing the Chassis Intrusion Switch Resetting the Chassis Intrusion Detector CAUTION: Before you begin any of the procedures in this section, follow the safety instructions located in the Product Information Guide. -
Page 20: Replacing The Chassis Intrusion Switch
Small Form Factor Computer Ultra Small Form Factor Computer Replacing the Chassis Intrusion Switch... -
Page 21: Resetting The Chassis Intrusion Detector
Resetting the Chassis Intrusion Detector 1. Turn on (or restart) your computer. 2. When the blue DELL™ logo appears, press <F2> immediately. If you wait too long and the operating system logo appears, continue to wait until you see the Microsoft® Windows® desktop. Then shut down your computer and try again. ... -
Page 22: Cleaning Your Computer
Back to Contents Page Cleaning Your Computer Dell™ OptiPlex™ GX620 User's Guide CAUTION: Before you begin any of the procedures in this section, follow the safety instructions located in the Product Information Guide. Computer, Keyboard, and Monitor CAUTION: Before you clean your computer, disconnect the computer from the electrical outlet. - Page 23 For stubborn dirt, try using water or a diluted solution of water and mild soap. You can also purchase commercial products that clean discs and provide some protection from dust, fingerprints, and scratches. Cleaning products for CDs are safe to use on DVDs. Back to Contents Page ...
-
Page 24: Replacing The Computer Cover
Back to Contents Page Replacing the Computer Cover Dell™ OptiPlex™ GX620 User's Guide CAUTION: Before you begin any of the procedures in this section, follow the safety instructions in the Product Information Guide. 1. Ensure that all cables are connected, and fold cables out of the way. -
Page 25: Notes, Notices, And Cautions
Trademarks used in this text: Dell, the DELL logo, OptiPlex, Inspiron, Dimension, Latitude, Dell Precision, DellNet, TravelLite, Dell OpenManage, PowerVault, Axim, PowerEdge, PowerConnect, and PowerApp are trademarks of Dell Inc.; Intel, Pentium, and Celeron are registered trademarks of Intel Corporation; Microsoft, MS-DOS, and Windows are registered trademarks of... - Page 26 ENERGY STAR guidelines for energy efficiency. Other trademarks and trade names may be used in this document to refer to either the entities claiming the marks and names or their products. Dell Inc. disclaims any proprietary interest in trademarks and trade names other than its own.
-
Page 27: Finding Information
NOTE: The Quick Reference Guide is optional and may not ship with your computer. NOTE: This document is available as a PDF at support.dell.com. Warranty information Dell™ Product Information Guide Terms and Conditions (U.S. only) Safety instructions Regulatory information Ergonomics information End User License Agreement... - Page 28 DSS utility. DSS provides critical updates for your operating system and support for Dell™ 3.5-inch USB floppy drives, Intel® Pentium® M processors, optical drives, and USB devices. DSS is necessary for correct operation of your Dell computer. The software automatically detects your computer and operating system and installs the updates appropriate for your configuration.
- Page 29 Back to Contents Page ...
-
Page 30: Getting Help
Dell's Express Service Code system may not be available in all countries. When prompted by Dell's automated telephone system, enter your Express Service Code to route the call directly to the proper support personnel. If you do not have an Express Service Code, open the Dell Accessories folder, double-click the Express Service Code icon, and follow the directions. -
Page 31: Problems With Your Order
Product Information If you need information about additional products available from Dell, or if you would like to place an order, visit the Dell website at www.dell.com. For the telephone number to call to speak to a sales specialist, see the contact numbers for your region. -
Page 32: Before You Call
In certain countries, technical support specific to Dell Inspiron™ XPS computers is available at a separate telephone number listed for participating countries. If you do not see a telephone number listed that is specific for Inspiron XPS computers, you may contact Dell through the technical support number listed and your call will be routed appropriately. - Page 33 E-mail for French-speaking Customers: Belgium (Brussels) support.euro.dell.com/be/fr/emaildell/ Technical Support for Inspiron XPS computers only 02 481 92 96 International Access Code: 00 Technical Support for all other Dell computers 02 481 92 88 Country Code: 32 Technical Support Fax 02 481 92 95 Customer Care 02 713 15 .65 City Code: 2 Corporate Sales 02 481 91 00...
- Page 34 Switchboard 22537 2711 Website: support.euro.dell.com E-mail: support.euro.dell.com/dk/da/emaildell/ Technical Support for Inspiron XPS computers only 7010 0074 Technical Support for all other Dell computers 7023 0182 Denmark (Copenhagen) Customer Care (Relational) 7023 0184 International Access Code: 00 Home/Small Business Customer Care 3287 5505...
- Page 35 E-mail: support.euro.dell.com/fr/fr/emaildell/ Home and Small Business Technical Support for Inspiron XPS computers only 0825 387 129 Technical Support for all other Dell computers 0825 387 270 Customer Care 0825 823 833 France (Paris) (Montpellier) Switchboard 0825 004 700 Switchboard (calls from outside of France) 04 99 75 40 00...
- Page 36 0120-198-226 Technical Support outside of Japan (Dimension and Inspiron) 81-44-520-1435 Technical Support (Dell Precision, OptiPlex, and Latitude) toll-free:0120-198-433 Technical Support outside of Japan (Dell Precision, OptiPlex, and Latitude) 81-44-556-3894 Japan (Kawasaki) Technical Support (PDAs, projectors, printers, routers) toll-free: 0120-981-690...
- Page 37 Transaction Sales (Xiamen, China) 29 693 115 Website: support.ap.dell.com Malaysia (Penang) Technical Support (Dell Precision, OptiPlex, and Latitude) toll-free: 1 800 88 0193 Technical Support (Dimension, Inspiron, and Electronics and Accessories) toll-free: 1 800 88 1306 International Access Code: 00 Technical Support (PowerApp, PowerEdge, PowerConnect, and PowerVault) toll-free: 1800 88 1386...
- Page 38 Grenadines Website: support.ap.dell.com Singapore (Singapore) Technical Support (Dimension, Inspiron, and Electronics and Accessories) toll-free: 1800 394 7430 Technical Support (OptiPlex, Latitude, and Dell Precision) toll-free: 1800 394 7488 International Access Code: 005 Technical Support (PowerApp, PowerEdge, PowerConnect, and PowerVault) toll-free: 1800 394 7478 Country Code: 65 Customer Service (Penang, Malaysia) 604 633 4949...
- Page 39 Transaction Sales toll-free: 00801 65 1228 Corporate Sales toll-free: 00801 651 227 Website: support.ap.dell.com Technical Support (OptiPlex, Latitude, and Dell Precision) toll-free: 1800 0060 07 Thailand Technical Support (PowerApp, PowerEdge, PowerConnect, and PowerVault) toll-free: 1800 0600 09 International Access Code: 001 Customer Service (Penang, Malaysia) 604 633 4949 Country Code: 66 Corporate Sales toll-free: 1800 006 009...
- Page 40 Software and Peripherals Sales toll-free: 1-800-671-3355 Spare Parts Sales toll-free: 1-800-357-3355 Extended Service and Warranty Sales toll-free: 1-800-247-4618 toll-free: 1-800-727-8320 toll-free: 1-877-DELLTTY Dell Services for the Deaf, Hard-of-Hearing, or Speech-Impaired (1-877-335-5889) U.S. Virgin Islands General Support 1-877-673-3355 Venezuela General Support 8001-3605 Back to Contents Page...
- Page 41 Back to Contents Page Glossary Dell™ OptiPlex™ GX620 User's Guide Terms in this Glossary are provided for informational purposes only and may or may not describe features included with your particular computer. A AC — alternating current — The form of electricity that powers your computer when you plug the AC adapter power cable in to an electrical outlet.
- Page 42 bootable disk — A disk that you can use to start your computer. In case your hard drive is damaged or your computer has a virus, ensure that you always have a bootable CD or floppy disk available. bps —...
- Page 43 system setup or reinstallation. Also referred to as the Product Key or Product ID. Control Panel — A Windows utility that allows you to modify operating system and hardware settings, such as display settings. controller — A chip that controls the transfer of data between the processor and memory or between the processor and devices. ...
- Page 44 A connector on the system board (in some computers) where you insert an expansion card, connecting it to the system bus. Express Service Code — A numeric code located on a sticker on your Dell™ computer. Use the Express Service Code when contacting Dell for assistance. Express Service Code service may not be available in some countries. extended display mode —...
- Page 45 FCC — Federal Communications Commission — A U.S. agency responsible for enforcing communications-related regulations that state how much radiation computers and other electronic equipment can emit. floppy drive — A disk drive that can read and write to floppy disks. ...
- Page 46 Hz — hertz — A unit of frequency measurement that equals 1 cycle per second. Computers and electronic devices are often measured in kilohertz (kHz), megahertz (MHz), gigahertz (GHz), or terahertz (THz). I IC — Industry Canada — The Canadian regulatory body responsible for regulating emissions from electronic equipment, much as the FCC does in the United States.
- Page 47 A device that allows your computer to communicate with other computers over analog telephone lines. Three types of modems include: external, PC Card, and internal. You typically use your modem to connect to the Internet and exchange e-mail. module bay — A bay that supports devices such as optical drives, a second battery, or a Dell TravelLite™ module. monitor — The high-resolution TV-like device that displays computer output.
- Page 48 N network adapter — A chip that provides network capabilities. A computer may include a network adapter on its system board, or it may contain a PC Card with an adapter on it. A network adapter is also referred to as a NIC (network interface controller). ...
- Page 49 processor — A computer chip that interprets and executes program instructions. Sometimes the processor is referred to as the CPU (central processing unit). program — Any software that processes data for you, including spreadsheet, word processor, database, and game packages. Programs require an operating system to run.
- Page 50 An I/O port often used to connect devices such as a handheld digital device or digital camera to your computer. Service Tag — A bar code label on your computer that identifies your computer when you access Dell Support at support.dell.com or when you call Dell for customer service or technical support. ...
- Page 51 system tray — See notification area. T TAPI — telephony application programming interface — Enables Windows programs to operate with a wide variety of telephony devices, including voice, data, fax, and video. text editor — A program used to create and edit files that contain only text; for example, Windows Notepad uses a text editor. Text editors do not usually provide word wrap or formatting functionality (the option to underline, change fonts, and so on).
- Page 52 W W — watt — The measurement of electrical power. One W is 1 ampere of current flowing at 1 volt. WHr — watt-hour — A unit of measure commonly used to indicate the approximate capacity of a battery. For example, a 66-WHr battery can supply 66 W of power for 1 hour or 33 W for 2 hours.
-
Page 53: Ddr2 Memory Overview
Small Form Factor Computer Specifications Ultra Small Form Factor Computer Specifications NOTICE: Before you install new memory modules, download the most recent BIOS for your computer from the Dell Support website at support.dell.com. DDR2 Memory Overview Dual-channel DDR2 memory modules should be installed in pairs of matched memory size. If the DDR2 memory modules are not installed with the same amount of memory in each channel, the computer will continue to operate, but with a slight reduction in performance. -
Page 54: Addressing Memory With 4-Gb Configurations
If you remove your original memory modules from the computer during a memory upgrade, keep them separate from any new modules that you may have, even if you purchased the new modules from Dell. If possible, do not pair an original memory module with a new memory module. - Page 55 NOTE: Memory purchased from Dell is covered under your computer warranty. 1. Follow the procedures in "Before You Begin." 2. Press out the securing clip at each end of the memory module connector. 1 memory connector closest to processor...
- Page 56 Then repeat steps 5, 6, and 7. 9. When the System Memory total is correct, press <Esc> to exit system setup. 10. Run the Dell Diagnostics to verify that the memory modules are operating properly. Back to Contents Page ...
-
Page 57: About Your Mini Tower Computer
Back to Contents Page Mini Tower Computer Dell™ OptiPlex™ GX620 User's Guide About Your Mini Tower Computer Inside Your Computer About Your Mini Tower Computer Front View CD/DVD drive Insert a CD or DVD (if applicable) into this drive. floppy drive Insert a floppy disk into this drive. -
Page 58: Back View
To exit from a power-saving mode, press the power button or use the keyboard or the mouse if it is configured as a wake device in the Windows Device Manager. For more information about sleep modes and exiting from a power-saving mode, see "Power Management."... - Page 59 parallel Connect a parallel device, such as a printer, to the parallel connector. If connector you have a USB printer, plug it into a USB connector. NOTE: The integrated parallel connector is automatically disabled if the computer detects an installed card containing a parallel connector configured to the same address.
-
Page 60: Inside Your Computer
Inside Your Computer CAUTION: Before you begin any of the procedures in this section, follow the safety instructions located in the Product Information Guide. CAUTION: To avoid electrical shock, always unplug your computer from the electrical outlet before removing the computer cover. NOTICE: Be careful when opening the computer cover to ensure that you do not accidentally disconnect cables from the system board. -
Page 61: Jumper Settings
memory module connectors (DIMM_1, DIMM_2, DIMM_3, DIMM_4) 15 PCI Express x1 connector (SLOT4) serial ATA drive connectors (SATA0, SATA2, SATA1, SATA3) 16 PCI connector (SLOT2) front-panel connector (FNT_PANEL) 17 PCI connector (SLOT3) CD drive analog audio cable connector for optional analog audio cable (CD_IN) 18 serial connector (SER2) power connector (POWER) 19 floppy drive connector (DSKT) CD/DVD drive connector (IDE) -
Page 62: Pci And Pci Express Cards And Serial Port Adapters
PCI Express x16 card slot One PCI Express x1 card slot NOTE: Your Dell computer uses only PCI and PCI Express slots. ISA cards are not supported. PCI Cards Installing a PCI Card 1. Follow the procedures in "Before You... - Page 63 b. With your free hand, gently squeeze the sides of the card retention mechanism to release it from the tab slots holding it in place. c. Pivot the card retention mechanism upward to release it from the two tab slots. ...
-
Page 64: Removing A Pci Card
6. If you are removing the card permanently, install a filler bracket in the empty card-slot opening. If you need a filler bracket, contact Dell. NOTE: Installing filler brackets over empty card-slot openings is necessary to maintain FCC certification of the computer. The brackets also keep dust and dirt out of your computer. -
Page 65: Installing A Pci Express Card
1 fully seated card 2 not fully seated card 3 bracket within slot 4 bracket caught outside of slot 8. Gently press down on the card retention mechanism to secure the adapter bracket in place. 9. Close the card retention latch by snapping it into place. NOTICE: To connect a network cable, first plug the cable into the network wall jack and then plug it into the computer. - Page 66 1. Follow the procedures in "Before You Begin." 1 card retention latch 4 card-edge connector 2 alignment guide 5 card connector 3 card 6 release tab 2. Gently push the release tab on the card retention latch from the inside to pivot the latch open. The latch will remain in the open position. ...
-
Page 67: Removing A Pci Express Card
1 PCI Express x16 card 2 lever 3 securing slot (not all cards) 4 securing tab 5 PCI Express x16 card connector 1 fully seated card 2 not fully seated card 3 bracket within slot 4 bracket caught outside of slot ... -
Page 68: Installing A Serial Port Adapter
4. If you are removing the card permanently, install a filler bracket in the empty card-slot opening. If you need a filler bracket, contact Dell. NOTE: Installing filler brackets over empty card-slot openings is necessary to maintain FCC certification of the computer. The brackets also keep dust and dirt out of your computer. - Page 69 1 card retention latch 2 alignment guide 2. Gently push the release tab on the card retention latch from the inside to pivot the latch open. The latch will remain in the open position. 3. Open the card retention mechanism that secures the adapter bracket and cards in place from the top: a.
-
Page 70: Removing A Serial Port Adapter
NOTICE: Do not route cables over or behind any installed cards. Cables routed over the cards can prevent the computer cover from closing properly or cause damage to the equipment. 8. Connect the adapter cable to the serial port adapter connector (SER2) on the system board. ... -
Page 71: Removing The Computer Cover
Back to Contents Page Dell™ OptiPlex™ GX620 User's Guide Removing the Computer Cover Removing the Computer Cover CAUTION: Before you begin any of the procedures in this section, follow the safety instructions located in the Product Information Guide. CAUTION: To guard against electrical shock, always unplug your computer from the electrical outlet before removing the computer cover. -
Page 72: General Installation Guidelines
Back to Contents Page Dell™ OptiPlex™ GX620 User's Guide Drives Drives Your computer supports: Two serial ATA hard drives Two floppy or optional Zip drives Two CD or DVD drives NOTE: Due to the limited number of drive bays and IDE controllers on this computer, you will not be able to connect all supported devices at once. -
Page 73: Power Cable Connectors
1 colored stripe on IDE cable 2 interface cable connector 3 interface connector Most interface connectors are keyed for correct insertion; that is, a notch or a missing pin on one connector matches a tab or a filled-in hole on the other connector. -
Page 74: Removing A Hard Drive
CAUTION: To guard against electrical shock, always unplug your computer from the electrical outlet before removing the computer cover. NOTICE: To avoid damage to the drive, do not set it on a hard surface. Instead, set the drive on a surface, such as a foam pad, that will sufficiently cushion it. - Page 75 2. Check the documentation for the drive to verify that it is configured for your computer. NOTE: If your replacement hard drive does not have the plastic hard-drive bracket attached, remove the bracket from the existing drive by unsnapping it from the drive.
-
Page 76: Adding A Second Hard Drive
See the documentation for your operating system for instructions. 12. Test the hard drive by running the Dell Diagnostics. 13. If the drive you just installed is the primary drive, install your operating system on the hard drive. -
Page 77: Drive-Panel Inserts
8. Attach the serial ATA connector removed in step 5 to the first hard drive. 9. Locate an unused serial ATA connector on the system board and attach a drive cable to this connector and to the second hard drive. 1 hard-drive cable 2 hard-drive cable on system board 3 power cable... - Page 78 drive panel release tab drive-panel insert 3. Select the drive-panel insert in front of the drive bay that you want to use. 4. Gently press the release tab of the insert to remove it from the drive panel. 1 CD/DVD-drive panel insert 2 floppy-drive panel insert 3 holder for shoulder screws...
-
Page 79: Removing The Floppy Drive
Floppy Drive CAUTION: Before you begin any of the procedures in this section, follow the safety instructions located in the Product Information Guide. CAUTION: To guard against electrical shock, always unplug your computer from the electrical outlet before removing the computer cover. ... -
Page 80: Removing A Cd/Dvd Drive
Enter system setup and use the Diskette Drive option to enable your new floppy drive. 7. Verify that your computer works correctly by running the Dell Diagnostics. CD/DVD Drive CAUTION: Before you begin any of the procedures in this section, follow the safety instructions located in the Product Information Guide. -
Page 81: Installing A Cd/Dvd Drive
2. Disconnect the power and CD/DVD drive cables from the back of the drive. 3. Remove the CD/DVD drive by sliding and holding the drive release latch downward. Then slide the drive out of the computer. CD/DVD drive drive release latch ... - Page 82 Replace the computer cover. 9. Update your configuration information in system setup by setting the appropriate Drive option (0 or 1) under Drives. 10. Verify that your computer works correctly by running the Dell Diagnostics. Back to Contents Page ...
-
Page 83: Removing The I/O Panel
Back to Contents Page Dell™ OptiPlex™ GX620 User's Guide I/O Panel I/O Panel Removing the I/O Panel CAUTION: Before you begin any of the procedures in this section, follow the safety instructions located in the Product Information Guide. CAUTION: To guard against electrical shock, always unplug your computer from the electrical outlet before removing the cover. - Page 84 Back to Contents Page ...
-
Page 85: Removing The Processor
NOTICE: If you are installing a processor upgrade kit from Dell, remove the heat sink assembly from the shroud and discard the original heat sink. If you are not installing a processor upgrade kit from Dell, reuse the original heat sink when you install your new processor. -
Page 86: Installing The Processor
center cover latch processor cover processor socket release lever NOTICE: When replacing the processor, do not touch any of the pins inside the socket or allow any objects to fall on the pins in the socket. 5. Gently remove the processor from the socket. Leave the release lever extended in the release position so that the socket is ready for the new processor. - Page 87 If you are not installing a processor upgrade kit from Dell, reuse the original heat sink assembly when you replace the processor. If you installed a processor replacement kit from Dell, remove the original heat sink assembly from the shroud and return it with the processor to Dell in the same package in which your replacement kit was sent.
-
Page 88: Replacing The Power Supply
Back to Contents Page Dell™ OptiPlex™ GX620 User's Guide Power Supply Power Supply Replacing the Power Supply CAUTION: Before you begin any of the procedures in this section, follow the safety instructions located in the Product Information Guide. NOTICE: To prevent static damage to components inside your computer, discharge static electricity from your body before you touch any of your computer's electronic components. -
Page 89: Dc Power Connectors
9. Reconnect the DC power cables to the power supply. 10. Connect the AC power cable to the AC power connector. Replace the computer cover. DC Power Connectors DC Power Connector P1 Pin Number Signal name 18-AWG Wire... - Page 90 Black Black VCC (+5 V) VCC (+5 V) VCC (+5 V) Black *Use 22-AWG wire instead of 18-AWG wire. DC Power Connector P2 Pin Number Signal Name 18-AWG Wire Black Black +12 VDC Yellow +12 VDC Yellow ...
- Page 91 Pin Number Signal Name 22-AWG Wire +5 VCD Black Black +12 VDC Yellow DC Power Connectors P8 and P9 Pin Number Signal name 18-AWG Wire +12 VDC Yellow Black Black +5 VDC Back to Contents Page ...
-
Page 92: Mini Tower Computer Specifications
Back to Contents Page Dell™ OptiPlex™ GX620 User's Guide Mini Tower Computer Specifications Mini Tower Computer Specifications Microprocessor Microprocessor type Intel® Pentium® or Celeron® processor Level 1 (L1) cache 32 KB Level 2 (L2) cache 512-KB, 1-MB, or 2-MB pipelined-burst, eight-way set associative, write-back SRAM ... - Page 93 Drives four serial ATA controllers supporting one device each and one parallel Ultra ATA/100 IDE supporting two devices per channel with one channel Expansion Bus Bus type PCI 2.3 SATA 1.0a and 2.0 USB 2.0 PCI Express 1.0a Bus speed PCI: 33 MHz SATA: 1.5 Gbps and 3.0 Gbps USB: 480 Mbps...
- Page 94 environment specified by the remote boot environment (PXE) rather than from one of the devices in the system setup Boot Sequence option (during start-up only) <F12> or <Ctrl><Alt><F8> displays a boot device menu that allows the user to enter a device for a single boot (during start-up only) as well as options to run hard-drive and system diagnostics ...
- Page 95 Back to Contents Page ...
-
Page 96: Fcc Notices (U.s. Only)
Using shielded cables ensures that you maintain the appropriate EMC classification for the intended environment. For parallel printers, a cable is available from Dell. If you prefer, you can order a cable from Dell on the World Wide Web at accessories.us.dell.com/sna/category.asp?category_id=4117. -
Page 97: Fcc Identification Information
The following information is provided on the device or devices covered in this document in compliance with FCC regulations: Model numbers: DCTR, DCNE, DCSM, DCCY Company name: Dell Inc. One Dell Way Round Rock, Texas 78682 USA 512-338-4400 Back to Contents Page... -
Page 98: Reinstalling Drivers And The Operating System
A driver acts like a translator between the device and any other programs that use the device. Each device has its own set of specialized commands that only its driver recognizes. Dell ships your computer to you with required drivers already installed—no further installation or configuration is needed. NOTICE: The optional Drivers and Utilities CD may contain drivers for operating systems that are not on your computer. -
Page 99: Using The Optional Drivers And Utilities Cd
If this is your first time to use the Drivers and Utilities CD, the Installation window opens to inform you that the CD will begin the installation. Click OK and respond to the installation program prompts to complete the installation. 2. Click Next at the Welcome Dell System Owner screen. 3. Choose the appropriate selections for System Model, Operating System, Device Type, and Topic. -
Page 100: Restoring The Computer To An Earlier Operating State
Restoring the Computer to an Earlier Operating State NOTICE: Before you restore the computer to an earlier operating state, save and close any open files and exit any open programs. Do not alter, open, or delete any files or programs until the system restoration is complete. ... -
Page 101: Reinstalling Windows Xp
The Operating System CD provides options for reinstalling Windows XP. The options can overwrite files and possibly affect programs installed on your hard drive. Therefore, do not reinstall Windows XP unless a Dell technical support representative instructs you to do so. - Page 102 9. If the Modem Dialing Information screen appears, enter the requested information and click Next. 10. Enter the date, time, and time zone in the Date and Time Settings window, and click Next. 11. If the Networking Settings screen appears, click Typical and click Next. ...
-
Page 103: Replacing The System Board
Back to Contents Page Replacing the System Board Dell™ OptiPlex™ GX620 User's Guide Removing the System Board: Mini Tower, Desktop, and Small Form Factor Computers 1. Shut down the computer through the Start menu. 2. Ensure that your computer and attached devices are turned off. If your computer and attached devices did not automatically turn off when you shut down your computer, turn them off now. -
Page 104: Desktop System Board Screws
1 mini tower system board 2 screws (10) Desktop System Board Screws 1 desktop system board 2 screws (10) Small Form Factor System Board Screws... - Page 105 1 small form factor system board 2 screws (8) Place the system board assembly that you just removed next to the replacement system board to ensure it is identical. Replacing the System Board: Mini Tower, Desktop, and Small Form Factor Computers ...
-
Page 106: About Your Desktop Computer
If your operating system has ACPI enabled, when you press the power button the computer will perform an operating system shutdown. Dell badge This badge can be rotated to match the orientation of your computer. To rotate, place fingers around the outside of the badge, press firmly, and turn the badge. -
Page 107: Back View
10 floppy drive Insert a floppy disk into this drive. 11 CD/DVD drive Insert a CD or DVD (if applicable) into this drive. Back View 1 card slots Access connectors for any installed PCI and PCI Express cards. 2 back-panel Plug serial, USB, and other devices into the appropriate connector. -
Page 108: Inside Your Computer
NOTE: Do not plug a telephone cable into the network connector. On computers with a network connector card, use the connector on the card. It is recommended that you use Category 5 wiring and connectors for your network. If you must use Category 3 wiring, force the network speed to 10 Mbps to ensure reliable operation. -
Page 109: System Board Components
4 system board System Board Components fan connector (FAN) 12 password jumper (PSWD) processor connector (CPU) 13 battery socket (BATT) power connector (12VPOWER) 14 PCI Express x16 connector (SLOT1) memory module connectors (DIMM_1, DIMM_2, DIMM_3, DIMM_4) 15 PCI connector (SLOT3) serial ATA drive connectors (SATA0, SATA2) 16 PCI riser connector (SLOT2) front-panel connector (FNT_PANEL) - Page 110 PSWD Password features are enabled (default). Password features are disabled. RTCRST Real-time clock has not been reset (default). Resetting Real-time clock (jumpered temporarily). jumpered unjumpered Back to Contents Page ...
-
Page 111: Pci And Pci Express Cards And Serial Port Adapters
PCI card slots One low-profile PCI Express x16 card slot NOTE: Your Dell computer uses only PCI and PCI Express slots. ISA cards are not supported. PCI Cards Installing a PCI Card 1. Follow the procedures in "Before You... - Page 112 card card-edge connector card connector CAUTION: Some network adapters automatically start the computer when they are connected to a network. To guard against electrical shock, be sure to unplug your computer from its electrical outlet before installing any cards. ...
-
Page 113: Installing A Pci Card In The Riser-Card Cage
5. If you are removing the card permanently, install a filler bracket in the empty card-slot opening. If you need a filler bracket, contact Dell. NOTE: Installing filler brackets over empty card-slot openings is necessary to maintain FCC certification of the computer. The brackets also keep dust and dirt out of your computer. - Page 114 1 riser-card cage 2 handle 4. If you are installing a new card, remove the filler bracket to create an empty card-slot opening. If you are replacing a card that is already installed in the computer, remove the card. If necessary, disconnect any cables connected to the card. Grasp the card by its corners, and ease it out of its connector.
-
Page 115: Removing A Pci Card From The Riser-Card Cage
1 riser-card cage 3 riser cards (2) 2 slots 4 system board connectors (2) 10. Reconnect any cables that you removed in step 11. Connect any cables that should be attached to the card. NOTICE: Do not route card cables over or behind the cards. Cables routed over the cards can prevent the computer cover from closing properly or cause damage to the equipment. - Page 116 6. If you are removing the card permanently, install a filler bracket in the empty card-slot opening. If you need a filler bracket, contact Dell. NOTE: Installing filler brackets over empty card-slot openings is necessary to maintain FCC certification of the computer. The brackets also keep dust and dirt out of your computer.
-
Page 117: Installing A Pci Express X16 Card
12. If you removed an network adapter card: Enter system setup, select Network Controller, and change the setting to On. b. Connect the network cable to the integrated network connector on the back panel of the computer. PCI Express Cards Your computer supports one low-profile PCI Express x16 card. -
Page 118: Removing A Pci Express X16 Card
1 fully seated card 2 not fully seated card 3 bracket within slot 4 bracket caught outside of slot 6. Release the card lever, ensuring that the securing tab fits into the notch on the front end of the card. ... -
Page 119: Installing A Serial Port Adapter
5. If you are removing the card permanently, install a filler bracket in the empty card-slot opening. If you need a filler bracket, contact Dell. NOTE: Installing filler brackets over empty card-slot openings is necessary to maintain FCC certification of the computer. The brackets also keep dust and dirt out of your computer. - Page 120 adapter retention latch release tab serial-port adapter bracket serial port adapter connector serial port adapter system board connector (SER2) 6. Connect the adapter cable to the serial port adapter connector (SER2) on the system board. 7. Connect any cables that should be attached to the serial port adapter. NOTE: See the documentation for the serial port adapter for information about the cable connections.
- Page 121 1 riser-card cage 2 handle 3 riser cards (2) 3. If you are installing a new serial port adapter, remove the filler bracket to create an empty card-slot opening. If you are replacing an adapter that is already installed in the computer, remove the adapter. If necessary, disconnect any cables connected to the adapter. Grasp the serial port adapter by its top corners, and ease it out of its connector.
- Page 122 1 riser-card cage 2 handle 3 riser cards (2) 3. Press the tab to raise the riser-card retention latch. 4. Disconnect the cable that attaches the adapter to the system board connector (SER2). 5. Grasp the serial port adapter by its corners, and ease it out of its slot. ...
-
Page 123: Removing The Computer Cover
Back to Contents Page Dell™ OptiPlex™ GX620 User's Guide Removing the Computer Cover Removing the Computer Cover CAUTION: Before you begin any of the procedures in this section, follow the safety instructions in the Product Information Guide. CAUTION: To guard against electrical shock, always unplug your computer from the electrical outlet before removing the computer cover. -
Page 124: General Installation Guidelines
Back to Contents Page Dell™ OptiPlex™ GX620 User's Guide Drives Drives Your computer supports: One serial ATA hard drive One optional ATA hard drive One optional floppy drive One optional CD or DVD drive 1 CD/DVD drive 2 floppy drive 3 hard drive ... -
Page 125: Cd/Dvd Drive
Most interface connectors are keyed for correct insertion; that is, a notch or a missing pin on one connector matches a tab or a filled-in hole on the other connector. Keyed connectors ensure that the pin-1 wire in the cable (indicated by the colored stripe along one edge of the IDE cable—serial ATA cables do not use a colored stripe) goes to the pin-1 end of the connector. -
Page 126: Installing A Cd/Dvd Drive
1 drive release latch 2 CD/DVD drive 3. Disconnect the power and CD/DVD drive cables from the back of the drive. Installing a CD/DVD Drive 1. Unpack the drive and prepare it for installation. Check the documentation that accompanied the drive to verify that the drive is configured for your computer. If you are installing an IDE drive, configure the drive for the cable select setting. -
Page 127: Removing A Floppy Drive
8. Update your configuration information by setting the appropriate Drive option (0 or 1) under Drives. See "System Setup" for more information. 9. Verify that your computer works correctly by running the Dell Diagnostics. Floppy Drive CAUTION: Before you begin any of the procedures in this section, follow the safety instructions in the Product Information Guide. -
Page 128: Installing A Floppy Drive
1 drive release latch 2 floppy drive 4. Disconnect the power and floppy-drive cables from the back of the floppy drive. Installing a Floppy Drive 1. If you are installing a new drive: a. Use a small flat-edge screw driver on the back side of the drive-panel insert to gently pop off the insert. b. - Page 129 Enter system setup and set the Diskette Drive option to enable your new floppy drive. 10. Verify that your computer works correctly by running the Dell Diagnostics. Hard Drive CAUTION: Before you begin any of the procedures in this section, follow the safety instructions in the Product Information Guide.
-
Page 130: Installing A Hard Drive
Installing a Hard Drive 1. Check the documentation for the drive to verify that it is configured for your computer. NOTICE: To avoid damage to the drive, do not set it on a hard surface. Instead, set the drive on a surface, such as a foam pad, that will sufficiently cushion it. - Page 131 14. Partition and logically format your drive before you proceed to the next step. For instructions, see the documentation that came with your operating system. 15. Test the hard drive by running the Dell Diagnostics. 16. Install your operating system on the hard drive.
-
Page 132: Removing The I/O Panel
Back to Contents Page Dell™ OptiPlex™ GX620 User's Guide I/O Panel I/O Panel Removing the I/O Panel CAUTION: Before you begin any of the procedures in this section, follow the safety instructions located in the Product Information Guide. CAUTION: To guard against electrical shock, always unplug your computer from the electrical outlet before removing the cover. - Page 133 ...
-
Page 134: Removing The Processor
2 captive screw housing (2) NOTICE: If you are installing a processor upgrade kit from Dell, discard the original heat sink. If you are not installing a processor upgrade kit from Dell, reuse the original heat sink when you install your new processor. -
Page 135: Installing The Processor
center cover latch processor cover processor socket release lever NOTICE: When replacing the processor, do not touch any of the pins inside the socket or allow any objects to fall on the pins in the socket. 5. Gently remove the processor from the socket. Leave the release lever extended in the release position so that the socket is ready for the new processor. - Page 136 If you are not installing a processor upgrade kit from Dell, reuse the original heat sink assembly when you replace the processor. If you installed a processor replacement kit from Dell, return the original heat sink assembly and processor to Dell in the same package in which your replacement kit was sent.
- Page 137 3 captive screw housing (2) Replace the computer cover. Back to Contents Page ...
- Page 138 Back to Contents Page Dell™ OptiPlex™ GX620 User's Guide Power Supply Power Supply Replacing the Power Supply CAUTION: Before you begin any of the procedures in this section, follow the safety instructions located in the Product Information Guide. NOTICE: To prevent static damage to components inside your computer, discharge static electricity from your body before you touch any of your computer's electronic components.
- Page 139 11. Replace the CD/DVD drive. 12. Connect the AC power cable to the connector. Replace the computer cover. DC Power Connectors DC Power Connector P1 Pin Number Signal name 18-AWG Wire +3.3 VDC Orange +3.3 VDC Orange...
- Page 140 VCC (+5V) VCC (+5V) Black *Use 22-AWG wire instead of 18-AWG wire. DC Power Connector P2 Pin Number Signal Name 18-AWG Wire Black Black +12 VDC Yellow +12 VDC Yellow DC Power Connector P3 ...
- Page 141 Pin Number Signal name 18-AWG Wire +3.3 VDC Orange Black +5 VDC Black +12 VDC Yellow Back to Contents Page ...
-
Page 142: Desktop Computer Specifications
Back to Contents Page Dell™ OptiPlex™ GX620 User's Guide Desktop Computer Specifications Desktop Computer Specifications Microprocessor Microprocessor type Intel® Pentium® or Celeron® processor Level 1 (L1) cache 32 KB Level 2 (L2) cache 512-KB, 1-MB, or 2-MB pipelined-burst, eight-way set associative, write-back SRAM ... - Page 143 Drives two serial ATA controllers supporting one device each and one parallel Ultra ATA/100 IDE supporting two devices per channel with one channel Expansion Bus Bus type PCI 2.3 SATA 1.0a and 2.0 USB 2.0 PCI Express 1.0a Bus speed PCI: 33 MHz SATA: 1.5 Gbps and 3.0 Gbps USB: 480 Mbps...
- Page 144 Video 15-hole VGA connector Network adapter RJ45 connector Optional PS/2 with secondary serial port two 6-pin mini-DINs adapter two front-panel and six back-panel USB 2.0– compliant connectors Audio three connectors for line-in, line-out, and microphone; two front-panel connectors for headphones and microphone System board connectors: Primary IDE drive...
- Page 145 Physical Height 11.4 cm (4.5 inches) Width 39.9 cm (15.7 inches) Depth 35.3 cm (13.9 inches) Weight 10.4 kg (23 lb) Environmental Temperature: Operating 10° to 35°C (50° to 95°F) Storage –40° to 65°C (–40° to 149°F) Relative humidity 20% to 80% (noncondensing) Maximum vibration: Operating 0.25 G at 3 to 200 Hz at 0.5 octave/min Storage 0.5 G at 3 to 200 Hz at 1 octave/min Maximum shock:...
-
Page 146: About Your Small Form Factor Computer
If your operating system has ACPI enabled, when you press the power button the computer will perform an operating system shutdown. Dell badge Can be rotated to match the orientation of your computer. To rotate, place fingers around the outside of the badge, press firmly, and turn the badge. -
Page 147: Back View
11 CD/DVD drive Insert a CD or DVD (if applicable) into this drive. Back View 1 card slots Access connectors for any installed PCI and PCI Express cards. 2 back-panel Plug serial, USB, and other devices into the appropriate connector. connectors 3 power Insert the power cable. -
Page 148: Inside Your Computer
NOTE: Do not plug a telephone cable into the network connector. On computers with a network connector card, use the connector on the card. It is recommended that you use Category 5 wiring and connectors for your network. If you must use Category 3 wiring, force the network speed to 10 Mbps to ensure reliable operation. -
Page 149: System Board Components
1 drive release latch 4 hard drive 2 CD/DVD drive 5 system board 3 power supply and fan 6 heat sink and blower assembly System Board Components 1 fan connector (FAN) 10 intrusion switch connector (INTRUDER) 2 processor connector (CPU) 11 password jumper (PSWD) 3 power connector (12VPOWER) 12 battery socket (BATT) - Page 150 Jumper Setting Description PSWD Password features are enabled. (default) Password features are disabled. RTCRST The real-time clock has not been reset. (default) The real-time clock is being reset (jumpered temporarily). jumpered unjumpered Back to Contents Page ...
- Page 151 One PCI Express x1 card slot NOTE: Your Dell computer uses only PCI and PCI Express slots. ISA cards are not supported. PCI Express Cards Your computer supports one PCI Express x16 card and one PCI Express x1 card.
- Page 152 computer. CAUTION: Some network adapters automatically start the computer when they are connected to a network. To guard against electrical shock, be sure to unplug your computer from its electrical outlet before installing any cards. 7. If you are installing the card into the x16 card connector, position the card so the securing slot is aligned with the securing tab, and gently pull the securing tab.
- Page 153 4. If you are removing the card permanently, install a filler bracket in the empty card-slot opening. If you need a filler bracket, contact Dell. NOTE: Installing filler brackets over empty card-slot openings is necessary to maintain FCC certification of the computer. The brackets also keep dust and dirt out of your computer.
- Page 154 NOTE: See the documentation that came with the serial port adapter for information on configuring the adapter, making internal connections, or customizing it for your computer. 4. Place the serial-port adapter bracket in the connector and press down firmly. Ensure that the adapter is fully seated in the slot. ...
-
Page 155: Removing The Computer Cover
Back to Contents Page Dell™ OptiPlex™ GX620 User's Guide Removing the Computer Cover Removing the Computer Cover CAUTION: Before you begin any of the procedures in this section, follow the safety instructions in the Product Information Guide. CAUTION: To guard against electrical shock, always unplug your computer from the electrical outlet before removing the computer cover. -
Page 156: General Installation Guidelines
Back to Contents Page Dell™ OptiPlex™ GX620 User's Guide Drives Drives Your computer supports: One serial ATA drive One FlexBay drive (floppy drive or Media Card Reader) One CD or DVD drive 1 FlexBay for optional floppy drive or Media Card Reader... -
Page 157: Hard Drive
is usually indicated by a silk-screened "1" printed directly on the board or card. NOTICE: When you connect an IDE interface cable, do not place the colored stripe away from pin 1 of the connector. Reversing the cable prevents the drive from operating and could damage the controller, the drive, or both. -
Page 158: Installing A Hard Drive
NOTICE: Do not pull the drive out of the computer by the drive cables. Doing so may cause damage to cables and the cable connectors. 5. Lift the drive out of the computer and disconnect the power and hard-drive cables from the drive. 1 securing tabs (2) 2 hard drive ... - Page 159 1 drive 2 release tabs (2) 3 hard drive bracket 4. Connect the power and hard-drive cables to the drive. 1 power cable 2 serial ATA data cable 5. Check all connectors to be certain that they are properly cabled and firmly seated. ...
- Page 160 13. Partition and logically format your drive before you proceed to the next step. For instructions, see the documentation that came with your operating system. 14. Test the hard drive by running the Dell Diagnostics. 15. Install your operating system on the hard drive.
- Page 161 6. Remove the two screws from the side of drive and remove the drive bracket. Then disconnect the CD/DVD drive cable from the back of the drive. 1 screws (2) 2 drive bracket 3 CD/DVD drive 4 CD/DVD drive cable ...
- Page 162 7. See the documentation that came with the drive for instructions on installing any software required for drive operation. Enter system setup and select the appropriate Drive option. 9. Verify that your computer works correctly by running the Dell Diagnostics. Floppy Drive CAUTION: Before you begin any of the procedures in this section, follow the safety instructions in the Product Information Guide.
- Page 163 1 cable release tab 2 data-cable edge connector 7. Pull up on the drive release latch and slide the floppy drive towards the back of the computer. Then lift up to remove the drive from the computer. Installing a Floppy Drive NOTE: In the event the replacement or new floppy drive does not have the shoulder screws, use the screws located within the drive-panel insert.
- Page 164 9. Enter and use the Diskette Drive option to enable your new floppy drive. See the documentation that came with the drive for instructions on installing any software required for drive operation. 10. Verify that your computer works correctly by running the Dell Diagnostics. Back to Contents Page ...
- Page 165 Back to Contents Page Dell™ OptiPlex™ GX620 User's Guide I/O Panel I/O Panel Removing the I/O Panel CAUTION: Before you begin any of the procedures in this section, follow the safety instructions located in the Product Information Guide. CAUTION: To guard against electrical shock, always unplug your computer from the electrical outlet before removing the computer cover.
- Page 166 2 captive screws in housing (2) NOTICE: If you are installing a processor upgrade kit from Dell, discard the original heat sink. If you are not installing a processor upgrade kit from Dell, reuse the original heat sink when you install your new processor.
- Page 167 center cover latch processor cover processor socket release lever NOTICE: When replacing the processor, do not touch any of the pins inside the socket or allow any objects to fall on the pins in the socket. 5. Gently remove the processor from the socket. Leave the release lever extended in the release position so that the socket is ready for the new processor.
- Page 168 If you are not installing a processor upgrade kit from Dell, reuse the original heat sink assembly when you replace the processor. If you installed a processor replacement kit from Dell, return the original heat sink assembly and processor to Dell in the same package in which your replacement kit was sent.
- Page 169 3 captive screw in housing (2) Replace the computer cover. Back to Contents Page ...
-
Page 170: Small Form Factor Computer Specifications
Back to Contents Page Dell™ OptiPlex™ GX620 User's Guide Small Form Factor Computer Specifications Small Form Factor Computer Specifications Microprocessor Microprocessor type Intel® Pentium® or Celeron® processor Level 1 (L1) cache 32 KB Level 2 (L2) cache 512-KB, 1-MB, or 2-MB pipelined-burst, eight-way set associative, write-back SRAM ... - Page 171 Drives one serial ATA controller supporting one device and one parallel Ultra ATA/100 IDE supporting two devices per channel with one channel Expansion Bus Bus type PCI 2.2 SATA 1.0a and 2.0 USB 2.0 PCI Express 1.0a Bus speed PCI: 33 MHz SATA: 1.5 and 3.0 Gbps USB: 480 Mbps...
- Page 172 up only) as well as options to run hard-drive and system diagnostics Controls and Lights Power control push button Power light green light — Blinking green indicates sleep mode; solid green indicates power-on state. amber light — Blinking amber indicates a problem with an installed device;...
-
Page 173: Notes, Notices, And Cautions
Microsoft Corporation; IBM is a registered trademark of International Business Machines Corporation; Bluetooth is a trademark owned by Bluetooth SIG, Inc. and is used by Dell Inc. under license. ENERGY STAR is a registered trademark of the U.S. Environmental Protection Agency. As an ENERGY STAR partner, Dell Inc. has determined that this product... - Page 174 Other trademarks and trade names may be used in this document to refer to either the entities claiming the marks and names or their products. Dell Inc. disclaims any proprietary interest in trademarks and trade names other than its own.
-
Page 175: Solving Problems
Check the cable connections Check for software and hardware conflicts Run the Dell Diagnostics CD and DVD drive problems NOTE: Because of different regions worldwide and different disc formats, not all DVD titles work in all DVD drives. -
Page 176: Keyboard Problems
Running the Dell IDE Hard Drive Diagnostics — The Dell IDE Hard Drive Diagnostics is a utility that tests the hard drive to troubleshoot or confirm a hard drive failure. 1. Turn on your computer (if your computer is already on, restart it). 2. When F2 = Setup appears in the upper-right corner of the screen, press <Ctrl><Alt><d>. -
Page 177: The Computer Does Not Start Up
NOTE: If you installed a unique image on your computer or if you had to reinstall your operating system, run the DSS utility. DSS is available on your Drivers and Utilities CD and at support.dell.com. ® ® NOTE: You must use Microsoft Windows XP Service Pack 1 or later when you reinstall Windows XP. -
Page 178: Memory Problems
Use a virus-scanning program to check the hard drive, floppy disks, or CDs Save and close any open files or programs and shut down your computer through the Start menu Run the Dell Diagnostics — If all tests run successfully, the error condition is related to a software problem. Memory Problems NOTE: Your computer might emit a series of beeps (beep code) during start-up if the monitor cannot display errors or problems. -
Page 179: Network Problems
Mouse Port option is set to On. 2. Exit system setup and restart the computer. Reinstall the mouse driver Run the Dell Diagnostics Check for software and hardware conflicts Network Problems Fill out the Diagnostics Checklist as you complete these checks. -
Page 180: Printer Problems
If the power light is blinking amber — The computer is receiving electrical power, but an internal power problem might exist. Ensure that the voltage selection switch is set to match the AC power at your location (if applicable). Ensure that the processor power cable is securely connected to the system board. ... -
Page 181: Serial Or Parallel Device Problems
Serial Port #1 setting (or the Serial Port #2 settings if you have an optional serial port adapter installed) or the LPT Port Mode setting matches the recommended settings. Run the Dell Diagnostics Sound and Speaker Problems Fill out the Diagnostics Checklist as you complete these checks. -
Page 182: No Sound From Headphones
Run the Dell Diagnostics Check for software and hardware conflicts No sound from headphones Check the headphone cable connection — Ensure that the headphone cable is securely inserted into the headphone connector. Disable digital mode — Your headphones do not work if the CD drive is operating in digital mode. - Page 183 Check the monitor settings — See the monitor documentation for instructions on adjusting the contrast and brightness, demagnetizing (degaussing) the monitor, and running the monitor self-test. Move the subwoofer away from the monitor — If your speaker system includes a subwoofer, ensure that the subwoofer is at least 60 cm (2 ft) away from the monitor. Move the monitor away from external power sources — Fans, fluorescent lights, halogen lamps, and other electrical devices can cause the screen image to appear "shaky."...
-
Page 184: Mini Tower Computer
Microsoft Corporation; IBM is a registered trademark of International Business Machines Corporation; Bluetooth is a trademark owned by Bluetooth SIG, Inc. and is used by Dell Inc. under license. ENERGY STAR is a registered trademark of the U.S. Environmental Protection Agency. As an ENERGY STAR partner, Dell Inc. has determined that this product... - Page 185 ENERGY STAR guidelines for energy efficiency. Other trademarks and trade names may be used in this document to refer to either the entities claiming the marks and names or their products. Dell Inc. disclaims any proprietary interest in trademarks and trade names other than its own.
- Page 186 ENERGY STAR guidelines for energy efficiency. Other trademarks and trade names may be used in this document to refer to either the entities claiming the marks and names or their products. Dell Inc. disclaims any proprietary interest in trademarks and trade names other than its own.
-
Page 187: Troubleshooting Tools And Utilities
2. When the DELL™ logo appears, press <F12> immediately. NOTE: If you see a message stating that no diagnostics utility partition has been found, run the Dell Diagnostics from your Drivers and Utilities CD (optional). If you wait too long and the operating system logo appears, continue to wait until you see the Microsoft® Windows® desktop. Then shut down your computer and try again. -
Page 188: Dell Diagnostics Main Menu
NOTE: The Service Tag for your computer is located at the top of each test screen. If you contact Dell, technical support will ask for your Service Tag. Your computer's Service Tag is listed in the System Info option in system setup. -
Page 189: Diagnostic Lights
If the computer does not boot, contact Dell for technical assistance. Blinking yellow A power supply or system board failure has occurred. "Power Problems." Solid green and a beep code during A problem was detected while the BIOS was executing. -
Page 190: Beep Codes
If your computer beeps during start-up: 1. Write down the beep code on the Diagnostics Checklist. 2. Run the Dell Diagnostics to identify a more serious cause. Contact Dell for technical assistance. ... -
Page 191: Error Messages
4. See the program documentation for installation instructions. Alert! Previous attempts at booting this system have failed at checkpoint [nnnn]. For help in resolving this problem, please note this checkpoint and contact Dell Technical Support — Contact Dell and report the checkpoint code (nnnn) to the support technician. Attachment failed to respond —... - Page 192 No timer tick interrupt — Run the Dell Diagnostics. Non-system disk or disk error — Replace the floppy disk with one that has a bootable operating system or remove the floppy disk from drive A and restart the computer.
-
Page 193: Resolving Software And Hardware Incompatibilities
Dell Diagnostics. WARNING: Dell's Disk Monitoring System has detected that drive [0/1] on the [primary/secondary] EIDE controller is operating outside of normal specifications. It is advisable to immediately back up your data and replace your hard drive by calling your support desk or Dell — If no replacement drive is immediately available and the drive is not the only bootable drive,... - Page 194 1. Click the Start button and click Control Panel. 2. Click Performance and Maintenance and click System. 3. Click the Hardware tab and click Device Manager. 4. In the Device Manager list, check for devices that are incorrectly configured. Incorrectly configured devices are indicated by a yellow exclamation point (!) or a red X if the device has been disabled.
-
Page 195: Ultra Small Form Factor Computer
Microsoft Corporation; IBM is a registered trademark of International Business Machines Corporation; Bluetooth is a trademark owned by Bluetooth SIG, Inc. and is used by Dell Inc. under license. ENERGY STAR is a registered trademark of the U.S. Environmental Protection Agency. As an ENERGY STAR partner, Dell Inc. has determined that this product... - Page 196 Other trademarks and trade names may be used in this document to refer to either the entities claiming the marks and names or their products. Dell Inc. disclaims any proprietary interest in trademarks and trade names other than its own.
-
Page 197: About Your Ultra Small Form Factor Computer
Back to Contents Page Ultra Small Form Factor Computer Dell™ OptiPlex™ GX620 User's Guide About Your Ultra Small Form Factor Computer Inside Your Computer Connecting the Power Adapter Badge About Your Ultra Small Form Factor Computer NOTICE: When setting up your computer, secure all cables toward the back of your work area to prevent the cables from being pulled, tangled, or stepped on. - Page 198 The vents, which are on each side of the computer, allow air to flow through your computer. To ensure proper ventilation, do not block these 1 vents cooling vents. Back View 1 diagnostic lights "Diagnostic Lights" for a description of light codes that can help you troubleshoot problems with your computer. 2 computer cover release knob Rotate this knob in a clockwise direction to remove the cover.
-
Page 199: Connecting A Vga Monitor
line-in Use the blue line-in connector to attach a record/playback device such as a cassette player, CD player, or VCR. connector Connect USB devices such as a mouse, keyboard, printer, joystick, and computer speakers into any of the USB connectors. connectors (5) serial Connect a serial device, such as a handheld device, to the serial connector. - Page 200 1 heat sink assembly 4 hard drive 2 speaker (optional) 5 security cable slot 3 memory modules (2) 6 chassis intrusion switch System Board Components 1 fan connector (FAN_FRONT) battery 2 internal speaker connector (INT_SPKR) 9 clear CMOS jumper (RTCRST) 3 system board speaker (BEEP) 10 password jumper (PSWD) 4 channel B memory connector (DIMM_2) 11 hard-drive power connector (SATA_PWR)
-
Page 201: Cable Cover (Optional)
Jumper Setting Description PSWD Password features are enabled. (default) Password features are disabled. RTCRST The real-time clock has not been reset. (default) The real-time clock is being reset (jumpered temporarily). jumpered unjumpered Cable Cover (Optional) ... -
Page 202: Connecting The Power Adapter
1 release button 1. If a security device is installed in the security cable slot, remove the device. 2. Press on the release button, grasp the cable cover, and slide the cover to the left until it stops, and then lift the cable cover up and away. Connecting the Power Adapter ... - Page 203 green light — solid green indicates the power adapter is connected to an AC outlet and the computer. amber light — solid amber indicates the power adapter is connected to an AC outlet but not the computer. The computer will not operate in this condition.
- Page 204 Back to Contents Page Dell™ OptiPlex™ GX620 User's Guide Removing the Computer Cover Removing the Computer Cover CAUTION: Before you begin any of the procedures in this section, follow the safety instructions in the Product Information Guide. NOTICE: To prevent static damage to components inside your computer, discharge static electricity from your body before you touch any of your computer's electronic components.
- Page 205 Back to Contents Page Dell™ OptiPlex™ GX620 User's Guide Drives Drives Your computer supports: One serial ATA hard drive One optional D-module CD/DVD drive, second hard drive, or floppy drive in the module bay General Installation Guidelines NOTE: For information on installing D-module drives, see the documentation that came with your optional device.
- Page 206 1 power cable 2 power input connector Connecting and Disconnecting Drive Cables When removing an IDE drive data cable, grasp the colored pull-tab and pull until the connector detaches. When connecting and disconnecting a serial ATA data cable, hold the cable by the black connector at each end. Like IDE connectors, the serial ATA interface connectors are keyed for correct insertion;...
- Page 207 12. Reboot the computer. 13. Partition and logically format your drive before you proceed to the next step. For instructions, see the documentation that came with your operating system. 14. Test the hard drive by running the Dell Diagnostics. ...
- Page 208 15. Install your operating system on the hard drive. For instructions, see the documentation that came with your operating system. Back to Contents Page ...
-
Page 209: Module Bay
You can install a Dell™ portable device such as a floppy drive, CD/DVD drive, or second hard drive in the module bay. Your Dell computer ships with either a CD/DVD drive or an airbay (filler blank) installed in the module bay. You can secure a device in the module bay by two methods: Locking switch (accessed by removing the computer cover) -
Page 210: Securing A Device In The Module Bay
1 device latch release NOTICE: Do not place any heavy objects on top of the computer. Doing so may bend the chassis and cause difficulty in removing a module device. 4. Pull the device by the latch release to remove the device from the module bay. 1 latch release ... - Page 211 Replace the computer cover. The module cannot be removed from the computer until the module locking switch is unlocked by pulling it up into its original position. 2. You may also secure a device in the module bay by using a device screw (packaged separately). 1 bottom of computer 2 device locking screw Back to Contents Page...
- Page 212 Back to Contents Page Dell™ OptiPlex™ GX620 User's Guide Processor Processor CAUTION: Before you begin any of the procedures in this section, follow the safety instructions in the Product Information Guide. CAUTION: To guard against electrical shock, always unplug your computer from the electrical outlet before removing the cover.
- Page 213 top of heat sink heat sink retention base release lever c. Gently lift the heat sink from the processor. NOTICE: Lay the heat sink down on its top, with the thermal grease facing upward. 4. Pull the release lever straight up until the processor is released, and then remove the processor from the socket. center cover latch processor cover processor...
- Page 214 5 center cover latch If you are installing a processor replacement kit from Dell, return the processor to Dell in the same package in which your replacement kit was sent. NOTICE: Ground yourself by touching an unpainted metal surface on the back of the computer.
-
Page 215: Ultra Small Form Factor Computer Specifications
Back to Contents Page Dell™ OptiPlex™ GX620 User's Guide Ultra Small Form Factor Computer Specifications Ultra Small Form Factor Computer Specifications Microprocessor Microprocessor type ® ® Intel® Pentium or Celeron processor Level 1 (L1) cache 32 KB Level 2 (L2) cache 512-KB, 1-MB, or 2-MB pipelined-burst, eight-way set associative, write-back SRAM ... - Page 216 Drives one serial ATA controller supporting one device Expansion Bus Bus type SATA 1.0a and 2.0; USB 2.0 Bus speed SATA: 1.5 and 3.0 Gbps; USB: 480 Mbps Drives Externally accessible one D-module bay for a CD/DVD drive, second hard drive, or floppy drive Internally accessible one bay for a 1-inch-high hard drive...
- Page 217 Diagnostic lights Four lights on the back panel. See "Diagnostic Lights." Standby power light AUX_PWR on the system board Power DC power supply Wattage 220-W external supply Heat dissipation 751 BTU/hr NOTE: Heat dissipation is calculated based upon the power supply wattage rating.
-
Page 218: Warranty
User's Guide Dell Inc. ("Dell") manufactures its hardware products from parts and components that are new or equivalent to new in accordance with industry-standard practices. For information about the Dell warranty for your computer, see the Product Information Guide or separate paper warranty document that shipped with your computer. -
Page 219: Microsoft® Windows® Xp Features
Back to Contents Page Microsoft® Windows® XP Features Dell™ OptiPlex™ GX620 User's Guide Transferring Information to a New Computer User Accounts and Fast User Switching Setting Up a Home and Office Network Transferring Information to a New Computer The Microsoft Windows XP operating system provides a Files and Settings Transfer wizard to move data from the source computer to the new computer. You can move data such as: E-mails... -
Page 220: User Accounts And Fast User Switching
User Accounts and Fast User Switching Adding User Accounts After the Microsoft Windows XP operating system is installed, the administrator or a user with administrator rights can create additional user accounts. 1. Click the Start button and click Control Panel. ... - Page 221 1. Click the Start button, point to All Programs® Accessories® Communications, and then click Network Setup Wizard. 2. On the welcome screen, click Next. 3. Click Checklist for creating a network. NOTE: Selecting the connection method This computer connects directly to the Internet enables the integrated firewall provided with Windows XP SP1.