Table of Contents
Advertisement
Advertisement
Table of Contents

Related Manuals for Philips VIDEOPLUS VR630/07


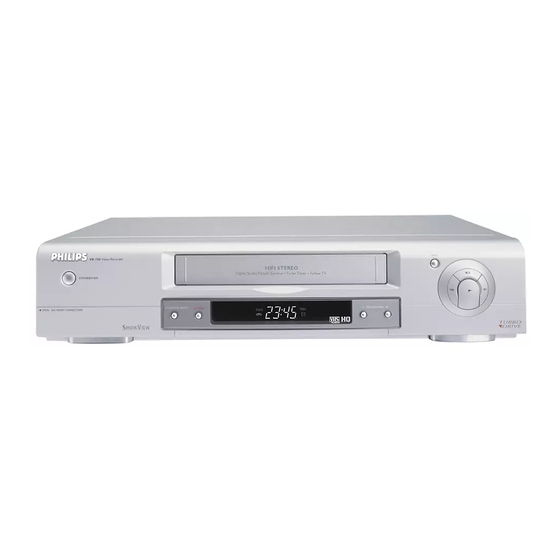
Summary of Contents for Philips VIDEOPLUS VR630/07
- Page 1 VR630/07 VR730/07 VR732/07 VR830/07 VRQ45/07 VR830...
-
Page 2: Table Of Contents
Table of Contents 1. Connecting the video recorder ... .4 Important for the United Kingdom Preparing the remote control for operation Connecting your video recorder to the TV set Connecting with a scart cable and ‘Easy Link’... -
Page 3: Important Notes Regarding Operation
OPERATING INSTRUCTIONS Thank you for buying a Philips video recorder. This video recorder is one of the most sophisti- cated and easy-to-use video recorders (VCR) on the market. Please take the time to read this operating manual before using your video recorder. -
Page 4: Connecting The Video Recorder
Audio and Video chain (TV, VCR, DVD, Dolby Surround amplifier etc...) If both your TV and your VCR are equipped with one of the following features: Easy Link, NextView Link, Megalogic, Datalogic, Cinema Link (all compatible with one another), your VCR can exchange information with your TV. -
Page 5: Connecting With A Scart Cable
Insert AC cable into the wall socket. Switch on this video recorder. The following screen will appear on the TV screen. PLEASE CONNECT AERIAL OR CABLE TO THE VCR THEN... PUSH P + KEY OR... FOR PLAY ONLY - PUSH PLAY... -
Page 6: Connecting Without A Scart Cable
TV's channel search as if you want- ed to save a new TV channel until the 'test image' appears. PLEASE CONNECT AERIAL OR CABLE TO THE VCR THEN... PUSH P + KEY OR... FOR PLAY ONLY - PUSH PLAY I do not see a TV channel search picture * Check the cable connections. -
Page 7: Important Notes For Operation
To cancel: with CLEAR To end: with STATUS/EXIT SELECT K L CHOOSE B TIMER RECORD SET UP VCR SET UP TUNER SET UP INITIAL SET UP END=EXIT The symbols on your video recorder display PWR. These symbols can light up on your video recorder display: When you keep your video recorder on. -
Page 8: Installing Your Video Recorder
3. Installing your video recorder Preparation for use This chapter shows you how to prepare the video recorder for use. The video recorder automatically seeks out and stores all available TV channels. 'Aim' correctly In the following sections, you require the remote control for the first time. -
Page 9: Manual Tv Channel Search
Manual TV channel search In some cases it can occur that all TV channels are not found and saved during the first installa- tion. In this case, the missing TV channels must be searched for and stored manually. Switch on the TV set. If required, select the programme number for the video recorder. -
Page 10: Sorting Tv Channels Automatically (Follow Tv)
What does Easy Link do ? With Easylink, TV channels are always trans- fered from the TV to the VCR. A new TV chan- nel must be tuned on the TV set. The transfer is then done automatically to the VCR. -
Page 11: Sorting And Clearing Tv Channels Manually
Sorting and clearing TV channels manually After you have performed the automatic channel search you may not agree with the sequence in which the individual TV channels have been allo- cated to the programme positions (programme numbers) of the video recorder. You can use this function to individually sort the TV channels already saved or to delete unwanted TV chan- nels or those with poor reception. -
Page 12: Setting The Rf Out Channel
Setting the RF out channel In some reception locations it is possible that a TV channel will be sent on the same or similar frequency as the video recorder. Result: As soon as the video recorder is switched on, the reception quality for this or sev- eral other TV channels will decrease. -
Page 13: Tape List [Vrq45]
4. Tape List [VRQ45] General information 'Tape List' helps you keep track of which movie is on which cassette. Tape List gives you also a quick and easy access to recordings. If desired, the video recorder will rewind to the beginning of the selected recording and auto- matically start playback. -
Page 14: Searching For A Title In The Tape List
Press on the remote control. An TAPE LIST overview of all saved titles/cassettes from the Tape List appears on the screen. I can see the message 'TAPE LIST- MEMORY EMPTY' * There are no recordings saved in the Tape List. Therefore, it is not possible to add or change a title. -
Page 15: Playback
5. Playback Playing cassettes You can use this video recorder to play back recorded VHS videocassettes. You can operate the video recorder using the remote control or the buttons on the front of the video recorder. Your video recorder can only record and play standard VHS cassettes. -
Page 16: Searching For A Tape Position With Picture(Scanning)
Searching for a tape position with picture (scanning) While a cassette is playing, press (reverse) or (forward) one or more times. Press to resume playback. Still picture / slow motion During playback, press STILL tape and display a still picture. During playback, press SLOW tape in slow motion. -
Page 17: Manual Recording
6. Manual recording General information Use 'Manual Recording' to make a sponta- neous recording (for example, a programme cur- rently being shown). If you want to start and stop a recording manual- ly, read the section 'Recording without auto- matic switch-off'. If you want to start a recording manually but have it stopped automatically, read the section 'Recording with automatic switch-off'. -
Page 18: Selecting The Recording Speed (Sp Or Lp)
Now start recording as usual by pressing on the remote control. RECORD/OTR I Stop recording with Selecting the recording speed (SP or LP) LP allows to double the recording duration on tape (for example six hours instead of three hours on an E180 cassette). -
Page 19: Direct Record
'Direct Record' With Direct Record, you can record the right TV channel in seconds even if your video recorder is switched off. If the recording is started manually, the video recorder uses the current TV channel set on the TV. You will find more information on how to switch 'Direct Record' on or off in the next section. -
Page 20: Programming A Recording (Timer)
7. Programming a recording (TIMER) General information Use a TIMER programming to automatically start and stop a recording at a later time or date. The video recorder will switch to the right programme number and begin recording at the correct time. With this video recorder, you can pre-programme up to eight recordings within a period of one year. -
Page 21: Problems And Solutions For Programmed Recordings
If you want to cancel the programmed recording, press 'TURN OFF VCR FOR TIMER RECORDING' flashes on the TV screen * The video recorder was switched on several min- utes before the start of a programmed recording. -
Page 22: Problems And Solutions For Programmed Recordings
6.With buttons you can enter 'START' 0..9 (start time) , 'STOP' (end time) , 'PROG.' (pro- gramme number) ‘VPS/PDC’ and 'DATE'. Programme numbers of the ' AV1 ' and ' AV2 ' scart socket You can also programme recordings from exter- nal sources via scart socket AV1(TV)or AV2 (DECODER). -
Page 23: Set Top Box Control [Vr830]
CDTV200 CDTV350 . The main menu will appear. MENU . Then press . Then press 0..9 ONCE TIMER START 11:30 STOP 12:30 PROG. VCR=1, SAT=2 CORRECT=CLEAR END=EXIT buttons you can enter 'START' (start 0..9 0..9 . The programming information 0..9... -
Page 24: Problems And Solutions For Programmed Recordings
Switch off the video recorder with . A programmed recording (timer) will only func- tion if the video recorder is switched off. 'TURN OFF VCR FOR TIMER RECORDING' appears on the screen * The video recorder was switched on several minutes before the start of a programmed recording. -
Page 25: Other Functions
This function is activated or deactivated as follows. Press . The main menu will appear. MENU Select line 'VCR SET UP' using and confirm with Select 'REPEAT PLAY' using SELECT K L CHOOSE B REPEAT PLAY... -
Page 26: Selecting The Sound Channel
Select 'AUTO STANDBY' using SELECT K L CHOOSE B REPEAT PLAY STATUS DISPLAY BLUE BACKGROUND [ON] AUTO STANDBY END=EXIT Select 'OFF' (no automatic switch-off) or 'ON' (automatic switch-off) with To end, press STATUS/EXIT Selecting the sound channel You can select the desired sound channel during playback or while receiving TV channels via the video recorder. -
Page 27: Before You Call An Engineer
9. Before you call an engineer If, contrary to expectation, you have any prob- lems using this video recorder, it may be caused by the following reasons. Your video recorder does not respond to any button being pressed: * There is no power supply: check the power supply. - Page 28 PHILIPS NORGE AS PHILIPS AUSTRIA GMBH Sandstuveien 70, Triesterstrasse 64 PO Box 1, Manglerud 1101 Wien N-0612 Oslo AUSTRIA NORWAY Tel: 0810 001 203 Phone: 2274 8250 OY PHILIPS AB PHILIPS INFO CENTER Sinikalliontie 3, Alexanderstrasse 1 02630 Espoo 20099 Hamburg FINLAND GERMANY puh.