Table of Contents
Advertisement
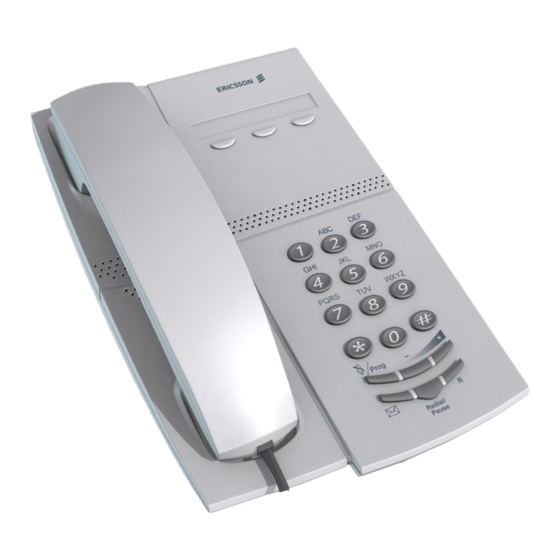
Dialog 4106 Basic/Dialog 4147 Medium
?
Cover Page Graphic
Place the graphic directly on the page, do not care about
putting it in the text flow. Select Graphics > Properties
and make the following settings:
•
Width: 15,4 cm (Important!)
•
Height: 11,2 cm (May be smaller)
•
Top: 5,3 cm (Important!)
•
Left: -0,3 cm (Important!)
This text should then be hidden.
Analog Telephones
User Guide
Advertisement
Table of Contents

Related Manuals for Ericsson Dialog 4106 Basic


Summary of Contents for Ericsson Dialog 4106 Basic
-
Page 1: User Guide
Dialog 4106 Basic/Dialog 4147 Medium Analog Telephones User Guide Cover Page Graphic Place the graphic directly on the page, do not care about putting it in the text flow. Select Graphics > Properties and make the following settings: • Width: 15,4 cm (Important!) •... - Page 2 Title EN/LZT 103 78 R1A © Ericsson Enterprise AB 2004...
-
Page 3: Table Of Contents
Table of Contents page General Information .......... 5 Description ............7 Incoming Calls ..........12 Outgoing Calls ..........13 During Calls ............ 18 Settings ............20 Installation ............27 Troubleshooting ..........32 Index .............. 33 Dialog 4106 Basic/Dialog 4147 Medium... - Page 4 Table of Contents Dialog 4106 Basic/Dialog 4147 Medium...
-
Page 5: General Information
No parts of this publication may be subject to alteration, modification or commercial use. Ericsson will not be liable for any damages arising from use of an illegal modified or altered publication. -
Page 6: Declaration Of Conformity
General Information Declaration of Conformity Hereby, Ericsson Enterprise AB, SE-131 89 Stockholm, declares that this telephone is in conformity with the essential requirements and other relevant provisions of the R&TTE directive 1999/5/EC. Details to be found at: http://www.ericsson.com/sdoc Dialog 4106 Basic/Dialog 4147 Medium... -
Page 7: Description
Description Description Dialog 4106 Basic (bottom side) Dialog 4106 Basic/Dialog 4147 Medium... - Page 8 See section “Settings” on page Loudspeaker (beneath handset) Handset with hearing aid function Please note: The handset may attract and retain small metal objects in the earcap region. Dialog 4106 Basic/Dialog 4147 Medium...
-
Page 9: Dialog 4147 Medium
Description Dialog 4147 Medium (upper side) (bottom side) Dialog 4106 Basic/Dialog 4147 Medium... - Page 10 See section “Settings” on page b. At the loudspeaker position, the loudspeaker key activates the loudspaker. See section “Settings” on page Prog On/Off switch Enable or disable the program key. See section “Settings” on page Dialog 4106 Basic/Dialog 4147 Medium...
- Page 11 Data port for connection of a modem, PC or other telephone equipment. Loudspeaker (beneath handset) Handset with hearing aid function Please note: The handset may attract and retain small metal objects in the earcap region. Dialog 4106 Basic/Dialog 4147 Medium...
-
Page 12: Incoming Calls
Incoming Calls Incoming Calls A ring signal indicates an incoming call. Answer calls Lift the handset. Replace the handset to end the call. Dialog 4106 Basic/Dialog 4147 Medium... -
Page 13: Outgoing Calls
12345678-1234. To wait for a new dial tone, you have to store a © pause before the extension number. Press. The phone number is dialed without the extension, in this example © 12345678. Press when the new dial tone is received. Now the extension number is dialed. Dialog 4106 Basic/Dialog 4147 Medium... -
Page 14: Last Number Redial
To do this, press the Redial/Pause key at the proper place in the number. See section “Wait for dial tone” on page Lift the handset. © Press to redial the last dialed number. Dialog 4106 Basic/Dialog 4147 Medium... -
Page 15: Dial By A Function Key
Press to make a call (pre-programmed). Head Office Notes: To dial a number that is stored on the second level, press the Message Waiting/2nd key before pressing the pre- programmed key. Only for Dialog 4147. Dialog 4106 Basic/Dialog 4147 Medium... - Page 16 Because of the special label material, you can also erase and re-write any key name. If you press an invalid key during programming, the programming mode will be terminated automatically and you will hear a special rejection tone. Dialog 4106 Basic/Dialog 4147 Medium...
- Page 17 You can remove the transparent cover in order to write the names beside the keys. If you press an invalid key during programming, the programming mode will be terminated automatically and you will hear a special rejection tone. Dialog 4106 Basic/Dialog 4147 Medium...
-
Page 18: During Calls
During an ongoing conversation: Press to switch between loudspeaker and handset. When the key lamp is lit, the other party´s voice is heard on the loudspeaker. Note: You can adjust the volume, see section “Settings” on page Dialog 4106 Basic/Dialog 4147 Medium... - Page 19 Press to switch the microphone on or off. When the lamp lights, the caller will not be able to hear the conversation in your room. Note: Mute key looks slightly different on the Dialog 4147 phone. Dialog 4106 Basic/Dialog 4147 Medium...
-
Page 20: Settings
Adjust the handset listening volume when the handset is off hook. • Adjust the headset listening volume when the headset is activated. • Adjust the loudspeaker volume when dial tone is heard via the ì loudspeaker. Press to change the volume. Dialog 4106 Basic/Dialog 4147 Medium... -
Page 21: Programming Of Ring Signal
Please note also that you will not hear the ring signal during ¥ programming. Press. The selected ring signal is stored. Replace the handset to finish the procedure. Dialog 4106 Basic/Dialog 4147 Medium... - Page 22 – Repetition rate 1 time 2 times 4 times 6 times 10 times î Note: Default setting is digit 0. Program Press. The selected ring character is stored. Replace the handset to finish the procedure. Dialog 4106 Basic/Dialog 4147 Medium...
- Page 23 Switch off/on ring signal: Lift the handset. î Wait for the dial tone. Program Press. Press. Press. î 0=Off and 1=On. Default setting is digit 1. Program Press. Replace the handset to finish the procedure. Dialog 4106 Basic/Dialog 4147 Medium...
-
Page 24: Hearing Aid Compatibility
Via a switch it is possible to enable or disable the program key. When the switch is set in the Off position, no programming is possible (i.e. the memory content is locked). At the bottom side of your phone: Slide the switch to the required position. Dialog 4106 Basic/Dialog 4147 Medium... - Page 25 Slide the switch to the required position.  Answer calls Press to answer. Ä Â Press to end the call. Make calls  With the handset on hook. Press. Dial the number. Ä Â Press to end the call. Dialog 4106 Basic/Dialog 4147 Medium...
-
Page 26: Flash Time
Change flash time: Lift the handset. î Wait for the dial tone. Program Press. Press. Press. î 0=100 ms and 1=600 ms. Default setting is digit 0. Program Press. Replace the handset to finish the procedure. Dialog 4106 Basic/Dialog 4147 Medium... -
Page 27: Installation
Note: The headset and the data port connections are for use with the Dialog 4147 phone only. For headset servicing and replacement, contact your local service centre or retailer shop. To change cables: Use a screwdriver to unlock the stop, and remove the cable. Dialog 4106 Basic/Dialog 4147 Medium... -
Page 28: Install Stands And Adapt Telephone
Installation Install stands and adapt telephone Position high Position low Press to fasten stand Release to remove stand Dialog 4106 Basic/Dialog 4147 Medium... -
Page 29: Install Card
Use the Designation Card Manager to make and print your own designation cards. The Designation Card Manager is included on the Telephone Toolbox CD for MD110 Communication System. For more information, please contact your Ericsson Enterprise certified sales partner. Dialog 4106 Basic/Dialog 4147 Medium... -
Page 30: Wall Mounting
Use a screwdriver to remove the handset hook. Turn the hook upside down and insert. Use a screwdriver to remove the two plastic covers. Drill wall holes according to measure. Mount screws according to measures and attach the phone. Dialog 4106 Basic/Dialog 4147 Medium... -
Page 31: Placing The Telephone
Do not use rough cloth, solvents or aggressive cleaning fluids. Any damages of the telephone, that are caused by non-observance of these instructions, are not part of the liability given by the manufacturer. Dialog 4106 Basic/Dialog 4147 Medium... -
Page 32: Troubleshooting
If that telephone is working properly, the problem is probably in your telephone, contact your system administrator. 5. Check for operational problems. If operational problems are found, the problem is in the telephone network, contact the local telephone service or the local telephone company. Dialog 4106 Basic/Dialog 4147 Medium... -
Page 33: Index
Last Number Redial 14 Make calls 13 Outgoing calls Handset, headset and loudspeaker volume 20 Bypass 15 Headset 25 Number presentation restriction 14 Hearing aid compatibility 24 Placing the telephone 31 Programming of ring signal 21 Dialog 4106 Basic/Dialog 4147 Medium... - Page 34 Troubleshooting 32 Flash time 26 Fault check list 32 Handset, headset and loudspeaker volume 20 Headset 25 Wall mounting 30 Hearing aid compatibility 24 Warranty 5 Message Waiting indication 24 Programming of ring signal 21 Dialog 4106 Basic/Dialog 4147 Medium...
- Page 35 Ericsson is shaping the future of Mobile and Broadband Internet communications through its continuous technology leadership. Providing innovative solutions in more than 140 countries, Ericsson is helping to create the most powerful communication companies in the world. Ericsson Enterprise AB All rights reserved.