
Related Manuals for Samsung SGH-I747M


Summary of Contents for Samsung SGH-I747M
- Page 1 SGH-I747M M O B I L E P H O N E User Manual Please read this manual before operating your phone, and keep it for future reference.
-
Page 2: Intellectual Property
Intellectual Property All Intellectual Property, as defined below, owned by or which is otherwise the property of Samsung or its respective suppliers relating to the SAMSUNG Phone, including but not limited to, accessories, parts, or software relating there to (the “Phone System”), is proprietary to Samsung and protected under federal laws, state laws, and international treaty provisions. - Page 3 THERETO. NOTHING CONTAINED IN THE INSTRUCTION MANUAL SHALL BE CONSTRUED TO CREATE AN EXPRESS OR IMPLIED WARRANTY OF ANY KIND WHATSOEVER WITH RESPECT TO THE PRODUCT. IN ADDITION, SAMSUNG SHALL NOT BE LIABLE FOR ANY DAMAGES OF ANY KIND RESULTING FROM THE PURCHASE OR USE OF THE PRODUCT OR ARISING FROM THE BREACH OF THE EXPRESS WARRANTY, INCLUDING INCIDENTAL, SPECIAL OR CONSEQUENTIAL DAMAGES, OR LOSS OF ANTICIPATED PROFITS OR BENEFITS.
- Page 4 ® ABOUT DIVX VIDEO-ON-DEMAND: This DivX Certified device must be registered in order to play purchased DivX Video-on-Demand (VOD) movies. To obtain your registration code, locate the DivX VOD section in your device setup menu (tap Apps > Settings > About device > Legal information >...
-
Page 5: Table Of Contents
Making a Call from the Address Book .....39 Creating a Samsung Account ......7 Answering a Call . - Page 6 Editing an Existing Contact ......59 Using Gmail ........87 Using Contacts .
- Page 7 Camera ......... . 135 Samsung Apps ........150 ChatON .
-
Page 9: Section 1: Getting Started
Section 1: Getting Started This section explains how to start using your phone by first configuring your hardware, activating your service, and then setting up your voice mail. Setting Up Your Phone Prior to use it is necessary to install both the battery and SIM into their corresponding internal compartments. -
Page 10: Installing The Sim Card
If necessary, remove the battery. Carefully slide the SIM card into the SIM card socket (as shown) until the card locks into place. • Make sure that the card’s gold contacts face into the phone and that the upper-left angled corner of the card is positioned as shown. - Page 11 Installing the Battery Installing the Memory Card Insert the battery into the opening on the back of the phone, Push the microSD card into the slot until it clicks (as shown). making sure the connectors align (1). • Make sure the microSD’s gold contact pins face downward and the card is securely inserted.
-
Page 12: Charging A Battery
Travel Charger that is used to charge the battery, is included with your device. Use only Samsung-approved batteries and chargers. Note: Long backlight settings, searching for service, vibrate mode, web browser use, and other variables may reduce the battery’s talk and standby times. -
Page 13: Low Battery Indicator
Warning!: The touch screen responds best to a light touch from the pad of your finger. Using excessive force or a metallic object when pressing on the touch screen may damage the tempered glass surface and void the warranty. Note: Failure to unplug the wall charger before you remove the battery, can cause damage to the phone. -
Page 14: Switching The Phone On Or Off
Switching the Phone On or Off Note: The display language is preset to English at the factory. To change the Press and hold (on the upper right side of the language, use the Language menu. For more information, refer to “Changing Your Settings”... -
Page 15: Creating A Samsung Account
At the Use Google location screen, a blue checkmark appears next to the text that explains that you allow With a Samsung account, you will be able to use Samsung Google’s location service to collect anonymous location services such as AppCenter on your phone. -
Page 16: Creating A New Google Account
Tap Create account and follow the onscreen instructions to Note: Once you have created a Google account, you only need to sign in. create a Samsung account. Retrieving your Google Account Password Tap Terms and conditions, read the content and tap OK, A Google account password is required for Google applications. -
Page 17: Android System Recovery
You may be prompted to enter a password. Once the Samsung Galaxy S III logo appears, release the Power key while continuing to press the Volume Up key. When connected, follow the voice prompts from the voice Continue to press the Volume Up and Home keys for at mail center. -
Page 18: Safe Mode
Safe Mode You can boot your phone into Safe Mode if you wish to troubleshoot whether or not added applications are causing problems with the device. Safe mode will only load basic system software. Make sure your phone is turned off. Press and hold the power key ( ) to boot up your device. -
Page 19: Section 2: Understanding Your Phone
Section 2: Understanding Your Phone This section outlines some key features of your phone and 16GB/32GB built-in memory (on-board) • describes the screen and the icons that appear when the phone is Up to 64 GB expandable memory slot • in use. -
Page 20: Front View Of Your Phone
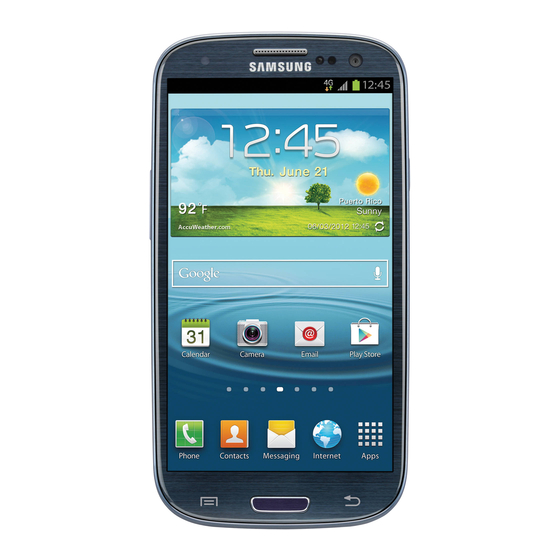
Front View of Your Phone notification has arrived. External speaker: allows you to hear the caller. Application icons: you can place shortcuts to your favorite applications on the Home screen. Primary shortcuts: allows quick access to important features such as Phone, Contacts, Messaging, Internet, and Apps. -
Page 21: Side Views Of Your Phone
Side Views of Your Phone AccuWeather screen: displays Time, Day, Date, Temperature and weather conditions for your area. Indicator icons: shows the information needed to operate your phone, such as the received signal strength, phone battery level, time, unread Emails, missed calls, etc. Front facing camera: allows you to take pictures of yourself when you set the camera shooting mode to Self shot. -
Page 22: Rear View Of Your Phone
Rear View of Your Phone 3.5mm Headset jack: allows you to plug in headphones. Volume keys: allow you to adjust the ringer volume while in standby mode or adjust the voice volume during a call. When receiving an incoming call, briefly press either volume key ( to mute the ring tone. -
Page 23: Display Layout
Display Layout Indicator Icons Your display screen provides a wealth of information about the This list identifies the symbols you’ll see on your phone’s display phone’s status and options, as well as providing access to and Indicator area: application icons. For more information, refer to “Front View of Displays your current signal strength. - Page 24 Displays when a call has been missed. Displays when your phone is communicating with the UTMS network. Displays when a call has been muted. Displays when your connection to an HSDPA, HSPA, or HSPA+ network is active. Displays when Call forwarding is set to Always forward. Displays when your phone is communicating with the For more information, refer to “Sound Settings”...
- Page 25 Displays when Bluetooth is activated. Displays when the phone is connected to a computer via a supported USB cable connection. Displays when a Bluetooth device has been paired Displays when the phone is tethered via a supported with the phone. USB cable connection.
-
Page 26: Application Icons
Displays when the keypad is active. Displays when data synchronization and application sync is active and synchronization is in progress for Displays when you have not yet set up a Samsung Gmail, Calendar, and Contacts. Account. Displays when your phone is connecting to the Device Management server when you first turn on your phone. - Page 27 The following table contains a description of each application. If Calculator: Using this feature you can use the phone as a the application is already described in another section of this user calculator. The calculator provides the basic arithmetic manual, then a cross reference to that particular section is functions;...
- Page 28 “Gallery” on page 72. or hide your location. For more information, refer to Game Hub: Game Hub is a premium game service that lets “Latitude” on page 139. you play, connect and share games on Samsung Android devices.
- Page 29 Restaurants, Cafes, Bars, on page 89. Hotels, Attractions, and other establishments, geographic More services: opens Samsung Apps to the More Services locations, or prominent points of interest . You can also add page. your own locations. For more information, refer to “Places”...
- Page 30 Play Store: The Play Store provides access to downloadable applications and games to install on your phone. For more Samsung Apps: Samsung Apps allows you to easily information, refer to “Play Store” on page 145. download an abundance of useful applications to your phone.
-
Page 31: Menu Navigation
Use the on-screen keypad to enter the item you want to Video player: The Video player application plays video files search for, then tap stored on your microSD card. For more information, refer to “Video Player” on page 71. to use Google Voice Search. For more Voice recorder: The Voice recorder allows you to record an information, refer to “S Voice”... -
Page 32: Using Gestures
Terms used in this user manual Capturing the screen • For more information, refer to “Motion” on page 101. Panning Lightly touch items to select or launch them. For example: Tap the on screen keyboard to enter characters or text. •... - Page 33 To activate motion: The following is a description some of the most commonly used gestures: From the Home screen, press and then tap Settings Motion Motion activation. ➔ ➔ Tap the Motion activation selection box to place a Double Tap - Go to Top of List checkmark in the box.
- Page 34 Direct call: Call contact currently displayed on the screen. Shake to update: Once enabled, shake your device to rescan for • • Smart alert: Pickup the device to be alerted and notified of you have Bluetooth devices, rescan for Wi-Fi devices, Refresh a Web page, etc. •...
-
Page 35: Locking And Unlocking The Phone
Turn over to mute/pause: Once enabled, mute incoming calls and any Swipe the touch screen in any direction. • playing sounds by turning the device over display down on a surface. Palm swipe to capture: Once enabled, you can capture any •... - Page 36 Navigating Through the Home Screens Sweep the screen left or right to access the other menus. Your phone initially has seven home screens. If you like, you can Tap one of the application icons. place different applications on each of the home screens. From the main Home screen, sweep the screen with your finger in either direction.
-
Page 37: Customizing Your Home Screen
Customizing Your Home Screen A sub-menu will appear at the bottom of the phone screen. You can customize your Home screen by doing the following: Tap an option. Creating Shortcuts • Adding and Removing Widgets on the Home Screen • Repositioning Widgets •... -
Page 38: Adding And Removing Primary Shortcuts
Touch and hold the application icon. This creates an Drag the icon over the Delete icon and release it. immediate shortcut of the selected icon and closes the As you place the shortcut into the Trash, both items turn Applications tab. red. - Page 39 Adding and Removing Widgets Moving Icons in the Applications Menu Press to activate the main Home screen. Widgets are self-contained applications that reside in either your Widgets tab or on the main or extended Home screens. Unlike a to display your current applications. shortcut, the Widget appears as an on-screen application.
- Page 40 Creating Application Folders Adding a New Page to the Application Menu You can create application folders to hold similar applications if You can add a new page to your application menu by following you wish. these steps: Press to activate the main Home screen. To create an application folder follow these steps: Press to activate the main Home screen.
- Page 41 • Gallery: select a wallpaper from photographs you have taken with Drag it to the location that you would like to place it. your camera. In this example, the fifth Home screen is moved to the last • Live wallpapers: select an animated wallpaper. position.
- Page 42 Press to activate the main Home screen. To add a Home screen, follow these steps: Press to activate the main Home screen. Press and tap Edit. Press and tap Edit. Touch and hold the Home screen you want to delete. Touch and hold the Home screen that contains Drag it to the trash can located at the bottom of the screen.
-
Page 43: Notification Bar
Clearing Notifications Press to return to the main Home screen. To clear all notifications from the Notification panel: You can now add items to your new Home screen. From the Home screen, touch and hold the Notification Bar Notification Bar until the pull-down displays, then drag down vertically. -
Page 44: Memory Card
Memory Card Tap OK. Your device lets you use a microSD (SD) or microSDHC card For more information, refer to “Removing and Installing the to expand available memory space. This secure digital card Memory Card” on page 3. enables you to exchange images, music, and data between SD card Available Memory Status SD-compatible devices. -
Page 45: Section 3: Call Functions
Section 3: Call Functions Making an International Call This section describes how to make or answer a call. It also includes the features and functionality associated with making or From the Home screen, tap , then touch and hold answering a call. . -
Page 46: Making Emergency Calls
Select Add wait to add a wait. A wait will pause the calling Tap the desired Contact to enter the Details page, then tap sequence until you enter a number or press a key. to make a call. Making Emergency Calls to make the call. -
Page 47: Making A Call Using Speed Dial
Complete your call. During this type of call, you will have The Speed dial setting screen displays showing the numbers access to the Speaker mode, Keypad, and End Call 1 through 9. The number 1 is reserved for Voicemail. features. Tap an unused number and the Select a contact screen •... -
Page 48: Answering A Call
Answering a Call When a call is received the phone rings and displays the caller’s phone number, or name if stored in the Address Book. At the incoming call screen: • Touch and drag in any direction to answer the call. •... -
Page 49: Dialing Options
Dialing Options All calls made, received, and missed are listed. Types of calls are identified by the following icons: From the Home screen and Application menus, you have the option to access the Dialer and initiate a call by tapping Incoming Calls: •... - Page 50 A list of recent calls is displayed. If the number or caller is listed in your Address Book, the associated name is displayed. Swipe the desired missed call to the right to call. – or – Swipe the desired missed call to the left to message. Saving a Recent Call to your Address Book From the Home screen, tap Logs.
- Page 51 Sending a Message to a Recent Call From the Home screen, tap Logs. ➔ Add as new contact A list of recent calls is displayed. Update existing Swipe the entry you want to message to the left. contact Call the number At the Message screen, tap the empty text field and use the Send a message on-screen keypad to type in a message.
-
Page 52: Call Duration
Adjusting the Call Volume A list of recent calls is displayed. During a call, to adjust the earpiece volume, use the Volume keys Touch and hold the call you want to add to the Reject List. on the left side of the phone. Tap Add to reject list. - Page 53 Mute/Unmute turn the onboard microphone either on or off. current caller on hold. • – Tap Mute during a call to mute the microphone. A green line will appear You can later reactivate this call by tapping Unhold under the Mute button. Unhold –...
- Page 54 To end a call on hold to end the currently active call. to disconnect the active call. To end a specific call Tap Swap until the call you want to end appears in a green The call on hold will now become the active call. Tap box.
- Page 55 To rejoin the conference call tap Unhold Use the Volume keys (located on the left side of your phone) Unhold to adjust the volume. to end the call. To deactivate the speakerphone, tap Speaker Using the Speakerphone During an Active Call Speaker Switching off the Microphone (Mute) While in an active call, it is possible to enable the speakerphone...
-
Page 56: Call Settings
Call rejection The Headset button now appears as and the Headset Bluetooth headset is activated. From the Call settings screen, tap Call rejection. Tap the OFF / ON icon to turn Auto reject mode on Tap Headset to deactivate the Bluetooth headset and Headset reactivate the phone speaker. -
Page 57: Call Forwarding
Auto screen off during calls Call alert. The proximity sensor turns off the screen when the phone is Tap Call vibrations to enable your phone to vibrate when the placed close to your face during a call. called party answers the phone. Accessory settings for call Tap Call status tones to set the sound settings during a call Set accessory options: Automatic answering, Automatic answering... -
Page 58: Additional Settings
• Forward when unanswered: allows you to forward voice calls to a • Fixed dialing numbers: allows you to restrict outgoing calls to a designated number instead of your voicemail number when there limited set of phone numbers. is no answer on your phone. You can also select the amount of •... -
Page 59: Internet Call Settings
Tap Change PIN2. From the Home screen, tap Call settings ➔ ➔ ➔ Voicemail settings. At the prompt, enter your old PIN2 code. Tap the Voice mail number field, backspace to erase the At the prompt, enter a new PIN2 code. digits, and enter a new voicemail number using the keypad, Confirm your PIN2 code. - Page 60 From the Home screen, tap Call settings ➔ ➔ ➔ Use Internet calling. ➔ Select For all calls when mobile network available, Only for Internet calls, or Ask for every call.
-
Page 61: Section 4: Entering Text
Section 4: Entering Text Entering Text Using the Samsung Keyboard This section describes how to select the desired text input method when entering characters into your phone. This section also From a screen where you can enter text, rotate your phone describes the predictive text entry system that reduces the amount counterclockwise to a Landscape orientation. -
Page 62: Changing The Text Input Mode - Keypad
Changing the Text Input Mode - Keypad There are two main keypad layout keys that will change the on- screen keys within the QWERTY keypad. The available Text Input modes are: Sym and Abc. Symbol/Numeric Mode: activates the number, symbol, and emoticon keys. ABC Mode: activates the default alphabet keys. -
Page 63: Using Symbol/Numeric Mode
Using Symbol/Numeric Mode Predictive Text Use Symbol/Numeric Mode to add numbers, symbols, or By using the Predictive Text option, you can have next-letter emoticons. prediction and regional error correction, which compensates for pressing the wrong keys on the QWERTY keyboard. Rotate your phone counterclockwise to a Landscape To turn Predictive Text on or off, tap from the keypad,... -
Page 64: Samsung Keyboard Settings
Note: You can also use Predictive Text mode in the portrait orientation. Samsung Keyboard Settings At the Listening prompt, speak clearly and distinctly into the For information on how you can configure your Samsung keyboard microphone. settings, see “Samsung Keyboard settings” on page 110. -
Page 65: Section 5: Contacts And Your Address Book
Section 5: Contacts and Your Address Book This section allows you to manage your daily contacts by storing • Picture: retrieve a previously stored image from your Gallery or from your My files folder and assign it to this entry. Tap an image their name and number in your Address Book. -
Page 66: Adding Pauses To Contact Numbers
Enter the phone number. Enter the address. to add another Phone number field or tap to add another address field or tap to delete a delete a field. field. Tap the Email field. Tap any of the following fields that you want to add to your new contact: The keypad is displayed. -
Page 67: Editing An Existing Contact
pause the calling sequence until you enter a number or press a the Contact that you want to edit. key. to edit. To add a pause or a wait to a Contact: Tap any of the fields to add, change, or delete information. From the Home screen, tap Contacts , and then tap the Tap Save to save the edited information. - Page 68 Within the Contacts list (sorted alphabetically), tap a letter Tap the phone icon to make a phone call or tap the on the right side of the display to quickly jump to the message icon to send a message. contacts beginning with that letter. For more information, refer to “Creating and Sending Messages”...
-
Page 69: Joining Contacts
Joining Contacts For more information about synchronizing accounts, see “Synchronizing Accounts” on page 62. Joining Contact Information From the Home screen, tap Contacts Many people now maintain multiple email accounts, social Tap a contact name (the name you want to join to another networking logins, and other similar account information. -
Page 70: Synchronizing Accounts
Unjoining a Contact Press Mark as default. The Mark as default screen ➔ displays radio buttons next to the contact names or phone From the Home screen, tap Contacts numbers of all the linked contacts. The radio button next to Tap a contact name (the account name from which you want the default contact will be green. -
Page 71: Address Book Options
Tap a contact and at the contact’s display screen, press memory card. You can also send a namecard via Bluetooth, Dropbox, ChatON, Email, Gmail, Messaging, or Wi-Fi Direct. • Merge with Samsung: allows you to merge your contacts together The following options are displayed: with your Samsung account contacts. -
Page 72: Groups
Tap Done to remove. • Print namecard: allows you to print the contact’s namecard to a Samsung printer using Wi-Fi. The contacts are now removed from the group. Groups Creating a New Group... -
Page 73: Address Book Favourites
Adding Favourites to your Address Book Tap Save to save the new Group category. From the Home screen, tap Contacts Editing a Caller Group Within the Contacts list, touch and hold a contact that you To edit a Group entry, there must be at least one member as part of the selected group. - Page 74 Copying Contacts to the SIM Card Copying Contacts to the Phone From the Home screen, tap Contacts ➔ ➔ Note: When storing an Address Book contact on the SIM card, note that only Import/Export. the name, phone number, group, and slot location are initially offered as fields (some SIM cards may allow an address as well).
- Page 75 Deleting Contacts At the Delete prompt, tap OK to delete the contact or Cancel to exit. To delete multiple contacts: From the Home screen, tap Contacts ➔ ➔ Using the Service Dialing Numbers Delete. You can view the list of Service Dialing Numbers (SDN) assigned by your service provider.
-
Page 76: Section 6: Multimedia
Section 6: Multimedia This section explains how to use the multimedia features of your Press and hold to rewind the song. Tap to go to phone, including Music, Music player, Video Player, Gallery, previous song. Camera, and Camcorder. Music Player Press and hold to fast-forward the song. -
Page 77: Music Player Options
Music Player Settings Displays the current song in the player window. The Settings menu allows you to set preferences for the music Opens the Equalizer. player such as whether you want the music to play in the background, sound effects, and how the music menu displays. Music Player Options From the Home screen, tap Music Player... - Page 78 Playlists can be created via either the handset’s Music player Tap the Playlists tab. options menu or from within a 3rd party music application (such as Tap a playlist. Windows Media Player) and then downloaded to the handset. Press Remove. ➔...
-
Page 79: Video Player
similar styles of music. Select a square on the screen to play PIP (Picture In Picture) view. The video music with similar characteristics. will be played in a small window so you can Video Player use your phone for other purposes while watching the video. -
Page 80: Gallery
Log on to your Google account if you have not already done Note: If your device displays that the memory is full when you access Gallery, delete some of the files by using My Files or other file management applications and try again. For more information, refer to “My Files” on Following the on-screen instructions for renting and viewing page 142. -
Page 81: Camera
to play the video. activate the camera mode. Press for additional options. Using the phone’s main display screen as a viewfinder, adjust the image by aiming the camera at the subject. For video player controls, see “Video Player” on page 71. Before you take a picture, you can zoom in up to 4x (400%) Camera using the Up and Down Volume keys or by pinching the... -
Page 82: Camera Options
Front/ Self portrait: allows you to activate the front facing Charger Connected Storage Location Rear camera so you can take pictures of yourself or video Camera chat. Mode Flash Flash: allows you to set the flash options to Off, On, or Camera Shooting Auto flash. - Page 83 Smile shot: the camera focuses on the face of your Settings: • subject. Once the camera detects the person’s Edit shortcuts: allows you to set shortcut icons for the smile, it takes the picture. settings that you use the most. Beauty: adjusts the contrast to smooth facial features.
- Page 84 Timer: allows you to set a time delay before a picture is taken. Metering: allows you to set how the camera measures or Options include: Off, 2 sec, 5 sec, and 10 sec. meters the light source: Centre-weighted, Spot, or Matrix. Anti-Shake: reduces image blur due to hand movement.
-
Page 85: Using The Camcorder
Touch and drag the Camera mode button down to Image viewer: allows you to access the Image viewer Camcorder Mode. and the various viewing options for a selected picture. Image viewer options are described in the following Using the phone’s main display screen as a viewfinder, section. -
Page 86: Camcorder Options
Tap the Video key ( ) again to stop the recording and Recording mode: allows you to set the recording mode save the video file to your Camera folder. to: Normal, which is limited only by available space Once the file has been saved, tap the image viewer, then on the destination location, Limit for MMS, which is limited by MMS size restrictions, and Self recording to play your video for review. - Page 87 Exposure value: allows you to adjust the brightness Reset: allows you to reset all camera or camcorder level by moving the slider. settings to the default values. Timer: allows you to set a time delay before starting to take Image viewer: allows you to access the Image viewer a video.
-
Page 88: Section 7: Messaging
Section 7: Messaging This section describes how to send and receive different types of Important!: When creating a message, adding an image, a sound file, or a messages. It also includes the features and functionality video clip to a text message changes the message from a text associated with messaging. -
Page 89: Message Options
• Delete threads: allows you to delete any message thread. Select Note: Enter additional recipients by separating each entry with a semicolon (;) the messages to delete and a green checkmark will appear next then using the previous procedure. to the message. Tap Delete. Options while composing a message Tap the Enter message field and use the on-screen keypad While composing a message, press... -
Page 90: Viewing New Received Messages
Adding Additional Text Pictures: allows you to tap an existing image from your Pictures list to • add it to your message. You can copy text such as names, phone numbers, and events Capture picture: allows you to temporarily exit the message, take a •... -
Page 91: Deleting Messages
From the main Home screen, tap Messaging then tap • View contact: displays the contact’s information. This option only displays if the sender is in your Contacts list. the new message to view it. • Add to Contacts: displays the Contacts information screen. This The selected message appears in the display. -
Page 92: Message Search
Message Search • Use the volume key: allows you to change the text size by using the up or down volume keys. You can search through your messages by using the Message Storage settings: Search feature. From the main Home screen, tap Messaging •... -
Page 93: Using Email
• Delivery reports: request a delivery report for each message you Notifications settings: send. • Notifications: allows you to see message notifications on your • Read reports: request a read report for each message you send. status bar. • Auto-retrieve: allows the message system to retrieve messages •... - Page 94 At the Account options screen, tap the Email check Tap the Microsoft Exchange ActiveSync field. frequency drop-down list box and select how often you Enter all the Exchange server information, Domain, User would like your email to be checked. name and Password, then tap Next. Tap the Notify me when email arrives check box to be At the Activation prompt, tap OK.
-
Page 95: Using Gmail
Enter the information required to set up another account. Sign on to your Google account if you are not already For more information, refer to “Creating an Email Account” signed on. For more information, refer to “Creating a New on page 85. Google Account”... -
Page 96: Google Talk
Viewing a Gmail Message Other Gmail Options From the Gmail Inbox, tap a message to view it. at the bottom of the screen to refresh the screen, send and receive new emails, and synchronize your email The following options are available at the bottom of the with the Gmail account. -
Page 97: Google
conversation in Messenger, Google+ sends an update to your Note: If you have already signed into an IM account, it is displayed on the Talk phone. application screen. Sign on to your Google account. For more information, refer Google+ to “Creating a New Google Account” on page 8. Google+ makes messaging and sharing with your friends a lot From the Home screen, tap ➔... -
Page 98: Chaton
ChatON With the ChatON application, you can interact with friends and family (“Buddies”) using text, images, hand-written notes and video shared instantly. You can chat in groups, while a Web client will allow the easy sharing of content and conversations between your phone and PC. -
Page 99: Section 8: Changing Your Settings
Section 8: Changing Your Settings Advanced Wi-Fi Settings This section explains the settings used for customizing your device. The advanced Wi-Fi settings allow you to set up and manage Accessing Settings wireless access points. From any Home screen, tap Settings ➔... -
Page 100: Bluetooth Settings
Bluetooth settings • Visible time-out: Use this setting to control when to automatically turn off the Discoverable option: 2 minutes, 5 minutes, 1 hour, or In this menu you can activate Bluetooth, view or assign a device Never timeout. name, activate your phone so other Bluetooth devices can •... -
Page 101: More Settings
From your PC, download the Samsung Kies application if Options display for Flight mode, Kies vis Wi-Fi, VPN, you don’t already have it. You can find it at samsung.com. Tethering and portable hotspot, NFC, Android Beam, S From your PC, launch the Samsung Kies application. - Page 102 Adding a VPN From your device, connect via Wi-Fi to the same Wi-Fi network that your PC is connected to if you have not already Before you add a VPN you must determine which VPN protocol to use: PPTP (Point-to-Point Tunneling Protocol), L2TP (Layer 2 done so.
- Page 103 Activate Wi-Fi on the device to be connected to your phone. Tap USB tethering to add a checkmark and activate the Find [SGH-I747M XXXX] in the Wi-Fi network list and connect feature. The USB tethering icon is displayed at the top to it (XXXX are four randomly generated digits that appear of your screen.
- Page 104 Bluetooth Tethering close together. You can beam browser pages, YouTube videos, contacts, and more. From the Home screen, tap Settings More ➔ ➔ From the Home screen, tap Settings More ➔ ➔ settings Tethering and portable hotspot. ➔ settings Android Beam. ➔...
- Page 105 Mobile networks From the Home screen, tap Settings More ➔ ➔ settings Wi-Fi Direct. ➔ Before you use applications such as Google Maps and find your location or search for places of interest, you must enable data Tap the OFF / ON slider to turn Wi-Fi Direct on access over mobile networks.
-
Page 106: Sound Settings
From the Home screen, tap Settings More Tap Select automatically to automatically select a network ➔ ➔ settings Mobile networks. connection. ➔ Tap Access Point Names. Note: Connecting to 3G networks slows the data transfer speed and time. A list of the Access Point names display. The active access Sound Settings point displays a green, filled circle to the right of the name. -
Page 107: Default Notifications
From the Home screen, tap Settings Sound This option allows you to set your phone to vibrate and ring. ➔ ➔ ➔ Volume. From the Home screen, tap Settings Sound. ➔ ➔ Touch and drag the slider to adjust the sound volume for Tap Device vibration. -
Page 108: Display Settings
Tap any of the following options to create a checkmark and • Smart stay: tap this option to disable the screen timeout if your device detects that your face is watching the screen. activate the feature: • Auto-rotate screen: allows you to switch the display orientation •... -
Page 109: Led Indicator
LED Indicator • Direct call: Call contact currently displayed on the screen. • Smart alert: Pickup the device to be alerted and notified of you This option allows you to turn on or off the LED indicators for have missed any calls or messages. charging, missed events, and incoming notifications. -
Page 110: Power Saving
Storage your hand. Once you remove your hand from the screen, the device goes back to normal by either continuing to play the From this menu you can view the memory allocation for the current video or unmuting the current sound. memory card and USB as well as mount or unmount the SD card. -
Page 111: Application Manager
The battery level displays in percentage. The amount of Tap Downloaded, Running, or All to display memory usage time the battery was used also displays. Battery usage for that category of applications. displays in percentage per application. The graph at the bottom of the Downloaded tab shows used and free device memory. -
Page 112: Accounts And Sync
Synchronizing Accounts Tap the Running tab. All the applications that are currently running on the device display. Select the items you want to synchronize on your account, such as Books, Calendar, or Contacts. Tap Show cached processes to display all the cached From a Home screen, tap Settings Accounts and... -
Page 113: Location Services
Removing an Account • Use GPS satellites: allows applications to use GPS to pinpoint your location. Important!: Removing an account also deletes all of its messages, contacts, • Location and Google search: allows Google to use your location and other data from the device. data for improved search results and other services. -
Page 114: Owner Information
• Pattern: A screen unlock pattern is a touch gesture you create To encrypt all data on the SD card, tap Encrypt SD card. and use to unlock your device. Follow the prompts to create or change your screen unlock pattern. Tip: Make sure your battery is charged more than 80 percent or the travel charger is connected. - Page 115 Set up SIM card lock Tap Sign in and sign in to your Samsung account. – or – Prevent another user from using your SIM card to make unauthorized calls or from accessing information stored on your Tap Create account and set up a Samsung account.
-
Page 116: Device Administrators
Unknown sources Tap Make passwords visible to create a checkmark and enable or disable the display of password characters. This feature allows you to download and install applications from locations other than Play Store. Device Administrators From the Home screen, tap Settings Security. -
Page 117: Language And Input
Scroll to the bottom of the details screen and tap Disable to Note: This setting is only activated if you have installed encrypted certificates. disable a System certificate or Remove to remove a User certificate. From the Home screen, tap Settings Security. - Page 118 Samsung Keyboard settings Note: Samsung keyboard is the only input method included with the phone. From this menu you can set Samsung keyboard options. Tap Configure input methods. From the Home screen, tap Settings Language ➔ ➔ and input. Tap the icon next to the input method that you would like to configure the settings for.
- Page 119 Tap the Keyboard swipe field to be able to sweep the Tap Tutorial for a short tutorial on using the Samsung keyboard to switch between letter and symbol entry (ABC keyboard. and ?123 modes). For more information, refer to “Text Input Tap Reset settings to return all settings to default values.
- Page 120 . Enter the new word, and input. then tap Done to save. Tap Voice recognizer and select either Google or Samsung To add words to automatically substitute (for example youve powered by Vlingo as your Voice recognition engine. becomes you’ve) tap Auto-substitution list.
- Page 121 • Language: Choose a language for your voice input. • Wake up in Samsung unlock: say your wake-up command to • SafeSearch: Set the sensitivity for filtering of explicit images from unlock the screen.
-
Page 122: Backup And Reset
Backup and Reset • Settings for Google Text-to-speech Engine/Samsung TTS: allows you to view Open Source Licenses and set voice effects Back Up My Data (Samsung TTS only). By setting this option, the Google server will back up all of your •... -
Page 123: Dock
From the Home screen, tap Settings Backup and From the Home screen, tap Settings Dock. ➔ ➔ ➔ ➔ reset. Tap Dock sound to play sounds when inserting or removing Tap Automatic restore to enable or disable automatic the phone from the dock. restoration of settings from the Google server. -
Page 124: Accessibility
From the Home screen, tap Settings ➔ ➔ Important!: Automatic date and time must be deactivated in order to manually Accessibility. set the time and date. Tap Auto-rotate screen to automatically rotate the screen Tap Automatic date and time and Automatic time zone to from landscape to portrait when you rotate your phone. -
Page 125: Developer Options
Tap Install Web scripts if you want to allow apps to install Note: This setting is used for development purposes. scripts from Google that make their Web content more accessible. Tap Allow. From the Home screen, tap Settings Developer ➔ ➔... -
Page 126: About Device
From the Home screen, tap Settings Developer • Force GPU rendering: Uses a 2D acceleration in applications. ➔ ➔ • Window animation scale: Configure the scale for animation options. (ranges from off to 10x). Tap Desktop backup password. • Transition animation scale: Configure the scale for transitioning In the Settings screen, enter the current full backup when using animation (ranges from off to 10x). - Page 127 To access phone information: • Kernel version: displays the kernel version loaded on this handset. From the Home screen, tap Settings About ➔ ➔ • Build number: displays the software build number. device. Note: Baseband, kernal and build numbers are usually used for updates to the The following information displays: handset or support.
- Page 128 The phone automatically updates the software (if available), otherwise, when the Current software is up to date prompt is displayed, tap OK. When updating software, once the update file is downloaded, you can delay the update on the start screen by postponing it for a certain period of time.
-
Page 129: Section 9: Connections
Section 9: Connections Zooming in and out of the Browser This section describes the various connections your phone can make including accessing the Internet with your Browser, Wi-Fi, There are several ways to Zoom in and out on your browser. After Bluetooth, and Connecting your PC. -
Page 130: Using Bookmarks
➔ • Downloads: displays the download history. A new browser window is opened. • Print: allows you to print the screen or web page on a Samsung printer using Wi-Fi. to see thumbnails of all open windows. • Settings: allows you to modify your web settings. For more Tap a window listing to open up that Internet window. - Page 131 From any webpage, tap • Share link: Allows you to share a URL address via Bluetooth, ChatON, Email, Flipboard, Gmail, Google+, Messaging, S Memo, The Bookmarks page is displayed. or Wi-Fi Direct. • Copy link URL: Allows you to copy the URL address to use in a Press to display the following options: message.
- Page 132 Editing Bookmarks From any webpage, press Settings Privacy and ➔ ➔ security Clear all cookie data From the Bookmarks page, tap and hold the bookmark you ➔ want to edit. At the Clear prompt, tap OK to delete the cookies or tap Cancel to exit.
-
Page 133: Browser Settings
A list of your saved webpages is displayed with Name and • Accept cookies: Allows sites, that require cookies, to save and read cookies from your device. URL address. The webpages that have been visited the • Clear all cookie data: Deletes all current browser cookie files. most will appear at the top. -
Page 134: Wi-Fi
-- black becomes white, etc.), and adjust the Contrast using a • Text encoding: Adjusts the current text encoding. slider bar. • Reset to default: Clears all browser data and resets all settings to Advanced default. Bandwidth management • Select search engine: allows you to set your default search engine to Google, Yahoo!, or Bing. - Page 135 Manually add your new network connection (unsecured) as within most Hot Spots, or Secured (requiring knowledge of the Router name and password). Tap Add network. Turning Wi-Fi On Enter the Network SSID. This is the name of your Wireless By default, your device’s Wi-Fi feature is turned off. Turning Wi-Fi Access Point.
- Page 136 Manually Scan for a Wi-Fi Network To access the Bluetooth Settings menu: From the Home screen, tap Settings Wi-Fi. From the Home screen, tap Settings Wi-Fi. ➔ ➔ ➔ ➔ Tap Advanced. Tap Scan. All available Wi-Fi networks are displayed. For more information, refer to “Advanced Wi-Fi Settings”...
-
Page 137: Nfc
Once the device you want to connect to is displayed, tap on The other device will receive a prompt to receive the information and must tap OK. The other device has 2 minutes to tap OK for the connection The file is transferred and the other device will receive a to be made. -
Page 138: Bluetooth
Bluetooth Status Indicators can beam images and videos from your gallery, music files from your music player, and more. For more information, refer to “S The following icons show your Bluetooth connection status Beam” on page 96. at a glance: Bluetooth Displays when Bluetooth is active. - Page 139 From the Bluetooth settings page, press Device From the Bluetooth settings page, tap Scan to search for ➔ name. visible external Bluetooth-compatible devices such as headsets, devices, printers, and computers. Enter a new name. Pairing Bluetooth Devices Tap OK to complete the rename process. The Bluetooth pairing process allows you to establish trusted To make your device visible: connections between your device and another Bluetooth device.
-
Page 140: Pc Connections
Note: Due to different specifications and features of other Bluetooth- Note: Prior to using this feature, Bluetooth must first be enabled, and the compatible devices, display and operations may be different, and recipient’s device must be visible. functions such as transfer or exchange may not be possible with all Bluetooth compatible devices. -
Page 141: Nfc
Note: To sync your device to your PC, it is highly recommended Connected as a media device and tap Camera (PTP). that you install Samsung Kies on your PC, which is available at http://www.samsung.com/kies (for Windows/Mac). Your phone will appear on your PC as a removable disk. -
Page 142: Section 10: Applications
FAQ for detailed instructions on setting up and using Allshare together. Play. If a Samsung account has been registered on your phone, the • My account: lets you view and adjust your account settings. phone is automatically registered to AllShare Play when it starts. -
Page 143: Calculator
• FAQ: access Getting Started information for AllShare Play. To use the scientific functions, turn the phone sideways to Calculator landscape mode. Camera With this feature, you can use the phone as a calculator. The calculator provides the basic arithmetic functions (addition, Use your 8.0 megapixel camera feature to produce photos in a JPEG subtraction, multiplication, and division) and scientific functions. -
Page 144: World Clock
• Alarm repeat: use this option to set the repeating status for the be set in the alarm settings. alarm. Tap the letter corresponding to each day that you want the Deleting Alarms alarm to sound to highlight the letter. To have the alarm repeat every week, tap Every week repeat. -
Page 145: Contacts
Timer To set Daylight Savings time, press and hold a city, then tap DST settings. You can use this option to set a countdown timer. Use a timer to count down to an event based on a preset time length (hours, Select Automatic, Off, 1 hour, or 2 hours. -
Page 146: Downloads
Downloads Email The Downloads application allows you to manage all of your Email enables you to review and create email using various email downloads from the Market and the Browser. services. You can also receive text message alerts when you receive an important email. -
Page 147: Google
account on the web. For more information, refer to “Using Gmail” From the Home screen, tap Latitude ➔ on page 87. To allow location sharing, tap Share location with family Google+ or friends. Google+ makes messaging and sharing with your friends a lot Your location is displayed on the map, accurate to 40 easier. -
Page 148: Maps
display on your phone. They can share their location from – Location settings: allows you to manage the settings for your Background location reporting, Location history, Latitude location their computer, phone, or tablet. For more information, go to sharing, and Check-ins. http://www.google.com/latitude. -
Page 149: Using Maps
Enabling a Location Source A map displays with your location in the center. Before you use Google Maps and find your location or search for The following options are available at the bottom of the places of interest, you must enable a location source. To enable screen: the location source you must enable the wireless network, or •... -
Page 150: Messaging
Music Player – Labs: this is a testing ground for experimental features that aren’t ready for primetime. They may change, break or disappear at any Music Player allows you to play music files that you have stored on time. Click on a Lab to enable or disable it. your phone and memory card. -
Page 151: Navigation
• Pictures: for downloaded pictures. Select one of the following SHORTCUTS: • Ringtones: for downloaded ringtones. • Speak Destination: allows you to speak your destination. • Type Destination: allows you to use the keypad to enter your Note: Different folders may appear depending on how your phone is destination. - Page 152 Obtaining Driving Directions • Layers: are additional items that you can have displayed on your map. They include: Your phone’s built-in GPS hardware allows you to get real-time – Traffic view: displays real-time traffic conditions so you can plan the driving directions to selected locations or establishments based on fastest route.
-
Page 153: Phone
As you drive the route display will be updated and you will The business details such as address, phone, website, and receive voice-guided navigation directions. location are displayed. You can also see reviews from around the web and from Google users. Phone Play Books The Phone application allows you to access the dialer keypad, call... -
Page 154: S Memo
Before using the Play Store you must have a Google Account. For Tap an existing Memo to open it then tap the screen to enter more information, refer to “Using Gmail” on page 87. edit mode. From the main Home screen, tap Play Store –... -
Page 155: S Planner
Lock screen wallpaper Press to access the following options: • Print: allows you to print the memo on a Samsung printer. S Planner Note: Depending on whether you have saved the memo, are in keypad mode, or in S Pen mode, the options will appear differently. The following is a With the Calendar feature, you can consult the calendar by day, list of the options you may see. -
Page 156: Calendar Options
To access the Calendar: Add Event From the Home screen, tap S Planner ➔ Display Tabs The following options are available: Next Month Previous Month • Year: displays all 12 months. Selected Day • Month: displays the selected month with today’s date highlighted. Events At the bottom of the calendar, scheduled events display in the Current Day... -
Page 157: S Suggest
Agenda – Week view: allows you to set the week view to Time line or Analogue. – First day of week: allows you to set the first day of the week to The Agenda displays all events that you have added for all dates Sunday or Monday. -
Page 158: S Voice
Samsung Apps With the S Voice application you can use your voice to perform Samsung Apps is a marketplace designed to provide a variety of operations that you would normally have to do by hand such as mobile applications especially developed and carefully selected for dialing a phone number, sending a text message, playing music, Samsung Mobile Phones. -
Page 159: Search
Talk your device. This is done in accordance with the Samsung Apps privacy policy Google Talk is a free Windows and web-based application for (http://www.samsungapps.com/common/privacy.as). In order to instant messaging offered by Google. Conversation logs are receive any of the applications, you must select the “Accept” button automatically saved to a Chats area in your Gmail account. -
Page 160: Youtube
YouTube recording. Once the audio recording has stopped, the message is automatically saved. Tap to cancel the YouTube is a free online video streaming service. You can use it to view and share videos. recording without saving. to display a list of all your voice recordings. Tap a Note: YouTube is a data-intensive feature. - Page 161 Enter the details of the upload and select Upload. Applications...
- Page 162 Play Store Favorites Books S Memo Finding an Address Book Entry Play Books S Planner Group Settings Samsung Apps Managing Address Book Contacts Calculator Using the Camcorder Call Functions Using the Camera Service Dialing Numbers 3-Way Calling (Multi-Party Calling) Voice Recorder...
- Page 163 Address Book Shooting Video Switching Between Email Accounts Adjusting the Call Volume Camera Answering a Call Camera Options Emergency Calls Call Back Missed Call Taking Pictures Making Call Duration Changing Your Settings With SIM Call Log Charging battery Without SIM Call Waiting Clock Entering Text...
- Page 164 Setting Up Your Phone Creating and Sending Text Voice mail Messages Joining Contacts Gmail Deleting a message Google Maps Gmail Keyboard Input Methods Google Search Bar Options Keyboard settings Google Voice Typing Settings Keypad Google voice typing settings Signing into Email Changing Text Input Google+ Signing into Gmail...
- Page 165 S Planner AAC+ Rear View S Voice eAAC+ Side View Safe Mode Switching On/Off Samsung Apps Phone information Screen Capture Pictures SD Card Gallery Search Bar Music Player Places Security settings adding music Play Books device administration creating a playlist...
- Page 166 USB Tethering Using Bookmarks Tethering Adding Bookmarks Text Input Deleting a Bookmark Abc mode Editing Bookmarks Methods numeric mode symbol mode Video Player Timer Voice Mail Touch Screen Accessing Lock/Unlock From Another Phone Travel Charger Setup Using Voice Recorder Volume Understanding Your Phone Features of Your Phone Front View...