Table of Contents
Advertisement
Quick Links
Advertisement
Table of Contents

Related Manuals for Canon Mk2500


Summary of Contents for Canon Mk2500
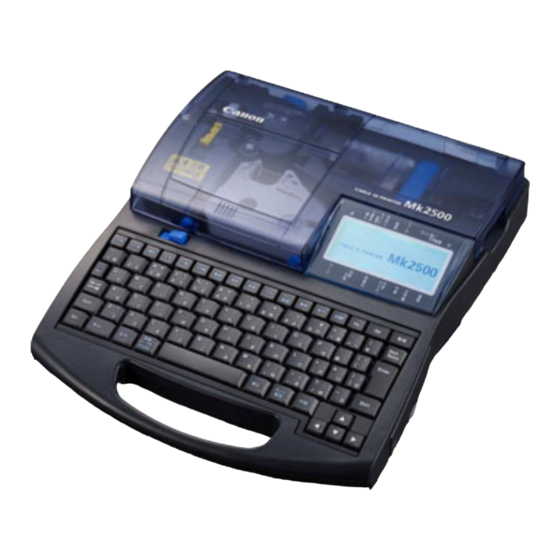
- Page 1 User’s Guide...
- Page 3 Tube Labeled with switch name or number Label switches clearly Label with clear adhesive lamination The Mk2500 can also be Easy yet high-quality used to print label tape (sold printing separately). Because labels that correspond to specific When applied after printing,...
- Page 4 In addition to being compact at 250 mm (W) x 300 mm (D) x 85 mm (H), the printer also has a lightweight design (2kg), making it easy to transport to the site of electrical facilities. Overall, the printer greatly increases work efficiency. When printing at fast speed, the printer can easily print 42 tube segments per minute.* * When a tube is cut into to 20mm segments and five “3mm 100%”...
- Page 8 The meanings of the symbols that are used in this manual are explained below. A precaution to be followed to use the printer in safe is written. Failure to follow it can WARNING result in fatal or serious injury. Be sure to follow it. A precaution to be followed to use the printer in safe is written.
- Page 9 In order to ensure safe operation of the printer, be certain to observe the following safety precautions. The shape of the power plug varies according to country. WARNING Disassembling or modifying the unit could cause a fire or damage the unit.
- Page 10 Clean the AC adapter plug periodically. If dust, dirt, soot, etc., is allowed to accumulate on the plug, the dust could absorb moisture, creating an insulation fault that could cause a fire. If the unit begins to smoke or emit an unusual odor, turn the power switch off immediately, unplug the AC adapter plug from the power outlet, and then contact your nearest dealer.
- Page 11 Use only at the indicated power voltage. Use at voltage between 100 and 240V AC. If not, it may result in fire, electrical shock or machine failure. Use only the included AC adapter (K30120) and cord. Using any AC adapter or cord other than the included one can result in fire, electric shock, or printer failure.
- Page 12 CAUTION Do not place the unit on an unstable surface or a surface that is subject to vibration. The unit could fall or tip over and cause injury. Do not place the unit directly on a rug or carpet. Fibers and dust from the carpet can get inside of the unit and cause a fire.
- Page 13 If the machine will not be used for a long time, unplug the AC adapter from the power outlet. Otherwise, electrical leakage may occur, and fire could result if dust has accumulated. In order to allow you to unplug the AC adapter quickly in an emergency, do not place other objects around the outlet.
- Page 14 CAUTION Do not subject the unit to strong impacts. Doing so could damage the unit. Do not handle the keyboard roughly when typing. Rough handling could result in damage to the unit. Do not attempt to re-use ribbons or label tape. Doing so could damage the unit.
- Page 15 The purpose of this unit is to print on tube or labels. This unit cannot print directly on wires or cables, so do not attempt to feed wires or cables into the unit. Doing so could result in damage to the unit. Do not touch the connection terminal (metal part) of the cassette.
- Page 16 This section explains the basic use of the printer for people who want to start using it quickly. Although the printer features a wide variety of functions, this section explains only the most basic sequence of operations: installing accessories → turning on the power → inputing characters → printing. Refer to the main body of this manual for more specific details on the functions of the printer.
- Page 17 • Align the hooks on the tube attachment with the holes in the printer. • Push the tube attachment in until it clicks into the place. • Push the tube in until its tip touches the transport roller 2. • Insert the tube with the warp oriented as shown in the figure.
- Page 18 Printing “C-2” on a 3.0mm-diameter tube Printed results • The “=” disappears.
- Page 19 • Make sure that “Tube” is selected. “No ribbon cassette” is displayed if the ribbon cassette is not installed. Install the ribbon cassette. “No ribbon information. No ribbon amount displayed. Press enter” is displayed if the information cannot be read due to the ribbon cassette failure and so forth.
- Page 22 To print to other media, remove the wrap around tape guide...
- Page 23 Open this cover when you need to load a cassette This roller feeds printing media past the print or tube. head. Pull this lever to the left to open the cover. This roller feeds printed printing media to the cutter. Use this switch to turn the power on and off.
- Page 24 Not half cut, but a solid line is printed Indicates whether the Caps Lock mode is active. showing where to cut with scissors, etc. : Active, so all alphabetic characters are Not half cut, but a dotted line is printed entered in uppercase.
- Page 25 Indicates that another page exists prior to the currently displayed page. Indicates which printing orientation has been selected: “horizontal/horizontal character”, “vertical/vertical character”, or “vertical/ horizontal character”. : Horizontal/horizontal character : Vertical/vertical character : Vertical/horizontal character Indicates the type of frame that has been selected to print around text.
- Page 26 Use this key to change the printing orientation. Use this key to print a specific page multiple times (continuous printing). Use this key to change the cutting length (the length of one tube or one label tape), the character Use this key to print numbered character data alignment (left-justified or centered), and the (numbered printing).
- Page 27 Use this key to feed a printing media forward or To input symbols, use this key to select or delete backward ( pages 126 and 128), to replace the characters. cutter ( page 133), to forcibly full cut a tube or label tape ( page 131), and so forth.
- Page 28 Plug it in all the way. Plug it in all the way. The shape of the power plug varies according to country.
- Page 29 WARNING Do not plug in or unplug the AC adapter while your hands are wet. Doing so could result in electric shock. Do not connect this unit to a multi-outlet adapter or extension cord. Doing so could result in fire or electric shock. Do not power on with the power cord tied.
- Page 30 Install the printer diver and application in the PC in advance. For details on how to use the PC connection kit, refer to “Application Software for Mk2500” and the printer driver contained in the included Software CDROM. To use the PC connection kit, connect the printer to the PC as shown.
- Page 32 The procedure for printing on tube or clear tube is shown below. Install the ribbon cassette and the tube attachment. • Remove the stopper and then take up any slack in the ribbon. The printer cannot detect the ribbon if it has any slack. Always be sure to take up slack in the ribbon when installing the ribbon cassette.
- Page 33 • Push the cassette in until it clicks into the place. If the ribbon cassette is loose, the ribbon may not be detected, so be sure to press it in until it clicks. CAUTION Do not hold the connection terminal (metal part) of the cassette. Doing so could cause an improper recognition of the cassette.
- Page 34 Tube is not provided with the printer; it must be purchased separately. The printer can print on tube with a diameter ranging from 2.5mm to 6.5mm. Note that the printer will not print properly on tube that is bumpy, dirty, or of uneven thickness. •...
- Page 35 Before turning the power switch on, make sure that the cassettes and tube have been inserted properly, that the cover is closed, and that the AC adapter has been properly connected. • The startup display appears. • Character input display appears after displaying the ribbon cassette information.
- Page 36 Tube to be used: φ 3.0mm To input uppercase letters or the characters appearing on the upper half of the keycaps, press and hold the [Shift] key, and then press the desired key. If you input a wrong character by mistake, press [Back Space] to delete the character and then input the correct character.
- Page 37 Follow the procedure described below to make changes if you accidentally input an incorrect character. ◄ ► If you press [Back Space] instead of [Del], the character to the left of the cursor (“2” in this case) is deleted. Follow the procedure described below to delete all characters input on all pages. •...
- Page 38 The printer can accept data input of totalling approximately 2500 characters on all pages combined; if the printer’s capacity is exceeded, the message “Not enough memory Character input is no longer possible.” appears. If this occurs, save all text data ( refer to “Saving character data”...
- Page 39 Once the characters have been input, begin printing. • The print media selection display appears. “No ribbon cassette” is displayed if the ribbon cassette is not installed. Install the ribbon cassette. “No ribbon information. No ribbon amount displayed. Press enter” is displayed if the information cannot be read due to the ribbon cassette failure and so forth.
- Page 40 Print the text by the following operating procedure. Prepare the following according to the type of media to be printed • To print on label tape: label tape cassette • To print on heat shrink tube: heat shrink tube cassette •...
- Page 41 • Push the cassette in until it clicks into the place. If the ribbon cassette is loose, the ribbon may not be detected, so be sure to press it in until it clicks. CAUTION Do not hold the connection terminal (metal part) of the cassette. Doing so could cause an improper recognition of the cassette.
- Page 42 The printer can print on tube, clear tube, label tape, heat shrink tube, wrap around tape, plate, and 4mm I.D. strip, but each requires a different type of cassette. Loading a wrong type of cassette makes it impossible to print characters properly. Install the ribbon cassette and tube attachment in the machine.
- Page 43 Before turning the power switch on, make sure that the cassettes have been inserted properly, that the cover is closed, and that the AC adapter is connected. • The startup display appears. • Character input display appears after displaying the ribbon cassette information.
- Page 44 If you accidentally input an incorrect character, press [Back Space] to delete the character and then input the correct one. • A new page appears, and the system waits for input of more character data. • Since the middle label has two lines press [Set Lines] to change the Lines setting.
- Page 45 ▼ ► If you press [Enter] instead of [ ▼ ] or [ ► ], a new page is created. • A new page appears, and the system waits for input of more character data. • Since the third label has just one line, press [Set Lines] to change the Line setting for the third label.
- Page 46 Once the characters have been input, begin printing. • The print media selection display appears. “No ribbon cassette” is displayed if the ribbon cassette is not installed. Install the ribbon cassette. “No ribbon information. No ribbon amount displayed. Press enter” is displayed if the information cannot be read due to the ribbon cassette failure and so forth.
- Page 47 Wrap around tape consists of a printable part and a transparent laminate. It is used for indicating the destinations of cables. Prepare a wrap around tape cassette and print characters by the following procedure. Note that a wrap around tape cassette is not supplied with the machine; it must be purchased separately. Install a ribbon cassette and the wrap around tape cassette.
- Page 48 • Push the cassette in until it clicks into the place. If the ribbon cassette is loose, the ribbon may not be detected, so be sure to press it in until it clicks. CAUTION Do not hold the connection terminal (metal part) of the cassette. Doing so could cause an improper recognition of the cassette.
- Page 49 Before turning the power switch on, make sure that the cassettes have been inserted properly, that the cover is closed, and that the AC adapter is connected. • The startup display appears. • Character input display appears after displaying the ribbon cassette information.
- Page 50 Once the characters have been input, begin printing. • The print media selection display appears. “No ribbon cassette” is displayed if the ribbon cassette is not installed. Install the ribbon cassette. “No ribbon information. No ribbon amount displayed. Press enter” is displayed if the information cannot be read due to the ribbon cassette failure and so forth.
- Page 51 When wrapping, the laminating cover should overlap the printed part sufficiently. We therefore recommend using with cable of φ 3 to φ 7.6 mm. Because wrap around tape has a strong adhesive, it may be hard to peel the film off the backing.
- Page 52 The procedure for printing on plates is shown below. Install the plate ribbon cassette and the plate attachment. This device may not print properly on some types of plate. Please contact your nearest dealer for details. • Use the plate ribbon cassette. •...
- Page 53 • Push the cassette in until it clicks into the place. If the ribbon cassette is loose, the ribbon may not be detected, so be sure to press it in until it clicks. CAUTION Do not hold the connection terminal (metal part) of the cassette. Doing so could cause an improper recognition of the cassette.
- Page 54 Plates are not provided with the printer; they must be purchased separately. The printer can print on from 8.0mm to 10mm plates. Note that the printer will not print properly on plates that are bumpy, dirty or of uneven thickness. •...
- Page 55 Before turning the power switch on, make sure that the cassettes and plate have been inserted properly, that the cover is closed, and that the AC adapter is properly connected. • The startup display appears. • Character input display appears after displaying the ribbon cassette information.
- Page 56 • Since the first plate has two lines, press [Set Lines] to change the Lines setting. ▲ ▼ An “×” appears next to number of lines that are not available. ▼ ► If you press [Enter] instead of [▼] or [►], a new page is created. •...
- Page 57 • Since the second plate has just one line, press [Set Lines] to change the Line setting for the second plate. ▲ ▼ • A new page appears, and the system waits for input of more character data. • Since the third plate has two lines, press [Set Lines] to change the Line setting for the third plate.
- Page 58 • The Set cut selection display appears. ▲ ▼ • The Half cut selection display appears. ▲ ▼ • The Cut line selection display appears. ▲ ▼ • Now the cut line is printed as a dotted line. The media cannot be cut in the plate mode. •...
- Page 59 Once the characters have been input, begin printing. • The print media selection display appears. “No ribbon cassette” is displayed if the ribbon cassette is not installed. Install the ribbon cassette. “No ribbon information. No ribbon amount displayed. Press enter” is displayed if the information cannot be read due to the ribbon cassette failure and so forth.
- Page 62 Input the following characters: To input uppercase letters or the characters that appear on the top half of the keycaps, hold down the [Shift] key while pressing the desired key. Press [Back Space] to delete the character and then input the correct one.
- Page 63 Input the following characters: When the character size is set to 1.3 mm, no symbol can be entered. • The symbol selection display appears. ◄ ▲ ► ▼ Delete the symbol by holding down the [Alt] key while pressing [Back Space] and then input the correct one.
- Page 64 Delete the symbol by holding down the [Alt] key while pressing [Back Space] and then input the correct one. You can also move the cursor by holding down the [Alt] key while pressing [◄] or [►]. • This inputs the symbol “Ω”.
- Page 65 There are two methods for deleting characters: one uses the [Back Space] key, and the other uses the [Del] key. • Press [ ◄ ] or [ ► ] to move the cursor. • The [Back Space] key deletes the character that is located to the left of the cursor.
- Page 66 It is possible to delete all text on all pages in a single operation. There are two alternatives: “Text only” or “Text + settings.” This operation deletes the text on all pages, but leaves the settings from the final page. This operation deletes the text on all pages, and restores the initial values for the settings such as character size and character spacing.
- Page 67 Press the [Ins] key to toggle between “insert mode” and “overwrite mode.” To determine which is the current mode, check the upper left corner of the display. If the insert mark ( ) appears, input is in the insert mode; otherwise, input is in the overwrite mode.
- Page 68 In order to print three tube segments as shown below, a total of three pages of character data must be created. This is accomplished by creating a page break between each page of text data. When a page break is created, a new page is created automatically.
- Page 69 The cursor can be moved to the beginning of the line, to the end of the line, or to the preceding or following page. • Press [Shift] + [ ▲ ] . • Press [Shift] + [ ▼ ]. • Press [Shift] + [ ◄...
- Page 72 This section explains various character and line-related functions, such as changing the size of printed characters, widening the spacing between characters, and printing on two lines. It is possible to change the size and width of printed characters. There are seven choices available for the size and width of printed characters.
- Page 73 The spacing between printed characters can be changed as desired. There are three possible spacings of printed characters, as shown below. Initially, “Narrow” is selected. The spacing between printed characters can be changed for individual pages. • The Character Space selection display appears. ▲...
- Page 74 In order to make it easier to distinguish sixes and nines, both characters can be printed with an underline. Initially, the printer prints sixes and nines without an underline. This function cannot be changed for individual pages. • The Settings display appears. ▲...
- Page 75 It is possible to add various types of frames to characters as shown below. Initially, the printer is set to print without frames. Different types of frames can be specified for individual pages. When the segment length is shorter than 6 mm, you cannot set a frame. •...
- Page 76 It is possible to print on two lines or three lines as shown below. Initially, the printer is set to print on one line. The number of lines to be printed can be changed for individual pages. • Since the first label has two lines, you must first press [Set Lines]. ▲...
- Page 77 ▲ • The display returns to the character input display. When printing characters on three lines, set the character size to “1.3 mm” before selecting “Number of lines”. You can select the “3 lines” only when the characters size is set to “1.3 mm”. •...
- Page 78 Assume that we want to create three tube segments as shown below. First, we input “200V” on the character input display, and this character data is automatically placed on the first page. After the characters have been input, pressing [Enter] creates a new (second) page; we can then input the characters “Pump Room” on this new page.
- Page 79 It is possible to copy an entire page of character data and paste it onto a new page immediately before or after another existing page. ◄ • Display the character data from page 1. ◄ ◄ • The Page Edit display appears. ▲...
- Page 80 ◄ ► • After the display shown at right is displayed, the character input display re-appears. This indicates that the character data from page 1 has been copied. • The Page Edit display appears. ▲ ▼ • The system asks where you want to paste the copied data. ◄...
- Page 81 It is possible to cut an entire page of character data and paste it onto a new page immediately before or after another existing page. Use this function to move a page. ◄ ► • Display the character data from page 2. You can press [Page] to quickly find out which page is currently being displayed.
- Page 82 ◄ ► • After the display shown at right appears, display returns to the character input display. This indicates that the character data from page 2 has been cut. • The Page Edit display appears. ▲ ▼ • The system asks where you want to paste the data that was cut. ◄...
- Page 83 It is possible to insert blank pages. Use this function if you want to insert a new page in a specific location after you have already input character data for several pages. ◄ ► • Because the blank page will be inserted in front of the currently displayed page, display the page that will follow the blank page.
- Page 84 It is possible to delete specific pages. If you delete a page, the character data that was input on that page is also deleted. ◄ ► • Display the character data on page 2. You can press [Page] to quickly find out which page is currently being displayed. Press any key to return to the character input display.
- Page 85 Data entered in two lines on one page can be divided into two pages. The first line becomes the first page, and the second line the second page. • The Page Edit display appears. ▲ ▼ • The Page division selection display appears. ▲...
- Page 86 ■ • The Page Edit display appears. ▲ ▼ • The Page division selection display appears. ▲ ▼ • After the display shown at right is displayed, the final divided page appears. • When a page with one line is divided, the same data is duplicated on the newly created page.
- Page 87 Two pages of data can be combined into two lines on a single page. Data from the earlier page is on the first line, and that on the latter page is on the second line. • The Page Edit display appears. ▲...
- Page 88 ■ • The Page Edit display appears. ▲ ▼ • The Page combining selection display appears. ▲ ▼ • The combine confirmation display appears. • After the display shown at right is displayed, the final combined page appears. • Pages for which sequential numbers are set or pages on which characters are entered on two lines or three lines cannot be combined.
- Page 89 You can save character data that you have created in “files” in the printer’s internal memory. When you save a file, you have to assign it a file name; the purpose of the file name is to allow you to quickly identify the data that is stored in that file.
- Page 90 Character data that has been created can be stored in files. A total of approximately 15,000 characters of character data can be saved. For example, if you have already saved a file containing 50 characters, an additional 14,950 characters can be saved. •...
- Page 91 Turning the power off during file saving can damage data. The maximum number of files that can be saved in one folder is 50. If an attempt is made to save more than 50 files in a folder, the message “Already 50 files in selected folder.” appears.
- Page 92 There are two methods for retrieving character data that has been stored in files: “New” and “Add”. When character data (file) is retrieved, the character data that is currently displayed is deleted and is replaced with the retrieved character data. When the character data (file) is loaded, it is added following the last page of the data that is currently displayed.
- Page 93 ▲ ▼ • The Choose Folder display appears. ▲ ▼ • The Choose File display appears. If no files have been saved in the selected folder, the message “No files in selected folder.” appears and the display returns to the folder selection display. “*”...
- Page 94 It is possible to delete character data files that have been saved. There are three different modes for deleting files: “One file”, “Folder contents” and “All files”. Deletes only one file in a folder. Deletes all files within a folder. Deletes all files within all folders.
- Page 95 ▲ ▼ • The deletion confirmation display appears. ◄ ► • After the display at right appears, the display returns to the character input display.
- Page 96 Although the printer has three predefined folders (“Folder 1”, “Folder 2”, and “Folder 3”), these folders can be renamed freely. • The file operation selection display appears. ▲ ▼ • The Choose Folder display appears. ▲ ▼ • The Input folder name display appears. •...
- Page 97 To restore the original folder names (“Folder 1”, “Folder 2”, and “Folder 3”) when the folder names have been changed, follow the procedure described below. • The file operation selection display appears. ▲ ▼ • The Choose Folder display appears. ▲...
- Page 98 For the sake of example, assume that the following character data for printing three tube segments has been input. If “3” is set as the sets to print, tube segments are printed as shown below. In short, the three pages of character data are printed three times, resulting in a total of nine tube segments.
- Page 99 • The Print Media selection display appears. ▲ ▼ • The Tube size selection display appears. ▲ ▼ • The Sets to print and Range setting display appears. ▲ ▼ If you input the wrong number by mistake, press [Back Space] to delete the number and then input the correct number.
- Page 100 ▲ ▼ ◄ ► ▲ ▼ ▲ ▼ • Printing begins. If you press [Canc], the message “Aborting print.” appears and printing is aborted. In this case, the tube that is currently being printed is cut and then ejected. Hold down [Canc] until the printer beeps. The printer stops all operations immediately. In this case, the tube is not cut and it is not ejected.
- Page 101 It is possible to print characters with their orientation changed as shown below. And it is also possible to change the orientation on a page basis or for all pages together after entering characters. If entered characters are expected to be omitted from the page after the orientation is changed on a page basis, it is not possible to select such an orientation with the “Page”...
- Page 102 ▼ ► If you press [Enter] instead of [ ▼ ] or [►], a new page is created. • The Print Media selection display appears. ▲ ▼ • The label tape size (width) selection display appears. ▲ ▼ • The sets to print and range setting display appears. •...
- Page 103 After each tube or label is printed, it is output in a “Half cut” condition*. The length between half cuts is called the “segment length”. There are two modes for setting the segment length: “Automatic” and “Specify”. Furthermore, the positioning of characters printed on a tube or label is called the “Alignment”. There are two settings: “Centered”...
- Page 104 • The segment length selection display appears. When the specified segment length is shorter than 8.5 mm, the printer specifications change depending on the media type. Refer to “List of Function” ( page 151). ▲ ▼ If you accidentally input an incorrect number, press [Back Space] to delete the number and then input the correct one.
- Page 105 • “Changing character size” ( page 68) • “Changing the spacing between characters” ( page 69) If “All” is selected on the Seg Length selection display, characters typed exceeding the specified segment length are deleted. If 2.00 mm is specified as the segment length, all characters are deleted even when a page containing “6mm 100%”...
- Page 106 ◄ ► • The correction value can be specified with the [+] or [-] key and numeric keys. You can input a correction value for negative correction. However, if there is no correction space (part other than characters), no more correction can be made. The minimum unit of correction which is handled internally is 0.085 mm.
- Page 107 Assume that you want to produce the following tube segments. The number of continuous printings can be set from 1 to 100 for each page. In this case, it might seem acceptable to create the character data shown below, but what if you wanted to print 20 tube segments labeled “Pump Room”...
- Page 108 ▲ ▼ If you accidentally input an incorrect number, press [Back Space] to delete the number and then input the correct one. • The display returns to the character input display. Cancel continuous print by following the procedure described below. •...
- Page 109 Assume that you want to produce the following tubes. Serial characters can be set in only one place on a page. The portion of the character data consisting of numbers from 1 to 10 is incremented (or decremented) by “1” each time it is printed, and is called the “number portion”.
- Page 110 ▲ ▼ • The decimal numbering setting display appears. In addition to decimal numbering, you can also specify hexadecimal or alphabetical numbering. For details, refer to Memo on the next page, “Various types of numbered printing”. If you accidentally input an incorrect number, press [Back Space] to delete the number and then input the correct one.
- Page 111 The following different types of numbering print are possible. The selection of the type is made in step 3 on the preceding page. For example, if the numbers in the number portion run from 8 to 12, the number of digits needed for “8”...
- Page 112 When printing, enviromental factors or characteristics of the print media may cause printing to start slightly out of position or to be shifted slightly in the vertical direction so that character data is not printed correctly, even though the correct print media type and size are selected. In such cases, you can shift the printing position slightly up/down or left/right.
- Page 113 ► • Pressing [ ► ] increases the value in steps of 0.25mm. Press [ ◄ ] to move the printing start position to the left. The printing start position can be adjusted up to 2.5 mm to the left or right. •...
- Page 114 When printing two lines per page, a centerline can be printed between the lines. This function cannot be changed from one page to another. Centerlines cannot be printed on pages with only one line or three lines. • The Function selection display appears. ▲...
- Page 115 By selecting "Expansion" on the Plate Printing Area selection display and selecting character size and number of lines accordingly, the printable number of characters within the short pitch will increase. If “Expansion” is selected on the Plate Printing Area selection display, only plates can be used as the printing media. Printing on a plate for a narrow width terminal block.
- Page 116 • Input “A-123”, press [▼], and then input “R11”. • Perform the printing operation. • Only 1.3mm double-byte characters can be set to three lines. • The maximum number of printable characters depends on segment length setting. When “Normal” is selected on the Plate Printing Area selection display, spaces are automatically inserted at the left and right of the print.
- Page 117 Printing may be too dark or too light in some cases, depending on the environment in which the printer is used and the characteristics of the print media. In such cases, adjust the printing density. The printing density can be adjusted to five levels.
- Page 118 It is possible to change the printing speed. However, if the printing speed is too fast for the environment in which the printer is used and the characteristics of the print media, printing may shift out of position or be otherwise affected.
- Page 119 If you examine a long tube that has been printed and output, you will see notches between each segment. These notches allow you to break the individual tube segments apart by hand. The same is true for label tape. The notches make it easy to peel each label off.
- Page 120 • The Set Cut display appears. ▲ ▼ • The Half Cut display appears. ▲ ▼ • The Cut Line display appears. ▲ ▼ • The display returns to the character input display.
- Page 121 For example, if character data as shown in Fig. 1 is input and the number of tube segments to be printed is set as “3”, tube segments are produced as shown in Fig. 2. Initially, the printer is set to make one full cut after all tube segments are printed, but it is possible to change this setting so that a full cut is made after a certain number of tube segments are printed, as shown in Fig.
- Page 122 When changing the print media from tube to label tape, or from label tape to tube, it is necessary to take out the media that is currently set in the printer. However, because the printer feeds tube or label tape into its transport rollers, it is not possible to simply pull out the current media.
- Page 123 • See “Part 2 Basic Operation” for information on how to set the print media. Tighten the ribbon if the ribbon is slacked when removing the tube or label tape.
- Page 124 The display can be difficult to see, depending on the ambient brightness and the viewing angle. If the display is difficult to see, adjust the display contrast. The display contrast can be set to any of nine levels. Intensity of the back light is not adjustable. •...
- Page 125 Follow the procedure described below to turn off sounds such as the warning sound and the key touch sound for operations other than character input. • The Settings display appears. ▲ ▼ • The Sound display appears. ▲ ▼ • The display returns to the character input display.
- Page 126 It is possible to restore all settings to their initial values. • The initialization confirmation display appears. ◄ ► • After the screen shown at right appears, the display returns to the character input display. The settings are returned to the factory settings when initialized. Therefore, note that all current data and saved files will be erased.
- Page 128 If a tube or tape is jammed during printing, a “Media JAM” message is displayed on the LCD and the printer stops. Remove the jammed tube or tape according to the messages shown on the display. If you cannot do this because the “Media JAM” message is not shown although a tube or tape is jammed or you have turned off the printer after display of the “Media JAM”...
- Page 129 ► ◄ • While you keep pressing the [ ► ] or [ ◄ ] key, the tube is continuously fed reverse or forward. If the ribbon cassette could not be removed in step 4 or the label tape could not be removed in step 5, open the cover and check whether the ribbon cassette or label tape can be removed.
- Page 130 The tube or tape may wind itself around the roller inside the printer when it is ejected improperly after printing or it is improperly fed after replacement. If you happen to turn off the printer after “Media JAM” message is displayed and as a consequence you cannot clear the jam according to the messages, you can remove the jammed printing media using the Feed function in the maintenance mode.
- Page 131 ▲ ▼ • A display indicating how to feed the printing media forward or reverse appears. ► ◄ • While you keep pressing the [ ► ] or [ ◄ ] key, the printing media is continuously fed reverse or forward.
- Page 132 Using the Feed function in the maintenance mode allows you to feed the tube or label tape loaded in the printer. Note that this function should be used only when the tube or label tape is not ejected or fed properly. Feeding the tube or label tape continuously can damage the printing media or winds the ribbon of the ribbon cassette around other parts, causing a jam.
- Page 133 If you feed the label tape excessively in the reverse direction, the leading edge of the label tape enters the cassette. Refer to Note, “What to do if the label tape becomes stuck inside the cassette” ( page 38). The ribbon of the ribbon cassette can slacken when it is fed reverse. Open the cover and check whether the ribbon is slack.
- Page 134 If the cutter does not cut tube or label tape properly, try changing the cutting depth. The cutting depth for half cuts and for full cuts can be adjusted as described below. In addition, these adjustments can be made separately for each type of print media.
- Page 135 ▲ ▼ • The Full Cut Depth display appears. ▲ • Each time [ ▲ ] is pressed, the cutting depth increases by one. When adjusting the depth for a half cut, pressing [▼] reduces the depth. • The display returns to the character input display. The cutting depth is now one step deeper.
- Page 136 If cutting is not performed smoothly for certain types of tube or label tape, try reducing the cutting speed. The cutting speed can be adjusted to one of two levels (“Normal” and “Low”) for half cuts and for full cuts, respectively.
- Page 137 If tube or label tape is not fully separated even with forced full cutting ( page 131), the cutter should be replaced. When replacing the cutter, be sure to replace the cutter receiver at the same time. Contact your nearest dealer for details on how to obtain a replacement cutter. If half cuts are too deep even though the cutting depth has been adjusted to the shallowest level, it is possible that the cutter receiver is worn.
- Page 138 • To ensure correct orientation, align the “ ” mark on the cutter with the “◄” mark as shown, and insert the cutter all the way in. • Push the cutter receiver in as far as it will go. • Press the “...
- Page 139 • The Maintenance display appears. ▲ ▼ • After the display shown at right appears, the display returns to the character input display. The setting that was made in the section “Changing the cutting depth” ( page 130) returns to its original value.
- Page 140 If the message “End of ribbon.” appears while printing is in progress, replace the ribbon cassette as shown below. Contact your nearest dealer to purchase replacement ribbon cassettes. • Pull the cassette out toward you. Place the removed ribbon cassette into the plastic bag, then discard it immediately in compliance with local regulations regarding the disposal of such items.
- Page 141 Remove the tube or label tape cassette as follows, and install a new one. Contact your dealer if you need to purchase tube or label tape cassettes. The same procedure as for a label tape cassette applies when using heat shrink tube, wrap around tape and 4mm I.D. strip. Clear tube and plate is handled in the same way as regular tube.
- Page 142 Wipe the body with a cloth that has been dampened with water and then wring out thoroughly. Do not use alcohol, benzene, or other solvents. Doing so could not only damage the finish, but could also damage the unit itself. Use gauze to wipe away any dirt on the transport rollers.
- Page 143 Transport roller 3 release lever To clean transport rollers 2 or 3, first pull the transport roller 3 release lever to the right. Transport roller 1 Transport roller 2 Transport roller 3 • The transport rollers rotate. The roller rotates one revolution when the cover is opened and closed six times. •...
- Page 144 Use a cotton swab to clean dirt from the print head. Be very careful not to scratch the head. Also, always be sure to turn the power switch off before beginning to clean the print head. If the print head is extremely dirty, place a few drops of water on the cotton swab, and then wipe the dirt away.
- Page 146 The consumable supplies used by the printer are listed below. Contact your nearest dealer to purchase supplies. Purchase any commercially available tube with an Purchase any commercially available 0.5mm-thick inner diameter ranging from φ 2.5mm to 6.5mm. plate with width of 8 to 10mm. The thickness of usable tubes is 0.5 mm.
- Page 147 The following options are available. Contact your nearest dealer for details. Cassettes Ink ribbon cassette (black, white) Plate ink ribbon cassette (black) Label tape cassette (white) Tube Warmer warms the tube that has harden with cold. Using the tube warmer enables clear printing 12mm in low temperature environment.
- Page 148 Cannot modify. An attempt was made to select an Check the User's Guide and make unavailable setting. the correct setting. Check the User's Guide and make Input value out of range. An attempt was made to input a value that is outside of the settable the correct setting.
- Page 149 Cannot input. The specified character size or Change the segment length or Change length or character size. segment length does not allow you character size. to input characters. Don’t operate. 3 lines in the page. The page to be divided or Edit or delete the pages on which combined contains data entered on characters are entered on three...
- Page 150 Memory backup battery low. The memory backup batteries do Contact your dealer. Contact dealer. not have adequate capacity. Memory backup battery exhausted. Because the memory backup Contact your dealer. Resetting memory. batteries do not have adequate capacity, the data settings have been initialized.
- Page 151 The display remains blank when The AC adapter is not connected Turn the power switch off, and the power is turned on. properly. then make sure that the AC adapter is securely plugged into the power outlet and is connected to the main unit.
- Page 152 Surface of the print media is dirty. When transporting the tube, the Wipe the dirt from the printed edge of it touched the ribbon material with dry cloth. cassette and smeared. The print media is not fed into the The load placed on the tube when Minimize the load that is placed printer.
- Page 153 Torn ribbon The tube is stained with sticky Use a clean tube. matter similar to the glue. Cannot select printing media other There is a page for which Select “Auto” on the Seg Length than the plate. “Expansion” was selected on selection display according to the Plate Printing Area selection "Printing with short pitch width”...
- Page 155 Clear tube reverse *About the Printing Performed with the Segment Length Specified The following table summarizes the specifications to conform to when printing characters Plate A segment length can be specified, but only [Centered] can be specified as the character alignment. Label A segment length can be specified, but only [Centered] can be specified as the character alignment.
- Page 156 Printing method ........Thermal transfer using one-line head Resolution ..........300dpi Printing speed ........Tube: High speed mode (40 mm/sec), Middle speed mode (25 mm/sec), Low speed mode (18.5 mm/sec) Label: High speed mode (40 mm/sec), Middle/Low speed mode (25 mm/sec) Throughput .........High speed mode (42 tube segments/min), Middle speed mode (35 tube segments/min), Low speed mode (30 tube segments/min) (Printing conditions: Printing media =Tube, Segment length = 20 mm, Characters to print = Five “3mm 100%”...
- Page 157 PUB. 4Y5-8253-010 ©Nisca Corporation 2011 PRINTED IN JAPAN...