Table of Contents
Advertisement
Quick Links
Advertisement
Chapters
Table of Contents

Related Manuals for Pioneer AVH-3250BT


Summary of Contents for Pioneer AVH-3250BT
- Page 1 Operation Manual DVD AV RECEIVER AVH-P4250DVD AVH-P3250DVD AVH-P3250BT English...
-
Page 2: Table Of Contents
Contents Thank you for purchasing this PIONEER product. To ensure proper use, please read through this manual before using this product. It is especially important that you read and observe WARNINGs and CAUTIONs in this manual. Please keep the manual in a safe and accessible place for future refer- ence. - Page 3 Contents Changing audio language during playback Registering a connected cellular phone 43 (Multi-audio) 34 Voice recognition 44 Changing the subtitle language during Connecting a Bluetooth audio player 44 playback (Multi-subtitle) 34 Connecting to a Bluetooth device Changing the viewing angle during playback automatically 44 (Multi-angle) 34 Displaying BD (Bluetooth Device)
-
Page 4: Precautions
Section Precautions IMPORTANT SAFEGUARDS WARNING Please read all of these instructions regarding ! Do not attempt to install or service your your display and retain them for future refer- display by yourself. Installation or servi- ence. cing of the display by persons without 1 Read this manual fully and carefully be- training and experience in electronic fore operating your display. -
Page 5: To Avoid Battery Exhaustion
Section Precautions To avoid battery exhaustion To watch a video image on the front display, park your vehicle in a safe place and apply the Keep the vehicle engine running when using parking brake. this unit to avoid draining the battery power. ! When no power is supplied to this unit, When using a display such as when the vehicle battery is being... -
Page 6: Dvd Video Disc Region Numbers
DVD video disc region numbers ! We offer the latest information about Pioneer Corporation on our website. Only DVD video discs with compatible region numbers can be played on this player. You can find the region number of the player on the... -
Page 7: Feature Demo Mode
Section Before You Start Press RESET with a pen tip or other Important pointed instrument. Failure to connect the red lead (ACC) of this unit to a terminal coupled with ignition switch on/off operations may lead to battery drain. Use and care of the remote control RESET button (AVH-P4250DVD) -
Page 8: Adjusting The Response Positions Of The Touch Panels (Touch Panel Calibration)
Section Before You Start Using the remote control Point the remote control in the direction of the front panel to operate. ! The remote control may not function prop- erly in direct sunlight. Important ! Do not store the remote control in high tem- peratures or direct sunlight. -
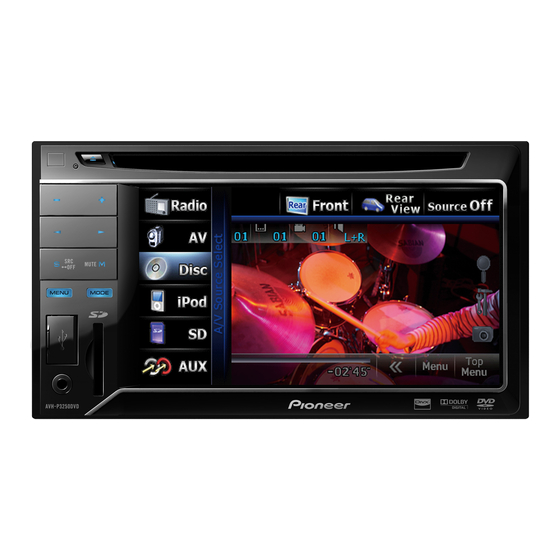
Page 9: What's What
EQ micro- phone. MUTE CAUTION ! (AVH-P3250DVD/AVH-P3250BT) Use an optional Pioneer USB cable (CD-U50E) to connect the USB audio player/USB mem- (AVH-P4250DVD) ory as any device connected directly to the unit will protrude out from the unit and may be dangerous. -
Page 10: Remote Control
Section What’s what Remote control Part Operation Press to select the tuner band when tuner is selected as a source. Also used to cancel the control mode of functions. Press to switch be- BAND/ESC tween modes when playing discs with compressed audio and audio data (CD- DA) such as CD-... -
Page 11: Basic Operations
View view camera (back up camera) on page 66. image on or off. ! An external unit refers to a Pioneer product, Turning the unit off. such as those which will be available in the fu- ture. Although incompatible as a source, the... -
Page 12: Operating The Scroll Bar And The Scrubber Bar
Section Basic Operations Operating the scroll bar Activating the touch panel and the scrubber bar keys 1 1 1 1 1 1 Audio Wed 28 may Fader/Balance F/R 0 L/R 0 12:45 Graphic EQ Super Bass Abcdeabcdeabcdeabcdeab Auto EQ Sonic Center Control L/R:0 Loudness Subwoofer... -
Page 13: Common Operations For Menu Settings/Lists
Section Basic Operations Common operations for Adjust the LCD panel to an easily view- able angle. menu settings/lists (AVH-P3250BT only) Laying the panel down. Starting the Bluetooth telephone menu. Refer to Introduction of Bluetooth tel- Returning the panel to the upright ephone operations on page 24. -
Page 14: Ejecting An Sd
Section Basic Operations Ejecting an SD (AVH-P3250DVD/AVH-P3250BT) % Press an SD to eject. Setting the clock Switch to Clock Adjustment display. Refer to Basic Operations on page 11. Select the item to set. Touch a or b to set the correct date and time. -
Page 15: Tuner
Section Tuner Introduction of tuner Note operations Listening AM radio while an iPod is charged from 1 1 1 3 3 3 this unit may generate noise. In this case, discon- nect the iPod from this unit. Local Wed 28 may Radio 12:45 87.50... -
Page 16: Operations
Section Playing moving images Introduction of video you can enjoy the video contents of the iPod as an iPod source. playback operations ! (AVH-P3250DVD/AVH-P3250BT) You can view DVD/DVD-R/DVD-RW/CD/CD-R/ If an iPod with video capabilities is con- CD-RW/USB/SD/iPod. nected to this unit using an interface cable such as the CD-IU50V (sold separately), you can enjoy the video contents of the iPod as an iPod source. - Page 17 Section Playing moving images Switching the audio output, Moving ahead one frame at a when playing video discs re- time during playback. corded with LPCM audio. Refer to Frame-by-frame play- Refer to Selecting audio out- back on page 33. put on page 35. Touch and hold for more Switching between stereo than two seconds to slow...
- Page 18 ! If the ignition switch is set to ACC or ON, the OFF or touch the source icon to select the source. iPod battery will be charged while connected. ! While an iPod is connected to this unit, PIONEER, However, the iPod battery is not charged when Accessory Attached or (check mark) is dis- you select an SD as the source.
-
Page 19: Playing Audio
Section Playing audio Introduction of sound Switching the equalizer curves. playback operations Refer to Using the equali- zer on page 46. You can listen to DVD-R/DVD-RW/CD/CD-R/ Touch and hold for more CD-RW/USB/SD/iPod sound files. than two seconds to turn the auto-equalizer on or 1 1 1 2 2 2 3 3 3 4 4 4 5 5 5... - Page 20 1 If a disc has already been inserted, press SRC/ OFF or touch the source icon to select the source. Switching to Link Search ! While an iPod is connected to this unit, PIONEER, mode to play songs re- Accessory Attached or...
- Page 21 Section Playing audio ! Text information may not be correctly dis- played depending on the recorded environ- ment. ! USB storage device that can be charged via USB will be recharged when plugged in and the ignition switch is set to ACC or ON. However, the USB storage device that can be charged via USB will not be recharged when you select an SD as the source.
-
Page 22: Introduction Of Still Image Playback Operations
Section Playing still images Introduction of still image Displaying the file name list to select the files. playback operations Refer to Selecting files from the file name list on page You can view still images saved in CD-R/CD- RW/USB/SD. 1 1 1 2 2 2 3 3 3 4 4 4 Starting or pausing the sli- Wed 28 may... -
Page 23: Playing Still Images
Section Playing still images Notes ! This unit can play back a JPEG file recorded Selecting a folder. on CD-R/RW/ROM/SD/USB storage device. (Please see the following section for files that can be played back. Refer to page 85.) ! Files are played back in file number order and folders are skipped if they contain no files. -
Page 24: Operations
Section Bluetooth Telephone ! Be sure to park your vehicle in a safe place Introduction of Bluetooth and apply the parking brake when performing telephone operations this operation. 1 Incoming call notice Indicates that an incoming call has been re- Wed 28 may Radio 12:45... -
Page 25: Bluetooth Telephone
Section Bluetooth Telephone Adjusting the other party’s 1 Connection listening volume. First, you need to connect a Bluetooth telephone Refer to Adjusting the other to this unit. party’s listening volume on For detailed instructions on connecting your page 39. phone to this unit via Bluetooth wireless technol- Accepting an incoming call. -
Page 26: Tv Tuner
Section TV tuner Introduction of TV tuner Manual tuning (step by step) using the buttons operations 1 Press c or d (TRACK/SEEK). Seek tuning using the buttons 1 Press and hold c or d (TRACK/SEEK). 1 1 1 2 2 2 3 3 3 Wed 28 may 12:45... -
Page 27: Using Bluetooth Wireless Technology
Section Using Bluetooth wireless technology Introduction of Bluetooth Switching the equalizer curves. telephone operations Refer to Using the equalizer on page 46. Touch and hold for more 2 2 2 3 3 3 1 1 1 than two seconds to turn the auto-equalizer on or off. -
Page 28: Bluetooth Audio Operations
Section Using Bluetooth wireless technology Turning automatic answering 1 Connection on or off. First, you need to connect a Bluetooth telephone Refer to Setting automatic an- to this unit. swering on page 39. For detailed instructions on connecting your Touch and hold for more phone to this unit via Bluetooth wireless technol- than two seconds to connect ogy, see following section. -
Page 29: Setting Up For Bluetooth Audio
Section Using Bluetooth wireless technology ! Since there are a number of Bluetooth audio players available on the market, available op- erations will vary extensively. When operating Setting the action for c and d icons. your player with this unit, refer to the instruc- Auto tion manual that came with your Bluetooth audio player as well as this manual. -
Page 30: Detailed Instructions
Section Detailed instructions Storing and recalling stations Tuning in to strong signals You can easily store up to six(for tuner)/12(for Local seek tuning lets you tune in to only TV) stations for each band as presets. those radio stations with sufficiently strong ! Six stations for each band can be stored in signals for good reception. -
Page 31: Operating This Unit's Ipod Function From Your Ipod
Section Detailed instructions Select the desired menu item. Refer to Introduction of sound playback opera- tions on page 19. Operate the connected iPod to select a video/song and play. Selecting the desired menu item. Random play (shuffle) Videos/songs can be played back in random order. -
Page 32: Playing Videos From Your Ipod
Section Detailed instructions ! This function cannot be operated during Switch to iPod video mode. Video CD playback featuring PBC (playback control). Switching to iPod video mode. Video ! If you perform chapter search, fast forward/ reverse, frame-by-frame playback or slow motion playback, the repeat play will stop. -
Page 33: Resume Playback (Bookmark)
Section Detailed instructions Touch the title of the list that you want By using the Bookmark function, you can re- to play. sume playback from a selected scene the next Repeat this operation until you find the de- time the disc is loaded. sired video/music. -
Page 34: Changing Audio Language During Playback (Multi-Audio)
Section Detailed instructions Touch the desired search option (e.g., Changing the subtitle Chapter). language during playback (Multi-subtitle) Touch 0 to 9 to input the desired num- ber. With DVDs/DivX files featuring multi-subtitle # To cancel the entered numbers, touch C. recordings, you can switch between subtitle languages during playback. -
Page 35: Selecting Audio Output
Section Detailed instructions This function cannot be used if a specified Notes scene has not been preprogrammed on the ! You can display the menu by touching Return DVD disc. during PBC playback. For details, refer to the instructions provided with the disc. ! PBC playback of a Video CD cannot be can- Selecting audio output celed. -
Page 36: Using Advanced Sound Retriever
Section Detailed instructions Start playback of the selected list. Touch one of the categories in which you want to play. ! Artist – Displays an album list of the artist Starting playback of the selected list. currently being played. ! Album – Displays a song list from the album currently being played. -
Page 37: Capture An Image In Jpeg Files
Section Detailed instructions ! DivX VOD content is protected by a DRM (Di- Changing the wide screen gital Rights Management) system. This re- mode stricts playback of content to specific, You can select a desired mode for enlarging a registered devices. 4:3 picture to a 16:9 picture. -
Page 38: Calling A Number In The Phone Book
Section Detailed instructions ! Different settings can be stored for each video Note source. Depending on the cellular phone, the phone book ! When a video is viewed in a wide screen mode may not be transferred automatically. In this that does not match its original aspect ratio, it case, operate your cellular phone to transfer the may appear different. -
Page 39: Using The Missed, Received And Dialed Call Lists
Section Detailed instructions End the call. Refer to Introduction of Bluetooth telephone op- Switching to the call history list. erations on page 24. Make the call. Refer to Introduction of Bluetooth telephone op- Using the missed, received erations on page 24. and dialed call lists End the call. -
Page 40: Switching The Ring Tone
Section Detailed instructions Make the call. To maintain the good sound quality, this unit can adjust the other party’s listening volume. Refer to Introduction of Bluetooth telephone op- If the volume is not loud enough for the other erations on page 24. party, use this function. -
Page 41: Setting The Private Mode
Section Detailed instructions Note Switching between the device names and BD addresses. Entering phone number mode cannot be oper- ated unless a Bluetooth telephone is connected # To cancel searching, touch Stop. to this unit. # If five devices are already paired, Memory Full is displayed and pairing cannot be performed. -
Page 42: Connecting To A Bluetooth Device Automatically
Section Detailed instructions Connecting to a Bluetooth If you cannot open the connection between your Bluetooth device and this unit from your device automatically Bluetooth device, you can use this function to (Function of AVH-P3250BT) establish a connection. If this function is set to on, a connection be- Display the Bluetooth Connection tween your Bluetooth device and this unit will Menu. -
Page 43: Entering Pin Code For Bluetooth Wireless Connection
Section Detailed instructions This unit displays its BD address. You may need to refer to the operation manual that came with your phone if you are unsure Display the Bluetooth Connection how to initiate a connection from your phone. Menu. Put the unit in initiating a connection Refer to Introduction of Bluetooth telephone op- erations on page 24. -
Page 44: Voice Recognition
Section Detailed instructions # If registration failed, the device name of the If this function is set to on, a connection be- connected phone will not be displayed in the se- tween your Bluetooth device and this unit will lected assignment. In such cases, return to step take place automatically as soon as the two 1 and try again. -
Page 45: Menu Operations
Section Menu operations Introduction of menu cessor’s audio menu. For details, refer to Intro- duction of DSP adjustments on page 49. operations ! You can display the DVD setup menu when a Disc, USB or SD source is selected. 2 2 2 1 ! If you start the DVD setup menu, playback is Audio stopped. -
Page 46: Audio Adjustments
Section Menu operations Audio Adjustments Display Equalizer curve Note Vocal Vocal Custom1 Custom 1 When selecting FM as the source, you cannot switch to Source Level Adjuster. Custom2 Custom 2 Flat Flat Using fader/balance adjustment Super Bass Super bass You can change the fader/balance setting to ! The equalizer curves for Custom1 and provide an ideal listening environment for all Custom2 can be adjusted. -
Page 47: Adjusting Loudness
Section Menu operations Touch Graphic EQ on the audio function Adjusting loudness menu. Loudness compensates for deficiencies in the low- and high-frequency ranges at low volume. Touch c or d to select the desired item. Powerful—Natural—Vocal—Custom1— Display the audio function menu. Custom2—Flat—Super Bass Refer to Introduction of menu operations on page 45. -
Page 48: Boosting The Bass
Section Menu operations Boosting the bass Display the audio function menu. Refer to Introduction of menu operations on You can boost the bass level. page 45. Display the audio function menu. Compare the FM volume level with the Refer to Introduction of menu operations on level of the source you wish to adjust. -
Page 49: Digital Signal Processor
Section Menu operations Digital Signal Processor Using the position selector One way to assure a more natural sound is to Introduction of DSP adjustments optimize the stereo image and place you right You can use this unit to control a DEQ-P7650 in the center of the sound field. -
Page 50: Adjusting Source Levels
Section Menu operations Display the DSP function menu. (such as Musical, Drama or Action). Refer to Introduction of menu operations on On the other hand, when selecting SFC effects page 45. that are suitable for 2-channel audio sources (such as Jazz, Hall or Club), we recommend turn- Touch Fader/Balance on the DSP func- ing Dolby Pro Logic II off. - Page 51 Section Menu operations ! When direct control is on, all audio func- Using dynamic range control tions except VOLUME/VOL and The dynamic range refers to the difference be- Dolby Pro Logic II are locked. tween the smallest and largest sounds emitted.
-
Page 52: Setting The Speaker Setting
Section Menu operations ! Panorama (Panorama) extends the front Setting the speaker setting stereo image to include the surround Be sure to adjust the speaker settings, such speakers for an exciting “wraparound” ef- as size (bass capacity), according to the fect. -
Page 53: Adjusting The Speaker Output Levels
Section Menu operations Display the DSP function menu. Rear-R (right rear speaker)—Rear-L (left rear Refer to Introduction of menu operations on speaker)—Subwoofer (subwoofer) # Speakers with the size set to Off cannot be se- page 45. lected. (Refer to Setting the speaker setting on the Touch Speaker Setting. -
Page 54: Adjusting The Speaker Output Levels Using A Test Tone
Section Menu operations Note Notes ! If necessary, select speakers and adjust their When you select a cross-over frequency, you are ‘absolute’ output levels. (Refer to Adjusting setting the cross-over frequency for the subwoo- fer’s L.P.F. (low-pass filter) and the Small speak- the speaker output levels on the previous er’s H.P.F. -
Page 55: Using The Equalizer
Section Menu operations ! The equalizer curves for Custom1 and Display the DSP function menu. Refer to Introduction of menu operations on Custom2 can be adjusted. ! When Flat, no changes are made to the page 45. sound. You can check the effects of the Touch Time Alignment and then touch equalizer curves by switching alternatively Adjustment. - Page 56 Section Menu operations Touch Parametric EQ. Using the auto-equalizer The auto-equalizer is the equalizer curve cre- Touch a or b to select the desired item. ated by auto TA and EQ (refer to Auto TA and EQ (equalizer)—SP-Select (speakers)—Band EQ (auto-time alignment and auto-equalizing) (bands)—Frequency (center frequency)—...
- Page 57 Section Menu operations — The fader/balance settings return to the ! If the microphone is placed in an unsuitable position the measurement tone may become center position. (Refer to page 49.) — The equalizer curve switches to Flat. loud and measurement may take a long time, resulting in battery drainage.
- Page 58 Section Menu operations # It takes about nine minutes for auto EQ mea- Select the position for the seat on which the microphone is placed. surement to be completed when all the speakers Refer to Using the position selector on page are connected.
-
Page 59: Setting Up The Dvd Player
Section Menu operations Setting up the DVD player Setting the audio language You can set the preferred audio language. Setting the subtitle language Display the Video Setup Menu. You can set a desired subtitle language. When Refer to Introduction of menu operations on available, the subtitles will be displayed in the page 45. -
Page 60: Setting The Slide Show Interval
Section Menu operations ! The TV aspect ratio cannot be changed for Setting the multi-angle DVD some discs. For details, refer to the disc’s in- display structions. The angle icon can be set so it appears on scenes where the angle can be switched. Setting the slide show interval Display the Video Setup Menu. -
Page 61: Setting The Divx Subtitle File
Section Menu operations Setting the code number and level details, refer to the instruction manual that came with the disc. A code number must be registered in order to play back discs with parental lock. Changing the level Display the Video Setup Menu. You can change the set parental lock level. -
Page 62: Setting For Digital Output
Section Menu operations Touch DivX Subtitle on the Video Setup Touch DivX VOD on the Video Setup menu to select the desired subtitle setting. menu. ! Original – Display the DivX subtitles Touch Deactivation Code. ! Custom – Display the DivX external subti- # To cancel deactivation, touch Cancel. -
Page 63: System Settings
Section Menu operations Touch DVD Auto Play to turn automatic System settings playback on. Switching the auxiliary setting # To turn automatic playback off, touch DVD Auto Play again. Activate this setting when using an auxiliary device connected to this unit. Display the system menu. -
Page 64: Selecting The Menu Language
Section Menu operations Touch Rear Speaker on the system Notes menu to switch the subwoofer output or ! When Mute is displayed, the sound is turned full-range speaker. off and no audio adjustments can be made. # When no subwoofer is connected to the rear ! When ATT is displayed, the sound is attenu- output, select Full (full-range speaker). -
Page 65: Setting The Fm Tuning Step
Section Menu operations Setting the FM tuning step Touch Clear. After selecting a desired item, a confirmation The FM tuning step employed by seek tuning display appears. Touch OK to delete the mem- can be switched between 100 kHz, the preset ory. -
Page 66: Setting The Rear View Camera
Refer to Introduction of menu operations on your nearest Pioneer dealer. page 45. ! Only when a Pioneer TV tuner (e.g. GEX- Touch Camera Polarity on the system P5700TVP) is connected to this unit, you menu to select the appropriate setting. -
Page 67: Selecting The Area Group
Section Menu operations Touch TV Signal on the system menu to loud and measurement may take a long time, select the appropriate TV signal. resulting in battery drainage. Be sure to place Auto—PAL—NTSC—PAL-M—SECAM the microphone in the specified location. Before operating the auto EQ function Selecting the area group ! Carry out auto EQ in as quiet a place as Display the system menu. - Page 68 Section Menu operations — The front, center and rear speakers will Plug the microphone into the micro- automatically be adjusted to a high phone input jack on this unit. pass filter setting. ! Previous settings for auto EQ will be over- written.
-
Page 69: Correcting Distorted Sound
Section Menu operations # To cancel this function on the way, touch Store the microphone carefully in the glove compartment or another safe place. Cancel. If the microphone is subjected to direct sun- Touch Reset again. light for an extended period, high tempera- The reset end was carried out. -
Page 70: Entertainment Settings
Section Menu operations Entertainment settings The customized color has been stored in the memory. Selecting the illumination color The set color will be recalled from the memory the next time you touch the same icon. This unit is equipped with multiple-color illu- mination. -
Page 71: Customizing Menus
Section Menu operations Customizing menus Display menu columns to register. Refer to Introduction of menu operations on page 45. You can customize menus except DVD setup menu. Touch and hold the menu column to register it. # To cancel registration, touch and hold the menu column again. -
Page 72: Other Functions
Section Other Functions # You cannot adjust the picture adjustment for Changing the picture the rear view camera when Camera Polarity is adjustment set to Off. (Refer to Setting the rear view camera You can adjust the Brightness (brightness), (back up camera) on page 66.) # If the color system is set to PAL/PAL-M/ Contrast (contrast), Color (color) ,Hue (hue), Dimmer (dimmer), Temperature (tempera-... -
Page 73: Adjusting The Response Positions Of The Touch Panels (Touch Panel Calibration)
AUX source ! If the touch panel cannot be adjusted prop- and is assigned to AUX. erly, consult your local Pioneer dealer. Turn the unit off. About AUX connection methods Refer to Basic Operations on page 11. -
Page 74: Using An External Unit
Refer to Using the auto-equalizer Using an external unit on page 47. An external unit refers to a Pioneer product, such as those which will be available in the fu- Actions will differ depending on ture. Although incompatible as a source, the the connected external unit. -
Page 75: Additional Information
Appendix Additional Information Troubleshooting Symptom Cause Action (Refer- ence page) Common There is no The parking Connect the park- Symptom Cause Action (Refer- image dis- brake cable is ing brake cable, ence page) played. not connected. and apply the park- ing brake. - Page 76 Appendix Additional Information Symptom Cause Action (Refer- Symptom Cause Action (Refer- ence page) ence page) Nothing is dis- The rear view Connect a rear Dialog lan- The DVD being The language can- camera is not view camera. guage (and played does not not be switched if played.
-
Page 77: Error Messages
PBC. Video CDs that fea- possible. ture PBC. Error messages When you contact your dealer or your nearest iPod Pioneer Service Center, be sure to note the Symptom Cause Action error message. The iPod does The cables are in-... - Page 78 Appendix Additional Information Message Cause Action Message Cause Action Unplayable This type of disc Replace the disc Video frame DivX file’s frame Select a file that Disc cannot be played with one that can rate not sup- rate is more than can be played.
- Page 79 Appendix Additional Information Message Cause Action Message Cause Action Incompatible The USB device Connect a USB Unplayable The inserted disc Select a file that connected to is portable audio File-High Defi- contains a high can be played. player or USB nition definition DivX not supported by...
-
Page 80: Understanding Auto Eq/Auto Ta And Eq Error Messages
Pioneer Service Station. Understanding auto EQ/ auto TA and EQ error messages When correct measurement of the car’s inter- ior acoustic characteristics is not possible using auto TA and EQ, an error message may appear on the display. -
Page 81: Understanding Messages
Appendix Additional Information Understanding messages Indicator list Messages Translation Area 1 Area 2 Pioneer recommends the use of a camera CAUTION: Screen which outputs mirror- image may appear re- reversed images. versed. Otherwise, the screen image will appear re- versed. - Page 82 Appendix Additional Information Indicates that a cellular phone is Shows the artist name of the track/ song currently being played for CD connected. ! Indicates that an incoming call text discs. Shows the artist name of the artist has been received and has not currently being played for MP3/ been checked yet.
-
Page 83: Handling Guideline
Appendix Additional Information Handling guideline Road shocks may interrupt disc playback. Discs and player Read the precautions for discs before using them. Certain functions may not be available for some DVD Use only discs featuring any of following logos. video discs. It may not be possible to play back some DVD video discs. -
Page 84: Sd Memory Card
Appendix Additional Information Depending on the kind of USB portable audio player/ For details, refer to the manuals for the iPod. USB memory you use, the device may not be recog- About iPod settings nized or audio files may not be played back properly. ! When an iPod is connected, this unit changes the Do not leave the USB portable audio player/USB EQ (equalizer) setting of the iPod to off in order to... -
Page 85: Compressed Audio Compatibility (Disc, Usb, Sd)
Appendix Additional Information ! This unit plays back files with these filename Frequent loading and ejecting of a DualDisc may re- sult in scratches on the disc. Serious scratches can extensions (.jpg, .jpeg, .jpe or .jfif) as a JPEG lead to playback problems on this unit. In some image file. -
Page 86: Ipod Compatibility
LPCM: No CAUTION Bit rate: 8 kbps to 320 kbps (CBR), VBR Pioneer accepts no responsibility for data lost on the USB memory/USB portable audio player/SD Sampling frequency: 8 kHz to 48 kHz memory card even if that data is lost while using Compatible external subtitle file extension: .srt... -
Page 87: Sequence Of Audio Files
PIONEER Service Station. Do not use the unit... -
Page 88: Copyright And Trademark
Bluetooth SIG, Inc. ! To protect the LED backlight, the display and any use of such marks by Pioneer will darken in the following environments: Corporation is under license. Other trade- —... - Page 89 Appendix Additional Information iTunes iPod Apple and iTunes are trademarks of Apple Inc., registered in the U.S. and other coun- tries. Supply of this product only conveys a license for private, non-commercial use and does not convey a license nor imply any right to use this product in any commercial (i.e.
- Page 90 Appendix Additional Information Manufactured under license from Dolby the registration process and learn more about Laboratories. Dolby, Pro Logic, and the double- DivX VOD. D symbol are trademarks of Dolby Laboratories. DTS Digital Out Manufactured under license under U.S. Patent #: 5,451,942 &...
-
Page 91: Language Code Chart For Dvd
Appendix Additional Information Language code chart for DVD Language (code), input code Japanese (ja), 1001 Dzongkha (dz), 0426 Kurdish (ku), 1121 Kinyarwanda (rw), 1823 English (en), 0514 Ewe (ee), 0505 Komi (kv), 1122 Sanskrit (sa), 1901 French (fr), 0618 Esperanto (eo), 0515 Cornish (kw), 1123 Sardinian (sc), 1903 Spanish (es), 0519... -
Page 92: Specifications
Appendix Additional Information Specifications HPF: Frequency ......50/63/80/100/125 Hz Slope ........–12 dB/oct General Subwoofer (mono): Rated power source ....14.4 V DC Frequency ......50/63/80/100/125 Hz (allowable voltage range: Slope ........–18 dB/oct 12.0 V to 14.4 V DC) Gain ........ -
Page 93: Infrared Remote Control
Appendix Additional Information Compatible physical format ............. Version 1.10 Maximum memory capacity ............. 2 GB File system ........FAT12, FAT16, FAT32 MP3 decoding format ... MPEG-1 & 2 Audio Layer 3 WMA decoding format ..Ver. 7, 7.1, 8, 9, 10, 11 (2ch audio) (Windows Media Player) AAC decoding format .... - Page 96 TEL: (03) 9586-6300 PIONEER ELECTRONICS OF CANADA, INC. 300 Allstate Parkway, Markham, Ontario L3R 0P2, Canada TEL: 1-877-283-5901 TEL: 905-479-4411 PIONEER ELECTRONICS DE MEXICO, S.A. de C.V. Blvd.Manuel Avila Camacho 138 10 piso Col.Lomas de Chapultepec, Mexico, D.F. 11000 TEL: 55-9178-4270 先鋒股份有限公司...