Dymo LabelWriter Print Server User Manual
For labelwriter 400 or later series printers
Hide thumbs
Also See for LabelWriter Print Server:
- User manual ,
- Quick start manual ,
- Overview (2 pages)
Table of Contents
Advertisement
Advertisement
Table of Contents

Related Manuals for Dymo LabelWriter Print Server


Summary of Contents for Dymo LabelWriter Print Server
-
Page 1: User Guide
LabelWriter ® ® Print Server Print Server User Guide... - Page 2 No part of this document or the software may be reproduced or transmitted in any form or by any means or translated into another language without the prior written consent of Sanford, L.P. Trademarks DYMO and LabelWriter are registered trademarks of Sanford, L.P. All other trademarks are the property of their respective holders.
-
Page 3: Table Of Contents
Contents About the LabelWriter Print Server ........... . . 1 Print Server Features . - Page 4 Technical and Certification Information ..........29 Technical Specifications .
-
Page 5: About The Labelwriter Print Server
We encourage you to take a few minutes to review how to use and care for your print server. Using the print server, you can connect your LabelWriter 400 or later series printer directly to your network, without dedicating a computer to printer sharing. Now everyone connected to your network can print to a single LabelWriter printer. -
Page 6: System Requirements
This User Guide includes information for installing and using the print server with a DYMO LabelWriter printer. Depending on the model of DYMO printer you are using, some sections of this User Guide may not apply to you. The following table provides a summary of the contents. -
Page 7: Installing The Labelwriter Print Server
In addition to the items that come with the print server, you will need the following: • A LabelWriter 400 or later series printer, with power adapter and USB cable • Installed LabelWriter printer drivers (included in the DYMO Label Software installation) •... -
Page 8: Connecting The Cables
You can install the Control Center software in Windows. To install the software in Windows Insert the LabelWriter Print Server CD into your CD-ROM drive. After a few seconds, the installation screen appears. If the installation screen does not appear: Click Start, then Run on the Windows taskbar. -
Page 9: Installing The Software In Mac Os
Double-click the CD icon, and then double-click the Mac folder. Double-click Dymo LabelWriter Print Server Control Center.dmg. The DYMO LabelWriter Print Server folder opens. Drag the DYMO LabelWriter Print Server Control Center icon into the Applications folder on your computer. Double-click DYMO LabelWriter Print Server Control Center in the Applications folder to open the Print Server Control Center. - Page 10 Installing the LabelWriter Print Server To set a static IP address If the Control Center is not already open, double-click on your desktop (Windows) or in the Applications folder (Mac OS). Click Configure Server on the Control Center toolbar. The Login to LW Print Server dialog box appears.
-
Page 11: Adding A Printer
Adding a Printer In order to print to the LabelWriter printer that is connected to the print server, you must first add the printer to your computer. You can add the printer to any or all of the computers connected to your network. - Page 12 The port name is filled in automatically. (Optional) Enter a new name for the port in the Port Name field. When adding a LabelWriter Duo printer, you must give the Label printer port and the Tape printer port different names. Click Next.
- Page 13 Next. To print a test label, select Yes, and then click Next. Click Finish. The printer is now available in the printer list. For the LabelWriter Duo, you now need to add the tape portion of the printer.
- Page 14 Do not share this printer, and then click Next. To print a test label, select Yes, and then click Next. Click Finish. The LabelWriter Duo Tape printer is now available in the printer list along with the Label printer.
-
Page 15: Adding A Printer In Windows Vista
This section describes how to add a LabelWriter printer in Windows Vista. When adding a LabelWriter Duo printer, you will need to create separate ports for the Label printer and the Tape printer. Each port must have a unique name. - Page 16 On the Install the printer driver page, do the following: Choose DYMO from the Manufacturer list. Choose the LabelWriter printer that you are adding from the Printers list. To add the LabelWriter Duo, choose DYMO LabelWriter DUO Label. Click Next.
- Page 17 The printer is now available in the printer list. For the LabelWriter Duo, you now need to add the tape portion of the printer. To add the Tape printer portion of the LabelWriter Duo printer Repeat steps 1-7 in "To add a LabelWriter printer"...
- Page 18 Click Next. To print a test label, click Print a test page. Click Finish. The LabelWriter Duo Tape printer is now available in the printer list along with the Label printer.
-
Page 19: Adding A Printer In Mac Os
(Optional) Enter a name for the printer. Click Add. The printer is now available in the Printers list. For the LabelWriter Duo, you now need to add the tape portion of the printer. To add the Tape printer portion of the LabelWriter Duo printer... -
Page 20: Adding A Printer In Linux
If you are adding the DYMO LabelWriter Duo printer, make sure that you select DYMO LabelWriter Duo Label from the list. If you see the Tape printer and not the Label printer in the Available Printers list, click Reload until the Label printer is displayed in the list. - Page 21 Adding a Printer in Linux To add the Tape printer portion of the LabelWriter Duo printer Select the Printers tab. Write down the Device URI for the LabelWriter Duo Label printer. Select the Administration tab, and then click Add Printer.
-
Page 22: Printing A Test Label
Adding a Printer Select DYMO from the Make list, and then click Continue. Select the DYMO LabelWriter DUO Tape printer that you are adding from the Model list, and then click Add Printer. The printer is now available. Printing a Test Label Make sure that the printer is connected and working properly by printing a test label after you have added a printer. -
Page 23: Managing The Labelwriter Print Server
Access the server home page. • Configure the server. If you have more than one LabelWriter Print Server connected to your network, you can access all of the print servers from the Control Center. To view print server information (Windows only) Double-click on your desktop. -
Page 24: About The Print Server Web Pages
Managing the LabelWriter Print Server The server information is now displayed in a separate pane under the servers list. About the Print Server Web Pages From the Print Server Web pages, you can: • View server status. • Change the configuration. -
Page 25: Configuring The Server
Configuring the Server Configuring the Server From the Print Server Configuration page, you can change the server name and description, configure the IP address, change the administrator name and password, and perform maintenance on the print server. To access the print server Configuration page Click Config at the top of the Print Server home page. -
Page 26: Changing The Tcp/Ip Configuration
Managing the LabelWriter Print Server Changing the TCP/IP Configuration You can configure the print server to obtain an IP address automatically or assign a static IP address that you choose. If you are using the print server on a small office or home network, we recommend that you configure the server to use a static IP address. -
Page 27: Upgrading The Firmware
You can upgrade your print server whenever new firmware becomes available. We recommend that you only upgrade the firmware if you are instructed to do so by a DYMO Technical Support representative or if you are experiencing a problem that has been identified as a firmware issue. - Page 28 Managing the LabelWriter Print Server This page intentionally left blank for double-sided printing.
-
Page 29: Getting Help
Chapter 5 Getting Help Your LabelWriter Print Server should offer years of trouble-free service with very little maintenance. However, in the event that you encounter a problem, this chapter offers suggestions for resolving problems that can occur when using the print server. If you are unable to solve a problem, this chapter also describes how to contact DYMO Technical Support. -
Page 30: Limited Warranty
This warranty does not cover loss of or damage to a computer or other devices connected directly or indirectly to this Dymo product. This warranty also does not cover any loss of or damage to data, programs, records or other information. -
Page 31: Obtaining Technical Support
If you cannot resolve your problem by consulting the documentation, you can obtain additional information and assistance from DYMO. DYMO maintains an Internet Web site at www.dymo.com that includes the latest support information for your LabelWriter Print Server. - Page 32 Getting Help...
-
Page 33: Technical And Certification Information
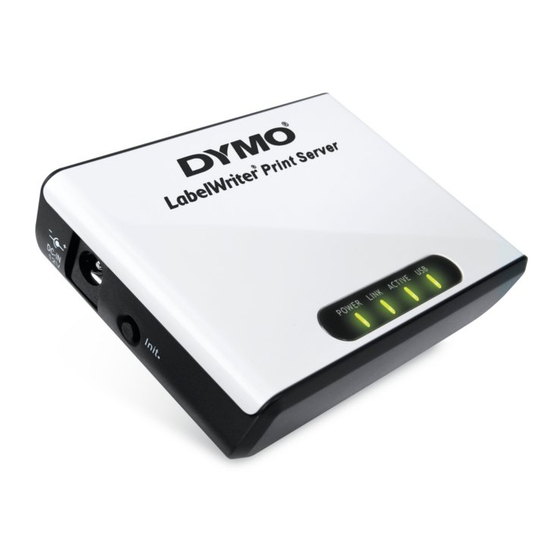
Chapter 6 Technical and Certification Information This chapter contains technical and certification information for the LabelWriter Print Server. Technical Specifications LabelWriter Print Server Dimensions (WHD) 3.07 in (78 mm) by 2.31 in (59 mm) by 0.88 in (22 mm) Weight 2.1 ounces (58 g) -
Page 34: Documentation Feedback
We also welcome your suggestions for additional topics you would like to see covered in the documentation. Send email feedback to: documentation@dymo.com Please keep in mind that this email address is only for documentation feedback. If you have a technical question, please contact Customer Service.