
Related Manuals for Elation Elation DMX OPERATOR PRO


Summary of Contents for Elation Elation DMX OPERATOR PRO
-
Page 1: User Manual
DMX OPERATOR PRO User Manual (24-004-1262 2.0) E-mail: support@elationlighting.com Internet: http://www.elationlighting.com... -
Page 2: Table Of Contents
DMX OPERATOR PRO Table of Contents Sections: General Introduction………………..…………………………………………………………...………3 2 : Safety Information & Maintenance……….………………………..………………………………..4 3 : Information Notice…………………..……………..………………………………….………………... 5 4 : Features and Specifications………………………..………………………………………………..5 5: Technical Specifications ……………………………………………………………………….……..6 6: Basic Control Parts……………………………………………………………………………..….…6-8 7: Set Up & Operation……………………..…… ………………………………………………….……….9 7.1 Connections……………….…………………………………………………………………………..9 7.1.1 Setting DMX Address Channels for Moving Lights….……….……………………………9 7.1.2 Setting DMX Address Channels for Dimmer Packs (Par Cans)………………………...10... -
Page 3: General Introduction
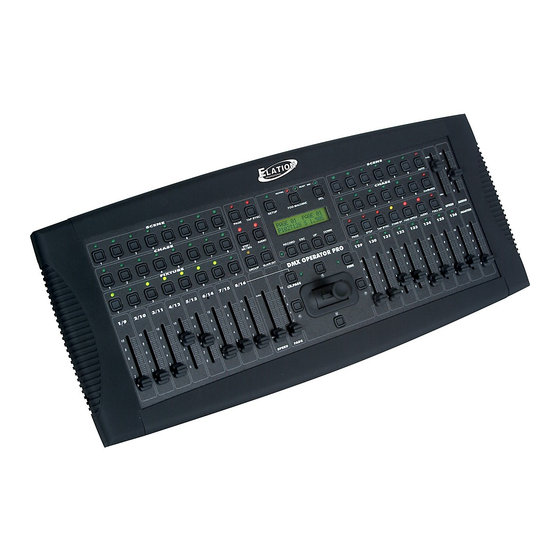
11: Erase All Memory........................38 Section 1: General introduction Thank you for choosing the Elation DMX Operator Pro. The DMX Operator Pro is a 136 channel hybrid lighting control device designed for DJ’s, clubs and small touring applications. This controller allows operators to easily manipulate conventional and moving lights via simple to use buttons and faders. -
Page 4: Safety Information & Maintenance
DMX OPERATOR PRO Section: 2 Safety Information & Maintenance Please read all instructions prior to assembling, mounting, and operating your DMX OPERATOR PRO. To protect against fire, electric shock and injury to persons, please follow the safety precautions listed below and observe all warnings in this manual and warnings printed on the console. -
Page 5: Information Notice
DMX OPERATOR PRO Section: 3 Information Notice Please read through this manual carefully and thoroughly, as it gives important information regarding safety, use and maintenance. Keep this manual with the unit for possible future reference. Product Modification Warning: Elation Professional products are designed and manufactured to meet the requirements of United States and International safety regulations. -
Page 6: 5: Technical Specifications
DMX OPERATOR PRO Section: 5 Technical Specifications • Model………………………………….DMX OPERATOR PRO • Power Input…………………………..DC 9~15V, 600 mA min. • LCD……………………………………2×16 characters • Audio Trigger…………………………Built-in microphone or line in • DMX Output…………………….…….3 PIN female DMX connector • Dimensions…………………………...7” (L) × 3.15” (H) × 19” (W) •... - Page 7 DMX OPERATOR PRO Section: 6 Basic Control Parts (Cont.) • GROUP button: The Group button is used to control more than one moving light at a time. • BLACKOUT button: The Blackout button takes all DMX values to zero. • SETUP button: The Setup button allows access to the DMX Operator Pro’s menu options.
-
Page 8: Basic Control Parts
DMX OPERATOR PRO Section: 6 Basic Control Parts (Cont.) • ONE/MIX/SEQ button: This button is used to select between the three modes. • Speed Fader: This fader is used to adjust desired Chase rate during playback. • Fade Fader: This fader is used to adjust desired fade time during playback. •... -
Page 9: 7: Set Up & Operation
DMX OPERATOR PRO Section: 7 Set Up 7.1 Connections (1) With an XLR male to female cable, connect the XLR male end into the DMX Operator Pro. (2) Connect the female XLR end into the input of your first moving light fixture or dimmer pack. -
Page 10: Setting Dmx Address Channels For Dimmer Packs (Par Cans)
DMX OPERATOR PRO 7.1.2 Setting DMX Address Channels for Dimmer Packs (Par Cans) There is no fixture library incorporated into this console. There are eight DMX channels reserved for par cans which will be independently controlled via eight faders. These eight DMX channels were designed to be assigned to two four channel dimmer packs. - Page 11 DMX OPERATOR PRO 7.2 Assign Joystick to Pan & Tilt (Cont.) (4) Press the "UP" button sixteen (16) times or until your LCD display reads "PAN >NONE" on the top line as displayed below. PAN >NONE (5) Next, press the "DOWN" button until the LCD display's the Pan channel # for your fixture.
-
Page 12: Assign Joystick To Pan & Tilt
DMX OPERATOR PRO 7.2 Assign Joystick to Pan & Tilt (Cont.) (10) Now that you’ve assigned your Pan and Tilt channels to the joystick, you need to confirm and save these settings to memory. To do this, press the "RECORD" button one (1) time. -
Page 13: Record A Moving Light Scene
DMX OPERATOR PRO 7.3.1 Record a Moving Light Scene (Cont.) (3) Select the “SCENE” button where you wish to record to. The selected Scene LED will flash repeatedly. For example, if you are on Page #01 and you select Scene #1, the LED above the #1 Scene button will flash repeatedly and your LCD will display the following: EDIT SCENE1/PG01... -
Page 14: Record A Moving Light Chase
DMX OPERATOR PRO 7.3.2 Record a Moving Light Chase These next steps will guide you on how to record Chases for your moving lights. Chases are a sequence of Scenes that incorporate separate hold and fade times- the hold times work in conjunction with the SPEED fader, the fade time’s work in conjunction with the FADE fader. - Page 15 DMX OPERATOR PRO 7.3.2 Record a Moving Light Chase (Cont.) (4) Next, set your desired hold and fade time for your first Chase step by using the “SPEED” fader for your HOLD time and the “FADE” fader for your FADE time. The hold and fade time range is five tenths of a second to ten minutes.
-
Page 16: Playback Moving Light Scenes & Chases
DMX OPERATOR PRO 7.4 Playback Moving Light Scenes and Chases 7.4.1 Playback Moving Light Scenes (1) Press the “PAGE” button so the red LED above the Page button comes on. (2) Locate the page which contains the scene that you wish to playback by using the “UP &... -
Page 17: Playback Moving Light Chases
DMX OPERATOR PRO 7.4.2 Playback Moving Light Chases Chases can be played back in MIXED or SEQUENCE modes. On the console MIXED is abbreviated by “MIX” and SEQUENCE by “SEQ”. In MIXED mode, selected Chase LED’s will flash simultaneously and all selected Chases will run at the same time. If a fixture or fixtures are included into more than one (1) Chase, the last selected Chase will be the one to take precedence. -
Page 18: Edit Moving Light Chases
DMX OPERATOR PRO 7.5 Edit Moving Light Chases 7.5.1 Add Moving Light Chase steps (1) Press and hold down the "RECORD" button for three (3) seconds or until the green LED next to the RECORD button comes ON. The LCD will display the following: SELECT A SCENE OR CHASE! PAGE01 (2) Select the “CHASE”... -
Page 19: Delete Moving Light Chase Steps
DMX OPERATOR PRO 7.5.1 Add Moving Light Chase steps (Cont.) (8) Press the “DEL” button one (1) time to erase the temporary step. (9) To delete additional steps, repeat steps 3 thru 8. Press “ESC” two (2) times to exit. 7.5.2 Delete Moving Light Chase steps (1) Press and hold down the "RECORD"... -
Page 20: Delete Moving Light Chases
DMX OPERATOR PRO 7.5.3 Delete Moving Light Chases (1) Press and hold down the "RECORD" button for three (3) seconds or until the green LED next to the RECORD button comes on. The LCD will display the following: SELECT A SCENE OR CHASE! PAGE01 (2) Select the “CHASE”... -
Page 21: Recording Par Cans Scenes & Chases
DMX OPERATOR PRO 7.6 Recording Par Can Scenes and Chases 7.6.1 Record a Par Can Scene This next section will take you through the necessary steps to record Par Can Scenes. You will be using the Par Can section which is located on the right side of your console or all buttons and faders to the right of the LCD display- including buttons in the LCD display section. -
Page 22: Record A Par Can Chase
DMX OPERATOR PRO 7.6.1 Record a Par Can Scene (Cont.) (5) Next, use the eight (8) faders, labeled 129-136, to set your desired Par Can scene. (6) Once your look is set, press the “RECORD” button to SAVE. All LED’s will flash once confirming that your scene has been saved. - Page 23 DMX OPERATOR PRO 7.6.2 Record a Par Can Chase (Cont.) (3) If you previously programmed Scenes into page #01, the green LED’s above each button containing a scene, will be ON. At this time, you may select one of those Scenes or press the “PAGE”...
-
Page 24: Playback Par Can Scenes & Chases
DMX OPERATOR PRO 7.7 Playback Par Can Scenes and Chases 7.7.1 Playback Par Can Scenes (1) Press the “PAGE” button so the red LED above the Page button comes on. (2) Locate the page which contains the scene that you wish to playback by using the “UP &... -
Page 25: Playback Par Can Chases
DMX OPERATOR PRO 7..1 Playback Par Can Chases Par Can Chases can be played back in ONE, MIXED or SEQUENCE modes. On the console MIXED is abbreviated by “MIX” and SEQUENCE by “SEQ”. In ONE mode, Chases playback one at a time. Each selected Chase will over ride a previously selected Chase. In MIXED mode, all selected Chase LED’s will flash simultaneously and all selected Chases will run at the same time. -
Page 26: Edit A Par Can Chase
DMX OPERATOR PRO 7.8 Edit a Par Can Chase 7.8.1 Add Par Can Chase steps (1) Press and hold down the "RECORD" button for three (3) seconds or until the green LED next to the RECORD button comes ON. The LCD will display the following: SELECT A SCENE OR CHASE! PAGE01 (2) Select the “CHASE”... -
Page 27: Delete Par Can Chase Steps
DMX OPERATOR PRO 7.8.1 Add Par Can Chase steps (Cont.) (8) Press the “DEL” button one (1) time to erase the temporary step. (9) To delete additional steps, repeat steps 3 thru 8. Press “ESC” two (2) times to exit. 7.8.2 Delete Moving Light Chase steps (1) Press and hold down the "RECORD"... -
Page 28: Delete A Par Can Chase
DMX OPERATOR PRO 7.8.3 Delete a Par Can Chase (1) Press and hold down the "RECORD" button for three (3) seconds or until the green LED next to the RECORD button comes on. The LCD will display the following: SELECT A SCENE OR CHASE! PAGE01 (2) Select the “CHASE”... -
Page 29: 8: Menu Options Set Up
DMX OPERATOR PRO Section: 8 Menu Options Set Up 8.1 Access Menu Options (1) Press and hold down the "SETUP" button for three (3) seconds or until the green LED above the SETUP button comes on. The LCD will display the following with a cursor box flashing over the # 1 option. -
Page 30: Read Cf Card
DMX OPERATOR PRO 8.2 Save to CF Card (Cont.) (4) Use the “UP” and "DOWN" buttons to scroll through the various save options. The save options include: “ALL” – if selected, all settings including Scenes, Chases and Chases will be saved for both the Moving Light and Par Can sections, “(FIXTURE) SCENE”... -
Page 31: Read Cf Card
DMX OPERATOR PRO 8.3 Read CF Card (Cont.) (3) Press “RECORD” to enter. The LCD will display the following: DOWN (4) Use the “UP” and "DOWN" buttons to scroll through the various upload options. The upload options include: “ALL” – if selected, all settings including Scenes and Chases will be uploaded for both the Moving Light and Par Can sections, “(FIXTURE) SCENE”... -
Page 32: Channel Patch
DMX OPERATOR PRO 8.4 Channel Patch (1) Press and hold down the "SETUP" button for three (3) seconds or until the green LED above the SETUP button comes on. The LCD will display the following with a cursor box flashing over the # 1 option. ↓... -
Page 33: Pan/Tilt Fade Set Up
DMX OPERATOR PRO 8.4 Channel Patch (Cont.) (6) Next, press and hold down the "GROUP" button and simultaneously select the "FIXTURE" number buttons to select the moving lights that you wish to assign these settings to. All selected moving lights will have the LED above the buttons flashing. -
Page 34: Display Mode Set Up
DMX OPERATOR PRO 8.5 Pan / Tilt Fade Set Up (Cont.) (3) Press the "Record" button to enter the P/T FADE ONLY option. The LCD will display the following: FIXTURE1: ALL (4) Use the "UP" button to scroll through the FIXTURE # list and use the “DOWN” button to change the desired fade setting- “ALL or ONLY”. -
Page 35: Midi Channel Set Up
DMX OPERATOR PRO 8.6 Display Mode Set Up (Cont.) (2) Press the "DOWN" button three (3) times so that the cursor is now flashing over the # 4 "DISPLAY MODE." option. The LCD will display the following with the cursor box now flashing over the # 4 option. -
Page 36: Midi Channel Set Up
DMX OPERATOR PRO 8.7 MIDI Channel Set Up (Cont.) (2) Press the "DOWN" button four (4) times so that the cursor is now flashing over the # 5 "MIDI CH." option. The LCD will display the following with the cursor box now flashing over the #5 option. - Page 37 DMX OPERATOR PRO Section: 9 MIDI Trigger Chart This unit can receive and transmit MIDI NOTE information according to the relevant channels. Keep the following chart readily available for future reference. NOTE NUMBER FUNCTION 23-34 FIXTURE PAGE 1-12 35-50 PAR PAGE 1-16 51-58 MOVING LIGHT SCENE 1-8 59-66...
- Page 38 DMX OPERATOR PRO Section: 11 Erase Entire Memory (1) Switch the DMX Operator Pro’s power switch to the OFF position. (2) On the moving light side, simultaneously hold down Chase buttons 3 & 6 and Fixture buttons 2 & 7- then turn the power switch to the ON position. The LCD display the following: CLEAR MEMORY NOW PLEASE WAIT…...