Table of Contents
Advertisement
FK1875 B P0113OZ
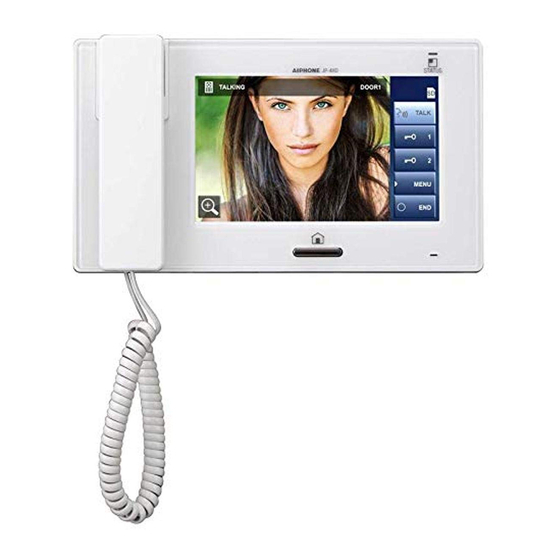
JM-4HD
HANDS-FREE COLOR VIDEO INTERCOM SUB MASTER STATION
INSTALLATION & OPERATION MANUAL
JM -4 H D
Thank you for selecting Aiphone for your communication and security needs. Please read this manual carefully before using this
system.
Please make sure to read this manual for safe and correct use of the system, and keep it in a safe place for future reference.
*
Please note that images and illustrations depicted in this manual may differ from the actual product.
Advertisement
Table of Contents

Related Manuals for Aiphone JM-4HD


Summary of Contents for Aiphone JM-4HD
- Page 1 INSTALLATION & OPERATION MANUAL JM -4 H D Thank you for selecting Aiphone for your communication and security needs. Please read this manual carefully before using this system. Please make sure to read this manual for safe and correct use of the system, and keep it in a safe place for future reference.
-
Page 2: Table Of Contents
CONTENTS PRECAUTIONS ......4 SETTING AND ADJUSTMENT ..14 WARNING ........... 4 SETTING LIST ......14 CAUTION ..........4 SETTING AND ADJUSTMENT GENERAL PRECAUTIONS ....4 DETAILS ........15 NOTICES ..........5 Setting the PIN PACKAGE CONTENTS ....5 [GENERAL] - [PIN SETTING] ..15 Call settings [CALL] ...... - Page 3 Answering a call from another APPENDIX ........27 residential station ......19 TECHNICAL PRECAUTIONS ... 27 ■ When PRIVACY MODE is set to “ENABLE” ..........19 SPECIFICATIONS ..... 27 Adjusting the display mode for viewing images at a video door WARRANTY ....Back cover station ..........
-
Page 4: Precautions
Do not use at outdoor locations. 5. For power supply, use Aiphone power supply model specifi ed 12. Please note the LCD panel, though manufactured with very high for use with system. If non-specifi ed product is used, fi re or precision techniques, inevitably will have a very small portion of its malfunction could result. -
Page 5: Notices
• This manual was created by Aiphone Co., Ltd., all rights reserved. 18. If there are loud noises around the unit (such as music playing or Copying, in part or in whole, this manual without prior permission children crying), the sound may break up and be diffi... -
Page 6: Installation
INSTALLATION CONNECTIONS Notes about handling cables Cables and connectors are not included with the product. Notes on cables (for door stations, etc.) • Use PE (polyethylene)-insulated PVC jacket cable. Parallel or jacketed 2-conductor, mid-capacitance, non-shielded cable is recommended. • Never use individual conductors, twisted pair cable, or coaxial cable. Notes on CAT5e cables (for residential stations) •... -
Page 7: Basic Connection Methods
“station-to-station wiring” or “home-run wiring”. Station-to-station (daisy-chained) wiring Master station (ID = 1) Sub master station 1 (ID = 2) JM-4MED JM-4HD CATe5 (non-shielded) Sub master station 2 (ID = 3) JM-4HD Ø1.0mm, 18AWG 2 conductor cable Sub master station 3 (ID = 4) -
Page 8: Connecting External Devices (Using The Option Connector)
Connecting external devices (using the option connector) The 6-pin option connector of this station can be used with external devices. CAUTION To prevent shorts, cut unused lead wires at insulation. • Be sure to perform an operation check after the connection to check for miswiring. •... -
Page 9: Mounting Procedure
Mounting procedure <Back wiring> Fasten the mounting 3-gang box bracket to the wall. The unit 83.5mm (3-5/16") Mounting bracket (pre-attached by factory) Mounting screw × 4 (included) CAT5e cable Mount the unit on the mounting bracket. Connect the CAT5e cables to the unit. Close Opening/closing the terminal cover Open... -
Page 10: Settings After Installation
SETTINGS AFTER INSTALLATION The following settings should be done by the installer or the administrator of this system. Be sure to assign ID to all the sub master stations connected to this system. NOTE: It is recommended to set the display language for the screen to the language needed on the master station. (Default language: English) Touch ENTER to continue. -
Page 11: Assigning An Id To Station [Id Setting]
Assigning an ID to station Initializing station [INITIALIZE] [ID SETTING] By initializing this station, all settings return to default. The ID setting should be made to all the sub master stations individually. From th e [INSTALL] menu window, touch INITIALIZE . Do not assign the same ID to two or more sub master A notice message is displayed. -
Page 12: Part Names
See the next page for Handset details. Status LED Indicates current status of this JM-4HD station by lighting up or blinking. See the table below for details. Speaker Call tones, audio from a station, and alarms are heard from here. -
Page 13: Screen
Screen This station features a touchscreen. Simply touch the icons or buttons displayed on the screen. The following are examples of typical windows and icons. The displayed windows and icons may differ depending on the devices connected to this system. HOME window This window appears when the screen is turned on. -
Page 14: Setting And Adjustment
SETTING AND ADJUSTMENT Program system settings using master station after all devices are installed. Program individual device settings on all master and sub master stations separately. Mainly, the results of settings made on the master station are also applied to the sub master stations. The settings and adjustments to be made on an individual sub master station are as in the table below. -
Page 15: Setting And Adjustment Details
SETTING AND ADJUSTMENT DETAILS Setting the PIN Call settings [CALL] [GENERAL] - [PIN SETTING] You can make the following settings for call. When this station is started up for the fi rst time or after this station is rebooted, program this setting fi rst. Some settings require a PIN to prevent content from being altered by unauthorized individuals. -
Page 16: Designate Residential Station(S) That Receive A Call From This Station [Room Station Call Settings]
■ Designate residential station(s) that receive a Setting the microphone on/off for a call from this station [ROOM STATION CALL call from a residential station [TALK] - SETTINGS] [PRIVACY MODE] You can set whether or not the other residential stations receive a call (all call or single call) from this station. -
Page 17: Enabling/Disabling The Operation Sound [General] - [Sound Setting] - [Audible Touch Tone]
Enabling/Disabling the operation sound Adjusting brightness and volume [GENERAL] - [SOUND SETTING] - [ADJUST] [AUDIBLE TOUCH TONE] You can adjust the brightness of the screen and sound volumes. You can make this station sound a beep whenever the touchscreen is touched. From HOME window, touch SETTINGS →... -
Page 18: Using The System
USING THE SYSTEM ANSWERING A CALL When receiving a call from a door station When there is a call from a The call tone sounds, an image is on the screen, and audio from the video door station door station can be heard. Blinks When there is a call from a door station without a camera or another residential station, the station type... -
Page 19: Receiving A Call While Talking With Another Door Station
■ Receiving a call while talking with another Adjusting the display mode for viewing door station images at a video door station The call tone sounds in a lower volume. You can adjust the display mode for viewing images at a video The video image on the screen will continue to display door station by using the following functions. -
Page 20: Pan & Tilt
■ Adjusting viewability of images [ADJUST] ■ Pan & Tilt If the image on the screen is hard to see due to bright light, When a zoom image is displayed, touching on the adjust settings. screen moves the image as shown below. NOTE: This function is not available for an image from a CCTV camera. -
Page 21: Adjusting The Speaker Or Handset Volume [Volume]
Dim light conditions (Night) Door release [DOOR RELEASE] When an image is displayed, touch MENU → IMAGE . Door release can be activated during a call-in, communication, or while monitoring a door station. The setting window appears. Release a door when is displayed on the screen. -
Page 22: Transferring A Door Call To Another Residential Station [Room Call]
Transferring a door call to another Priority of actions residential station [ROOM CALL] The order of priority for two or more actions (communication, calling, monitoring, etc.) performed at the You can transfer a call received from a door station to a single same time is as follows. -
Page 23: Calling/Monitoring Other Stations
CALLING/MONITORING OTHER STATIONS Communication with a door station ends automatically after 1 minute in hands-free mode, or after 3 minutes using handset. Communication with a residential station ends automatically after approx. 10 minutes. Calling all residential stations Calling another residential station simultaneously Residential stations must be set to receive a call from this station. -
Page 24: Monitoring
■ Monitoring residential station (Audio only) Monitoring You can monitor sounds at another residential station. You can monitor a door station or another residential station. Press the [HOME] button, touch screen, or lift ■ Monitoring door station (entrance) handset. When monitoring an audio door station, only audio from the Touch MONITOR from HOME window and select station is available. -
Page 25: Using The Security Function
USING THE SECURITY FUNCTION This function is available when the inputs 1, 2, and/or 3 of the master station are set to “SECURITY”, and a sensor is connected to each of the inputs. The security mode can be set and activated on the To stop alarm master station. -
Page 26: Functions Combined With External Devices
FUNCTIONS COMBINED WITH EXTERNAL DEVICES Triggering an alarm by using an external Activating an external device device This is available when an external device is connected to the option contact outputs of the master station. This is available when the inputs 1, 2, and/or 3 of the master station are set to “UTILITY”, and an external device, such as a sensor or a call button, is connected to each of the inputs. -
Page 27: Appendix
APPENDIX TECHNICAL PRECAUTIONS Cleaning: Clean all units with a soft cloth and gentle cleaner. Do not spray cleaner directly on unit. Do not use an abrasive cleaner or cloth. Door stations are water resistant. Trouble: When this station gets out of commission, reboot this station by pressing the reset button. SPECIFICATIONS Power supply DC 24V (from power supply) -
Page 28: Warranty
fi nal decision whether there is a defect in materials and/or workmanship; and whether or not the product is within the warranty. This warranty shall not apply to any Aiphone product which has been subject to misuse, neglect, accident, power surge, or to use in violation of instructions furnished, nor extended to units which have been repaired or altered outside of the factory.