Miele CS 1421 Salamander Operating And Installation Instructions
Salamander
Hide thumbs
Also See for CS 1421 Salamander:
- Operating and installation instructions (32 pages) ,
- Operating and installation instructions (36 pages)
Table of Contents

Related Manuals for Miele CS 1421 Salamander


Summary of Contents for Miele CS 1421 Salamander
- Page 1 Operating and installation instructions Salamander CS 1421 en - GB To avoid the risk of accidents or damage to the appliance it is essential to read these instructions before it is installed and used for the first time. M.-Nr. 07 180 450...
-
Page 2: Table Of Contents
Contents Guide to the appliance ..........4 Warning and Safety instructions . - Page 3 Contents Safety instructions for installation ........19 Appliance and building-in dimensions .
-
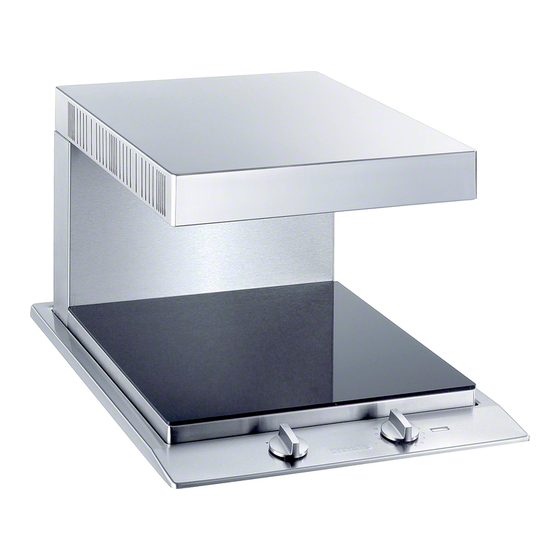
Page 4: Guide To The Appliance
Guide to the appliance Motor-driven browning unit Display Standing surface, removable Display Controls: In-operation indicator For setting the power level Residual heat indicator For selecting the height of the browning element... -
Page 5: Warning And Safety Instructions
Warning and Safety instructions Correct application This appliance complies with all This appliance is intended for relevant local and national safety domestic use only and may only be requirements. Improper use can, used as described in these instructions. however, present a risk of both Any other usage is at the owner's risk personal injury and material and could be dangerous. - Page 6 Warning and Safety instructions Safety with children Packaging, e.g. cling film, polystyrene and plastic wrappings, This appliance is only intended for must be kept out of the reach of babies use by adults who have read these and young children. Danger of instructions.
- Page 7 H 05 V V - F should be inspected by a qualified (pvc insulated), available from Miele. electrician. Never open the housing of the The manufacturer cannot be held liable appliance.
- Page 8 Faulty components must only be replaced by genuine Miele original spare parts. The manufacturer can only guarantee the safety of the appliance when Miele replacement parts are...
- Page 9 Warning and Safety instructions Correct use If oil or fat catches fire, do not attempt to put out the flames with water. The appliance gets hot when in use Use a suitable fire blanket, saucepan and remains hot for quite a while after lid, damp towel or similar to smother the being switched off.
-
Page 10: Caring For The Environment
Caring for the environment Disposal of the packing Disposal of your old appliance material Electrical and electronic appliances often contain materials which, if The transport and protective packing handled or disposed of incorrectly has been selected from materials which could be potentially hazardous to are environmentally friendly for human health and to the environment. -
Page 11: Before Using For The First Time
Before using for the first time Please stick the extra data plate for the appliance supplied with this documentation in the space provided in the "After sales service" section of this booklet. Cleaning for the first time ^ Remove any protective foil and adhesive labels. -
Page 12: Operation
Operation Raising and lowering the Switching on and off browning unit Do not leave the appliance ^ To raise the browning unit, turn the unattended whilst it is being used. left-hand control to -. The appliance is switched on by The browning unit will extend up to its turning the right-hand control to the full height, even if you release the... -
Page 13: To Brown Or Crisp Food
Operation To brown or crisp food Useful tips ^ Raise the browning unit. The salamander is perfect for browning and crisping food topped with cheese ^ Place the dish containing food to be (e.g. meat and pasta dishes, croque browned on the standing surface. monsieur, vegetable gratin) and ^ Lower the browning unit until the caramelised sweet dishes such as... -
Page 14: Safety Features
Safety features Thermal retraction stop sensor Obstruction sensor Your salamander is fitted with a thermal If the browning unit meets an retraction stop sensor to prevent obstruction (e.g. a dish) whilst it is damage to the appliance when being lowered, it stops immediately and lowering the browning unit. -
Page 15: Cleaning And Care
Cleaning and care Miele offer a range of branded cleaning To avoid damaging the surface of and conditioning agents for your your appliance, do not use: appliance. See “Optional accessories”. – cleaning agents containing soda, alkalines, ammonia, acids or Do not use a steam cleaning chlorides, appliance to clean this appliance. -
Page 16: Stainless Steel
Cleaning and care Stainless steel Building-in frame The ceramic and stainless steel hob Clean the building-in frame regularly. cleaner is suitable for cleaner stainless Remove any food deposits or liquid im- steel surfaces (see "Optional mediately. Clean it with an E-Cloth or accessories"). -
Page 17: Problem Solving Guide
– the mains fuse has tripped. If the – the standing surface is positioned fuse has blown, contact a qualified correctly. electrician or the Miele Service department..everytime the browning unit is ... the appliance does not heat up. -
Page 18: Optional Accessories
Miele branded cleaning and conditioning products are available for your appliance. These can be ordered via the internet at www.miele-shop.com, or from Miele (see back cover for contact details) or from your Miele dealer. Ceramic and stainless steel hob cleaner 250 ml... -
Page 19: Safety Instructions For Installation
Safety instructions for installation Observe carefully the safety Fit the wall units and extractor hood distances given on the following pages. before fitting the appliance to avoid Do not use any sealant except damaging the surface. where expressly instructed to do so. The seal underneath the appliance The veneer or laminate coatings of provides a sufficient seal for the... - Page 20 Safety instructions for installation Safety distance above the appliance When two or more appliances are installed together below a cooker hood, e.g. a salamander and a gas wok, which have different safety distances given in the installation instructions, you should select the greater distance of the two.
- Page 21 Safety instructions for installation Safety distances to the sides of and behind the appliance Ideally the appliance should be installed with plenty of space on either side. There may be a wall at the rear and a tall unit or wall at one side. On the other side, however, no unit or divider should stand higher than the built-in appliance (see illustrations).
-
Page 22: Appliance And Building-In Dimensions
Appliance and building-in dimensions Spring clamps Front Building-in depth Mains connection box with mains connection cable, L = 2000 mm Browning unit, height-adjustable... -
Page 23: Preparing The Worktop
Preparing the worktop ^ Make the worktop cut-out for one or more appliances as applicable. Remember to maintain a minimum safety distance from the back wall, as well as from any tall unit or side wall to the right or left of the appliance. -
Page 24: Installation Of Several Appliances
Installation of several appliances When installing two or more appliances next to each other a spacer bar must be used between each one. See "Fixing the spring clamps and spacer bars". Worktop cut-out Worktop cut-out - two appliances - three appliances To calculate the cut-out width (D) required: Add up the widths of each appliance (e.g. - Page 25 Installation of several appliances Spring clamps Spacer bars Gap between spacer bar and worktop Sealing strip The illustration shows a worktop cut-out with spring clamps and spacer bars for 3 appliances. An additional spacer bar is required for each additional appliance. The position for securing each additional spacer bar will depend on the width of appliance B (288 mm / 380 mm / 576 mm).
-
Page 26: Fixing The Spring Clamps And Spacer Bars
Fixing the spring clamps and spacer bars Wooden worktops ^ Position the spring clamps supplied and spacer bars on the top edge of the cut-out in the positions marked. ^ Secure the spring clamps and spacer bars with the 3.5 x 25 mm screws supplied. - Page 27 Fixing the spring clamps and spacer bars Granite and marble worktops The screws are not required for granite or marble worktops. ^ Apply silcone to the side edges and the lower edges of the spring clamps and spacer bars ^ Then fill gap between the spacer ^ Position and secure the spring bars and the worktop with silicone...
-
Page 28: Installing The Appliance(S)
Installing the appliance(s) ^ Feed the connection cable down ^ Starting at the front, position the next through the cut-out. appliance in the worktop cut-out. ^ Starting at the front, position the ^ Connect each appliance to the mains appliance in the worktop cut-out. (see "Electrical connection"). -
Page 29: General Installation Tips
General installation tips Tiled worktop Do not use any sealant unless Grout lines and the hatched area expressly instructed to do so. The underneath the appliance must be sealing strip under the edge of the top smooth and even. If they are not, the part of the appliance provides a appliance frame will not sit flush with sufficient seal for the worktop. -
Page 30: Electrical Connection
H 05 V V-F be provided for all poles. (pvc insulated), available from Miele. For extra safety it is advisable to install a suitable residual current device Installation, repairs and other work (RCD). - Page 31 Electrical connection Important The electrical safety of this appliance can only be guaranteed when continuity is complete between the appliance and an effective earthing system, which complies with local and national regulations. It is most important that this basic safety requirement is present and tested regularly and if there is any doubt the electrical wiring in the home should be inspected by a...
-
Page 32: After Sales Service, Data Plate
Please note that telephone calls may be monitored and recorded to improve our service. When contacting Miele, please quote the model and serial number of your appliance which are given on the data plate. N.B. A call-out charge will be applied for service visits where the problem could have been resolved as described in these instructions. - Page 36 Alteration rights reserved/ 2809 M.-Nr. 07 180 450 / 05...