
Related Manuals for Miele T 220


Summary of Contents for Miele T 220
-
Page 1: Operating Instructions
Operating instructions for vented tumble dryer T 220 To avoid the risk of accidents or damage to the machine it is essential to read these instructions before it is installed or used for the first time. M.-Nr. 05 538 670... -
Page 2: Table Of Contents
Contents Warning and Safety instructions ........4 Caring for the environment . - Page 3 Contents Installation and connection ........25 Front view.
-
Page 4: Warning And Safety Instructions
Warning and Safety instructions Technical safety To avoid the risk of accidents and Before setting up the machine, damage to the machine please read check it for any externally visible these instructions carefully before damage. using it for the first time. They Do not install or use a damaged contain important information on its machine. - Page 5 Only when these parts are fitted can the safety standards of the machine be guaranteed. If the connection cable is faulty it must only be replaced by a Miele approved service technician to protect the user from danger. In countries where there are areas...
- Page 6 Warning and Safety instructions In the event of a fault or for Adequate ventilation is essential to cleaning purposes, the machine is avoid the danger of asphyxia and only completely isolated from the toxic fumes where another appliance electricity supply when: which also uses the room air (e.g.
- Page 7 Accessory parts may only be fitted following textiles must not be when expressly approved by Miele. dried in this machine: If non-Miele parts are used with this – fabrics which contain a large machine, guarantee, performance and proportion of rubber, foam rubber or product liability claims may be rubber like materials.
-
Page 8: Caring For The Environment
Caring for the environment Disposal of the packing It should be unplugged or disconnected from the mains electricity supply by a material competent person. The plug must be The transport and protective packing rendered useless and the cable cut off has been selected from materials which directly behind it to prevent misuse. -
Page 9: Control Panel
PC indicator light d I-On/0-Off button The indicator light marked PC is used by Miele Service technicians as an To switch the machine on or off / to optical interface. interrupt a programme. The Anti-crease/Finish lamp will light up as confirmation that the machine has been switched on. -
Page 10: Notes On Laundry Care
Notes on laundry care Wash care labels Items filled with down. The fabric lining on these garments Before drying check the drying may shrink depending on the quality. symbol on the wash care label. They can be partially dried using the Smoothing programme. -
Page 11: Programme Chart
Programme chart Programmes Fabric type Special notes COTTONS maximum load: 5 kg Drying levels Normal+ Single and multi-layered fabrics, e.g. mixed load of cotton fabrics (e.g. towelling, jerseywear). Normal Load of similar cotton If laundry is still too damp, fabrics (jersey wear, then: flannelette sheets, - finish drying using Timed... - Page 12 Programme chart Programmes Fabric type Special notes MINIMUM IRON maximum load: 2.5 kg Drying levels Normal+ Minimum iron items which Spin minimum iron fabrics are made of synthetic or for at least 30 seconds in the blended fabrics (e.g. washing machine before pullovers, dresses, trousers) drying them.
- Page 13 Programme chart Programme Fabric type Special notes Special care programmes Woollens maximum load: 2 kg hand care Woollen fabrics To refresh and fluff up woollen garments quickly. Remove garments immediately at the end of the programme. Do not repeat. Woollen fabrics are not dried completely by this programme.
-
Page 14: How To Dry Correctly
How to dry correctly A Prepare the laundry Do not overload the drum. ^ As far as possible, sort laundry for: Overloading can cause unnecessary - the type of fibre or weave, wear and tear to the laundry and - the degree of dryness required, give a disappointing drying result. -
Page 15: C Select A Programme
How to dry correctly C Select a programme D Start the programme ^ Press the Start button. The drying cycle begins. The drying stage reached is shown by the sequence indicator lamps on the right hand side of the control panel. At the end of the drying phase a cooling down phase commences to cool the laundry down. -
Page 16: Selecting A Different Programme
How to dry correctly Selecting a different programme The programme has been successfully cancelled when only the Anti-crease/ As long as the cooling down phase or Finish indicator lamp is on. the anti-crease phase has not been reached it is possible to change a E At the end of a programme programme after it has started by turning the programme selector to a... -
Page 17: Cleaning And Care
The fluff which is created by the A cleaning brush is available as an drying process is collected in the fluff optional extra from your Miele dealer filter in the door. Clean the filter after or the Miele Spare Parts Department. -
Page 18: Tumble Dryer
^ Dry all parts with a soft cloth. E-Cloth A microfibre "E-Cloth" is available from the Miele UK Spare Parts Department, which is suitable for cleaning surfaces such as stainless steel, glass, plastic and chrome without the use of... -
Page 19: Problem Solving Guide
Problem solving guide With the help of the following notes minor faults in the performance of the machine, some of which may result from incorrect operation, can be put right without contacting the Service Department. Repair work to electrical equipment should only be carried out by a suitably qualified person in accordance with local and national safety regulations. - Page 20 Problem solving guide Problem Possible cause Remedy There is a build Fluff is principally the result of Fluff is collected by the fluff up of fluff. friction when garments are filter and can be easily being worn and washed. removed (see "Cleaning and Machine drying hardly Care").
- Page 21 Problem solving guide Problem Possible cause Remedy The drying Important: Before attempting to remedy one of the following process goes on causes, switch the dryer off and switch on again to start the too long or even programme again. switches off. Ventilation to the dryer is Open a door or window while insufficient (e.g.
-
Page 22: Check And Fault Indicator Lamps
– Then start the Hand iron or Machine programme again. iron is flashing, and If the programme stops the buzzer sounds. again and the fault message reappears there is a fault. Contact the Miele Service Department. -
Page 23: To Change The Interior Drum Lamp
^ Apply a little pressure and whilst doing so turn your wrist in the direction of the arrow to open the cover. The cover will open downwards. The temperature resistant lamp should only be ordered from your Miele dealer or the Miele Spare Parts Department. -
Page 24: After Sales Service
Optional accessories back cover for address). Optional accessories for these dryers When contacting the Service are available from your Miele Dealer or Department, please quote the model from the Miele Spare Parts Department. and serial number of your machine, both of which are shown on the data plate situated on the right hand side below the drum aperture. -
Page 25: Installation And Connection
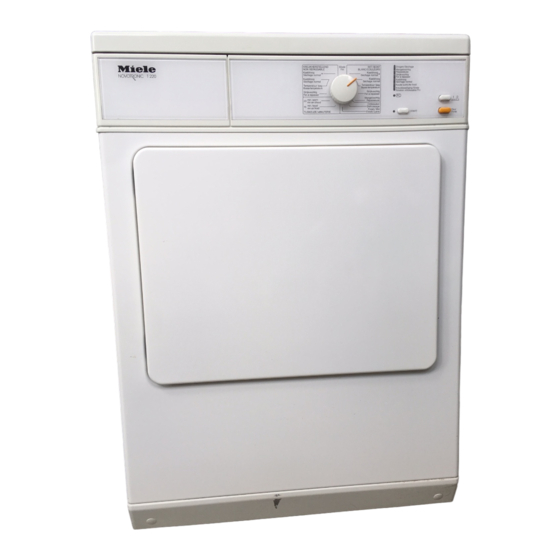
Installation and connection Front view a Venting connection: rear, right or left (supplied with the rear socket open) b Mains connection cable c Control panel d Door e Four height adjustable screw feet... -
Page 26: Installation Site
Transporting the machine to its required. installation site * Available as an optional accessory from your Miele dealer or the Miele When moving the machine you can hold it by the lid where it protrudes to Spare Parts Department. the rear of the dryer. To manoeuvre the... -
Page 27: Levelling The Machine
The machine must be perfectly level to * Available as an optional accessory ensure safe and proper operation. from your Miele dealer or the Miele Spare Parts Department. Stacking kits must only be installed by a suitably qualified fitter. -
Page 28: Electrical Connection
Electrical connection Electrical connection U.K. Non-rewireable plugs BS 1363 All electrical work should be carried out The fuse cover must be refitted when by a suitably qualified and competent changing the fuse, and if the fuse cover person, in strict accordance with is lost, the plug must not be used until a national and local safety regulations. -
Page 29: Installation - Venting
– The ducting outlet (e.g. wall pipe) * Available as an optional accessory should be installed in such a way from your Miele dealer or the Miele that the moist expelled air . . . Spare Parts Department..cannot be drawn back into the room in which the dryer is installed;... -
Page 30: Calculating The Effective Duct Length
1. To calculate the effective duct stack)* length required: Venting connection to the left/right 1.0 m * optional accessory from Miele ^ First measure the distance which will require straight ducting. Multiply this Table II amount by the corresponding Maximum effective Internal duct additional duct length factor in Table I. -
Page 31: Installation To The Left Or Right Side Of The Machine
Installation - venting Installation to the left or right 3. Example side of the machine At the rear The connection is opened at the factory. ^ Fit one of the venting systems described on the following pages. Left or right side of the machine Wall pipe, with louvred vent = 1 x 3.8 m Additional duct = 3.8 m... -
Page 32: Adapter
– flexible ducting hose*. – a wall vent kit* or window vent kit*. * Available as an optional accessory from your Miele dealer or the Miele Spare Parts Department. A ring adapter** (1) is installed in adapter (2) for the installation of a flexible vent duct. - Page 33 Installation examples - venting Connection to an exhaust flue system with flexible ducting Window vent 1. Pipe with connection piece (= supplied with the Miele wall vent kit) 1. Window vent kit (fitted in a "plexiglass" pane) 2. Adapter for flexible hose (separate fitting instructions are 3.
-
Page 34: Venting System With Plastic Piping
If the total duct length is greater than 10 m the ring adapter is not required. plastic piping B Fit Miele adapter (2) into the vent Plastic piping is a good option where opening on the dryer. the vented air has to ducted for some C Attach the pipe (3). -
Page 35: Connecting Directly To A Wall Vent
^ A wall pipe and a flexible foam gasket must be used (both Miele optional accessories). 1. Wall pipe A Before drilling into the wall . . . -
Page 36: Washer Dryer Stack
Washer dryer stack Miele washing machine with Comfort line angled fascia Height of venting outlet for washer dryer stack Miele washing machine with straight or sloping fascia Stacking kit* without pull-out shelf: C = 94.2 cm D = 170.0 cm... -
Page 37: Consumption Data
Consumption data Programmes Capacity Final spin speed Electricity Drying time (in a domestic consumption (incl. washing machine) cooling down time) Minutes COTTONS Normal+ 1200 2.70 1400 2.60 1600 2.30 1800 2.25 Normal 800 (70 % residual moisture) 3.30 2.60 Normal 1200 1400 2.45... -
Page 38: Technical Data
Technical data Height 85 cm (adjustable +0.7/-0.7 cm) Height without lid 82 cm Depth with door open 106 cm Width 59.5 cm Depth 58 cm Weight 48 kg Drum volume 100 litres Maximum capacity 5 kg dry weight Length of connection cable 1.60 m Voltage see data plate... - Page 40 Programmable functions for changing standard settings...
-
Page 41: Programmable Functions
Programmable functions Increased drying level in the E Turn the programme selector to the COTTONS Normal position. COTTONS programmes – If the Drying indicator lamp is not on, The machine is designed to dry the increased drying level is using as little energy as possible. deactivated. -
Page 42: Increased Drying Level In The Minimum Iron Programmes
Programmable functions Increased drying level in the E Turn the programme selector to the COTTONS Low Temperature MINIMUM IRON programmes position. The machine is designed to dry – If the Drying indicator lamp is not on, using as little energy as possible. the increased drying level is However, if you require the laundry to deactivated. -
Page 43: Buzzer
Programmable functions Buzzer E Turn the programme selector to the COTTONS Hand iron position. An audible tone sounds repeatedly at – If the Drying lamp is flashing, the the end of a programme. buzzer is activated. The buzzer is activated as standard ex- –... - Page 44 Alteration rights reserved/0205 M.-Nr. 05 538 670 / 06 en - GB...