
Related Manuals for Philips 52PFL8605S/98


Summary of Contents for Philips 52PFL8605S/98
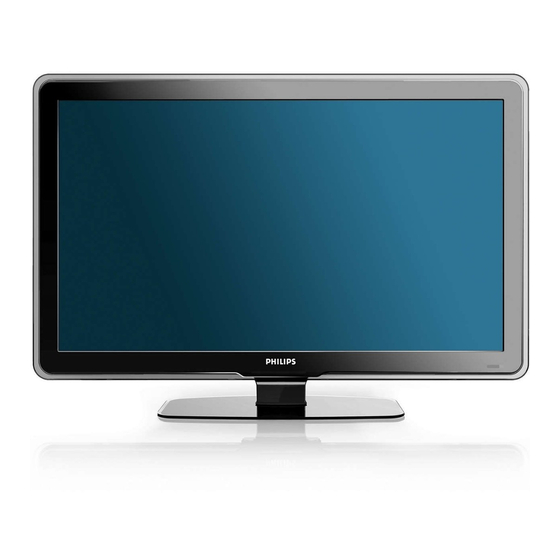
- Page 1 Register your product and get support at www.philips.com/welcome 52PFL8605S/98 46PFL8605S/98 42PFL8605S/98 52PFL8605 /98 46PFL8605 /98 42PFL8605 /98 46PFL6605S/98 40PFL6605S/98 46PFL6605 /98 40PFL6605 /98 User manual...
-
Page 2: Table Of Contents
Connect to a computer network (For 4 Use your TV PFL8605) Switch your TV on/off or to standby Use HDMI ARC Switch channels Use Philips EasyLink Adjust TV volume Use a Kensington lock Watch connected devices Use teletext 8 Product information... -
Page 3: Notice
Koninklijke Philips Electronics N.V. or their open or remove covers to the inside of the respective owners. Philips reserves the right product. Repairs may only be done by Philips to change products at any time without being Service Centres and official repair shops. Failure obliged to adjust earlier supplies accordingly. -
Page 4: Important
TV. Secure the wall mount to a wall that can support the combined weight of Safety the TV and wall mount. Koninklijke Philips Risk of electric shock or fire! Electronics N.V. bears no responsibility •... -
Page 5: Screen Care
Disposal of your old product and • When you disconnect the power cord, always pull the plug, never the cable. batteries • Disconnect the TV from the power outlet and antenna before lightning storms. During lightning storms, never touch any part of the TV, power cord or Your product is designed and manufactured antenna cable. -
Page 6: Your Tv
3 Your TV Remote control Congratulations on your purchase, and welcome to Philips! To fully benefit from the support that Philips offers, register your TV at www.philips.com/welcome. This section gives you an overview of commonly used TV controls and functions. -
Page 7: Color Buttons
(Browse) Accesses the browse menu to select: • channel list • Teletext (Navigation buttons) Navigates menus. (Previous/Next) • Skips to the previous or next channel. • Skips to the previous or next page of the menu. • Skips to the previous or next track, album or folder. -
Page 8: Use Your Tv
4 Use your TV Switch channels P/CH +/- on the side of the TV. • Press This section helps you perform basic TV operations (see ‘Use more of your TV’ on page 10). Switch your TV on/off or to standby •... -
Page 9: Adjust Tv Volume
Adjust TV volume Watch connected devices Note • For easy access, add new devices to the home menu before selecting them. Add a device to the home menu Connect and switch on devices before adding them to the home menu. To increase or decrease volume Press (Home). -
Page 10: Use Teletext
Use Ambilight • To avoid screen clutter, remove devices from Press (Experience). the home menu when they are no longer connected (see ‘Remove devices from the The experience bar appears. » home menu’ on page 11). Press the Navigation buttons to select [Ambilight], then press OK. -
Page 11: Use More Of Your Tv
5 Use more of Select a setting then press OK to adjust the setting. your TV Press OK to confirm your choice. The following language settings can be Change menu language configured. [Primary audio]/ [Secondary audio] • Select primary and secondary audio Note languages for digital channels. -
Page 12: Change Picture And Sound Settings
Press OK. Follow the on-screen instructions to » remove the device. Once complete, the Watch TV Watch TV Browse USB Browse PC Scenea device is removed from the home menu. Add your devices Setup Access the browse menu When watching TV, press (Browse). - Page 13 Use pre-defined picture settings Manually adjust picture settings Use the[Smart picture] experience bar to When watching TV, press (Home). access frequently used picture settings. The home menu appears. » Press the Navigation buttons to select Note [Setup], then press OK. •...
- Page 14 Change picture format [100 Hz Clear LCD]: Sets the • TV refresh rate to a maximum of Press (Experience). 100Hz to provide superior motion The experience bar appears. » sharpness, better black level, high contrast with a flicker free, quiet Press the Navigation buttons to select image and a larger viewing angle.
- Page 15 Shift picture position [Auto fill] Adjusts the picture to fill the Press (Experience). screen (subtitles The experience bar appears. » remain visible). Press the Navigation buttons to select Recommended [Picture shift], then press OK. for minimal screen distortion Press the Navigation buttons to adjust (but not for HD the position of the picture.
-
Page 16: Change Ambilight Settings
Change Ambilight settings Manually adjust sound settings When watching TV, press (Home). You can adjust Ambilight color, brightness, and The home menu appears. » mode to your taste. Press the Navigation buttons to select When watching TV, press (Home). [Setup], then press OK. »... -
Page 17: Use Advanced Teletext Features
Use advanced teletext Select teletext subpages features A teletext page can hold several subpages. Subpages are displayed on a bar next to the Access the teletext options menu main page number. When available on a teletext page, press Access the teletext features through the to select subpages. -
Page 18: Use Timers
Use timers Use child and rating locks You can set timers to switch the TV to standby You can prevent your children from watching at a specified time. TV by locking the TV and using age ratings. Automatically switch the TV to Set or change the child lock code standby (sleep timer) When watching TV, press... -
Page 19: Use Subtitles
Use subtitles Set age ratings Some digital broadcasters rate their programs You can enable subtitles for each TV channel. according to age. You can set your TV to Subtitles are broadcast via teletext or DVB-T display only programs with age ratings higher digital broadcasts. -
Page 20: Use The Tv Clock
If your selected country supports digital Caution broadcast, the clock displays the time data • Philips is not responsible if your USB storage from your TV service operator as default. device is not supported nor is it responsible for Press (Home). -
Page 21: Listen To Music
Connect to a network and enter the [Play once]: Plays the collection of • pictures once. The slideshow stops content browser (For PFL8605) when the collection is complete. [Repeat]: Repeats the slideshow. • Before accessing the content browser, be • [Shuffle on]: Displays pictures in the sure that the TV is connected to a computer slideshow at random. -
Page 22: Listen To Digital Radio Channels
Listen to digital radio channels Press OK to confirm your choice. The music setting is applied. » If digital broadcasting is available, digital radio channels are installed automatically during installation. Note While watching TV, press • Slideshow settings are also available by Select [Channel list], then press OK. -
Page 23: Use Scenea To Display A Picture As Tv Wallpaper
Enable settings for visually impaired Press the green button to turn on audio feedback or press the red button to turn (Only available in some cities) Some digital TV it off. channels broadcast special audio adapted for Press to exit. people who are visually impaired. -
Page 24: Update The Tv Software
If an update is available, a message appears prompting you to update the software. We strongly recommend that you update the Philips continuously tries to improve its software when prompted. products and we recommend that you update Follow the instructions below to update the the TV software when updates are available. -
Page 25: Change Tv Preferences
Update software (from internet) Change TV preferences For PFL8605 only (Only available in some countries/cities) If When watching TV, press (Home). your TV is connected to a router, which is » The home menu appears. connected to the Internet, you can update the Press the Navigation buttons to select TV software directly from the Internet. -
Page 26: Start A Tv Demo
Start a TV demo When watching TV, press (Home). The home menu appears. » Press the Navigation buttons to select [Setup], then press OK. to select [TV demonstrations], Press then press OK. The demo menu appears. » Press the Navigation buttons to select a demo, then press OK. -
Page 27: Install Channels
6 Install channels When watching TV, press (Home). The home menu appears. » Press the Navigation buttons to select The first time you setup your TV, you are [Setup], then press OK . prompted to select a menu language and to Select [Automatic channel search] >... -
Page 28: Reorder Stored Channels
Fine tune analog channels Select [Reorder], then press OK. A message appears. To continue, go to » You can fine tune analog channels manually step 5. when reception is poor. To cancel and exit, press (Options) » When watching TV, select the channel to and follow the on-screen instructions. -
Page 29: Hide And Unhide Channels
Hide and unhide channels Set up your favorite channels Hide channels Add or remove channels from a favorite list Hide channels from the channel list, to prevent unauthorised access. When watching TV, press (Browse) When watching TV, press (Browse). Select [Channel list], then press OK. The channel list appears. -
Page 30: Connect Devices
7 Connect devices Bottom connectors This section describes how to connect devices with different connectors. Examples are provided in the Quick Start. Note CVI 1 • You can use different types of connectors to Analog audio and video input from analog connect a device to your TV. -
Page 31: Connectors For Pfl8605
Connectors for PFL8605 HDMI Digital audio and video input from high- Back connectors definition digital devices such as Blu-ray players. VGA and AUDIO IN Audio and video input from a computer. ANTENNA Signal input from an antenna, cable or satellite. Side connectors NETWORK Data input from a network. - Page 32 Connect a computer with one of the HDMI cable and HDMI-DVI adaptor • following connectors: (rear HDMI and AUDIO IN) Note AUDIO IN DVI / VGA • Connections via DVI or VGA require an additional audio cable. HDMI cable • HDMI cable and HDMI-DVI adaptor •...
-
Page 33: Connect To A Computer Network (For Pfl8605)
TV to a computer network. If necessary, read documentation accompanying network components. Philips is not responsible for lost, damaged or corrupt data. What you need • A network router (with DHCP enabled) •... - Page 34 In Microsoft Windows Media Player Note • The instructions are applicable to both Microsoft Windows XP and Vista. Enable media sharing In Microsoft Windows, start Windows Media Player 11. Windows Media Player appears. » Click the arrow next to Network discovery.
- Page 35 Add folders for media sharing Click Add. In Windows Media Player, click Library -> Add Folder window appears. » Add to Library..Select a folder to share and click OK. Add To Libary window appears. » When all folders are added, click OK in the Add To Library window.
- Page 36 In Twonky Media v4.4.2 (Macintosh Add folders for media sharing OS X) In TVersity, click the Sharing tab. Sharing options appear. » Enable media sharing In Mac OS X, start Twonky Media. » Twonky Media appears. In the Basic Setup box, click Clients/ Security.
-
Page 37: Use Hdmi Arc
(see ‘Enable or disable remote control key forwarding’ on page 38). Pixel Plus Link Connected Philips EasyLink devices may apply their own picture quality processing to a video, before streaming it to the TV. This may interfere with the image processing of the TV. Enable Pixel... - Page 38 EasyLink devices to standby. disables display of subtitles from Press and hold (Standby-On) Philips EasyLink compliant Home for at least 3 seconds. Theatre Systems over the video image on your TV. The video image is stretched across the whole of TV...
- Page 39 HTS using both a HDMI cable (for video) and a digital audio • Do not enable Philips EasyLink if you do not cable (for audio). You can output TV audio intend to use it. through the HDMI cable solely, provided both When watching TV, press (Home).
-
Page 40: Use A Kensington Lock
Select one of the following, then press Auto subtitle shift displays subtitles from [TV]: On by default. Streams TV • Philips EasyLink compliant home theater over audio through TV speakers until the the video image on your TV. The video image connected HDMI-CEC audio device is thus stretched across the whole of tour TV switches to system audio control. -
Page 41: Product Information
Images: .jpg Product information is subject to change • Supported multimedia file formats: without notice. For detailed product Format Video Audio File information, go to www.philips.com/support. exten- sion MPEG-4 SP, MPEG .avi Supported display resolutions MPEG-4 ASP Layer 2/3, Computer formats (HDMI) -
Page 42: Tuner/Reception/Transmission
42.4 (mm) • Weight: 19.9 kg • With TV stand To mount the TV, purchase a Philips TV mount. • Dimension (WxHxD): 1243 x 796 x To prevent damage to cables and connectors, 295 (mm) be sure to leave a clearance of at least 2.2 •... -
Page 43: Troubleshooting
Disconnect the power cable from the power outlet. Wait until the TV cools down before reconnecting the power cable. If the blinking reoccurs, contact Philips Consumer Care. You forgot the code to unlock the child lock feature • Enter ‘8888’. -
Page 44: Picture Issues
Picture issues An “e-sticker” banner displaying information appears on the TV display: The TV is in [Shop] mode. Remove the The TV is on, but there is no picture: e-sticker by setting the TV to [Home] mode. • Check that the antenna is properly In the [Home] menu, select [Setup] >... -
Page 45: Hdmi Connection Issues
AUDIO L/R or AUDIO IN (mini-jack only). If you cannot resolve your problem, refer to You cannot use EasyLink features: the FAQs for this TV at www.philips.com/ • Check that your HDMI devices are support. -
Page 46: Index
10 Index default settings demo devices add to home menu 10, 8 age ratings connect Ambilight remove brightness watch change settings digital channel set active mode subtitles switch on or off digital radio antenna digital services Audio Return Channel, ARC teletext 9, 16 display... - Page 47 power 41, 42 preferences Kensington lock product specifications language radio menu 42, 10 reception subtitle recycle troubleshoot register product list reinstall TV channels remote control location batteries 41, 4 home or shop RC pass-through lock technical specifications Kensington lock troubleshooting lock channels rename channels PIN code...
- Page 48 © 2010 Koninklijke Philips Electronics N.V. All rights reserved. Document order number: 3139 125 41601...