Table of Contents
Advertisement
Advertisement
Table of Contents

Related Manuals for Lowrance HDS series


Summary of Contents for Lowrance HDS series
- Page 1 HDS Series Installation manual...
-
Page 2: Preface
Warranty • The warranty card is supplied as a separate document. • It is shipped with the product registration card. • In case of any queries, refer to the brand web site of your display or system. www.lowrance.com... -
Page 3: Declaration Of Conformity
The equipment named in this declaration, is intended for use in international waters as well as coastal sea areas administered by countries of the E.U. and E.E.A. A full Declaration can be obtained from www.lowrance.com Disposal Waste Electrical and Electronic Equipment (WEEE) The use of the WEEE Symbol indicates that this product may not be treated as household waste. -
Page 4: Table Of Contents
Contents Preface .....................1 Declaration of Conformity .....................2 Disposal .........................2 Introduction ....................5 About this Manual ......................5 Important Safety and Warning Information ..............5 Check the Parts ......................6 Overview ........................7 Display Installation ................9 Mounting location ......................9 Panel Mount ........................11 Bracket Mount .......................12 Transducer Installation .................14 Recommended Tools and Supplies ................14 Skimmer Installation Instructions ..................15 System Architecture ................28... - Page 5 Dimensional Drawings ................43 HDS5 ..........................43 HDS7 ..........................44 HDS8 ..........................45 HDS10 ...........................46 NMEA Information ................47 NMEA 2000 PGN List ....................47 Supported NMEA 0183 sentences .................49...
-
Page 6: Introduction
Introduction About this Manual • This manual is a reference guide for installing a Lowrance HDS System. • The information in this manual at the time of printing is correct to the best of our knowledge. Navico can not be liable for any inaccuracies or missing information. -
Page 7: Check The Parts
Check the Parts Packaged Parts List ISO 30 Degree with Perspective HDS Head Unit Models: 5”, 7”, 8” HDS Bezel or 10” HDS Mounting HDS Dust Cover Bracket HDS Cut-out HDS Bracket Knobs Template Power/Data Cable Connector Caps Installation Manual Operation Manual Quick start guide 4 x SCREW NO. -
Page 8: Overview
Overview Description CURSOR CONTROL: Move the cursor, scroll through menus, adjust features, view sonar/GPS history. 8 & 10 models also have a fly wheel to aid scrolling. CONTROL KEYS ZOUT: Zoom out to see more of the map with less detail ZIN: Zoom in to see less of the map with more detail. - Page 9 Description Sonar (Not available on HDS5M, 7M, 8M or 10M units) Power/Data ENET (Ethernet) NMEA2K (NMEA2000) Network...
-
Page 10: Display Installation
Display Installation Mounting location Choose the mounting locations carefully before you drill or cut. The display should be mounted so that the operator can easily use the controls and clearly see the display screen. Be sure to leave a direct path for all of the cables. The display screen is high-contrast and anti- reflective, and is viewable in direct sunlight, but for best results install the display out of direct sunlight. - Page 11 Bezel Removal To removing the bezel from the 5 and 7-inch models the card slot door must be open To remove the bezel use a flat head screwdriver. Insert screwdriver into the bezel release slots and pry out and away from the unit. The bottom of the bezel will release from the unit.
-
Page 12: Panel Mount
Panel Mount Attach the flush mounting template Drill pilot holes for the four hole saw to the selected mounting position cuts and for the four self tapping using adhesive tape. screws used to secure the display. Use a hole saw to cut the four corner Cut along the dotted line and remove radius the shaded area. -
Page 13: Bracket Mount
Bracket Mount An alternative to flush mounting the HDS display is to bracket mount the unit. This method has the advantage that the display can be easily removed when not in use and may be tilted to achieve the best possible viewing angle. Loosely screw securing knobs to the Temporarily mount the display unit Display unit. - Page 14 Slide the display into the mounting Attach the bezel. Firmly clip the bracket and secure in place with the front bezel in place. bracket knobs.
-
Page 15: Transducer Installation
Transducer Installation Recommended Tools and Supplies Tools and Supplies (not included) If you plan to route the transducer cable through the transom, you will need either a 1” drill bit or a 5/8” drill bit depending on the size of the transducer cable connector. Each transom mount requires a high quality, marine grade above- or below-waterline sealant/adhesive compound. -
Page 16: Skimmer Installation Instructions
Skimmer Installation Instructions Transducer location and installation is one of the most critical steps in sonar installation. Select a transducer location To function properly the Skimmer transducer must be in the water at all times and in a location that has a smooth flow of water when the boat is moving. Poor location Good location Poor location... - Page 17 Aligning Ratchets on Transducer bracket Aligning ratchets on one-piece bracket: The one-piece bracket assembly includes two black plastic ratchets. The ratchets are used to align the transducer with the boat hull. Each ratchet has the letters A-E molded into it. Insert the ratchets in the bracket with the letter "A"...
- Page 18 Aligning ratchets on two-piece bracket The two-piece bracket includes four black plastic ratchets. The ratchets are used to align the transducer with the boat hull. Each ratchet has the letters A-F molded into it. If the transducer will not adjust with its face parallel to the ground. Ratchet Place two of the ratchets in each side of the bracket...
- Page 19 Assembling the Transducer bracket After determining the correct position for the ratchets, loosely assemble the transducer and bracket assembly as shown in one of the two diagrams below. One-piece bracket assembly Metal washer Lock nut Rubber washers Metal washer Ratchets Bolt Note: Do not tighten the transducer bracket assembly until you have aligned the transducer...
- Page 20 Aligning and Attaching the Transducer Adjust the transducer so that its "face" is parallel with the ground and its center line is even with the bottom of the boat hull. Transducer bracket Transducer bracket mounted too low. mounted too high. Transom Transom Bottom of hull.
- Page 21 Hold the transducer and bracket assembly against the transom. When the transducer and bracket are properly aligned mark its position on the hull. Drill the mounting holes for the transducer bracket. For the one- piece bracket use a #29 bit (for the #10 screws).
- Page 22 If you drill a hole in the transom for the transducer cable, make sure it is located above the waterline. Seal the hole with an above or below waterline marine grade sealant. Route the transducer cable to the sonar unit. Make sure to leave some slack in the cable near the transducer.
- Page 23 TMB-S Trolling Motor Bracket Installation Note: The TMB-S bracket is designed for one-piece bracket transducers only. The TMB-S trolling motor bracket (Part No. 51-45) is an optional accessory and is available through LEI Extras at www.lei-extras.com. The TMB-S bracket is used to attach a one-piece bracket transducer to a trolling motor. If you regularly fish in water with a lot of underwater structure, such as rocks, stumps and trees, you may consider using a Pod transducer for trolling motor installation.
- Page 24 Skimmer Transducer Shoot-thru-hull Installation Before attempting any installation on boats with flotation material sandwiched within the hull, consult the boat manufacturer. In a shoot-thru-hull installation the transducer is epoxied to the inside of the boat hull. WARNING: Do not remove any material from the inner hull. Careless grinding or cutting on the hull could damage the integrity of the hull.
- Page 25 A transducer can not shoot through wood or metal hulls. Wood and metal hulls require either a transom mount or "thru-hull" installation. For shoot-thru-hull applications many boat hulls have a flat keel pad that offers a good transducer mounting surface. If you are using a Skimmer transducer versus a Pod transducer for this installation, make sure the Skimmer transducer is oriented so the nose of the transducer is facing the bow (front) of the boat.
- Page 26 Pod Transducer Installation Instructions The following instructions explain how to install a Pod transducer inside a hull or on a trolling motor. Read the following instructions carefully before attempting any installation. Use extreme care when mounting a transducer inside a boat hull. Once epoxied into position, the transducer can be very difficult to remove.
- Page 27 On vee hulls try to place the transducer where the deadrise is 10° or less. Sand both the inside surface of the hull, where the transducer is to be epoxied, and the face of the transducer. Sand face of You may want to start with a rougher grit transducer sandpaper, such as 60 grit, and finish with a and bottom...
- Page 28 Pod Transducer Trolling Motor Installation The top of the transducer is curved to fit the contour of the trolling motor. You will need a hose clamp large enough to fit over the trolling motor. The hose clamp is NOT included with the Pod transducer.
-
Page 29: System Architecture
System Architecture This section explains how the HDS connects to other devices as part of a system. The HDS has a highly scalable system architecture. A system can consist of a basic stand alone fishfinder or chart plotter, or expand to a networked, multi-display system connected to a wide range of accessories. -
Page 30: Wiring The Hds
Wiring the HDS Wiring Guidelines Most installation problems are caused by shortcuts taken with system cables. When wiring the HDS follow the guidelines below. Don’t do this Do this Don’t make sharp bends in the cables Do make drip and service loops Don’t run cables in a way that allows water Do tie-wrap all cables to keep them secure to flow down into the connectors... -
Page 31: Power/Data Cable
Power/Data Cable Power / Data cable Power (3 wire) Data cable (5 wire) Yellow (Accessory Wake Up) NMEA0183 Wiring RS-422 All HDS Units Red (FUSE) Yellow TX (+) BLUE TX (-) Com 1 Orange (RX+) Black Green (RX-) Shield (ground) Alternative NMEA0183 Wiring RS-232 HDS 8 &... -
Page 32: Nmea 0183 Wiring Table
NMEA 0183 Wiring Table RS-422 Device Green RX (-) Transmit (-) Orange RX (+) Transmit (+) Shield (Ground) Ground Yellow TX (+) Receive (+) Blue TX (-) Receive (-) RS-232 HDS-8 & 10 Only — (COM 1) Device Yellow TX Receive Orange RX Transmit... -
Page 33: Nmea 2000 Wiring
T joiners and NMEA 2000 Devices. Lowrance offers a NMEA 2000 starter kit (000-0124-69) that includes two (2) terminators, two (2) T connectors, one (1) 2ft extension/drop cable, one (1) 15ft extension cable and one... -
Page 34: Ethernet
Ethernet The HDS system uses an Ethernet network to interconnect high bandwidth devices such as other HDS displays, radar and sonar. Each HDS display has one network port with 5 pin connector. Ethernet network has orange connectors that are retained by a bayonet type locking collar. -
Page 35: Hds-8 & Hds-10 Data Bridging
HDS-8 & HDS-10 Data Bridging Supported NMEA0183 sentences entering the system are bridged (converted) to NMEA2000 and distributed on the Lowrance backbone for all other displays to use. Certain NMEA2000 PGNs (messages/sentences) are bridged across to NMEA0183 to be available as an output from any HDS display. -
Page 36: Single Station
Single Station Single station configuration possibilities Supplied Optional NMEA2000 Devices POWER with display accessory Red (FUSE) LGC-4000 GPS Receiver Temperature Sensor Black Fluid Level Sensor Fuel Flow Sensor Y ellow Pressure Sensor HDS Display Heading Sensor/Compass Engine Interface Blue No Connect SonicHub Audio Server LMF Gauges VHF Radio... -
Page 37: Dual & Multi Station
Dual & Multi Station Dual station configuration possibilities Supplied Optional with display accessory NMEA0183 RS-422 Device Green RX (-) Transmit (-) Orange RX (+) Transmit (+) Shield (ground) Ground Yellow TX (+) Receive (+) Blue TX (-) Receive (-) RS-232 HDS-8/10 only Device Yellow TX Receive... -
Page 38: Connecting Hd Radar
Connecting HD Radar 12 V DC ONLY Scanner Ethernet HEADING In Description HDS Display. LRA1800 &LRA2400 HD radar system for HDS. Includes parts C,D and E. 2kw & 4 kW Radome. Scanner cable. 15 m (50 ft) An Optional 20 m (65ft) cable is available HD Radar Processor Ethernet cable RJ45 (male/male). -
Page 39: Connecting Br24 Radar
Connecting BR24 Radar SimNet Network Power Scanner cable Description HDS Display. BR24 BroadBand™ Radar system for HDS. Includes parts B, C and D (not included in US) and E (2 m 6ft) Scanner cable. 10 m (33 ft) : Optional 20 m (65 ft) and 30 m (98 ft). RI10 Radar interface box (Used with MARPA) (Not included with US version) Ethernet cable. -
Page 40: Commissioning Check List
Commissioning Check List Commissioning your system will improve the functionality and operation of your unit. The following pages will give you an overview of the minimum settings we recommend you set up before you start operating your HDS. Please refer to the HDS operations guide for more information on how to change these settings. -
Page 41: Selecting A Fishing Mode
Selecting a Fishing Mode Fishing modes enhance the performance of your unit by providing preset packages of sonar settings geared to specific fishing conditions. To select a fishing mode: Press Menu twice. Select Sonar and press enter. Highlight Fishing Mode and press enter. Select the desired fishing mode and press enter. Fishing Mode Depth Settings... -
Page 42: Sonar
Magnetic Variation Converts magnetic north data to true north, increasing the accuracy of navigation information. The Magnetic Variance Auto setting, automatically converts magnetic north to true north. Note: When using manual mode, you will have to input the magnetic variance. Satellites Monitors the location of satellites in view and the quality of the unit’s satellite lock-on. - Page 43 Water speed off set Water speed calibration is used to adjust the speed value from the paddle wheel to match the actual speed. This can be measured either from the GPS speed over ground (SOG) or by timing the boat over a known distance. Water speed calibration should be performed with as little wind and current movement as possible.
-
Page 44: Dimensional Drawings
Dimensional Drawings HDS5... -
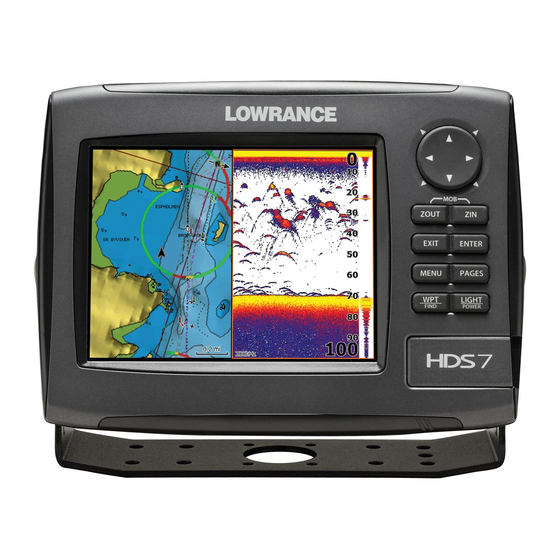
Page 45: Hds7
HDS7... -
Page 46: Hds8
HDS8... -
Page 47: Hds10
HDS10... -
Page 48: Nmea Information
NMEA Information NMEA 2000 PGN List NMEA 2000 PGN Transmit 65293 LGC-2000 Configuration 126208 ISO Command Group Function 130818 Reprogram Data 126992 System Time 130819 Request Reprogram 126996 Product Info 130828 Set Serial Number 127237 Heading/Track Control 130831 Suzuki Engine and Storage 127250 Vessel Heading Device Config... - Page 49 NMEA 2000 PGN Receive 59392 ISO Acknowledgement 129802 AIS Safety Related Broadcast 59904 ISO Request Message 60928 ISO Address Claim 129808 DSC Call Information 60928 ISO Address Claim 130074 Route and WP Service - WP List 126208 ISO Command Group Function WP Name &...
-
Page 50: Supported Nmea 0183 Sentences
Supported NMEA 0183 sentences TX / RX Receive Transmit Navigation Receive Transmit Echo Receive Transmit Compass Receive Transmit Wind Receive Transmit AIS / DSC Receive AIS sentences are not bridged MARPA Transmit These are only out put sentences... - Page 52 Visit our website: www.lowrance.com © Copyright 2011 *988-10043-001* All Rights Reserved Navico Holding AS...