Advertisement
Table of Contents
Owner's Manual
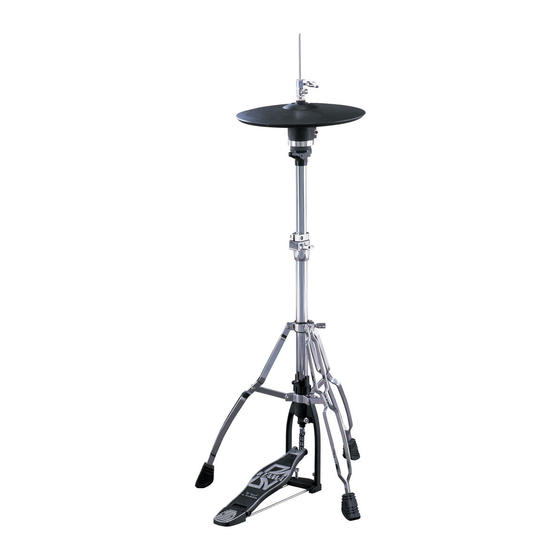
We'd like to take a moment to thank you for purchasing the Roland V-Hi-Hat VH-11.
When using the VH-11, you will need to make the settings for the sound
module. Refer to p. 6 or p. 8.
fig.Structure
* Hi-hat stand is not included.
For details on compatible stands, refer to p. 9.
201a
Before using this unit, carefully read the sections entitled: "USING THE UNIT SAFELY"
and "IMPORTANT NOTES" (p. 2; p. 3). These sections provide important information
concerning the proper operation of the unit. Additionally, in order to feel assured that
you have gained a good grasp of every feature provided by your new unit, Owner's
manual should be read in its entirety. The manual should be saved and kept on hand
as a convenient reference.
202
Copyright © 2005 ROLAND CORPORATION
All rights reserved. No part of this publication may be reproduced in any form without the
written permission of ROLAND CORPORATION.
Advertisement
Table of Contents

Related Manuals for Roland V-HI-HAT VH-11


Summary of Contents for Roland V-HI-HAT VH-11
- Page 1 Owner’s Manual We’d like to take a moment to thank you for purchasing the Roland V-Hi-Hat VH-11. When using the VH-11, you will need to make the settings for the sound module. Refer to p. 6 or p. 8. fig.Structure * Hi-hat stand is not included.
- Page 2 • Do not attempt to repair the unit, or replace parts within it (except when this manual provides specific instructions directing you to do so). Refer all servicing to your retailer, the nearest Roland Service Center, or an authorized Roland distributor, as listed on the “Information” page.
-
Page 3: Important Notes
• The hi-hat’s rubber surface may turn white, but this has no effect on the hi-hat’s function. • Do not remove the special VH-11 clutch from the hi-hat or disassemble the clutch. • When not using the hi-hat for extended periods, store the hi-hat in the open position to prevent placing any stress on the motion sensor unit. -
Page 4: Features
Features Similar Touch and Feel as with an Acoustic Hi-Hat The VH-11 is constructed with one floating cymbal, making it compatible with commercially available hi-hat stands and providing the same feel as you get from an acoustic hi-hat, including the stick rebound, the looseness of the cymbal when you strike it, and the vertical action of the cymbal when you press and release the pedal. -
Page 5: Mounting On Hi-Hat Stand
5. Loosen the clutch screw and place the hi-hat on the motion sensor unit with the cymbal rod passing through the hi-hat hole. Position the “Roland” logo on the farther side, as viewed from the player. fig.Assy.e Clutch Screw... -
Page 6: Connecting/Adjusting
Adjusting the Sound Module TD-12 and VH-11’s Offset The VH-11’s offset needs to be adjusted to ensure proper expression of the hi-hat’s opening and closing. Perform this adjustment while the sound module is connected. Using the TD-12 This section describes the adjustment procedure when the VH-11 is used with a TD-12. - Page 7 * The tension may not be adjustable on some stands. When performing, make sure that the name “Roland” on the hi-hat is on the opposite side of the stand from the hi- hat pedal (p. 5).
-
Page 8: Adjusting Sound Module/Vh-11'S Offset
* If “VH11” is available as a Trigger Type setting on the TD-20 you are using, follow the instructions in Using the TD-12 (p. 6) to set the TD-20 and adjust the VH-11’s offset. 1. Confirm that the VH-11 and TD-20 are connected properly. -
Page 9: Playing Methods
When played as shown in the figure, the “rim-side” sound of the connected trigger input is triggered. fig.Play-02.e Position the “Roland” logo on the farther side, as viewed from the player (p. 5). Compatible Stand Diameter: 6.0–7.0 mm (0.236"–0.276") -
Page 10: Troubleshooting
Are you striking the area where an edge sensor is located? The VH-11 has an edge sensor only at the area closest to you, at the front (p. 9). Position the “Roland” logo on the farther side, as viewed from the player (p. -
Page 11: Clutch Was Apart From Hi-Hat
If the hi-hat clutch is inadvertently removed from the hi-hat, use the following procedure to reassemble and attach the clutch. Due to the different shape, the clutch included with the hi-hat stand cannot be used with the VH-11. Be sure to use the special VH-11 clutch. fig.HH-Assy1.e Clutch Top... - Page 12 Information When you need repair service, call your nearest Roland Service Center or authorized Roland distributor in your country as shown below. PHILIPPINES AFRICA G.A. Yupangco & Co. Inc. 339 Gil J. Puyat Avenue EGYPT Makati, Metro Manila 1200, Al Fanny Trading Office...