Table of Contents
Advertisement
Quick Links
CO M M E RC I A L L I N E
COUNTER DOOR OPERATOR
N O T F O R R E S I D E N T I A L U S E
This Installation Manual provides the information required to install, troubleshoot and
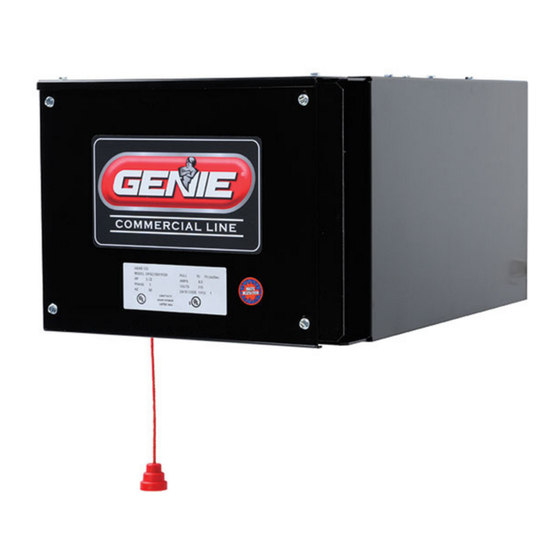
GCL-GCX
maintain a GCL-GCX
™
PROPER APPLICATION
Door Type
Operator Type
Rolling Steel
Counter Door
Counter Door
™
Counter Door Operator.
112070.501539
08-12
Max Door Weight/HP
1/2HP = 500 lbs.
Advertisement
Table of Contents

Related Manuals for Genie GCL-GCX


Summary of Contents for Genie GCL-GCX
- Page 1 Counter Door N O T F O R R E S I D E N T I A L U S E This Installation Manual provides the information required to install, troubleshoot and maintain a GCL-GCX ™ Counter Door Operator.
-
Page 2: Table Of Contents
Warranty ......... 11.1 Resetting the MRT, Monitored Reversing Devices ..GCL-GCX www.geniecompany.com... -
Page 3: Section 1: How To Use This Manual
Detail important features and troubleshooting information for typical installation and normal operations that may occur. Sections 9-11 Provide related information on service and maintenance items, operator drawings for use in troubleshooting and service activities, along with important warranty and returned goods policy information. GCL-GCX www.geniecompany.com 08-12 Counter Door Operator... -
Page 4: Safety Information & Instructions
1. Read manual and warnings carefully. representative. For the number of your local Genie® Dealer, call 800-OK-GENIE, and for Genie® Factory Technical Advice, 2. Keep the door in good working condition. call 800-843-4084. -
Page 5: Critical Installation Information
MillerEdge ME, MT and CPT series monitored edge sensors used in combination with Timer-Close Module P/N OPABTCX.S, and/or OPAKMEIGX.S INTERFACE MODULE. 2) Residential Safe-T-Beam® Monitored Photocells from The Genie® Company, model OSTB-BX (P/N 38176R). 3) Series II Commercial Safe-T-Beam®, Monitored Photocells P/N OPAKPE.S. -
Page 6: Entrapment Protection
UNTIL ONE OF THESE MONITORED EXTERNAL ENTRAPMENT DEVICES IS INSTALLED, THE OPERATOR WILL NOT ALLOW MOMENTARY CONTACT OPERATION IN THE CLOSE DIRECTION. APPROVED DEVICES ALLOWABLE DOOR WIDTH Miller Edge ME, MT & CPT series monitored edge sensors used in combination with either the Genie® ANY WIDTH Timer-Close Module or Direct connect through STB inputs using the OPAKMEIGX.S Interface Module. -
Page 7: Manual Release
7) Install the Entrapment Warning Placard next to the control station and in a prominent location. 8) For products having a manual release, instruct the end user on the operation of the manual release. GCL-GCX www.geniecompany.com 08-12 Counter Door Operator... -
Page 8: Installation
5) Place 3/8" flat washers and 3/8"-16 keps nuts on 3/8" carriage bolts closest to wall. FIG. 2. FLAT WASHERS & KEPS NUTS • Leave nuts flush with ends of bolts. t a r . r o nuts flush with end of bolts GCL-GCX www.geniecompany.com 08-12 Counter Door Operator... - Page 9 • Slide operator away from hood until drive chain is tensioned but not tight. FIG. 7. • Tighten mounting nuts. Figure 4A Figure 5 Figure 4 TOWARD WALL Figure 7 AS FAR AS SLOTS WILL ALLOW 90° GCL-GCX GCL-GCX www.geniecompany.com 08-12 Counter Door Operator...
-
Page 10: Manual Release
4) Remove four (4) self-tapping screws from front panel of the enclosure and remove front panel to expose control circuits and allow for installation of any optional accessory board. FIG. 8. Figure Warning Placard MUST BE ATTACHED ADJACENT to push button. 111735 00 1 GCL-GCX GCL-GCX www.geniecompany.com 08-12 Counter Door Operator... - Page 11 • Attach module by inserting self-tapping screw (provided in kit) through module bracket and into hole in side panel. Do not overtighten. 6) Replace front panel. Figure 11 MOUNTING Self tapping BRACKET screw GCL-GCX www.geniecompany.com 08-12 Counter Door Operator...
-
Page 12: Wiring
WARNING • DO NOT apply power to operator until instructed to do so. • The Genie® Company recommends that line voltage wiring be performed by a qualified electrician. • Be sure that electrical power has been disconnected from the input power wires being connected to the operator prior to Figure 1 handling these wires. -
Page 13: Low Voltage Control Wiring
• Plug all unused conduit holes. SCROLL SCROLL ENAB + 24 NTLK HO ST NTLK GCL-GCX www.geniecompany.com 08-12 Counter Door Operator... -
Page 14: External Wire Diagram
STOP BUTTON SERIES II SAFE-T-BEAM ® INTERFACE MODULE TO BE W RED N SER ES (OPAKMEIGX.S) (STB) See Fig 5 pg 5 4 CONNECT STB WIRES TO EITHER TERMINAL) 2-WIRE MONITORED SENSING EDGE SWITCH GCL-GCX www.geniecompany.com 08-12 Counter Door Operator... -
Page 15: Wall Control
“STOP” AND “GND” terminals as shown. 3-BUTTON 3-BUTTON STATION STATION NOTE: Long Distance Relay Kit wiring is not required for long OPEN/CLOSE PULL SWITCH distance control runs and should not be used GCL-GCX www.geniecompany.com 08-12 Counter Door Operator... -
Page 16: Photocell Wiring
NOTE: Blue wire supplies 20 – 40VDC. Photocells used must be compatible with this RELAY voltage range. Figure 8 + 24VDC RADIO NOTE: If no voltage is present at Blue wire, check fuse F-1 on Control board. TRANSMITTER RECEIVER THRU-BEAM PHOTOCELLS GCL-GCX www.geniecompany.com 08-12 Counter Door Operator... - Page 17 • Check sensing edge switch for proper operation. WARNING: Actuating the operator using constant contact on the CLOSE button will override external reversing devices, including sensing edges or reversing edges. GCL-GCX www.geniecompany.com 08-12 Counter Door Operator...
-
Page 18: Locking Bottom Bar / Interlock Switch
T-HANDLE TYPE LOCKING BOTTOM BAR electronically controlled commercial operator. CONTROL SIGNAL TERMINAL STRIP SLIDE TYPE LOCKING BOTTOM BAR OPEN CLOSE STOP 1 BTN SAFETY SAFETY INTLK INTLK Figure 11 * REMOVE JUMPER WHE N INSTALLING EXTERNAL INTERLOCK GCL-GCX www.geniecompany.com 08-12 Counter Door Operator... -
Page 19: External Radio/Safety Instructions
Have only trained door systems technicians make repairs to Figure 12 cables, spring assemblies, other hardware and any wooden blocks or like items to which they may be attached. 7) SAVE THESE INSTRUCTIONS. GCL-GCX www.geniecompany.com 08-12 Counter Door Operator... -
Page 20: Control Panel
The display in run mode will be one of the condition codes listed in Appendix C. Figure 1 WARNING: DO NOT calibrate operator or operate door unless doorway is in sight and free of obstructions. Keep people clear of opening while door is moving. GCL-GCX www.geniecompany.com 08-12 Counter Door Operator... -
Page 21: Setting Close Direction
6) Press CAL/RUN to return to run mode or, press SCROLL to shift to SCROLL Figure 4 another function. DID DOOR CLOSE? CLOSE STOP OPEN Figure 5 CLOSE SCROLL KEY STOP SCROLL CLEAR SCROLL GCL-GCX www.geniecompany.com 08-12 Counter Door Operator... -
Page 22: Setting Travel Limits
OPEN CLOSE desired height. STOP 5) Press SET/CLEAR to switch display to ”UP LIMIT>SET” or CLEAR SCROLL ”DOWN LIMIT>SET” CLEAR 6) Press CAL/RUN to return to run mode. SCROLL Figure 8 GCL-GCX www.geniecompany.com 08-12 Counter Door Operator... -
Page 23: Setting Limit Overrun
The Limit Overrun function will override external reversing devices, including photocells and sensing or reversing edges. Therefore, any externally connected devices will be disabled during that portion of door travel which is controlled by the Limit Overrun function. GCL-GCX www.geniecompany.com 08-12 Counter Door Operator... -
Page 24: Setting Open & Close Modes
Figure 10 “CLOSE MODE>C-REV” or ”CLOSE MODE>MOM” on the display. 4) Press a SCROLL key to shift to a new function and lock in the setting. SCROLL 5) Press CAL/RUN to return to run mode. GCL-GCX www.geniecompany.com 08-12 Counter Door Operator... -
Page 25: Setting Mid-Stop Limit
1) Press CAL/RUN to enter calibration mode. until display reads “MID-STOP > SET” 3) Press SCROLL SCROLL until the display reads ”MID-STOP > CLR” 5) Press SET/CLEAR CLEAR 8) Press CAL/RUN to return to run mode. GCL-GCX www.geniecompany.com 08-12 Counter Door Operator... -
Page 26: Monitored Reversing Devices
4) Series II Safe-T-Beam® Monitored Photocells (P/N OPAKPE.S). NOTE Installation of Series II Monitored Photocells DOES NOT make the GCX unit legal for 5) Monitored Photocells P/N OPAKPEN4GX.S. residential use. The Genie® Company strictly prohibits any installation of a commercial unit in any residentially zoned construction. GCL-GCX www.geniecompany.com... -
Page 27: Operator Cycle Count
This display will cycle between the version number of the current GDO firmware and the current Display Firmware. STOP 3) Press CAL/RUN to return to run mode. OPEN DISPLAY V# ####### CLOSE STOP Figure B SCROLL CLEAR GCL-GCX www.geniecompany.com 08-12 Counter Door Operator... -
Page 28: Operator Type
STOP This will display the current GDO type. 3) Press SET/CLEAR until display indicates correct GDO type SCROLL CLEAR CLEAR . ) T SCROLL 4) Press CAL/RUN to return to run mode. Figure 3 GCL-GCX www.geniecompany.com 08-12 Counter Door Operator... -
Page 29: Troubleshooting
The display will flash the number of the error code and SCROLL CLEAR the 2-digit error code followed by a description of the error code. Fig. 1 & 2. SCROLL Figure 2 GCL-GCX www.geniecompany.com 08-12 Counter Door Operator... -
Page 30: Run Codes
These codes are displayed in calibration mode. The display will flash the number of the run code and the 2-digit run code followed by a description of the run code. Fig. 3 & 4. Figure 4 GCL-GCX www.geniecompany.com 08-12 Counter Door Operator... - Page 31 The CLOSE wall button was then activated, causing the operator to close. While closing, the Normally-Open (N-O) Safety Input was activated, causing the operator to stop and then reverse, stopping at the up limit. Figure 5 GCL-GCX www.geniecompany.com 08-12 Counter Door Operator...
-
Page 32: Led Indicators
1. INTLK SWITCH OPEN HOIST INTLK ENABLED INTLK 2. HOIST RELEASE NEEDS RESET SCROLL 3. INTLK CONNECTOR NOT PLUGGED IN SCROLL 4. INTERLOCK DEFECTIVE E AB + 24 NTLK HO ST NTLK TROUBLESHOOTING LEDs GCL-GCX www.geniecompany.com 08-12 Counter Door Operator... - Page 33 4 BLINKS, PAUSE 2. SOURCE DEFECTIVE 2. CALL CUSTOMER SERVICE (REPEAT) WARNING : THE GENIE® COMPANY RECOMMENDS THAT LINE WARNING: ACTUATING THE OPERATOR BY USING CONSTANT VOLTAGE WIRING BE PERFORMED BY A QUALIFIED ELECTRICIAN. CONTACT ON THE CLOSE BUTTON WILL OVERRIDE EXTERNAL SEE SECTION 5 FOR ADDITIONAL WIRING INSTRUCTIONS.
-
Page 34: Service & Maintenance
5,000 CYCLES 10,000 CYCLES 30,000 CYCLE MANUAL OPERATION OF DOOR CHECK DRIVE CHAINS AND LUBRICATE PHOTOCELL/ SENSING EDGE OPERATION CHECK FOR LOOSE OR MISSING HARDWARE CHECK LIMIT POSITION GEAR TRAIN WEAR * If Installed. GCL-GCX www.geniecompany.com 08-12 Counter Door Operator... -
Page 35: Operator Parts Breakdown (Exploded View)
Section 10: Appendix A Operator Parts Breakdown (Exploded View) GCL-GCX GCL-GCX www.geniecompany.com 08-12 10.1 Counter Door Operator... -
Page 36: Operator Parts Breakdown (Parts List)
MAIN FRAME, BACK 111933.0001 MAIN FRAME 111679.0002 FRAME SIDE MOUNTING, RH 111932.0001 111932.0002 FRAME SIDE MOUNTING, LH FRAME ASSY, MTR & GEAR 111950.0001 ** CONTACT DEALER FOR PROPER PART BASED ON YOUR SPECIFIC MODEL. GCL-GCX GCL-GCX www.geniecompany.com 08-12 10.2 Counter Door Operator... - Page 37 XFMR ENAB + 24 CONNECTOR NTLK HO ST EXPANSION O EN C OSE SA E SA E NTLK LINE INPUT PORT TERMINALS CONTROL WIRE TERMINALS AUX BOARD (OPTIONAL) TRANSFORMER TROUBLESHOOTING LED'S LINE GROUND GCL-GCX www.geniecompany.com 08-12 10.3 Counter Door Operator...
-
Page 38: Appendix B
Causes moving door to stop. Prevents the operator from running. Hoist Interlock Plug or Jumper. HOIST INTLK Operates even if microcontroller is non-functional. Limit Sensor Plug. LIMIT SENSOR Causes door to stop at top and bottom of normal travel. GCL-GCX www.geniecompany.com 08-12 10.4 Counter Door Operator... -
Page 39: Run Codes
GDO REVERSED BECAUSE THE AUXILIARY OPEN INPUT WAS ACTIVATED REV > OPEN KEY GDO REVERSED BECAUSE THE KEYPAD OPEN KEY WAS ACTIVATED REV > N-O SAFETY GDO REVERSED BECAUSE THE N-O REVERSING INPUT WAS ACTIVATED GCL-GCX www.geniecompany.com 08-12 10.5 Counter Door Operator... - Page 40 GDO WON'T RUN BECAUSE ITS AT OR ABOVE THE MID-STOP LIMIT & CAN'T RUN UP & A REVERSING INPUT IS PREVENTING IT FROM CLOSING EXP MODULE FAIL GDO WON'T RUN BECAUSE AN EXPANSION MODULE FAILURE IS PREVENTING IT GCL-GCX www .geniecompany.com 08-12 10.6...
-
Page 41: Error Codes
OPENING FROM TRANSMITTER # __ CLOSING > XMTR # CLOSING FROM TRANSMITTER # __ HALT > XMTR # HALT FROM TRANSMITTER # __ NO XMTR > CC NO CONTROL FROM TRANSMITTER, CONSTANT CONTACT EMPLOYED AT LOCAL CONTROL GCL-GCX www.geniecompany.com 08-12 10.7 Counter Door Operator... - Page 42 GCL-GCX GCL-GCX www.geniecompany.com 08-12 11.1 Counter Door Operator...
- Page 43 THIS PAGE LEFT BLANK GCL-GCX www.geniecompany.com 08-12 Counter Door Operator...
- Page 44 1 Door Drive Mt. Hope, Ohio 44660...