Pentax K-X Operating Manual
Hoya corporation
Hide thumbs
Also See for K-X:
- Operating manual (324 pages) ,
- User manual (40 pages) ,
- Manual de instrucciones (343 pages)
Table of Contents
Advertisement
Quick Links
Advertisement
Table of Contents

Related Manuals for Pentax K-X


Summary of Contents for Pentax K-X
- Page 1 SLR Digital Camera Operating Manual Operating...
- Page 2 Copyright Act, and care should be taken here also. Regarding trademarks PENTAX, IC-X and smc PENTAX are trademarks of HOYA CORPORATION. PENTAX Digital Camera Utility and SDM are trademarks of HOYA CORPORATION. SDHC logo is a trademark.
-
Page 3: Safely
AC adapter, and contact your nearest PENTAX Service Center. Continuing to use the product can cause a fire or electric shock. • Do not place your finger over the flash when discharging the flash. - Page 4 • Some portions of the camera heat up during use. There is a risk of low temperature iiiiiiiiiiiiiiiiiiiiiiiiiiiiiii burns when holding such portions for long periods. iiiiiiiiiiiiiiiiiiiiiiiiiiiiiii • Should the monitor be damaged, be careful of glass fragments. Also, be careful not iiiiiiiiiiiiiiiiiiiiiiiiiiiiiii to allow the liquid crystal to get on your skin or in your eyes or mouth.
-
Page 5: During Handling
• Do not place or drop heavy objects on or forcefully bend the AC plug cord. Doing so may damage the cord. Should the AC plug cord be damaged, consult a PENTAX Service Center. • Do not touch or short-circuit... -
Page 6: Manual
In order to better serve you, we request that you complete the product registration, which can be found on the CD-ROM supplied with the camera or on the PENTAX webs te. Refer to p.273 for deta s. Thank you for your cooperat on. -
Page 7: Table Of Contents
For Using Your Camera Safely ............Care to be Taken During Handling ............Contents ....................Composition of the Operating Manual ..........Before Using Your Camera IIIIIIIIIIIIIIIIIIIIIIIIIIIIIIIIIIIIIIIIIIIIIIIIIIIIIIIIIIIIIIIIIIIIIIIIIIIIIIIIIIIIIIIIIIIIIIIIIIIIIIIIIIIIIIIII_ /_-X Camera Characteristics ............. Checking Contents of the Package ........Names Functions of Working Parts ........ - Page 8 iiiiiiiiiiiiiiiiiiiiiiiiiiiii_ Basic Operations iiiiiiiiiiiiiiiiiiiiiiiiiiiii_ iiiiiiiiiiiiiiiiiiiiiiiiiiiii_ Basic Shooting Operation ............60 Holding the Camera ................Letting the Camera Choose the Optimal Settings ......Using a Zoom Lens ..............Using Built-in Flash ............... Setting the Flash Mode ..............Compensating Flash Output .............. Allowing Shooting while Charging...
-
Page 9: Table Of Contents
Taking Pictures Continuously ........... 136 Continuous Shooting ................ Multi-exposure ................. Taking Pictures Using Digital Filters ........Shooting with Live View ............Taking Still Pictures ................. Recording Movies ................Using the Flash Flash Characteristics in Each Exposure Mode ......156 Using the Slow-speed Sync ............. - Page 10 iiiiiiiiiiiiiiiiiiiiiiiiiiiii_ Playback Functions iiiiiiiiiiiiiiiiiiiiiiiiiiiii_ iiiiiiiiiiiiiiiiiiiiiiiiiiiii_ Playback Functions Operation ..........200 Playback Mode Palette Setting Iterns ..........Playback Menu Setting Items ............Enlarging Images ................ Displaying Multiple Images ............Multi-image Display Screen ............. Displaying Images by Folder ............Displaying Images by Shooting Date (Calendar Display) ....
- Page 11 Computer ........Saving Images Your Computer ..........Setting USB Connection Mode ............Saving Images by Connecting Your Camera and Your Computer ..266 Using Provided Software ............. Installing the Software ..............The PENTAX Digital Camera Utility 4 Screen .........
- Page 12 iiiiiiiiiiiiiiiiiiiiiiiiiiiii_ Appendix iiiiiiiiiiiiiiiiiiiiiiiiiiiii_ iiiiiiiiiiiiiiiiiiiiiiiiiiiii_ Default Settings ................Resetting the Menu ................Functions Available with Various Lens Combinations ... 282 Notes on [22. Using Aperture Ring] ..........Cleaning the CMOS Sensor ............Removing Dust by Shaking the CMOS Sensor (Dust Removal) ..
- Page 13 Composition of the Operating Manual This Operating Manual contains the following chapters. 1 Before Using Your Oamera Explains camera characteristics, accessories and the names and functions of various parts. 2 Getting Started Explains your first steps from purchasing the camera to taking pictures. Be sure to read it and follow the instructions.
- Page 14 symbols used in this Operating Manual are explained below. Indicates reference page number explaining a related operation. Indicates useful information. Indicates precautions to take when operating the camera. iiiiiiiiiiiiiiiiiiiiiiiiiiiii_ iiiiiiiiiiiiiiiiiiiiiiiiiiiii_...
-
Page 15: Of The Package
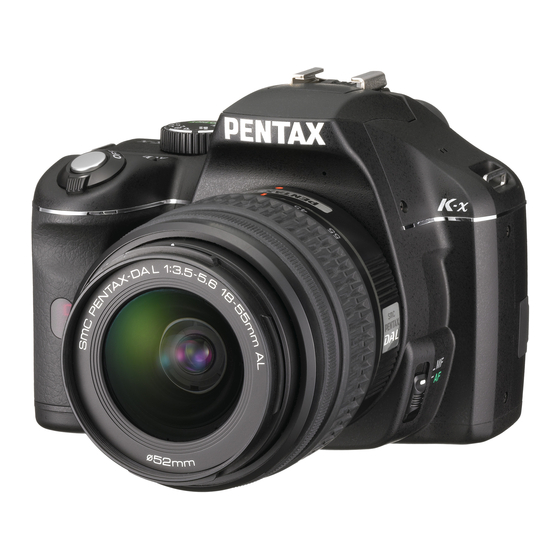
Before Using Your Camera Check the package contents and the names and functions of working parts before use. I(-X Camera Characteristics ......14 Checking the Contents of the Package ....16 Names and Functions of Working Parts .... 17 Display Indicators .......... - Page 16 • Features a 23.6xl 5.8 mm CMOS sensorwith approximately 12.4 million effective pixels for high precision and a wide dynamic range. • Features Shake Reduction (SR), an image sensor shifting shake reduction system. This enables you to capture sharp pictures with minimal camera shake regardless of the lens type.
- Page 17 300x 1.5=450 Focal length is equivalent to a 450 mm lens on a 35 mm camera. Shake Reduction (SR) Shake Reduction (SR) on the /_-X features a PENTAX original system which uses magnetic force to move the image sensor at high...
- Page 18 The following accessories are packaged with your camera. Check that all accessories are included. Hot shoe cover FK Eyecup FQ Body mount cover (Installed on camera) (Installed on camera) (Installed on camera) iiiiiiiiiiiiiiiiiiiiiiiiiiiii_ iiiiiiiiiiiiiiiiiiiiiiiiiiiii_ iiiiiiiiiiiiiiiiiiiiiiiiiiiii_ USB cable Strap Software (CD-ROM) I-USB7 O-ST53 S-SW99...
- Page 19 ___.._ Hot shoe Power lamp j_'_"_.._ Speaker Self-timer Iamp/-_ ._ _' _.._--_ ' _X'_x Strap lug Remote control receiver Microphone Card cover _/._ Mirror Lens mount index-_ __. (red d ot) AF coupler Lens unlock button Lens information contacts Built-in Diopter adjustment lever...
- Page 20 Functions ofbuttons, dials and levers u sed d uring s hooting arenoted. The f actory default setting sare explained here. Depending on the b utton, these settings can be changed: ® iiiiiiiiiiiiiiiiiiiiiiiiiiiii_ iiiiiiiiiiiiiiiiiiiiiiiiiiiii_ ® \,.,j...
- Page 21 button _) (Green) button You can assign a function to Switches to Playback mode. this button. (p.179) (p.74) $2_ Shutter release button button Press to capture images. Displays the Live View. (p.64) (p.143) _3_ INFO _3_ Main switch button Move to turn the camera on Displays the status screen and off.
- Page 22 Functions of buttons, dials and levers used during playback are noted. ,?.._< iiiiiiiiiiiiiiiiiiiiiiiiiiiii_ iiiiiiiiiiiiiiiiiiiiiiiiiiiii_ ®...
- Page 23 INFO button Shutter release button Press halfway to switch to Displays shooting information Capture mode. on the monitor. (p.25) ® OK button S2h Main switch Move to turn the camera on Saves the setting you selected and off. (p.51) in the menu or playback screen.
- Page 24 The following indicators appear on the monitor depending on the status of the camera. Monitor %_i_ _ Th e brightness and the color Of the monitor can be adjusted. (p_250 p1251) ..iiiiiiiiiiiiiiiiiiiiiiiiiiiii_ iiiiiiiiiiiiiiiiiiiiiiiiiiiii_ [[[[[[[[[[[[[[[[[[[[[[[[[[[[[ii iiiiiiiiiiiiiiiiiiiiiiiiiiiiiii Guides appear on the monitor for 3 seconds (default setting)
- Page 25 While shooting, the status screen is displayed showing the current shooting function settings. You can change the screen displayed pressing the INFO button. Status screen • Status screen (All items are displayed here for explanatory purposes. The actual display may differ.) iiiil_l iiii,liiiiYiiiiliiiiiil _i!i ..
- Page 26 • Control panel Press the INFO button in the status screen to display the control panel and change settings. Function name Highlight Correction (p.189) Setting Shadow Correction (p.190) Custom Image (p.194) File Format (p.177) iiiiiiiiiiiiiiiiiiiiiiiiiiiii_ iiiiiiiiiiiiiiiiiiiiiiiiiiiiiii Cross Processing (p.196) JPEG Recorded Pixels (p.174) iiiiiiiiiiiiiiiiiiiiiiiiiiiiiii...
- Page 27 The camera switches the type of information display when you press the INFO button during playback. Standard Captured image, file format and indicators are displayed. Captured image and histogram (Brightness/RGB) Histogram display displayed. Not available during movie playback. Detailed information Detailed information on how and when the image was...
- Page 28 • Detailed information display Use the four-way controller ( • • ) to switch between pages. The copyright information is displayed on page 2. Page 1 Still Picture ii;ii; I.N.N_T_I _/....Movie iiiiiiiiiiiiiiiiiiiiiiiiiiiii_ iiiiiiiiiiiiiiiiiiiiiiiiiiiii_ iiiiiiiiiiiiiiiiiiiiiiiiiiiiiii Page 2 • • iiiiiiiiiiiiiiiiiiiiiiiiiiiiiii Still Picture/Movie iiiiiiiiiiiiiiiiiiiiiiiiiiiiiii...
- Page 29 Digital Filter (p.140) Rotation information (p.213) Sensitivity (p.90) Captured image White Balance (p.182) Protect (p.219) Adjust White Balance (p.186) Capture Mode (p.83) File Format (p.177) Focus Mode (p.112) Recorded Pixels (p.148, p.174) AF point (p.117)/ Autofocus Mode (p.144) Quality Level (p.148, p.175) Color Space (p.187)
- Page 30 • Histogram Display The following histograms can be displayed when playing back still pictures. The "Brightness histogram" shows the distribution of brightness and the "RGB histogram" shows the distribution of color intensity. Press the four-way controller (• v) to switch between "Brightness histogram"...
- Page 31 A histogram shows the brightness 1" distribution of an image. The horizontal axis represents brightness (dark at the "6 left and bright at the right) and the vertical axis represents the number of pixels. The shape and the distribution of the (Dark) _Brightness_ (Bright) histogram...
- Page 32 Understanding Color Balance Distribution of color intensity is displayed for each color in the RGB histogram. The right side of the graphs look similar for images that have White Balance adjusted well. If only one color is lopsided to the left, that color is too intense.
- Page 33 AF frame (p.50) Spot metering frame (p.104) Flash status (p.67) Lit: when flash is available. Blinks: when flash is recommended but not set. Picture mode icon (p.84) The icon for Picture mode in use appears. (Normal mode in @), • (Portrait), _, (Landscape), _ (Macro),...
-
Page 34: Function Settings
Function settings can be changed using the direct keys, the control panel or the menu. This section explains the basic ways to change function settings. In Capture mode, you can set Drive Mode, Flash Mode, White Balance and Sensitivity by pressing the four-way controller ( •... - Page 35 While shooting, the current settings can be checked on the status screen. You can also switch the display to the control panel and change settings. Below, how to set the JPEG Quality will be explained as an example. Check the status screen and then press the INFO button.
- Page 36 Press the button. The setup screen of the selected item appears. Use the four-way controller ( 4 • ) or e-dial to select a setting value. iiiiiiiiiiiiiiiiiiiiiiiiiiiiiii ::::::::::::::::::::::::C ::::::::::::::::::::::::C ::::::::::::::::::::::::C iiiiiiiiiiiiiiiiiiiiiiiiiiiiiii Press the button. The camera returns to the control panel and is ready to take a picture.
- Page 37 This section explains operation methods for the [1_ Rec. Mode], [r€l Playback], ["N Set-up] and [C Custom Setting] menus. Below, how to set [HDR Capture] in the [1_ Rec. Mode 2] menu will be explained as an example. MENU Press button Capture mode.
- Page 38 Press the four-way controller (•). Available settings are displayed. Cross Processing Digital Filter The frame moves to the pop-up menu if there is one. Multi-exposure AF Mode AF.A AE Metering Select AF Point Use the four-way controller (• • ) o_&...
- Page 39 Getting Started ,_ iiiili iIiilii 1111111 iilii 1111111 iilii 1111111 iilii 1111111 iilii 1111111 iilii 1111111 iilii 1111111 iilii 1111111 iilii 1111111 iilii 1111111 iilii 1111111 iilii 1111111 iilii 1111111 iilii 1111111 iilii 1111111 iilii 1111111 iilii 1111111 iilii 1111111 iilii 1111111 iilii 1111111 iilii 1111111...
- Page 40 Pass the end of the strap through the strap lug, then secure it on the inside of the clasp. iiiiiiiiiiiiiiiiiiiiiiiiiiiiiii iiiiiiiiiiiiiiiiiiiiiiiiiiiiiii Attach the other end of the strap in the same manner as iiiiiiiiiiiiiiiiiiiiiiiiiiiiiii described above. iiiiiiiiiiiiiiiiiiiiiiiiiiiiiii iiiiiiiiiiiiiiiiiiiiiiiiiiiiiii iiiiiiiiiiiiiiiiiiiiiiiiiiiiiii iiiiiiiiiiiiiiiiiiiiiiiiiiiiiii iiiiiiiiiiiiiiiiiiiiiiiiiiiiiii iiiiiiiiiiiiiiiiiiiiiiiiiiiiiii iiiiiiiiiiiiiiiiiiiiiiiiiiiiiii...
- Page 41 Insert batteries into the camera. Use four AA lithium batteries, AA Ni-MH rechargeable batteries, or AA alkaline batteries. This camera is packaged with AA lithium batteries for checking the camera functionality but other kinds of batteries are also compatible. Use the compatible batter es accord ng to the ntended purpose.
- Page 42 Push and hold the battery cover unlock lever as shown in the illustration (_), slide the battery cover toward the lens ($2_)and then flip open. Insert the batteries according to the +/- indicators in the battery chamber. iiiiiiiiiiiiiiiiiiiiiiiiiiiiiii ::::::::::::::::::::::::::::::: ::::::::::::::::::::::::::::::: ::::::::::::::::::::::::::::::: ::::::::::::::::::::::::::::::: :::::::::::::::::::::::::::::::...
- Page 43 Status Screen Battery Level (Green) Batteries are full. (Orange) Batteries are running low. (Red) Batteries are almost empty. "Battery depleted" The camera turns off after displaying the message. or _ (Red) may appear even when th e battery level is sufficient if the camera is used at low temperatures or when performing...
- Page 44 We recommend using the AC adapter kit K-AC84 (optional) when using the monitor for a long time or when connecting the camera to a computer or AV device. Make sure the camera is turned off. If batteries are inserted into the camera, open the battery cover and remove the batteries.
- Page 45 Close the battery cover. Refer to Step 3 on p.40. Connect the DC terminal on the AC adapter to the DC coupler. Connect the AC plug cord to the AC adapter. Plug the AC cord into the power outlet. • Make Sure the camera is turned off before connecting or disconnecting AC adapter.
-
Page 46: The Sd Memory Card
This camera uses either an SD Memory Card or an SDHC Memory Card. (Both cards are referred to as SD Memory Cards hereafter.) Make sure the camera is turned off before inserting or removing the SD Memory Card (commercially available). i Do not remove the SD Memory card while the Ca[d access !amp is !it, •... - Page 47 Push the SD Memory Card in once to remove. Close the card cover ((_) and then slide it in the direction of the arrow (@). i!ii_i!l_iiiiii iiiiiii!_iii iiiiiii_i_ Precautions When Using the SD Memory Card The SD Memory Card is equipped with a write-protect switch.
-
Page 48: Level
If the SD Memory Card is not used for a long time, the data on the card may become unreadable. Be sure to regularly make a backup of important data on a computer. Avoid using or storing the card where it may be exposed to static electricity electrical... - Page 49 JPEG format or the high quality and editable RAW format. For RAW file format, you can select PENTAX's original PEF format or general-purpose DNG (Digital Negative) format designed by Adobe Systems. On a 1 GB SD Memory Card, you can record up to 48 images in both PEF and DNG formats.
- Page 50 Attach aproper lens t othe camera's body. When y ou use one ofthe following lenses with theJ!'_-X, all t he camera's capture modes will b eavailable. (a) DA, D A L,DFA, F AJlenses (b) Lenses with anAperture A (Auto) position, when u sed i nthe A position Turn the camera off before attaching or removing...
- Page 51 Remove the front lens cap by pushing the indicated portions inward. To detach the lens, hold down the lens unlock button (,_) and turn the lens counterclockwise. assume n ° responsibility nor liability for accidents, damages malfunctions resulting from the use of lenses made by other manufacturers. •...
-
Page 52: Diopter
Adjust the viewfinder diopter to suit your eyesight. If it is difficult to see the viewfinder image clearly, slide the diopter adjustment lever sideways. You can adjust the diopter from approximately -2.5 to +1.5 m-1 . Look through the viewfinder and slide the diopter adjustment... - Page 53 iiiiiiiiiiiiiiiiiiiiiiiiiiii Turn the main switch to [ON]. The camera will turn on. Set the main switch to the position [OFF] to turn off the camera. • Always turn the camera offwhen not in use. - The powerwill automatically turn offwhen you do not perform any operations within a set period of time.
-
Page 54: Language
The first time the camera is turned on after Language/_ purchasing, the [Language/_=_] screen Dansk E/,kqvlKa appears on the monitor. Follow the Fran_:ais Svenska PyCCK_ Deutsch Suomi _-_o_ procedure below to set the language Espadol Polaki €:_ displayed on the monitor and the current PortuguCs (_e,_tina dP _ F_ _$... - Page 55 Press the button. The [Initial Setting] screen for the selected language appears. New York Press the four-way controller ('v) twice Text Size Standard and proceed to Step 10 of p.54 if Settings complete [Hometown] does not have to be changed. Press the four-way controller...
- Page 56 Press the four-way controller (1_) Setting and use the four-way controller Language/_ English (• •) to select [Standard] or New York [Large]. Selecting [Large] magnifies the selected Settings complete menu item. Press the button. Press the four-way controller (•) Initial Setting to select [Settings complete].
- Page 57 When the Wrong Language is Set If you mistakenly select the wrong language in the [Language/_] screen and proceed to the [Date Adjustment] screen, you can perform the following operation to set the language back. If you have proceeded to switch the camera to Capture mode (and the camera is ready to take a picture), perform the following operation...
- Page 58 : when the hometown and the date and time are not Setl the !Initial setting] screen or [Date Adjustment ] screen wil! be displayed whe n the camer a is turned en again, If you have not proceeded to the [Date Adjustment] screen, you can resetect a language using the four-way...
- Page 59 Press the four-way controller (•). The frame moves to [Date]. Press the four-way controller (•). The frame moves to the month. Use the four-way controller (• •) _ustrnent to set the month. Date Format mrn/dd/yy Set the day and year in the same manner. Next, set the time.
- Page 61 Basic Operations This chapter explains basic operations for shooting by setting mode dial to _ (Auto Picture) to ensure successful capturing. For information about advanced functions and settings for taking pictures, refer to chapter 4 and onward. Basic Shooting Operation ........
- Page 62 How you hold the camera is important when taking pictures. • Hold the camera firmly with both hands and keep your elbows close to your body. • Press the shutter release button gently when taking a picture. Horizontal position Vertical position •...
- Page 63 Letting the Camera Choose the Optimal Settings The IC-X features various capture modes, focus modes, and drive modes for expressing your photographic vision. This section explains how to take pictures by simply pressing the shutter release button. Set the mode dial to _. The camera will select the optimal capture mode for the subject.
- Page 64 Look through the viewfinder view the subject. A zoom lens can be used to change the size of the subject in the viewfinder. (p.66) Position the subject inside AF frame and press the shutter release button halfway. The autofocus system operates. The focus indicator •...
- Page 65 Review the captured image on the monitor. The image appears for 1 second on the monitor shortly after capturing (Instant Review). ,_ Setting the Display for Instant Review (p.249) You can magnify the image during Instant Review with the e-dial. (p.202) You can delete the image during Instant Review by pressing the _.UP/_ button.
- Page 66 Operating the shutter release button shutter release button two working positions. Not pressed Pressed halfway Pressed fully (first position) (second position) Pressing it down halfway (first position) turns on the viewfinder indicators and the autofocus system operates. Pressing it fully (second position) takes a picture.
- Page 67 Subjects that are difficult to focus on The autofocus mechanism is not perfect. Focusing may be difficult when taking pictures under the following conditions. These also apply to manual focusing using the focus indicator O in the viewfinder. (a) Extremely low-contrast subjects such as a white wall in the focusing...
- Page 68 Enlarge the subject (telephoto) or capture a wider area (wide angle) with a zoom lens. Adjust the subject to the desired size and take pictures. Turn the zoom ring to the right or left. Turn the zoom ring clockwise for telephoto and counterclockwise for wide angle.
- Page 69 Use the following procedures to take pictures in low light or backlit conditions or when you want to use the built-in flash. The built-in flash is optimum at about 0.7 m to 5 m from the subject. Exposure will not be properly controlled and vignetting (darkening of the...
- Page 70 Flash Mode Function _<_ Auto Flash+Red- Discharges a pre-flash for red-eye reduction before the eye Reduction automatic flash. _® Manual Flash+ Discharges the flash manually. A pre-flash for red-eye Red-eye Reduct. reduction is discharged before the main flash. Sets to a slow shutter speed depending on the...
- Page 71 Use the four-way controller (4 • ) to select a flash mode. Turn the e-dial to perform the flash exposure compensation. (p.72) Press the button. The camera is ready to take a picture. , .E.U _,',(_'-_/_C!J '_,' _ SON. Set the mode dial to _, _, _, _="...
- Page 72 Push down on the portion indicated in the illustration to retract the built-in flash. Switch between _A (Auto Flash DiSCharge) and { (Manual Flash Discharge) by pressing the _UP!'_ button while the built-in flash is popped up. Press the _.UP/'_ button.
- Page 73 When the mode dial is set to _ (Elash Off), the built_in flash Wi!l not POP uP even if the _UP!_ button is pressed: Using red-eye reduction flash "Red-eye" is the phenomenon where eyes look reddish in photographs taken in dark environments with a flash.
- Page 74 Daylight-Sync Shooting In daylight conditions, the flash will eliminate shadows when a portrait picture is taken with a person's face cast in shadow. Use of the flash in this way is called Daylight-Sync Shooting. The { (Manual Flash Discharge) mode is used when shooting with Daylight-Sync Shooting.
- Page 75 Set the flash compensation value by turning the e-dial in the [Flash Mode] screen. Pressing the _) (Green) button returns the flash exposure compensation to the default value (0.0). (Available only when [Green Button] is assigned to the _) (Green) button in [Green Button] of the [1_1 Rec.
- Page 76 You can play back captured images with the camera. use the provided !'PENTAX Digital Camera utility 4'! Software to playback picture s using a computer. Refer to '!Using the Provided Software'! (p,268) for details on the software. Press the _ button.
- Page 77 Deleting a Single Image delete image at a time. t Deteted images Cann°t be lest°red! • Protected images cannot be deleted: (p1219) Press the _ button and use the four-way controller (_1 • ) to select an image to delete. Press the _.UP/'_ button.
-
Page 79: Using Digital Filters
Shooting Functions This chapter describes the various basic and advanced shooting functions available with the _'_"-X. How to Operate the Shooting Functions ... 78 Selecting the Appropriate Capture Mode ..83 Setting the Exposure ........... Focusing ............. Checking the Composition, Exposure and Focus Before Shooting (Preview) ........ - Page 80 You can change capture-related settings using the direct keys, control panel, [1_ Rec. Mode] menus or [C Custom Setting] menus. _i7_0_ For details on how to operate the menasl [efer to ,Using the Menus: ! (p-35)_ Press the four-way controller •...
- Page 81 Rec. Mode Menu Setting Items The following settings can be performed the [1_ Rec. Mode 1-4] menus. Press the MENU button in Capture mode to display the [1_ Rec. Mode 1] menu. Menu Item Function Page Custom Image* Sets the image finishing tone such as color p.194 and contrast...
-
Page 82: The Live View
Menu Item Function Page Movie Sets the movie settings, p. 148 Live View Sets the Live View display settings, p.144 Status Screen Sets the status screen display color settings, p.248 Instant Review Sets the Instant Review display settings, p.249 Color Space Sets the color space to use. - Page 83 Custom Setting Menu Setting Items Set the [C Custom Setting 1-4] menus to fully use the functions of a SLR camera. Menu Item Function Page 1. EV Steps Sets the adjustment steps for exposure, p.108 2. Sensitivity Steps Sets the adjustment steps for ISO p.91 sensitivity.
- Page 84 Menu Item Function Page High-ISO NR is activated when shooting 15. High-ISO p.92 with a sensitivity higher than the set Start Level sensitivity. 16. Release While Sets whether to release shutter while the Charging p.73 built-in flash is charging. 17. Flash in Sets the built-in flash discharge...
- Page 85 You can switch the capture modes by setting the icons on the mode dial to the dial indicator. Dial indicator The I_-X features various shooting modes, enabling you to take pictures with settings suited for your photographic vision. In this manual, the capture modes are referred to as follows.
-
Page 86: Sync
Set the mode dial to _, al, _, _&,, -_,-or dP if you cannot capture the desired image in _ (Auto Picture) mode. The characteristics of each mode are as follows. Mode • Characteristics The optimal capture mode is automatically selected from the O (Standard),... -
Page 87: Mode
By setting the mode dial to SCN (Scene), you can choose from the following 10 shooting scenes. Mode Characteristics Used for night scenes. Use a tripod, etc. to prevent Night Scene shaking. For capturing images of dazzling backgrounds, such Surf & Snow as snowy mountains. - Page 88 SCN. Set the mode dial to The scene mode status screen appears. Press the INFO button. i_iiiiiiiiiiiiii!liiiiiiiiiii/i!_ The icon for the currently selected shooting scene appears in the control panel. Use the four-way controller iiil;_!ii!i!i!ili (• • 4 • ) to select [Scene Mode] and press the OK button.
- Page 89 When the MENU button is pressed while [SCN the mode dial is set to (Scene), the Scene] menu appears. The scene mode can also be selected from the [SCN Scene] menu. Used for night scenes. Use a tripod, etc. to prevent shaking Exposure...
- Page 90 Correct exposure of the subject is determined by the combination shutter speed and aperture setting. There are many correct combinations of shutter speed and aperture value for a particular subject. Different combinations produce different effects. By changing the shutter speed, you can manipulate how time is expressed in the pictures you create.
- Page 91 • Opening the aperture (reduce the aperture value) Objects closer and farther than the focused subject will be more out of focus. For instance, if you take a picture of a flower against a landscape with the aperture open, the landscape in front and behind the flower will be blurred, emphasizing only the flower.
- Page 92 Setting the Sensitivity You can set the sensitivity to suit the brightness of the surroundings. The sensitivity can be set to [AUTO] or within a sensitivity range equivalent to ISO 200 to 6400. The default setting is [AUTO]. Press the four-way controller (•) in Capture mode.
- Page 93 • When (Stage Lighting)/_ (Night Snap) in (Scene) mode or ,1_ (Movie) mode is selected, the sensitivity is fixed to AUTO and cannot be changed. • When the mode dial is set to SV (Sensitivity Priority) or M (Manual), [AUTO Setting] is not displayed.
- Page 94 Noise Reduction When shooting with a digital camera, image noise (image roughness or unevenness) becomes noticeable in the following situations. - Shooting with a long exposure - Shooting with a high sensitivity setting - When the temperature of the CMOS sensor is high You can reduce image noise by using Noise Reduction.
- Page 95 Changing the Exposure Mode This camera features the following five exposure modes. Use the mode dial to change the exposure mode. (p.83) The settings available for each exposure mode are as follows. Change I Exposure . _. EVCom- Change Change Mod e _esc[lP!'°n pensati0n...
- Page 96 Using a Lens with an Aperture Ring When using a lens with an aperture ring, set the aperture to the A (AUTO) position while holding down the auto- lock button on the lens. Automatically sets the shutter speed and aperture value to obtain the proper exposure according to Program line when taking pictures.
- Page 97 The EV compensation value is displayed in the status screen and viewfinder. EV compensation value ' EV compensation Value Can be Set in increments of 1/3 EVor 1/2 EV. set the exposure steps in [1. EV Steps] 0fthe [C Custom Setting !] menu, (p.!08) •...
- Page 98 You can set the sensitivity to suit the brightness of the subject. The shutter speed and aperture value are automatically set according the selected sensitivity to obtain the proper exposure. Set the mode dial to Sv. Turn the e-dial to adjust the sensitivity.
- Page 99 iiiiiiiiiiiiiiii Lets you set the desired shutter speed for expressing moving subjects. When taking pictures of a fast moving subject, you can increase shutter speed to make the subject look still or decrease the shutter speed to have the subject show movement. The aperture value is automatically set to give the proper exposure depending...
-
Page 100: Flash
• Turn the e-diat While pressing the F_Av button to change the EV cornpensation va!ue: (p,! 07) The shutter speed can be set in increments of t/3 EV or 1/2 EV. Se t the exposure steps in [1. EV Steps ] of the [C Custom Setting !] menu;... - Page 101 Turn the e-dial to adjust the aperture value. The set values are displayed in the status screen and viewfinder. • Turn the e-diat Wh le pressing the F_ Av button to Change the EV Compensation Value, (p.107 ) • ]-he aperture value can be set in increments of 1/3 EV or 1/2 EV.
- Page 102 You can setthe shutter speed a nd aperture value. This mode i ssuitable totake pictures ofyour c hoice bycombining them. This mode i s convenient fortaking p ictures using t he same c ombination ofthe shutter speed a nd aperture settings ortaking i ntentionally underexposed (darker) oroverexposed...
- Page 103 The set values are displayed in the status screen and viewfinder. On the status screen, the e-dial indicator appears next to the shutter speed or aperture value, depending on which is being adjusted. Of the shutter speed and aperture value, the value being adjusted is underlined in the viewfinder.
- Page 104 Using AE Lock If [10. AF/AE-L Button] in the [C Custom Setting 2] menu is set to [AE Lock], you can press the AF/AE-L button to lock the exposure value. (p.108) Example) If the shutter speed is 1/125 sec. and aperture is F5.6 and these settings are locked with the AF/AE-L button, the...
- Page 105 !!!!!!!!!!!!!!!!!!!!!! Set the mode dial to M. i_ii Turn the e-dial and set the shutter speed to Bulb. Bulb appears after the slowest shutter speed (30 sec.). !!!!i;_i;!!!!!!!!!!!! iiiiii_!i Press the shutter release button. The shutter remains open as long as the shutter release button is kept pressed.
- Page 106 • Turn the e-dial while holding down the F_Av button to adjust the aperture value, (p.107) • The aperture value can be set in increments of 1/3 EV or 1/2 EV. Set the exposure steps in [1, EV Steps] of the [C Custom Setting 1] menu.
- Page 107 Use the four-way controller (A • 4 •) to select [AE Metering] !i!i!i!i!i!i!i!i!i!i!i!i and press the OK button. !i!i!i!i!i!i!i!i!i!i!i!i !i!i!i!i!i!i!i!i!i!i!i!i The [AE Metering] screen appears. !i!i!i!i!i!i!i!i!i!i!i!i !i!i!i!i!i!i!i!i!i!i!i!i !i!i!i!i!i!i!i!i!i!i!i!i [[[[[[ Use the four-way controller (4 • ) to select a metering method. Press the button.
- Page 108 Linking AE to AF Point during Multi-segment Metering In [6. Link AE to AF Point] of the [C Custom Setting 1] menu (p.81), you can link the exposure and AF point in the focusing area during multi-segment metering. Exposure is set separately from the AF point. (default setting) Exposure is set in accordance with the AF point.
- Page 109 isdisplayed inthe status screen and viewfinder during compensation. Compensation value - EV compensation is not available when the mode dial is set to M (Manual). • The EVcompensation is not canceled by turning the camera off or by setting any other capture mode. •...
- Page 110 Set the exposure setting steps in [1. EV EV Steps Steps] of the [C Custom Setting 1] menu (p.81) to increments of 1/3 EV or 1/2 EV. 2 1/2 EV Steps Exposure compensation steps now set to 1t3 EV Step Interval Exposure Setting...
- Page 111 • The exposure remains locked as long as the AF/AE-L button is kept pressed or tne shutter release button is kept pressed halfway. The exposure remains in the memory for a period between 0.5x to 2x the metering timer (p.106) even after taking your finger off the AFiAE-L button •...
- Page 112 You can set [ 7. A uto Bracketing Order] inthe [CCustom S etting 1]menu (p.81). 1 0-+ Standard --> U nderexposed --> O verexposed (default setting) 2 -0+ Underexposed --> S tandard --> O verexposed 3 +0- Overexposed ÷ Standard ÷...
- Page 113 !!!! Press the shutter release button fully. Continue to press the shutter release button until three shots have been captured. Three consecutive images will be taken according to the order set in [7. Auto Bracketing Order] of the [C Custom Setting 1] menu. •...
- Page 114 PENTAX Europe GmbHJulius-Vosseler-Strasse 104, 22527 Hamburg, (European Headquarters) GERMANY (HQ -http://www.pentaxeurope.com) (Germany -http://www.pentax.de) PENTAX U.K. Limited PENTAX House, Heron Drive, Langley, Slough, Berks SL3 8 PN, U.K. (http://www.pentax.co.uk) PENTAX France S.A.S.112 Q uai de Bezons, B.P. 204, 95106 Argenteuil...