Table of Contents
Advertisement
Available languages
Available languages
Operator's
Manual
M
4-CycJe
Electric
Start Capable
WEEDWACKER® GAS TRIMMER
Model No. 316.731970
U_F_VABLE
STAftTt_6
EA $ $_
CAUTION:
Before
using this product,
read this manual
and follow
all its Safety
Rules and Operating
instructions.
,, SAFETY
* ASSEMBLY
* OPERATION
* MAINTENANCE
* PARTS LIST
* ESPANOL, R 23
Sears Brands
Management
Corporation,
Hoffman
Estates,
IL 60179 U.S.A.
Visit our website:
www.craftsman.com
769-08582 / 00
10/12
Advertisement
Table of Contents

Related Manuals for Craftsman WEEDWACKER Incredi-Pull 316.731970


Summary of Contents for Craftsman WEEDWACKER Incredi-Pull 316.731970
- Page 1 * MAINTENANCE read this manual and follow all its Safety * PARTS LIST Rules and Operating instructions. * ESPANOL, R 23 Sears Brands Management Corporation, Hoffman Estates, IL 60179 U.S.A. Visit our website: www.craftsman.com 769-08582 / 00 10/12...
- Page 2 TABLE OFCONTENTS Safety..........Warranty ..........Know Your U nit........Specifications ......... Assembly ..........OilandFuel ........... Starting a nd Stopping ........Operation ..........Maintenance ......... Cleaning andStorage ........Troubleshooting ........Repair Protection Agreements ......Parts L ist..........Service N umbers ......Back Cover Allinformation, illustrations...
- Page 3 • iMPORTANT SAFETY iNSTRUCTiONS READ ALL iNSTRUCTiONS BEFORE OPERATING WHILE OPERATING Wear safety glasses or goggles that meet current ANSI Z87.1 WARNING: When using the unit, all safety rules must be standards and are marked as such. Wear ear/hearing protection followed.
- Page 4 OTHER SAFETY WARNINGS Store the unit in a dry place, secured or at a height to prevent unauthorized use or damage. Keep the unit out of the reach of • All service, other than the maintenance procedures described in children. this manual, should be performed by a Sears or other authorized Never douse or squirt the unit with water or any other liquid.
- Page 5 This additional coverage does not apply to inner trimmer shaft components. For warranty coverage details to obtain free repair or replacement, visit the web site: www.craftsman.com This warranty covers ONLY defects in material and workmanship.
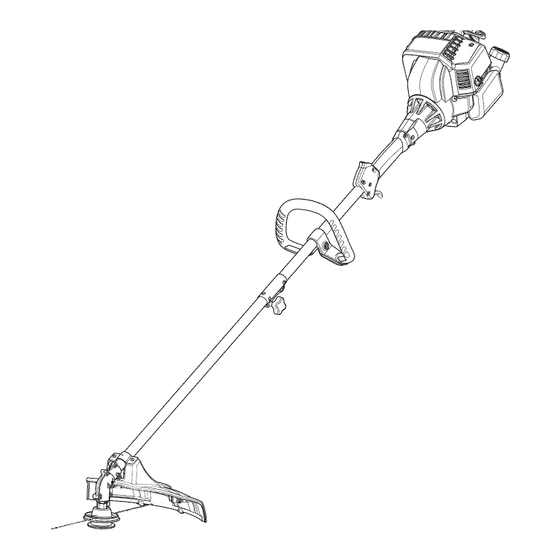
- Page 6 APPLiCATiONS Asatrimmer: Spark Plug Starter • Cutting g rass andlight w eeds. Muffler Rope Grip Edging Decorative trimming around t rees, fences, etc. Other o ptional accessories may beused withthisunit. Primer Bulb Shaft Gri ASSEMBLY TOOLS REQUIRED: On/Off Switch Fuel Cap •...
- Page 7 iNSTALLiNG THE CUTTING HEAD SHIELD Screws operate the unit without the cutting head shield in place. WARNING: To prevent serious personal injury, never Mount Bracket " hield Use the following instructions if the cutting head shield is not installed. Use only the instructions that apply to the type of shaft and shield equipped with this unit.
- Page 8 OPERATING THE COUPLER 90° Edging Hole The coupler enables the use of various optional attachments. (Trimmer Only) understand the manual that came with the attachment. WARNING: Before using any attachment, read and Follow all safety information contained within. damage to the unit, shut the unit off before removing or WARNING: To avoid serious personal injury and installing an attachment.
- Page 9 USING THE RIGHT OiL Use a high-quality SAE 30 weight oil. DO NOT use dirty oil. Failure to use clean oil of the correct type can cause premature engine wear and failure. Funnel Spout _(_ ADDING OIL: INITIAL USE WARNING: OVERFILLING THE CRANKCASE MAY CAUSE SERIOUS PERSONAL INJURY.
- Page 10 USING THE RIGHT FUEL The use of old fuel is the most common cause of performance problems. Use only fresh, clean unleaded gasoline. NOTE: This unit has a four-cycle engine. DO NOT mix oil with gasoline. Definition of Blended Fuels Today's fuels are often a blend of gasoline and oxygenates such as ethanol, methanol or MTBE (ether).
- Page 11 Off (O) / Stop outdoor area. Carbon monoxide exhaust fumes can be I WARNING: lethal in a confined area. Operate this unit only in a well-ventilated serious injury, the operator and the unit must be in a stable WARNING: Avoid accidentally starting the unit. To avoid position when pulling the starter rope (Fig.
- Page 12 ......Plug-in Power Start operator's manual for the proper use of this feature. 316.85951 ........Power Bit Start Please contact your local Craftsman retailer, call 1-800-469-4663 316.85953 ......Cordless Power Start visit www.craftsman.com for more information. STARTING iNSTRUCTiONS _il" i 1.
- Page 13 HOLDING THE TRIMMER body protection to reduce the risk of injury when operating| WARNING: Always wear eye, hearing, hand, foot and this unit. • Stand in the operating position (Fig. 13). Hold the shaft grip with the right hand. Keep the right arm slightly bent.
- Page 14 These can break off and become dangerous projectiles. WARNING: Never use metal-reinforced line, wire, chain or NOTE: When using Craftsman® Hassle Free XTRA QUIET Spiral Line, use the line best suited for the job at hand. Medium-sized (red) Line line is designed for cutting grass and small weeds.
- Page 15 Cleaning t heCutting Head NOTE: The cutting head will r emain a ttached totheunit. AITOW 1. Remove theoldline from the cutting h ead. The line glide plate cannot beremoved ifthere isstill l ine inthecutting h ead. 2. Locate thesmall hole inthe side ofthe cutting h ead t hat h olds t he black l ocking tab(Fig.
- Page 16 CHECKING THE OiL LEVEL WARNING: OVERFiLLiNG THE CRANKCASE MAY CAUSE SERIOUS PERSONAL iNJURY. Check the oil level before each use. The importance of maintaining the proper oil level cannot be overemphasized. inspecting the Oil Level Window 1. Stop the engine and allow it to cool. 2.
- Page 17 MAiNTAiNiNG THE AiR FILTER Hole Air Filter the engine and allow it to cool before cleaning or maintaining Air Filter WARNING: avoid serious personal injury, always stop | the unit. Cover Failure to maintain the air filter can result in poor performance or can cause permanent damage to the engine.
- Page 18 MAiNTAiNiNG THE SPARK PLUG 1. Stop the engine and allow it to cool. Grasp the spark plug boot firmly and pull it from the spark plug. 2. Clean around the spark plug. Remove the spark plug from the cylinder head with a 5/8-inch socket, turning counterclockwise. electrodes.
- Page 19 CLEANING STO RAG E • Never store a fueled unit where fumes may reach an open flame or spark. the engine and allow it to cool before cleaning or maintaining Allow the engine to cool before storing. WARNING" the unit. avoid serious personal injury, always stop Lock up the unit to prevent unauthorized use or damage.
- Page 20 PROBLEM SOLUTION The primer bulb was not pressed enough Press the primer bulb 10 times or until fuel is visible The spark plug is fouled Replace the spark plug Drain the fuel tank and add fresh fuel The fuel is old (over 30 days) _!!!!_!! _!_!!!!!!!!!!! !!!!!!!!!!!!!!!!!!!!!!!!!!!!!!!!!!!!!!!!!!!!!!!!!!!!!!!!!!!!!!!!Li...
- Page 21 Congratulations on making a smart purchase. Your new Craftsman® product is designed and manufactured for years of dependable operation. But like all products, it may require repair from time to time. That's when having a Repair Protection Agreement can save you money and aggravation.
- Page 23 Manual del Operador Motor de 4 tiernpos Con Posibilidad de Arranque El_ctrico RECORTADOR WEEDWACKER_ A GASOLINA Modelo No. 316.731970 U_F_VABLE $7_A_T_G EA $ E _ o SEGURIDAD o ENSAMBLAJE PRECAUCION: Antes de utilizar, este o OPERACION producto lea este manual y siga todas o MANTENIMIENTO las reglas de seguridad e instrucciones...
- Page 24 iNDICE Seguridad ........... Garantia ..........Conozca suunidad ........Especificaciones ........Montaje ..........Aceite ycombustible ........Arranque y detenci6n ........Funcionamiento ........Mantenimiento ........Limpieza yalmacenamiento ......Soluci6n deProblemas ......... Convenio deprotecci6n dereparaci6n ..... Lista depiezas........NQmeros deservicio ......Contraportada Toda lainformaci6n, lasilustraciones...
- Page 25 • INSTRUCCIONES DE SEGURIDAD IMPORTANTES • LEA TODAS LAS INSTRUCCIONES ANTES DE USAR LA Evite que se genere una fuente de encendido para el UNIDAD combustible derramado. Limpie de inmediato el combustible derramado de la unidad, antes de encenderla. Mueva la unidad al menos 30 pies (9.1m) de la fuente de combustible y del sitio ADVERTENCIA:...
- Page 26 • Utilice s olamente laspiezas d erepuesto y accesorios del OTRAS ADVERTENCIAS DE SEGURIDAD fabricante original (OEM) que selistan enlasecci6n L ista de Todas las tareas de reparaci6n, con excepci6n de los piezas de este manual. Si usa cualquier otra pieza o accesorio, procedimientos de mantenimiento que se describen en este...
- Page 27 • SJMBOLOS I NTERNAClONALES DE SEGURIDAD • Este manual del operador describe simbolos de seguridad e internacionales, asi como pictogramas, que pueden aparecer en este producto. Lea el manual del operador para obtener informaci6n completa sobre seguridad, montaje, funcionamiento, mantenimiento y reparaciones.
- Page 28 Para conocer los detaHes de la cobertura de garantia para la reparaci6n o reemplazo gratuitos, visite el sitio web: www.craftsman.com Esta garantia cubre SOLAMENTE defectos de materiales o mano de obra. La cobertura de garantia NO incluye: •...
- Page 29 APUCACIONES Bujia de Como recortadora: encendido ErnpuSadura cuerda • Corta hierbas ymalezas ligeras. SiJenciador arranque Bordeado Recorte decorativo alrededor dearboles, vallas, etc. Bulbo del Con esta unidad s epueden usar o tros accesorios opcionales: cebador EmpuSadura deJ eje Interruptor HERRAMIENTAS DE ENSAMBLADO encendido / apagado...
- Page 30 INSTALACK_N DEL PROTECTOR DEL CABEZAL DE CORTE Tornillos(2) Protector de, graves, no opere nunca la unidad sin el protector del ADVERTENClA: Para evitar lesiones personales cabezal de corte colocado. cabezaJ de corte Si el protector del cabezal de corte no esta instalado, siga las instrucciones a continuaci6n.
- Page 31 FUNCIONAMIENTO DEL ACOPLADOR Orificio de recorte de bordes de 90° El acoplador permite el uso de varios accesorios opcionales. (recortadora _nicamente) cualquiera de los accesorios, lea y comprenda el manual que viene con dicho accesorio. Tenga en cuenta toda la ADVERTENClA: Antes de comenzar a utilizar informaci6n...
- Page 32 USO DEL ACEITE CORRECTO Use un aceite pesado de alta calidad SAE 30. NO utilice aceite sucio. Si no se utiliza aceite limpio del tipo adecuado se puede producir un desgaste y una falla prematura del motor. Pico del _(_ INCORPORACI()N DE ACEITE: USO INIClAL embudo...
- Page 33 Uso de combustibles mezclados Si utiliza un combustible mezclado: • Utilice siempre gasolina nueva sin plomo • Use el aditivo para combustible STA-BIL ° u otro equivalente • Drene el dep6sito y ponga en marcha el motor en seco antes de almacenar la unidad ADVERTENCIA: NO UTILICE COMBUSTIBLE...
- Page 34 Off (O) / Parada zona bien ventilada, al aire libre. Los humos de escape de mon6xido de carbono pueden ser mortales en un lugar On ( I ) / Arranque DVERTENClA: Opere esta unidad Onicamente en una cerrado. la unidad. A fin de evitar que se produzcan lesiones graves, el operador y la unidad deben estar en una posici6n estable DVERTENOIA"...
- Page 35 316.85953 ..... Arrancador Electrico Inalambrico Para mas informaci6n, comuniquese con su distribuidor local Craftsman Ilamando al 1-800-469-4663 o visite www.craftsman.com. INSTRUCCIONES DE DETENCI()N INSTRUCClONES DE ARRANQUE 1. Controle el nivel de aceite. Consulte Control del nivel de aceite. 1. Suelte el control del acelerador y deje que el motor funcione en ralenti.
- Page 36 SOSTENER L A RECORTADORA e ta un.dad "eves'e, , re puesta protecci6n para los ojos, oidos, pies y cuerpo a fin de reducir el riesgo de lesiones. • Parese en la posici6n de operaci6n (Fig. 13). Sostenga la empu_adura del eje con la mano derecha. Mantenga el brazo derecho ligeramente flexionado.
- Page 37 Fig. 16 metal, alambre, cadena o soga. Los mismos pueden desprenderse y convertirse en un proyectil peligroso. NOTA: Cuando use la Linea Espiral Craftsman® Hassle Free XTRA QUIET, use la linea que mejor se ajuste al trabajo en cuesti6n.
- Page 38 4. Hale los extremos de la linea hasta que la misma este apretada contra el cabezal de corte. AsegQrese de que los extremos de la Flecha linea sean de igual Iongitud (Fig. 17). Limpieza del Cabezal de Corte NOTA: El cabezal de corte permanecera fijo a la unidad. 1.
- Page 39 CONTROL DEL NIVEL DE ACEITE ADVERTENClA: sl SE LLENA EXCESIVAMENTEEL CARTER SE PUEDEN PRODUCIR LESIONES PERSONALES GRAVES. Controle el nivel de aceite antes de cada uso. No esta de mas insistir en la importancia mantener el nivel de aceite adecuado. Inspecci6n del visor del nivel de aceite 1.
- Page 40 MANTENIMIENTO DEL FILTRO DE AIRE graves, siempre pare el motor y deje que se enfrie antes de ADVERTENCIA: A fin de evitar lesiones personales limpiar o mantener la unidad. Si no se mantiene el filtro de aire se puede obtener un rendimiento insuficiente o se pude dahar el motor de manera permanente.
- Page 41 MANTENIMIENTO DE LA BUJiA 1. Detenga el motor y deje que se enfrie. Sujete con firmeza la funda de la bujia y tire para sacarla de la bujia. 2. Limpie alrededor de la bujia. Retire la bujia de la tapa del cilindro con una Ilave de cubo de 5/8 pulgadas, girando en sentido contrario alas agujas del reloj.
- Page 42 LIMPIEZA ALMACENAMIENTO • Nunca almacene la unidad con combustible en lugares donde las emanaciones pueden alcanzar llamas abiertas o chispas. graves, siempre pare el motor y deje que se enfrie antes de Deje que se enfrie el motor antes de almacenar la unidad. ADVERTENClA: A fin de evitar lesiones personales limpiar o mantener la unidad.
- Page 43 PROBLEMA SOLUCION El bulbo del cebador no se presion6 Io suficiente Oprima el bulbo del cebador 10 veces o hasta que se vea combustible La bujia esta averiada Vuelva a colocar la bujia El combustible esta viejo (mas de 30 dias) Drene el dep6sito de combustible y agregue combustible nuevo...
- Page 44 Felicitaciones por haber hecho una compra inteligente. Su nuevo producto Craftsman@ fue dise_ado y fabricado con vistas a una operaci6n confiable por a_os. Pero como todos los productos, es posible que sea necesario repararlo alguna vez. Ahi es cuando tener un Convenio de Protecci6n de Reparacidn puede ahorrarle dinero y problemas.
- Page 46 REPLACEMENT PARTS - MODEL 316.731970 ELECTRIC START CAPABLE 4-CYCLE GAS TRIMMER item Part No. Description item Part No. Description 753-08065 Top Housing 736-0314 Washer 731-05509 Air Purge Primer 753-06246 Flywheel 841-031703S Starter Housing Assembly (includes 4 & 5) 714-04016 710-04742A Screw 725-06012 Module Assembly...
- Page 47 REPLACEMENT PARTS - MODEL 316.731970 ELECTRIC START CAPABLE 4-CYCLE GAS TRIMMER item Part No. Description 753-06790 Throttle Housing Assembly (includes 2-4) 753-06791 Throttle Trigger 791-182690 Throttle Trigger Spring 791-182405 Switch Assembly 753-05266 Throttle Cable Assembly 753-04236 Upper Drive Shaft Assembly 753-06039 D-Handle Assembly (includes 8) 753-06040...
- Page 48 Your Home For troubleshooting, product manuals and expert advice: managemylife www.managernylife.com For repair - in your home - of all major brand appliances, lawn and garden equipment, or heating and cooling systems, no matter who made it, no matter who sold it! For the replacement parts, accessories owner's...