Table of Contents
Advertisement
Quick Links
Advertisement
Table of Contents

Related Manuals for Shindaiwa 65004


Summary of Contents for Shindaiwa 65004
- Page 1 SHINDAIWA OWNER’S/OPERATOR’S MANUAL Model: 65004 MULTI-PURPOSE BRUSHCUTTER TOOL Minimize the risk of injury to yourself and others! Read this manual and familiarize yourself with the contents. Always wear eye and hearing protection when operating this unit. WARNING! X7502883201 02/13...
-
Page 2: Table Of Contents
If you have questions regarding your Shindaiwa hand held power equipment, or if you do not understand something in this manual, contact your local Shindaiwa dealer for assistance. -
Page 3: Safety
Never use a cracked or warped This Shindaiwa tool is specifically it suddenly begins to vibrate or cutting attachment: replace it with designed for use on the Shindaiwa shake. Inspect for broken, miss- a serviceable one and make sure Multipurpose Tool Carrier. Instal- ing or improperly installed parts or it fits properly. -
Page 4: Safety Labels
Safety Labels IMPORTANT! Safety and Information Labels: Make sure all safety and in- formation labels are undamaged, readable and up to date. Immediately replace damaged or missing labels. New labels are available through your local authorized Shindaiwa dealer. -
Page 5: Product Description
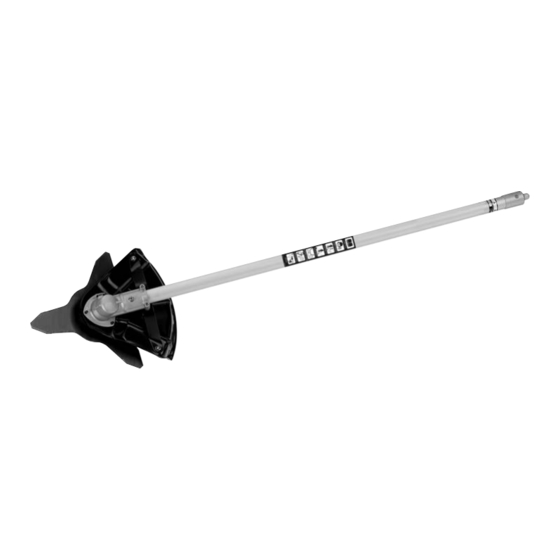
Product Description Multipurpose Brushcutter Tool Using the illustration as a guide, familiarize your- self with your machine and its various compo- nents. Understanding your machine helps ensure top performance, long service life and safer operation. 1 - Outer tube 2 - Gearcase 3 - Blade 4 - Cutting attachment shield WARNING! -
Page 6: Assembly
Assembly Installing a Tool Attachment 1. Place the Multipurpose Tool Carrier (A) and the Tool Assembly (B) on a clean, flat surface so that both assemblies fit end to end. The powerhead assembly should be facing up, and the tool assembly should be positioned with the lock- ing hole in the tube (C) end facing up. - Page 7 Barrier Bar and Hanger Assembly Socket-head Cap- 1. Remove the four socket-head cap screws screws on the handle and remove the Handle handle and mounting bracket. Throttle Assembly 2. Unscrew coupler locating screw, and loosen coupler clamp screw. Slide coupler off outer tube. 3.
-
Page 8: Operation
IMPORTANT! Discard blades that are bent, warped, cracked, broken or damaged in any way.Use a sharp blade. A dull blade is more likely to snag and thrust. IMPORTANT! Units with adjustable carburetors must be readjusted for blade use, otherwise serious engine damage can occur. WARNING! A standard grass trimmer unit with loop handle should NEVER be operated with blade-type attachments. -
Page 9: Maintenance
If it has been lost or cutting attachment are completely cause damage and lead to per- misplaced, contact Shindaiwa for a stopped. Disconnect the spark plug sonal injury. replacement. wire before performing service or maintenance work. -
Page 10: Troubleshooting Guide
Bent main shaft/worn or damaged bushings. Inspect and reinstall as required. Shaft not installed in powerhead or gearcase. Broken shaft. Cutting attachment will not Consult with an authorized Shindaiwa servicing move. dealer. Damaged gearcase. Adjust idle. Check Specifi cations page for correct idle Engine idle too high. -
Page 11: Warranty Statement
The owner shall demonstrate reasonable care and use, and follow preventative maintenance, storage, fuel and oil usage as pre- scribed in the operator’s manual. Should a product difficulty occur, you must, at your expense, deliver or ship your Shindaiwa unit to an authorized Shindaiwa servicing dealer for warranty repairs (within the applicable warranty period), and arrange for pick-up or return of your unit after the repairs have been made. - Page 12 89 octane or higher. Gasohol which contains a maximum 10% ethanol (grain alcohol) or 15% MTBE (methyl/tertiary/butyl/ether) is also approved. The prescribed mixing ratio of gasoline to oil is listed on the Shindaiwa oil label and covered in your operator’s manual.
- Page 13 NOTES...
- Page 14 NOTES...
- Page 15 NOTES...
-
Page 16: Servicing Information
Warranty Registration To ensure trouble free warranty coverage it is important that you register your Shindaiwa equipment by filling out the warran- ty registration card supplied with your unit. Registering your product confirms your warranty coverage and provides a direct link if we find it necessary to contact you.