Table of Contents
Advertisement
Advertisement
Table of Contents

Related Manuals for Shindaiwa C282


Summary of Contents for Shindaiwa C282
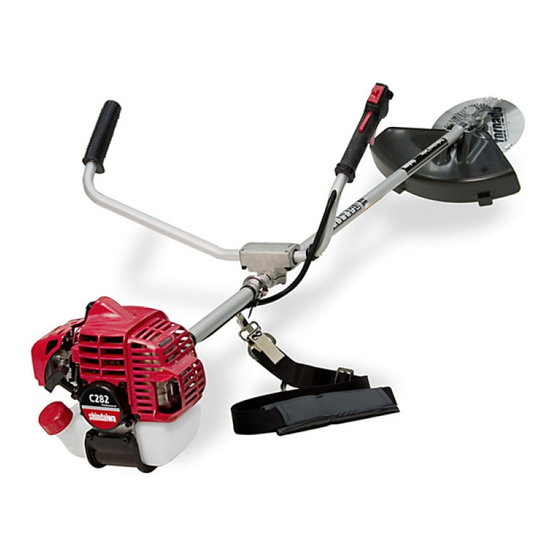
- Page 1 SHINDAIWA OWNER’S/OPERATOR’S MANUAL C282 BRUSHCUTTER Minimize the risk of injury to yourself and others! Read this manual and familiarize yourself with the contents. Always wear eye and hearing protection when operating this unit. WARNING! X7502825301 09/12...
-
Page 2: Table Of Contents
If you have questions regarding your unit, or if you do not understand something in this manual, contact your local authorized Shindaiwa dealer. You may also contact Shindaiwa at the address printed on the back of this Manual. -
Page 3: Safety
ANSI B175.3. IMPORTANT! Safety and Operation Information Labels: Make sure all information labels are undamaged and readable. Imme- diately replace damaged or missing information labels. New labels are available from your local authorized Shindaiwa dealer. - Page 4 Safety (continued) The Properly Equipped Operator Wear hearing protection devices and a Always wear eye protection such as broad-brimmed hat or helmet. A helmet goggles or safety glasses to shield is required when using a blade-equipped against thrown objects. brushcutter to clear small trees. Always wear a harness when operating the unit .
-
Page 5: Product Description
Brushcutter alter the machine operation and could jeopardize per- blade sonal safety during operation. Specifications Model Name C282 Engine Type Air cooled, two stroke, single cylinder gasoline engine Displacement 28.9 cc / 1.8 cu. in. Bore and Stroke 30 x 35 mm / 1.2 x 1.4 in Dr y Weight (less attachment) 7.0 kg / 15.5 lb. -
Page 6: Emission Control
Emission Control (Exhaust & Evaporative) EPA 2010 and Later and/or C.A.R.B. TIER III The emission control system for the engine is EM (engine modification) and, if the second to last character of the Engine Fam- ily on the Emission Control Information label (sample below) is “C”, “K”, or “T”, the emission control system is EM and TWC (3-way catalyst). -
Page 7: Throttle Linkage And Ignition Leads
Assembly (continued) 4. Handlebar Adjustments: a. Loosen 2 lower cap retaining screws (A) to adjust handlebar location on outer drive shaft tube. b. Loosen 4 handlebar clamp screws to adjust handgrip position. Access handlebar clamp screws through 4 holes (J) in bottom of handlebar mounting bracket. -
Page 8: Installing A Trimmer Head
Assembly (continued) Cutting Attachment Shield 1. Insert the cutting attachment shield between the outer tube and the cut- ting attachment mounting plate. Outer Tube Socket-Head Bracket NOTE: Cap Screws It may be necessary to loosen the Spacer retaining nut and clamp screw to adjust Cutting Attachment cutting attachment shield mounting Shield w/subshield... -
Page 9: Mixing Fuel
Mixing Fuel WARNING! Alternative fuels, such as E15 (15% ethanol), E-85 (85% ethanol) or any fuels not meeting Shindaiwa requirements are NOT approved for use in Shindaiwa gasoline engines. Use of alternative fuels may cause performance problems, loss of power, overheating, fuel vapor lock, and unintended machine operation, including, but not limited to, improper clutch engagement. -
Page 10: Handling Fuel
2-Stroke Oil is strongly recommended as it meets this standard and is specifically formulated for use in all Shindaiwa 2-stroke engines. Engine problems due to inadequate lubrication caused by fail- ure to use an ISO-L-EGD (ISO/CD 13738) and J.A.S.O. M345/FD certified oil will void the engine warranty. -
Page 11: Filling The Fuel Tank
Filling the Fuel Tank 1. Place the unit on a flat, level surface. ■ WARNING! ALWAYS store gasoline in 2. Clear any dirt or other debris from a container approved for around the fuel filler cap. Minimize the Risk of Fire flammable liquids. -
Page 12: Stopping The Engine
If a properly installed attachment vibrates, replace the attach- Use only authorized Shindaiwa parts and ment with new one and re-check. accessories with your Shindaiwa trimmer. WARNING! Do not make modifications to this unit... - Page 13 Cutting grass with a trimmer head Engine Operating Speeds Your Shindaiwa unit may be equipped with one of several Shindaiwa trimmer Operate at full throttle while cutting head models, each with features for spe- grass.
-
Page 14: Using A Blade
Operation (continued) Trimming and Mowing Grass Cut from left to right Trimmer head styles: Hold the grass trimmer so the trimmer head is angled slightly into the area to be Semi-automatic. Trimmer line is cut. To ensure maximum trimmer-line ser- indexed when the operator taps the Return vice life, cut only with the tip of the trim-... -
Page 15: Maintenance
MANCE AND DURABILITY TO AUTHORIZED PARTS MAY IMPAIR THE EFFECTIVENESS OF THE EMISSION CONTROL SYSTEM AND MAY HAVE A BEARING ON THE OUTCOME OF A WARRANTY CLAIM. NOTE: Using non-standard replacement parts could invalidate your Shindaiwa warranty. WARNING! WARNING! Before performing any main-... -
Page 16: Spark Plug
Keep the spark plug and wire connec- ■ DO NOT use 2-tooth or NON- Using non-standard replacement tions tight and clean. Shindaiwa approved 4-tooth cut- parts could invalidate your Shindaiwa Fasteners ting blades on Shindaiwa trim- warranty. mers or brushcutters. Make sure nuts, bolts, and screws ■... - Page 17 Maintenance (continued) 10-hour maintenance CAUTION! Do not operate the unit if the air cleaner or filter is damaged, or if the filter is wet or water soaked. Dual Layer Air Filter 1. Close choke (cold start position). This prevents dirt from entering the carbu- retor throat when the air filter is removed.
- Page 18 If damage, splitting or deterioration is noted, the unit should be removed from service until it can be inspected or repaired by a Shindaiwa- trained service technician. CAUTION! Make sure you do not pierce the fuel line with the end of the hooked wire.The line is delicate and can be...
- Page 19 If you note excessive carbon buildup, con- 3. With a Phillips type screwdriver, order of disassembly. sult with an authorized Shindaiwa servicing remove the 5 screws holding the dealer. spark arrester screen and cover to...
-
Page 20: Blade Sharpening
This engine has been factory adjusted to maintain satisfactory starting, emission, and durability performance up to 1,100 feet above sea level (ASL) (96.0 kPa). To maintain proper engine operation and emission compliance above 1,100 feet ASL the carburetor may need to be adjusted by an authorized Shindaiwa service dealer. IMPORTANT! If the engine is adjusted for operation above 1,100 feet ASL, the carburetor must be re-adjusted when operating the engine below 1,100 feet ASL, otherwise severe engine damage may result. -
Page 21: Long Term Storage
Damage resulting from stale or con- ■ 3. Repeat steps 1 and 2 until the engine taminated fuel is not covered by the Store the unit in a clean, dust-free will no longer start. Shindaiwa warranty policy. area. -
Page 22: Troubleshooting Guide
ISO-L-EGD and/or JASO FD classifi ed oils at 50:1 gasoline/oil ratio. ENGINE DOES NOT START What To Check Possible Cause Remedy Consult with an authorized Shindaiwa servicing dealer. Faulty recoil starter. Does the engine crank? Fluid in the crankcase. Internal damage. Tighten and re-test. - Page 23 89 or higher mixed with an air cooled engine oil that meets or exceeds ISO-L-EGD and/or JASO FD classifi ed oils at 50:1 gasoline/oil ratio. Piston seizure. Consult with an authorized Shindaiwa servicing dealer. Faulty carburetor and/or diaphragm. Overheating condition. Consult with an authorized Shindaiwa Engine is knocking.
- Page 24 Adjust idle. Check Specifi cations page for correct Idle set too high. Engine will not idle idle speed. down. Consult with an authorized Shindaiwa servicing Engine has an air leak. dealer. Adjust idle. Check Specifi cations page for correct idle Engine idle too high.
- Page 25 The owner shall demonstrate reasonable care and use, and follow preventative maintenance, storage, fuel and oil usage as pre- scribed in the operator’s manual. Should a product diffi culty occur, you must, at your expense, deliver or ship your Shindaiwa unit to an authorized Shindaiwa servicing dealer for warranty repairs (within the applicable warranty period), and arrange for pick-up or return of your unit after the repairs have been made.
- Page 26 89 octane or higher. Gasohol which contains a maximum 10% ethanol (grain alcohol) or 15% MTBE (methyl/tertiary/butyl/ether) is also approved. The prescribed mixing ratio of gasoline to oil is listed on the Shindaiwa oil label and covered in your operator’s manual.
-
Page 27: Warranty Statement
Authorized Dealer within 100 miles, ECHO Inc. will pay to ship the unit to the nearest authorized dealer. If you have questions regarding your warranty coverage, you should contact ECHO Inc. at 1-800-673-1558, web site WWW.ECHO-USA.COM or contact Shindaiwa at 1-877-986- 7783, web site WWW.SHINDAIWA.COM. - Page 28 NOTES...
- Page 29 NOTES...
- Page 30 NOTES...
- Page 31 NOTES...
-
Page 32: Servicing Information
Genuine Shindaiwa Parts and Assemblies for your Shindaiwa products are available only from an Authorized Shindaiwa Dealer. When you do need to buy parts always have the Model Number, Type and Serial Number of the unit with you. You can find these numbers on the engine. For future reference, write them in the space provided below.