Table of Contents
Advertisement
Advertisement
Table of Contents
Troubleshooting

Related Manuals for Ferris UltraBelt GD BGF36KAV15


Summary of Contents for Ferris UltraBelt GD BGF36KAV15
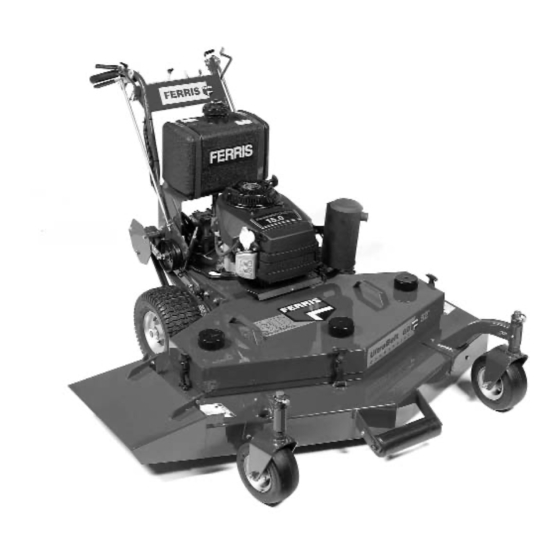
- Page 1 Ferris Industries 5375 North Main Street Munnsville, NY 13409 800-933-6175 OPERATOR’S MANUAL UltraBelt GD Series Belt-Drive Walk Behind Mower Model Number: BGF36KAV15 BGF48KAV15 Beginning S/N: 5409 & above 23230 Revision 02 Rev. Date: 8/2004 TP 100-7131-02-UB-F...
-
Page 3: Table Of Contents
Safety Rules & Information ...2 Identification Numbers ...7 Features & Controls ...8 Control Functions...8 Safety Interlock System ...9 Operating the Walk Behind Mower ...10 General ...10 Checks Before Starting ...10 Starting the Engine ...10 Driving the Mower ...11 Operating On A Slope...11 Stopping the Mower ...11 Mowing...11 Pushing the Rider by Hand...11... -
Page 4: Safety Rules & Information
Read these safety rules and follow them closely. Failure to obey these rules could result in loss of control of unit, severe personal injury or death to you, or bystanders, or damage to property or equipment. This mowing deck is capable of amputating hands and feet and throwing objects. The triangle in text signifies important cautions or warnings which must be followed. - Page 5 23. Use care when approaching blind corners, shrubs, trees or other objects that may obscure vision. 24. To reduce fire hazard, keep unit free of grass, leaves & excess oil. Do not stop or park over dry leaves, grass or combustible materials. 25.
- Page 6 Safety Rules & Information SERVICE AND MAINTENANCE To avoid personal injury or property damage, use extreme care in handling gasoline. Gasoline is extremely flammable and the vapors are explosive. Safe Handling of Gasoline 1. Extinguish all cigarettes, cigars, pipes, and other sources of ignition.
-
Page 7: Identification Numbers
Identification Numbers FERRIS FERRIS INDUSTRIES, INC. UNNSVILLE, NY 13409 ADE IN THE USA ODEL NO. SERIAL NO. When contacting your authorized dealer for replace- ment parts, service, or information you MUST have these numbers. Record your model/serial number and engine serial numbers on the space provided for easy access. -
Page 8: Safety Decals
Safety Decals GENERAL This unit has been designed and manufactured to pro- vide you with the safety and reliability you would expect from an industry leader in outdoor power equipment manufacturing. Although reading this manual and the safety instructions it contains will provide you with the necessary basic knowledge to operate this equipment safely and effec- tively, we have placed several safety labels on the unit to remind you of this important information while you are... - Page 9 SAFETY INTERLOCK SYSTEM This unit is equipped with safety interlock switches and other safety devices. These safety systems are present for your safety, do not attempt to bypass safety switch- es, and never tamper with safety devices. Check their operation regularly. Operational SAFETY Checks Your unit is equipped with an operator presence switch safety system.
-
Page 10: Features & Controls
Features & Controls Please take a moment and familiarize your- self with the name, location, and function of these controls so that you will better under- stand the safety and operating instructions provided in this manual. Figure 1. Control Locations Ground Speed Selector Lever Steering Levers C. -
Page 11: Safety Interlock System
Features & Controls E. Engine Ignition Switch Rotate the key switch to the ON position before pulling on the starter rope. F. Throttle Control The throttle controls engine speed. Move the throttle for- ward to increase engine speed and back to decrease engine speed. -
Page 12: Operating The Walk Behind Mower
Operation GENERAL OPERATING SAFETY Before first time operation: • Be sure to read all information in the Safety and Operation sections before attempting to operate this mower. • Become familiar with all of the controls and how to stop the unit. •... -
Page 13: Driving The Mower
DRIVING THE MOWER • Make sure the PTO switch is disengaged and the ground speed selector lever is in neutral. Make sure clutch lock levers are engaged. • Start the engine (see STARTING THE ENGINE). • Set the throttle control to FULL. •... -
Page 14: Storage
Operation STORAGE Temporary Storage (30 Days Or Less) Remember, the fuel tank will still contain some gasoline, so never store the unit indoors or in any other area where fuel vapor could travel to any ignition source. Fuel vapor is also toxic if inhaled, so never store the unit in any structure used for human or animal habitation. -
Page 15: Regular Maintenance
MAINTENANCE SCHEDULE & PROCEDURES The following schedule should be followed for normal care of your rider and mower. You will need to keep a record of your operating time. Determining operating time is easily accomplished by multiplying the time it takes to do one job by the number of times you’ve done the job, or you can install an hour meter. -
Page 16: Checking/Adding Fuel
Regular Maintenance CHECKING / ADDING FUEL To add fuel: • Remove the fuel cap. • Fill the tank. Do not overfill. Leave approximately 1” of room in the tank, below the bottom of the filler neck for fuel expansion. Refer to your engine manual for specific fuel recommendations. -
Page 17: Lubrication
LUBRICATION Lubricate the unit at the locations shown in Figures 4 through 6 as well as the following lubrication points. Grease: • front caster wheel axles • front caster wheel pivots • blade spindles • clutch plate pivots • brake arm pivots Use grease fittings when present. -
Page 18: Servicing The Mower Blades
Regular Maintenance SERVICING THE MOWER BLADES Blades should be sharp and free of nicks and dents. If not, sharpen blades as described in following steps. 1. Remove the deck guard. 2. Raise the mower deck and secure with jackstands. 3. To remove blade for sharpening, use two (2) 15/16” wrenches to remove the nut from the top of the blade bolt. -
Page 19: Troubleshooting Adjustments & Service
TROUBLESHOOTING While normal care and regular maintenance will extend the life of your equipment, prolonged or constant use may eventually require that service be performed to allow it to continue operating properly. The troubleshooting guide below lists the most common problems, their causes and remedies. -
Page 20: Troubleshooting The Mower Deck
Troubleshooting, Adjustment & Service TROUBLESHOOTING THE MOWER DECK PROBLEM Mower drive belt slips or fails to drive. Mower cut is uneven. Mower cut is rough looking. Engine stalls easily with mower engaged. Excessive mower vibration. Excessive belt wear or breakage. CAUSE 1. -
Page 21: Steering Lever Adjustment
STEERING LEVER ADJUSTMENT There should be approximately 2” (5,1cm) of clearance in between the handle bars and the steering levers when the clutch lock levers are disengaged (see Figure 10). To adjust: 1. Remove the hair pin and washer that retains the bar- rel nut in the clutch plate (see Figure 10). -
Page 22: Brake Adjustment
Troubleshooting, Adjustment & Service BRAKE ADJUSTMENT When the levers are fully engaged (squeezed), there should be 1/4” (0,6cm) of clearance in between the han- dle bars and brake handles (see Figure 11). To adjust: 1. Turn the wing nut (figure 11) to adjust the distance between the handle bars and steering levers. -
Page 23: Pto Clutch Adjustment
Figure 12. PTO Clutch Adjustment Adjustment Window (Qty. 3, one shown) Adjustment Nut PTO CLUTCH ADJUSTMENT Check the PTO clutch adjustment after the initial 50 hour break-in period and then after every 250 hours of opera- tion. Also perform the following procedure if the clutch is slipping or will not engage, or if a new clutch has been installed. -
Page 24: Pto Drive Belt
Troubleshooting, Adjustment & Service CHECK TENSION HERE Figure 14. PTO Drive Belt Belt Tension Adjustment Nut Spindle Pulley C. Tensioning Idler Pulley Stationary Idler Pulley PTO DRIVE BELT To avoid damaging belts, DO NOT PRY BELTS OVER PULLEYS. Adjust Belt Tension 1. -
Page 25: Gearbox Drive Belt
GEARBOX DRIVE BELT Adjust Belt Tension 1. First check the belt tension. A 10lbs. (13,5Nm) force is required to deflect the belt 3/16” (4,7mm). See Figure 15. 2. Loosen the idler mount bolt (A) and slide the idler pulley (C) to adjust the belt tension. Retighten the mount bolt. -
Page 27: Lawn Care
GENERAL INFORMATION Proper mowing is an important part of maintaining your lawn in the best possible condition. A healthy and well maintained lawn is better able to resist drought, weeds, and other stresses. But too much maintenance is as detrimental to your lawn as neglect. Proper care for your lawn involves more than just “cutting the grass.”... -
Page 28: Lawn Care & Mowing Information
Lawn Care & Mowing Information HOW HIGH TO MOW THE GRASS Often cutting height is a matter of personal prefer- ence. Typically, you should mow the grass when it is is between three and five inches high. The proper cutting height range for a specific lawn will depend upon several factors, including the type of grass,... -
Page 29: When And How Often To Mow
WHAT MOWING PATTERNS TO USE Always start mowing on a smooth, level area. The size and type of area to be mowed will determine the best mowing pattern to use. Obstructions such as trees, fences and buildings, and conditions such as slopes and grades must also be considered. -
Page 30: Mowing Methods
Lawn Care & Mowing Information MOWING METHODS Proper Broadcast Mowing Broadcasting, or side-discharging, disperses fine clip- pings evenly over the entire lawn. Many golf courses use this method. Your mower has a deep dish deck to allow freer circulation of clippings so they are broadcast evenly over the lawn. - Page 31 TIPS On Dealing With Clippings Clippings are beneficial to your lawn. A common mis- conception about clippings is that they automatically lead to thatch—this is untrue. Short clippings produced by broadcasting and clippings produced by mulching methods actually contribute to a healthy lawn because they: COMPOSTING The best way to recycle excess clippings and leave your...
- Page 32 Lawn Care & Mowing Information SOLUTIONS FOR COMMON MOWING PROBLEMS Streaking Streaking is when thin strips of uncut grass are left behind the mower. Streaking is usually caused by operator error or poor blade maintenance. CAUSE Blades are not sharp Blades are worn down too far Engine speed is too slow Ground speed is too fast...
- Page 33 Uneven Cutting Uneven cutting is waviness or smooth troughs in the lawn surface. Uneven cutting is usually caused by mower deck damage or misadjustment. CAUSE Deck is not leveled correctly Blades are dull or worn Blades are damaged Deck is clogged with grass clippings Deck shell is damaged Mower spindle is bent or loose Blades are installed incorrectly...
-
Page 34: Technical Manuals
Common International Symbols Choke Fast (Throttle) Slow (Throttle) Throttle Fuel Technical Manuals Additional Technical Literature Available Operators Manuals Additional copies of this manual are available, (and as part of our product support commitment, we maintain a stock of printed operators manuals going back many years!) Parts Manuals Fully illustrated parts manuals are also available —... - Page 35 Ferris Industries, Inc. (Ferris) warrants, in accordance with the provisions below, to the original purchaser only, for the periods described below that the commercial mower shall be free from substantial defects in material or workmanship under normal use and service. If you wish to file a claim under this limited warranty, you must provide prompt notice of your claim to an authorized Ferris dealer during the warranty period.
- Page 36 OPERATOR’S MANUAL UltraBelt GD Series Belt-Drive Walk Behind Mower Beginning S/N: 5409 & above Ferris Industries 5375 North Main Street Munnsville, NY 13409 800-933-6175 www.ferrisindustries.com © Copyright 2004 Ferris Industries All Rights Reserved. Printed in USA.