Table of Contents
Advertisement
Advertisement
Table of Contents

Related Manuals for Q-See QSDR04RTC


Summary of Contents for Q-See QSDR04RTC
- Page 1 QSDR04RTC USER’S MANUAL Contact US: Q-see Products 8015E.Crystal Dr Anaheim, CA 92807 Website: http://www.q-see.com Customer Service: Phone: 877-998-3440 x 538 Email:cs@dpsi-usa.com Tech Support: Phone: 877-998-3440 x 539 Email:ts@dpsi-usa.com Fax: 714-998-3509 Rev 090109...
-
Page 2: Table Of Contents
CONTENTS Chapter 1: DVR Features ..............................2 Chapter 2: Layout ................................3 2.1 Front Panel ..................................3 2.2 Rear Panel..................................4 2.3 Remote Control ................................5 Chapter 3: DVR Installation...............................6 3.1 Hard Drive Installation ..............................6 3.2 Camera and Monitor Connection...........................6 3.3 Power Supply connection ...............................6 Chapter 4: DVR Boot up ..............................7 4.1 System Initialization ...............................7 4.2 Main Interface................................7... - Page 3 6.3.1.4 Log out ..............................32 6.3.2 PTZ Control ................................32 6.3.3 Live Play Control ...............................32 Chapter 7: Specifications..............................33 Chapter 8: Appendix................................32 8.1 Operation Function Table ............................32 8.2 Recording Alarm setting...............................33 8.3 Troubleshooting................................33 8.4 System Connections..............................34 8.5 Accessories (Included) ..............................34 Q-See Product Warranty..............................35...
-
Page 4: User Manual
User Manual Safety Instructions Use proper power source. Do not use this product with a power source that applies more than specified voltage (100-240V AC). Never insert anything metallic into the DVR case. Putting something into the DVR case can be a source of dangerous electric shock. Do not operate in wet &... -
Page 5: Chapter 1: Dvr Features
User Manual Chapter 1: DVR Features Real time monitoring Supports real time surveillance via Monitor Saves Recordings DVR saves real-time recording image to HDD Backup Recordings Supports DVR backup via USB flash drive and hard drive. Playback Recordings Supports DVR single CH and multiple CH playback of recorded files Network operation Supports remote surveillance by multiple users simultaneously Supports HDD &... -
Page 6: Chapter 2: Layout
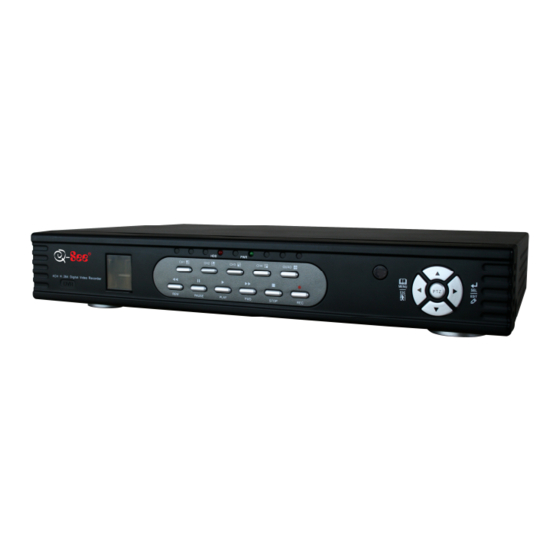
User Manual Chapter 2: Layout 2.1 Front Panel Item Key title/Indicator Marks Functions HDD indicator When the “Red” indicator flashes it means the hard drive is being read or written to Power indicator If the “Green” indicator is on the system is getting power IR Receiver Receives signal from Remote Control Channel Select:... -
Page 7: Rear Panel
User Manual 2.2 Rear Panel Item Physical port Connection method Connect CH1-4 ( BNC interface) Video input Video output Connect monitor output ( BNC interface) Audio input Connect CH1-4 audio signal input (RCA interface) Audio output Connect audio signal output (RCA interface) Ethernet Port Connect intranet, internet (RJ45 interface) USB Port... -
Page 8: Remote Control
User Manual 2.3 Remote Control Channel Select 1-8 ; Numeric key 9, 0 Numeric Keys Preview all Channels Menu Enter/Exit Main Menu Up Key ▲ Down Key ▼ ◄ / Left / Right Keys Select Key/ Edit Key Rewind key Play Key, Enter recording search menu Forward Key Manual Recording... -
Page 9: Chapter 3: Dvr Installation
User Manual Chapter 3: DVR Installation 3.1 Hard Drive Installation Caution : : : : Please do not Install or take out hard drive when DVR is running! (1) Remove screws and open DVR upper cover carefully; (2) Insert Power Cord and data cable into Pin of hard drive securely; (3) Put the upper cover back carefully, re-attach screws. -
Page 10: Chapter 4: Dvr Boot Up
User Manual Chapter 4: DVR Boot up 4.1 System Initialization After connecting the power adapter and turning On the power button, the system will boot-up and start initializing. Picture 4-1 4.2 Main Interface After finishing system initialization the system will enter into main interface. -
Page 11: Main Menu Preview
User Manual 5.1 Main Menu Preview Color set Camera Dwell time display Recording Network Search Playback Rec. Search Detail File File Backup HDD Management Alarm Setting E-mail setting Device PTZ Setting Management Mobile Area setting Motion Time Setting User password Video Setting System Language Select... -
Page 12: Camera Setup
User Manual 5.2.1 Camera setup Go to [Main Menu Camera] to set up the name display and position display of each channel (Shown as Picture 5-3), You can also adjust image brightness, saturation, contrast and hue settings of each channel after entering into [Color] Menu and set up whether each channel can be previewed or not under Live display and/or Recording mode. -
Page 13: Network Setup
User Manual The [Record Setup] menu allows you set up recording status (on/off) of each channel, it also allows you setup recording image resolution and quality, and turn audio on/off. This menu also allows you select recording mode (recording after power on and scheduled recording) and recording file length. Once a channel is set to “on”... -
Page 14: Pppoe
User Manual 5.2.3.2 PPPoE When selecting PPPoE, you need to input user and password provided by your internet service provider and set up web port (for details refer to the below picture 5-8) Picture 5-8 5.2.3.3 Static When selecting static allocation, You will need to setup the network settings on the DVR to match the settings of the router that you attach the DVR to. -
Page 15: Port Forwarding
User Manual 5.2.3.4 Port Forwarding To access the DVR from a remote computer over the internet you would then need to forward port 80 and port 9000 on the router the DVR is attached to, to the IP address of the DVR. You can get instructions on how to do this for most popular routers by going to the www.portforward.com website. -
Page 16: Recording Search
User Manual Picture 5-17 Picture 5-16 To connect to the DVR from the remote computer you would then open an Internet Explorer browser window and enter the internet IP of your router that you got by going to www.myipaddress.com. Notice : If you cannot use HTTP port 80 or 9000 because it is being used by another program, or it is being blocked by your service provider, you can use another port in the same range. -
Page 17: Multi Player
User Manual You can play video Forward at 2x, 4x, and 8x speeds, Slow play at 1/2x, 1/4x, and 1/8x, normal play, pause and play frame by frame using the playback control bar, and adjust volume by clicking or sliding tune control bar. - Page 18 User Manual Picture 5-24 Picture 5-25 O pen backup file: 、 1. Click [Play] menu (P) on the top of multimedia player interface to select playing the backup file; Picture 5-26 2. Click pop-up menu button on the bottom of multimedia player and [Play- ] button, then the backup file will be played on the according channel.
-
Page 19: Device Management
User Manual 4. Please refer to the below [Video on] setting procedure (System default - video for every channel is on) Setting Video play setting Normal video Bar Select the channel you want to display Select to play the video Apply OK Picture 5-27 Picture 5-27A 5. -
Page 20: Alarm Set
User Manual When you install a HDD, the system will automatically detect if HDD is formatted or not; If HDD needs to be formatted, HDD status will be shown as “Not format”, otherwise, the HDD status will be shown as “Normal” (refer to Picture 5-31) TOTAL SPACE: Indicates total space available on Hard Drive. -
Page 21: Email Alarm Notification
User Manual Email Alarm Notification (to send notice to email account when motion alarm is triggered) Click the [Email setup] menu to enter into its sub menu (shown as Picture 5-33). Picture 5-33 On the [Email setup] mode, refer to its parameter setup shown as picture 5-34 when setting email alarm to “on”. -
Page 22: Ptz Setup
User Manual soon as possible to avoid overloading your email account. For detailed SMTP protocols settings refer to the below picture 5-35A. Picture 5-35A 5.2.6.3 PTZ Setup Enter into [Main menu Device PTZ Setup] to select the channel you want to control and set PTZ protocol (Pelco-D or Pelco-P), Baud Rate (1200, 2400, 4800, 9600), Stop bit (1, 2), Parity Check (None, Odd, Even Mark Space), Address Code and Cruise status respectively. - Page 23 User Manual When accessing from a mobile phone with Windows Mobile operating system, use the following procedure: 1. Webcam installation First you need to install the webcam program that is included on the CD that comes with the DVR by copying the “QQeye.CAB”...
- Page 24 User Manual the DVR, setting range is between 1024 and 65535, the default setting is 18600. Note: this port is in addition to the ports used for standard remote access. Channel: Select the channel from the DVR you want to monitor and click [OK] button (red box in Pic 7) to display the screen in Pic 8 and start video connection.
- Page 25 User Manual 3. Click the Continue button (red box in Pic 5) on the information box displaying the program and current version. This will display the window in Pic 6. 4. Next choose where you want to install the program, to phone memory or to the memory card, and click on the Select option (red box in Pic 6).
- Page 26 User Manual By clicking on the image you can see it full screen as in Pic 13 Pic 13 When accessing from an iphone, use the following procedure: On the DVR: The DVR must have the latest Firmware version 090706 or newer Go to Menu –...
-
Page 27: Motion Detect
User Manual Click Play button on the bottom left corner (red box in first picture below) to connect to DVR. After connecting, CH1 will display as shown in the second picture below. You can change to CH2 by push # 2 (red box in second picture below). -
Page 28: System Function
User Manual 5.2.7 System Function The [System] Menu includes the below sub-menus: Time Set, User Password, Audio/Video Setting, Language select, System Info and System Maintenance. After entering into the [System], you can configure the system to meet your needs. Picture 5-40 5.2.7.1 Time Set Click the [Main menu System Date/Time] in turn to Enter into the time setup menu shown as Picture 5-41 to not only... -
Page 29: Language
User Manual 5.2.7.4 Language Enter into [System Language] menu to select the language you want to use on the DVR (shown as Picture 5-45) and click [APPLY] button. The selection will be available after system Auto restarts. Picture 5-45 5.2.7.5 Info. Click [Main Menu System Info] to enter into [System Information] menu to view system info, including Device type, Software... -
Page 30: Ptz Control
User Manual 5.5 PTZ Control We introduced setting PTZ parameters previously in chapter 5.2.5.3. Here we will discuss how to operate PTZ controls. Click pop-up menu to show PTZ option and enter into PTZ control interface (shown as Picture 5-49). You can now click Z+&Z- keys to zoom In or out, click F+&F- keys to control camera focus and click I+&I- to adjust iris. -
Page 31: Chapter 6: Net-Viewer Program
User Manual Chapter 6 Net-Viewer Program 6.1 Plug-ins download and installation Open IE browser and input IP address and web port of DVR, such as http://172.18.6.202 and confirm to download and install webcam. If your computer is connected to internet, computer will auto download and install the webcam. -
Page 32: Main Interface Of Net-Viewer
User Manual 6.3 Main Interface of Net-viewer Picture 6.3 Log in Net-viewer and show the interface as follows 6.3.1 Menu column (Section 1 on Picture 6-3) 6.3.2 PTZ Control (Numbers 2, 3, 4 on Picture 6-3) 6.3.3 Live Play Control (Numbers 6 through 10 on Picture 6-3) 6.3.1 Menu column (Section 1 on Picture 6-3) Menu column include [Live] menu, [Replay] menu and [Setup] menu and [Logout] menu. -
Page 33: Setup
User Manual F.F. button: fast forward playback recording Slow button: slow playback recording. Next Frame: play frame by frame. 264 TO AVI button: convert file from H.264 format to AVI format The native format of the backup files is H.264, you can convert H.264 format into more familiar AVI format by clicking the key of 264 to AVI. - Page 34 User Manual System allows you setup motion detection settings for each channel of DVR remotely (shown as Picture 6-8) Picture 6-8 PTZ Control ③ ③ ③ ③ Click [PTZ control] to setup PTZ cameras. Remote setup methods are the same as local DVR setup. Please refer to Section 5.2.5.3 (shown as Picture 6-9).
-
Page 35: Log Out
User Manual 6.3.1.4 Log out Log out of the system. 6.3.2 PTZ Control (Numbers 2, 3, 4 on Picture 6-3) Note: below-mentioned series no will be consistent with the remark no shown as Picture 6-2. 2 .PTZ direction control: Control PTZ moving direction ○... -
Page 36: Chapter 7: Specifications
User Manual Chapter 7: Specifications Model QSDR04RTC Video System NTSC / PAL(Optional) Compression Format Video H .264 / Audio 8 kHz*16bit ADPCM : : Video Input/Output 4-CH BNC Input/ 2-CH BNC Output / 1-VGA output Audio I/O 4-CH RCA audio Input / 2-CH RCA audio Output Display Resolution :... -
Page 37: Chapter 8: Appendix
User Manual Chapter 8: Appendix 8.1 Operation Function Table Type Title Description Time setting Setting system date, time and format and day-light saving time setting Language Select Setting system language Setting CH title and position; adjusting image color parameter value; setting CH display to CH Setting ON / Off and time display/recording time overlaying to On/Off. -
Page 38: Troubleshooting
User Manual 8.2 Recording Alarm setting Please refer the below matrix: “ ⊥ ” stand for “only alarm but no recording”; “AMR” stand for “alarm recording”; “NLR” stand for “normal recording”; and “NOR” stand for “ no recording”. Once alarm is triggered, alarm icon will occur, and when many alarms are triggered, alarm remarks will occur on the screen. -
Page 39: System Connections
User Manual 8.4 System Connections (Diagram is for reference only to show where to attach various devices to the DVR, the cameras, external alarms, USB flash drives, monitors and computers are not included with the standard DVR package) 8.5 Accessories (Included) Ethernet Cable Power Cord Power Adaptor... -
Page 40: Q-See Product Warranty
User Manual Q-See Product Warranty Thank you for choosing our products. All of our products users have a conditional free warranty repair service for hardware within 12 months starting from purchase date, and a free exchange service within one month (valid for manufacturing defects). -
Page 41: Customer Information Card
User Manual Customer Information Card User’s Name Mr./Mrs. Company Name Postal Address Postal code Phone Number E-mail Model Number of Product Serial Number of Product Purchase Date Distributor The material in this document is the intellectual property of our company. No part of this manual may be reproduced, copied, translated, transmitted, or published in any form or by any means without our company’s prior written permission.