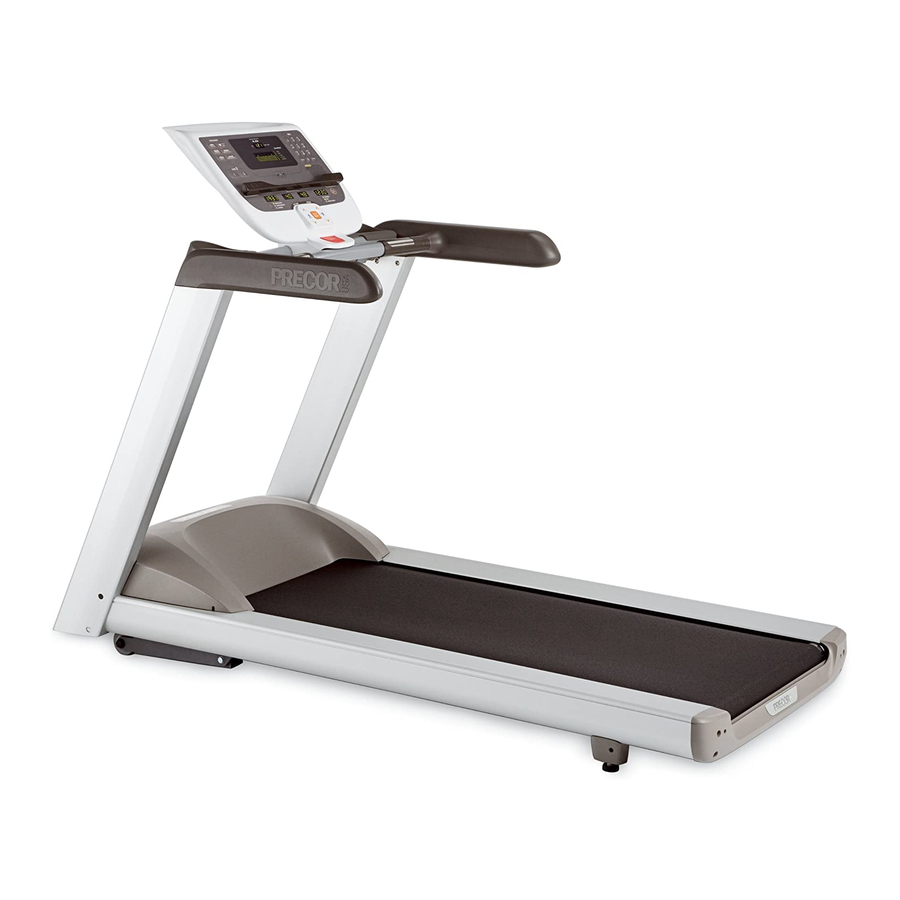
Precor 9.33 Owner's Manual
Low impact treadmill
Hide thumbs
Also See for 9.33:
- Manual (55 pages) ,
- Product specification (1 page) ,
- Owner's manual (86 pages)
Table of Contents
Advertisement
Advertisement
Table of Contents

Related Manuals for Precor 9.33


Summary of Contents for Precor 9.33
- Page 1 Owner’s Manual Low Impact Treadmill page 1...
-
Page 2: Important Safety Instructions
IMPORTANT SAFETY INSTRUCTIONS When using an electrical appliance, basic precautions should always be taken, including the following: • Read all instructions before using the M9.33 treadmill. These instructions are written to ensure your safety and to protect the unit. Before beginning any fitness program, you should obtain a complete physical examination by your physician. -
Page 3: Personal Safety
Do not overexert yourself or work to exhaustion. If you feel any pain or abnormal symptoms, stop your workout immediately and consult your physician. Precor treadmills are designed for the enjoyment of the serious runner as well as the dedicated walker. By following the above precautions and using good common sense, you will have many safe and pleasurable hours of healthful exercise with your Precor treadmill. -
Page 4: Rfi - Radio Frequency Interference
Consult an experienced radio/TV technician for help. Per FCC rules, changes or modifications to the CAUTION treadmill not expressly approved by Precor, could void the user’s authority to operate the equipment. Canadian Department of Communications This digital apparatus does not exceed the Class B limits for radio noise emissions from digital apparatus set out in the Radio Interference Regulations of the Canadian Department of Communications. -
Page 5: Safety Approval
If you do not follow these Grounding Instructions , you could void the Precor Limited Warranty. Correct power outlet for Diagram 1 U.S. -
Page 6: Table Of Contents
Table of Contents Important Safety Instructions ............. 2 Personal Safety ................. 3 Precor Heart Rate Option - Safety Guidelines ........3 RFI — Radio Frequency Interference ..........4 European Applications ..............4 Safety Approval ................. 5 Grounding Instructions ..............5 Before You Begin ..............9... - Page 7 Advanced Programming Techniques ......31 Programming Tips ................31 Selecting a U.S. Standard or Metric Display ........31 Securing the Treadmill with a Password .......... 32 Viewing the Odometer, Hours of Use, Software Version, and Error Log ............32 The M9.33 Courses ............33 Course Features and Course Descriptions ........
- Page 8 Notes: page 8...
-
Page 9: Before You Begin
The M9.33 treadmill does not contain any user-serviceable parts. For information about product operation or service, check out the Precor Web Site at www.precor.com or call Precor Customer Support at 1-800-347-4404. -
Page 10: Hardware Kit
Hardware kit. Diagram 2 Carefully unpack the pieces of the treadmill and lay them on the floor near the location where you plan to use the treadmill. Hardware Kit After unpacking the treadmill, open the hardware kit (refer to Diagram 2) and make sure that you have the following items: (A) four 2-inch socket head screws —... -
Page 11: Setting Up The Treadmill
Installation Requirements Follow these installation requirements when installing the treadmill. If you do not install the treadmill according to the following guidelines, you could void the Precor limited warranty. • Set up the treadmill on a solid, flat surface. Unpack and assemble the treadmill close to where you plan to use it. - Page 12 Damage to the cable due to improper Note: The left or right side of the treadmill can be determined when you stand at assembly is not covered by the Precor the rear of the running bed and face the motor.
- Page 13 Secure the display console to the upright supports. Diagram 7. Crimped or pinched cables are not covered Make sure that the cable is routed through the top of the upright support. by the Precor limited warranty. Have an assistant hold onto the cable (see inset). page 13...
- Page 14 Diagram 8 Secure the display console. CSAFE receptacle Cable receptacle Display console ¾ -inch screws (C) with washers (D) Tighten the screws, but leave room for adjustments. Align the display console with the upright support mounts. Insert two ¾-inch screws (C) with washers (D) and finger tighten. Do the same for the opposite upright support.
- Page 15 Diagram 10 Attach the handrails. Handrail clamp Loosen the four handrail clamp screws. Side bracket Screw (C) with washer (E) Lower portion of handrail. ¾ -inch screws (C) with washers (D) 11. Attach the handrails. Diagram 10. To install the handrails, loosen the four handrail clamp screws with the hex key provided.
- Page 16 Secure the fasteners. Diagram 12 Second: Alternately tighten four side upright screws. First: Alternately tighten four front panel screws. Third: Alternately tighten the four screws that secure the console to the uprights. CAUTION: Do not overtighten the screws 13. Tighten all mounting screws with the hex key (G) provided. Diagram 12. or you may inadvertently cause stress Start at the front of the treadmill with the four screws that attach the upright cracks.
-
Page 17: Turning The Unit On And Off
Level Diagram 14 unit. 16. Level the unit. Diagram 14. The M9.33 has adjustable rear feet. Check to make sure that the running surface is level (use a bubble level as shown in Diagram 14). If the treadmill is placed on a slightly, uneven surface, adjusting the rear feet can help, but will not compensate for extremely uneven surfaces. -
Page 18: Checking The Alignment Of The Running Belt
Important: If you notice that the belt needs alignment, make the adjustments at once. Failure to do so might cause the belt to tear or fray which is not covered by the Precor limited warranty. To stop the running belt, press the red Stop button. -
Page 19: Using The M9.33 Treadmill
Refer to Entering a Password below. • Prior to the start of a course, the display will return to the Precor banner if more than two minutes elapse without a key press occurring. This feature is helpful if you get called away just prior to starting your workout. -
Page 20: Workout Tips
To toggle between User I.D.’s, press the keys. • At the Precor banner, pressing Quick Start bypasses further selections and starts the running belt. Default values may apply (see Quick Start on page 29). ® Smart Rate is not active. -
Page 21: Quick Steps To Working Out
M9.33 courses and their operation. Brief While the Precor banner is being displayed, do one of the following: course descriptions start on page 33. Press Enter By pressing Enter, the User I.D. associated with the... -
Page 22: Cooling Down After Your Workout
Review your workout statistics 11. You are given ten minutes to review your workout statistics before the display automatically resets to the Precor banner. You can also press Reset during that time to return to the Precor banner. Remove the Security clip. -
Page 23: The Setup Mode And Quick Start Feature
The Quick Start feature can be pressed any time during the Setup prompts. See the table below. Note: Default values apply if Quick Start is pressed while the Precor banner is displayed. Refer to QUICK START on page 29. Press QUICK START at the,... -
Page 24: Pause, Workout Summary, And Exit Features
Precor banner. Workout Summary display — provides a ten minute time frame in which you can review your workout statistics before the display automatically resets to the Precor banner. The Workout Summary display can be accessed from the Pause or Cool Down/Pause modes, or by prematurely exiting a course. -
Page 25: The M9.33 Display
The green LED’s on the Smart Rate display indicate the Cardiovascular zone. Important: During a course, your heart rate must be above 40 beats per minute before the segment begins to blink. Note that pressing Quick Start at the Precor banner makes the Smart Rate ®... -
Page 26: Heart Rate Display
Polar Chest Strap on page 39. Center Display during a Workout The Precor banner, User I.D., setup prompts, course profiles and feature selections appear in the center display. Prior to working out, prompts guide you through the Setup mode. Refer to Setup Mode and Prompts . -
Page 27: Setup Mode And Prompts
ON/OFF [I/O] switch located at the front, near the power receptacle, to ON.) From the Precor banner, you can access your User I.D. and the Setup mode which lets you determine the course, workout time, weight, and age parameters as described below. -
Page 28: The M9.33 Keypad
The M9.33 Keypad When you first turn the unit ON, the Precor banner “PRECOR WORK OUT SMARTER” appears in the center display window. This banner indicates that the M9.33 is ready to accept user entries. Keypad Tips Important: The keys on the keypad are touch-sensitive. A light “touch” is all that is required to activate the key function. - Page 29 • answer prompts prior to starting a course, • determine which display features appear, SELECT keys 1 and 2: While the Precor banner is displayed, the SELECT keys act • prematurely end a course, and as User I.D. 1 and 2 (respectively). During a course, the Select keys change what •...
-
Page 30: Changing The Display Features Using The Select Key
SPEED : During a workout, the Speed keys let you decease or increase the running belt’s speed. The display can show a range from 0.5 to 11 miles per hour (1 to 18 Kilometers per hour) and changes can be made in 0.1 mph increments from 1 to 11 mph (1 to 18 kph). -
Page 31: Advanced Programming Techniques
1/3 second after pressing Reset or the display returns to the Precor banner. The third and subsequent key presses must occur within four seconds of the previous key press or the Precor banner returns and you will need to begin again. •... -
Page 32: Securing The Treadmill With A Password
Review Programming Tips on the previous page before taking the following steps. To view the odometer (the number of hours of that the M9.33 has been used), its software version number or the error log, start at the Precor banner and press the following key sequence: Reset, Enter, Quick Start The numbers 6, 5 appear on the display as you press the associated key. -
Page 33: The M9.33 Courses
M9.33 Courses A variety of exercise options are available on the M9.33. Descriptions of the courses printed on the display console label are described in this section. The information includes: • brief course features descriptions • clearing custom courses ® •... - Page 34 The blinking cursor indicates your position on the course. If you press Quick Start at the Precor banner to access the Manual course, the course TIME is infinite. You need to press the red Stop button when you have completed your workout.
- Page 35 INTERVAL (INTV) Course duration Description infinite The interval course is among the best for conditioning your CAUTION: Since the “speed” can be set TIME set by user cardiovascular system. The course is designed to raise and and saved with Custom, Interval and lower your heart rate in a repeating fashion for an indefinite Weight Loss courses, a warning message period of time.
-
Page 36: Deleting The Speed And Incline Settings In A Custom Course
Deleting the Speed and Incline Settings in a Custom Course To clear all the programmed segments in a custom course, take the following steps: From the Precor banner, select the user I.D that is affiliated with the custom course. Select the custom course that you wish to clear (CST1 or CST2). -
Page 37: Utilizing Heart Rate Interactive Capabilities
Do not push yourself when you press Quick Start while the Precor banner is being displayed. beyond the recommended range. Before using the Heart Rate capabilities, take time to read the following guidelines. -
Page 38: Heart Rate Course
Note: If the treadmill is having difficulty detecting your heart rate, three dashes will (- - -) appear in the Heart Rate display. Use the Precor spray that is supplied with the chest strap and readjust the strap around your chest. Make sure that it is against your skin. -
Page 39: Using The Polar Equipment
POLAR chest strap, please study this section thoroughly. Important: If you do not use the Precor Heart Rate Option according to the guide- lines found in this manual, you could jeopardize the accuracy of your heart rate readings or void the manufacturer’s limited warranty. -
Page 40: Maintaining The Treadmill
However, you are responsible for typical maintenance tasks such as, cleaning the unit to keep it free from dust and dirt accumulation. If you fail to maintain the treadmill as described below, it could affect or void the Precor limited warranty. Cleaning the Equipment DANGER —... -
Page 41: Servicing The Treadmill
Contact Precor Customer Support. Press the red Stop button (the running belt slows and stops moving). To return to the Precor banner, press Reset. Servicing the Treadmill Do not attempt to service the treadmill yourself except for the maintenance tasks described in this manual. - Page 50 Notes:...
-
Page 51: Warranty Card
Residential Equipment Limited Warranty Thank you for purchasing a PRECOR product. In order that we may continue to serve you in the future, please take a few minutes to complete and return this warranty registration. The undersigned hereby acknowledges receipt of the Precor Limited Warranty and affirms that the date of purchase was_____________ 20___;... -
Page 52: Specifications
U.S. and foreign patents for both the mechanical construction and the visual as- pects of its product design. Any party contemplating the use of Precor’s product designs is hereby forewarned that Precor considers the unauthorized appropriation of its proprietary rights to be a very...